Table of Contents
Advertisement
Quick Links
Advertisement
Table of Contents

Subscribe to Our Youtube Channel
Related Manuals for Wisenet XNP-6120H


Summary of Contents for Wisenet XNP-6120H
- Page 1 NETWORK CAMERA User Manual XNP-6120H...
- Page 2 Network Camera User Manual Copyright ©2017 Co., Ltd. All rights reserved. Hanwha Techwin Trademark Each of trademarks herein is registered. The name of this product and other trademarks mentioned in this manual are the registered trademark of their respective company. Restriction Copyright of this document is reserved.
- Page 3 overview WARNING IMPORTANT SAFETY INSTRUCTIONS TO REDUCE THE RISK OF FIRE OR ELECTRIC SHOCK, DO NOT EXPOSE THIS PRODUCT 1. Read these instructions. TO RAIN OR MOISTURE. DO NOT INSERT ANY METALLIC OBJECT THROUGH THE 2. Keep these instructions. VENTILATION GRILLS OR OTHER OPENNINGS ON THE EQUIPMENT. 3.
- Page 4 overview Class construction Please read the following recommended safety precautions carefully. y Do not place this apparatus on an uneven surface. An apparatus with CLASS construction shall be connected to a MAINS socket outlet with a protective earthing connection. y Do not install on a surface where it is exposed to direct sunlight, near heating equipment or heavy cold area.
-
Page 5: Table Of Contents
CONTENTS OVERVIEW WEB VIEWER Important Safety Instructions Connecting to the Camera Recommended PC Specifications Password setting Recommended Micro SD/SDHC/SDXC Login Memory Card Specifications Plug-in support specifications for each NAS recommended specs browser What’s Included Installing WebViewer Plugin At a Glance Using a Plug-in Free Webviewer Using the Live Screen Playing the recorded video... -
Page 6: Overview
overview RECOMMENDED PC SPECIFICATIONS NAS RECOMMENDED SPECS • CPU : Intel(R) Core(TM) i7 3.4 GHz or higher • Recommended capacity : 200GB or higher is recommended. • RAM : 8G or higher • Simultaneous access : One unit of NAS can accept a maximum of sixteen camera accesses. •... -
Page 7: What's Included
WHAT’S INCLUDED Please check if your camera and accessories are all included in the product package. (As for each sales country, accessories are not the same.) Appearance Item Name Quantity Description Appearance Item Name Quantity Description Audio/RS-485 cable Used for audio and RS-485 connection Camera Alarm cable Used for alarm connection... -
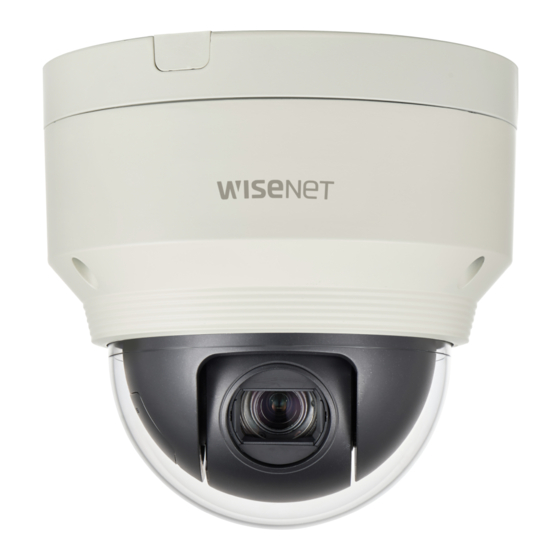
Page 8: At A Glance
overview AT A GLANCE Components Appearance Item Description Dome cover Case cover used to protect the lens and the main unit. Camera Case Housing part that covers the camera body. 8_ overview... - Page 9 Item Description Lens Lens for the camera. Port to connect the WiFi dongle. You can check the installation video through the applications installed in the smartphone. MICRO USB port Refer to “Connect to WiFi dongle” on page 14. WiFi dongle and OTG adapter are sold separately. Micro SD Memory Card Compartment for the Micro SD memory card.
-
Page 10: Installation & Connection 10 12 Installation
installation & connection INSTALLATION Installation 1. Drill a hole (diameter : 6mm, depth : min 55mm) of the case bottom and insert the provided plastic anchor to the end. This camera is waterproof and in compliance with the IP66 spec, but the jack connected to the external cable is not. You are 2. - Page 11 3. Insert the power cable into the small hole made by removing the projected 3. Insert the audio/RS-485 and alarm cable through the hole formed by part of the rubber plug in step 2 above, and lay the cable along the long removing the rubber plug in step 2, and connect it to the alarm terminal of groove.
- Page 12 & connection Optional Accessories for Installation 5. If installing XNP-6120H on a ceiling as built-in component • Flush-Mount Indoor Housing for PTZ Dome Camera (SHP-1680F) For your easier installation, you can purchase appropriate optional accessories available. 1. WALL MOUNT ADAPTOR(SBP-300WM or SBP-300WM1)/...
-
Page 13: Memory Card Information (Not Included)
MEMORY CARD INFORMATION (NOT INCLUDED) Removing a Micro SD Memory Card Gently press down on the exposed end of the memory card as shown in the diagram to eject the memory What is a memory card? card from the slot. The memory card is an external data storage device that has been developed to offer an entirely new way to record and share video, audio, and text data using digital devices. -
Page 14: Connecting With Other Device
1. Connect OTG adapter (5-pin) and WiFi dongle to the micro USB terminal. WiFi dongle Smartphone Setup 1. Install the Wisenet Installation application. 2. Select the camera SSID after turning on the WiFi. 3. Run the Wisenet Installation application. 4. When you log in to the camera, the video will be connected. (initial password: 4321) The video will be played without being logged in during the initial connection. - Page 15 Power Supply Connecting to Audio Input/Output Use the screwdriver to connect each line (+, –) of the power cable to the corresponding power port of the camera. Microphone Speaker If DC 12V and PoE power are supplied at the same time, the unit will operate with the external power (DC 12V). Speaker - You can also use a router featuring PoE to supply power to the camera.
- Page 16 installation & connection Connecting to the I/O port box RS-485 communication Connect the Alarm I/O cable to the corresponding port of the port box. • Control signal connection diagram Camera Controller RS-485+ TXD+ RS-485- TXD- Communication cable An RS-485 communication line is needed for communication between the camera and the controller. It is recommended that the cable length be less than 30M.
- Page 17 Select Normal Open from the setup menu. - The sensor input is activated when it is short if the contact type is used, and when it is at the “LOW” level if the active type is used. Select Normal Close from the Setup menu. - The sensor input is activated when it is open if the contact type is used, and when it is at a high-impedance state if the active type is used.
-
Page 18: Network Connection And Setup
network connection and setup CONNECTING THE CAMERA DIRECTLY TO A DHCP BASED DSL/CABLE You can set up the network settings according to your network configurations. MODEM CONNECTING THE CAMERA DIRECTLY TO LOCAL AREA NETWORKING Connecting to the camera from a local PC in the LAN INTERNET 1. -
Page 19: Pppoe Modem
CONNECTING THE CAMERA DIRECTLY TO A PPPoE MODEM CONNECTING THE CAMERA TO A BROADBAND ROUTER WITH THE PPPoE/CABLE MODEM INTERNET This is for a small network environment such as homes, SOHO and ordinary shops. PPPoE Modem External Remote PC Camera Camera DDNS Server (Data Center, KOREA) -
Page 20: Using Device Manager
network connection and setup USING DEVICE MANAGER If using a Broadband Router • IP Address : Enter an address falling in the IP range provided by the Broadband Router. Device manager program can be downloaded from <Technical Guides>-<Online Tool> menu at Hanwha Techwin website ex) 192.168.1.2~254, 192.168.0.2~254, (http://www.hanwha-security.com). -
Page 21: Manually Registering Camera
• Example of the Dynamic IP environment configure the IP. XNP-6120H - If a Broadband Router, with cameras connected, is assigned an IP address by the DHCP server 2. Click < + > at the main page of device manager. -
Page 22: Port Range Forward (Port Mapping) Setup
Port forwarding can be done without additional router setup if the router supports the UPnP (Universal Plug and Play) function. After connecting the network camera, select the checkbox from the menu <Quick connect> in <Wisenet DDNS> in “Settings -> Network -> DDNS”. -
Page 23: Connecting To The Camera From A Shared Local Pc
CONNECTING TO THE CAMERA FROM A SHARED LOCAL PC 1. Run device manager. It will scan for connected cameras and display them as a list. 2. Double-click a camera to access. The Internet browser starts and connects to the camera. Access to the camera can also be gained by typing the camera’s IP address in the address bar of the Internet browser. -
Page 24: Connecting To The Camera
To register your device to the <DDNS> server, visit http://ddns.hanwha-security.com and register your device first, and then set the Web Viewer’s <Network> - <DDNS> to <Wisenet DDNS>, as well as providing 2. Type the IP address and HTTP port number of the camera in the address bar. -
Page 25: Password Setting
PASSWORD SETTING PLUG-IN SUPPORT SPECIFICATIONS FOR EACH BROWSER When you access the product for the first time, you must register the The existing plug-in web viewer and a new plug-in free web view is embedded together. login password. This allows you to use the web viewer in newer browser environments that do not support plug-ins, such as When the “Password change”... -
Page 26: Installing Webviewer Plugin
web viewer INSTALLING WebViewer PLUGIN USING THE LIVE SCREEN To access to the plug-in webviewer and play a live video (H.264/H.265) or a recorded video, an installation a b c message will be prompted. At this time you need to install the webviewer plug-in to use the function properly. 1. - Page 27 Item Description Item Description You can select a profile type in <Video profile> under the <Basic> setup menu. Alarm output Activate the Alarm Out port. Click the icon to display the name of the current profile. Audio control Activates audio and adjusts the volume. Afterimages can be displayed on the screen under the following conditions if the video is Profile type played in the monitoring page:...
- Page 28 web viewer To Use Microphone To enable the Area Zoom mode • Click [Mic ( )] icon to activate the microphone. : For zoom movement, click and drag to the location on the screen that you want to move to. •...
-
Page 29: Playing The Recorded Video
PLAYING THE RECORDED VIDEO Item Description Search range setting Set the search date and time range for data saved in your Micro SD memory card or NAS. Before you can play the video, you must configure the record settings. For details on record settings, refer to “Storage”. (page 49) Saves the current video screen in an image file format (format may vary depending on the Capture Playback Screen Name and Features... - Page 30 web viewer To play after searching by time To Play an AVI File 1. Click the [ ] icon. (1) Micro SD memory card 2. On the calendar, set the search date, start time and end time. 1. Separate the Micro SD memory card from the camera. The event searched is displayed on the time bar.
-
Page 31: Setup
setup screen SETUP 7. According to your situation, set ATC (Auto Transmit Control) mode. • ATC mode : It adjusts the video properties according to the You can configure the basic camera information, PTZ, video and audio, network, event, analyze, system and open variance in the network bandwidth, controlling the bit rate. - Page 32 setup screen To Add/Change the Video Profile • Dynamic GOV : When the bit rate control is VBR in H.264/H.265 codec, it makes the GOV length automatically change to the set value of the maximum dynamic GOV. The profile setup can be added or modified to accommodate various profiles depending on the recording •...
- Page 33 User • Current users : If you select <Use>, you can set or change the user permissions. The administrator may set up audio input, audio output, alarm output and PTZ authority. 1. From the Setup menu, select the <Basic ( )>...
- Page 34 setup screen IP & Port 6. Click <Port>. 7. Type in each item in the Port menu as necessary. 1. From the Setup menu, select the <Basic ( )> tab. Neither the port range between 0 and 1023 nor port 3702 is available. 2.
-
Page 35: Ptz Setup
PTZ SETUP To add a preset 1. Click on the [Set preset] button. PTZ setup 2. Select the preset number to be added. You can change the direction of lens and activate the zoom. 3. Set the preset name and click on the [OK] button. 1. - Page 36 setup screen To set the last location 3. Press the [Apply] button. Saved in the bottom list. 1. Set whether or not to use the last position and time. 4. Press the [Start] button. When using the last position, if the time is set between 1 and 600 seconds, the current position value will It performs the group operation.
- Page 37 To set the auto run 5. Set the Propotional PT mode. Pan and tilt speed is adjusted according to the zoom magnification. As the zoom magnification grows, the This feature will activate the predefined sequence function if the user does not manipulate anything on the pan and tilt speed decreases.
-
Page 38: Video & Audio Setup
setup screen VIDEO & AUDIO SETUP Functions Supported for Each Protocol Protocol P control T control Zoom control Focus control Preset Remarks Video setup SAMSUNG-T 1. From the Setup menu, select the <Video & Audio ( )> tab. SAMSUNG-E 2. Click <Video setup>. PELCO-D 3. - Page 39 Camera setup 7. If you want to delete a name in the list, select it and click [Delete]. 8. To change the pattern of the configure privacy area, select the pattern from the pattern list and click the You can change the camera settings according to the environment where the camera is located. Apply ] button.
- Page 40 setup screen 2. Set the camera item for each image preset mode. To Set the Sensor 3. When done, click [Apply]. It specifies how many frames the camera CMOS sensor will capture per second. 1. Select <Sensor>. Initial setting for each image preset mode 2.
- Page 41 To Set BLC To Set WDR You can specify a desired area on the video manually and set the area to be displayed more clearly. It displays a sharp image of the objects in a scene where both bright and dark areas exist. 1.
- Page 42 setup screen • SSNR 2D Level : Adjusts the 2DNR level. To Setup Special - 2DNR : This is a method of reducing the noise by using the adjacent pixel information on a single 1. Select <Special>. video frame. 2. Select each item and set it properly. If you increase the level, the noise will be reduced but the video may be blurred.
- Page 43 To Set OSD Focus Setup Focus 1. Select <OSD>. 1. Select < >. 2. Select each item and set it properly. 2. Select each item and set it properly. • Camera title : It specifies the name of the camera to be •...
-
Page 44: Network Setup
Set a desired area of the video incoming from the camera as ROI area and specify the detection sensitivity for the area. 4. Type in the DDNS items according to the selected type. • Wisenet DDNS : Select this if you use the DDNS server 1. From the Setup menu, select the <Video & Audio ( )>... - Page 45 Registering with DDNS To connect to the Wisenet DDNS in camera setup 1. From the DDNS setup page, set <DDNS> to <Wisenet To register your product with the Wisenet DDNS DDNS>. 1. Visit the Wisenet DDNS web site (http://ddns.hanwha- 2. Provide the <Product ID> that you registered product ID with security.com) and sign in with a registered account.
- Page 46 setup screen 802.1x If selected <Allow registered IP> for IP Filtering and <IPv6 setup> of <IP & Port> is set to <Use>, both IPv4 and IPv6 addresses of the computer currently configuring should be assigned. When connecting network, you can choose whether using 802.1x protocol, and then install the certification. The IP address of the computer used for the current setup cannot be added to <Deny registered IP>, it should be added to 1.
- Page 47 • Friendly name : Display the camera name. information. The default name is <write>. Friendly name is displayed in the format of WISENET-<Model Name>-<MAC Address>. • Enable SNMP v3 : SNMP version 3 will be active. In the Windows operating system which basically supports UPnP, the cameras connected to the network are displayed.
-
Page 48: Event Setup
setup screen EVENT SETUP FTP / E-mail You can configure the FTP/E-mail server settings so that you can transfer the images taken with camera to Event setup your PC if an event occurs. You can easily set the event detection items, and move to the detailed setting. 1. - Page 49 Storage 5. Set <SD File System>. • Type : Camera supports VFAT and ext4 as an SD card file system, which can be configured by the user. You can activate recording on your device, set the recording conditions, check the saved data capacity and (However, in case of ext4 file system, an additional application is required to recognize the Windows format the device itself.
-
Page 50: Nas (Network Attached Storage) Guide
setup screen NAS (Network Attached Storage) guide If you want to record in your NAS 1. Set the saving operation and basic recording. Since data may not be saved after a temporary network interruption when using NAS, it is recommended that you use SD at Auto deletion is supported only if your NAS meets the recommended the same time to prevent loss of recorded images. - Page 51 4. Click the [Create] button. 10. Basic setting in the NAS is completed. Connect your camera to the actual NAS. 5. After entering the shared folder name(ID), click the [OK] As shown below, enter the NAS connection setting items. button to create a shared folder. In this example, the shared folder name is [testDirectory].
- Page 52 setup screen Alarm input Time schedule You can set the alarm input type, activation time, and operation mode. You can configure settings to transmit images at regular intervals at a scheduled operation time regardless of the occurrence of an event. 1.
-
Page 53: Configure Analysis Settings
CONFIGURE ANALYSIS SETTINGS Network disconnection When the network is physically disconnected, it is considered as an event to be saved. Motion detection 1. From the Setup menu, select the <Event ( )> tab. You can configure settings to generate an event signal when a motion is detected. 2. - Page 54 setup screen Tampering detection 7. Configure the event motion schedule and event motion conditions. For more information about <Event activation time> and <Event action settings>, refer to “Alarm input”. (page 52) You can set to detect tampering attempts and trigger events, such as sudden change of camera’s framing 8.
- Page 55 Fog detection Face detection You can configure settings to generate an event signal when fog is detected. You can configure the settings to generate an event signal in response to the detection of a face in the specified area. 1. From the Setup menu, select the <Analytics ( )>...
- Page 56 setup screen IVA (Intelligent Video Analysis) Configure analysis rules You can configure settings to generate an event signal when a motion or situation meeting the specified You can configure individual analysis rules as follows. event rules is detected. • Crossing 1.
- Page 57 Common settings Auto tracking Common settings are settings to increase the detection accuracy and minimize false positives, based on the It is possible to set the automatic tracking operation according to the installation environment, and to use environment. generate an event signal when the camera executes the automatic tracking operation. •...
- Page 58 setup screen Audio detection You can set to detect sound over the specified level and trigger an event accordingly. 1. From the Setup menu, select the <Analytics ( )> tab. Camera Height (2.5 m~30 m) 2. Click <Audio detection>. 3. Set whether or not to <Enable Audio detection>. 4.
-
Page 59: System Setup
SYSTEM SETUP Sound classification You can configure settings to generate an event signal in response to the detection of a specified sound Product information source. 1. From the Setup menu, select the <Analytics ( )> tab. 1. From the Setup menu, select the <System ( )>... - Page 60 setup screen To perform the upgrade 1. Click [Browse ( )] and specify a file to upgrade. You can check the system log or event log. 2. Click [Upgrade]. 1. From the Setup menu, select the <System ( )> tab. 3.
-
Page 61: Open Platform Setup
OPEN PLATFORM SETUP Open Platform A user can install an application on their camera to execute additional functions. 1. From the Setup menu, select the <Open Platform ( )> tab. 2. Click <Open Platform>. 3. Click the [Browse ( )] button to select the *.cap file from the user folder. -
Page 62: Troubleshooting
appendix appendix TROUBLESHOOTING PROBLEM SOLUTION Voice is not recorded even though PROBLEM SOLUTION y You must enable the <Audio In> check box in <Basic> - <Video Profile>. audio input settings are configured. When an Windows 10 user accesses y This is what happens when microphone driver has been set to Realtek driver. y Verify the settings in the following sequence: the web viewer through Chrome <Motion detection>... -
Page 63: Open Source Announcement
OPEN SOURCE ANNOUNCEMENT GNU GENERAL PUBLIC LICENSE Version 2, June 1991 GPL/LGPL software license Copyright (C)1989, 1991 Free Software Foundation, Inc. 51 Franklin Street,Fifth Floor, Boston, MA 02110-1301, USA Everyone is permitted to copy and distribute verbatim copies of this license document, but changing it is not allowed. Preamble The software included in this product contains copyrighted software that is licensed under the GPL/LGPL. - Page 64 components (compiler, kernel, and so on) of the operating system on which the executable runs, unless that component itself accompanies the executable. You should also get your employer (if you work as a programmer)or your school, if any, to sign a “copyright disclaimer” for the program,if necessary. Here is a If distribution of executable or object code is made by offering access to copy from a designated place, then offering equivalent access to copy the source sample ;...
- Page 65 2. Basic Permissions. The requirement to provide Installation Information does not include a requirement to continue to provide support service, warranty, or updates for a work that has been modified or installed by the recipient, or for the User Product in which it has been modified or installed. Access to a network may be denied when All rights granted under this License are granted for the term of copyright on the Program, and are irrevocable provided the stated conditions are met.
- Page 66 6. Redistributions of any form whatsoever must retain the following acknowledgment: "This product includes software developed by the OpenSSL Project for patent license to some of the parties receiving the covered work authorizing them to use, propagate, modify or convey a specific copy of the covered work, then the patent license you grant is automatically extended to all recipients of the covered work and works based on it.
- Page 67 THIS SOFTWARE IS PROVIDED BY THE COPYRIGHT HOLDERS AND CONTRIBUTORS “AS IS” AND ANY EXPRESS OR IMPLIED WARRANTIES, TORT (INCLUDING NEGLIGENCE OR OTHERWISE) ARISING IN ANY WAY OUT OF THE USE OF THIS SOFTWARE, EVEN IF ADVISED OF THE POSSIBILITY INCLUDING, BUT NOT LIMITED TO, THE IMPLIED WARRANTIES OF MERCHANTABILITY AND FITNESS FOR A PARTICULAR PURPOSE ARE DISCLAIMED.
- Page 68 The MIT License above copyright notice, this list of conditions and the following disclaimer in the documentation and/or other materials provided with the distribution. yy Neither the name of Sparta, Inc nor the names of its contributors may be used to endorse or promote products derived from this software without specific prior written permission.
- Page 69 1.11. "Source Code" means the preferred form of the Covered Code for making modifications to it, including all modules it contains, plus any associated interface for the Executable version does not attempt to limit or alter the recipient’s rights in the Source Code version from the rights set forth in this License. If You distribute definition files, scripts used to control compilation and installation of an Executable, or source code differential comparisons against either the Original Code or another the Executable version under a different license You must make it absolutely clear that any terms which differ from this License are offered by You alone, not by the well known, available Covered Code of the Contributor’s choice.
- Page 70 provides that the language of a contract shall be construed against the drafter shall not apply to this License. ansi2knr.c is NOT covered by the above copyright and conditions, but instead by the usual distribution terms of the Free Software Foundation; principally, that you must include source code if you redistribute it.
- Page 71 16. "Patch for Modification" means a difference, program, system, or the like in order to create the Modified Source Code from the Source Code or the Binary Source Code on the T-Engine Hardware or the Similar Hardware to T-Engine Hardware: Code thereof.
- Page 72 BZip2 License "Legal Entity" shall mean the union of the acting entity and all other entities that control, are controlled by, or are under common control with that entity. For the purposes of this definition, "control" means (i) the power, direct or indirect, to cause the direction or management of such entity, whether by contract or otherwise, or (ii) ownership of fifty percent (50%) or more of the outstanding shares, or (iii) beneficial ownership of such entity.
- Page 73 PHP 3.01 License The PHP License, version 3.01 Copyright (c) 1999 - 2010 The PHP Group. All rights reserved. Component Name License php-5.2.17 PHP 3.01 http://www.php.net/distributions Redistribution and use in source and binary forms, with or without modification, is permitted provided that the following conditions are met: 1.
Need help?
Do you have a question about the XNP-6120H and is the answer not in the manual?
Questions and answers