Advertisement
i.
iii.
APPLICATION
Note: Application data is subject to change at any time
A4 (8K)
A5 (8TF, 8F7, 8TA) 2008 - 2016
Note: vehicle will need modification. Please familiarise yourself with the instructions before undertaking installation.
RECOMMENDED TOOLS
• Panel Removal Tool
• Cutting Tool
FEATURES
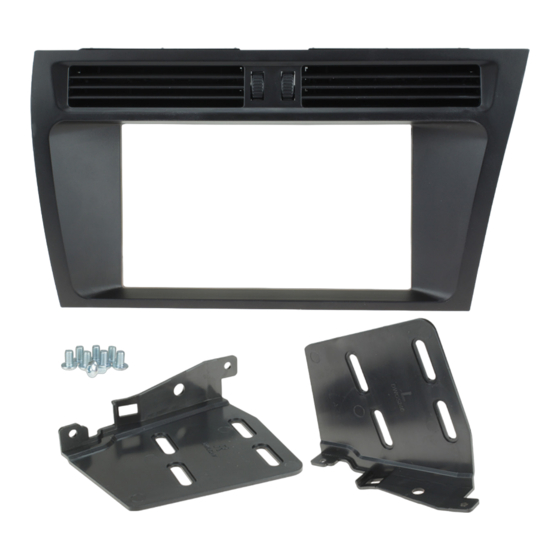
• Allows for the installation of a double DIN aftermarket stereo
• Includes mounting brackets and fitting accessories
• Finished in matt black to match vehicle dashboard
The information provided in this document is subject to change without notice due to manufacturer changes and/or improvements to the product/s. This
instruction manual is based on documented data and research. The manufacturer of this product cannot be held responsible for any changes made to the
vehicle by the manufacturer or damages that may occur through the installation of this product in accordance with the steps outlined herein.
2008 - 2016
• Pick Tool
Need help? Visit support.connects2.com/tickets/technical
Double DIN Fitting Kit
for Audi (Non-MMI) Vehicles
ii.
• Screwdriver
DISCLAIMER
CT23AU12/L
IN THE KIT
i.
Double DIN Fascia Panel*
ii.
Brackets
iii.
Hex Screws (x8)
*Note the fascia panel showcased
throughout this instruction manual is
for Right hand vehicles.The procedure is
identical for Left hand vehicles, although
you will need to use the CT23AU12L fascia
panel during installation.
• 8mm Socket Wrench
V2 03/21
Advertisement
Table of Contents

Summary of Contents for Connects2 CT23AU12/L
- Page 1 • Includes mounting brackets and fitting accessories • Finished in matt black to match vehicle dashboard Need help? Visit support.connects2.com/tickets/technical DISCLAIMER The information provided in this document is subject to change without notice due to manufacturer changes and/or improvements to the product/s. This instruction manual is based on documented data and research.
- Page 2 Please ensure that the correct tools are used during the installation to avoid damage to the vehicle or product. Connects2 can not be held responsible for the installation of this product. INSTALLATION GUIDE Audi Non-MMI OEM dashboard.
- Page 3 INSTALLATION GUIDE DASH DISASSEMBLY Begin by using a Bojo tool (or similar variant) to pry away and unclip the trim that surrounds the top screen. Once loose, disconnect the hazard switch connector and place to one side. Using the Bojo tool again, pry away and unclip the bottom HVAC panel.
- Page 4 DASH DISASSEMBLY Using a blade or dremel tool, proceed to cut the portion of the interior dash highlighted. This allow the new head unit to sit higher and in align with the fascia plate. KIT ASSEMBLY Attach the new Double DIN Brackets to the aftermarket head unit utilising the screws within the kit.


Need help?
Do you have a question about the CT23AU12/L and is the answer not in the manual?
Questions and answers