Table of Contents
Advertisement
Quick Links
Advertisement
Table of Contents

Related Manuals for Siemens WM14VG0CFG


Summary of Contents for Siemens WM14VG0CFG
- Page 1 Translated from Dutch to English - www.onlinedoctranslator.com Washing machine WM14VG0CFG User manual and install ation instructions Register your product on My Siemens and discover exclusive services and off to/welcome siemens-home.bsh-group.c The future moving in. Siemens Home Appliances...
-
Page 2: Table Of Contents
Refer to the Digital User's Guide for more information. Index 1 Safety..........4 6 Before using for the first time ....20 1.1 General instructions ....4 6.1 Starting a wash cycle without 1.2 Destination of the device laundry..........20 rate ........ - Page 3 13.13 Taking out the laundry ....36 13.14 Switching off the appliance..36 14 Child Lock ........ 37 14.1 Activating child lock ... 37 14.2 Deactivating the child lock..37 15 Basic Settings ....37 15.1 Overview of the basic settings ........
-
Page 4: Safety
NLSafety 1 Safety Observe the following safety instructions. 1.1 General instructions sRead this manual carefully. sKeep the operating instructions and product information for future reference. for use or for subsequent owners. sDo not connect the device in case of transport damage. 1.2 Destination of the device Only use the device: sto wash machine-safe textiles and wool by hand... -
Page 5: Secure Installation
SafetyNL 1.4 Secure installation Observe the safety regulations when installing the device. WARNING ‒ Risk of electric shock! Improper installations are dangerous. ▶ Only connect and use the device in accordance with the information on the type plate. ▶ Only connect the device to a mains supply with alternating current via a properly installed earthing socket. - Page 6 NLSafety ▶ Use only manufacturer-approved adapters and power cords. ▶ If the power cord is too short and a longer power cord is not available, contact an electrical retailer to adjust the home installation. WARNING ‒ Risk of injury! The heavy weight of the device can cause injuries when lifted. ▶...
-
Page 7: Safer Use
SafetyNL There is a tripping hazard with incorrectly laid hoses and mains connection cables. ▶ Lay the hoses and connection cables in such a way that they cannot be tripped over. If the appliance is moved by protruding parts, such as the loading door, the parts can break off. - Page 8 NLSafety WARNING ‒ Risk of health hazard! Children can lock themselves in the appliance and endanger their lives. ▶ Do not install the appliance behind a door that blocks or prevents the opening of the appliance door. ▶ In the case of discarded appliances, remove the plug of the mains cable from the socket, then cut the mains cable and damage the lock of the appliance door so that the appliance door no longer closes.
-
Page 9: Safe Cleaning And Maintenance
SafetyNL Reaching into the rotating drum can cause injury to hands. ▶ Wait for the drum to come to a complete stop before reaching inside the drum with your hand. CAUTION ‒ Risk of burns! The soap gets hot when washing at high temperatures. ▶... - Page 10 NLSafety WARNING ‒ Risk of injury! The use of non-original spare parts and non-original accessories is dangerous. ▶ Only use original spare parts and original accessories from the manufacturer. WARNING ‒ Risk of poisoning! Toxic fumes can be generated when cleaning agents containing solvents are used.
-
Page 11: Avoiding Material Damage
Avoid material damageNL Make sure that the internal ▶ 2 Material damage diameter of the water tap is at least avoid 17 mm. Make sure that the thread length ▶ on the connection to the water Follow this instruction to avoid tap is at least 10 mm. -
Page 12: Environmental Protection And Saving
NLEnvironmental protection and saving Clean the device only with water ▶ Detergent according to the degree of and a soft, damp cloth. soiling of the laundry . ▶ Remove all detergent residues, spray aFor a light to normal degree mist residues or residues immediately of contamination, a small amount upon contact with the appliance. -
Page 13: Energy Saving Mode
Set up and connectNL 3.3 Energy Saving Mode 4.2 Package contents If you do not operate the device for a After unpacking, check all parts for long time, it automatically switches transport damage and the to energy-saving mode. completeness of the delivery. The energy saving mode is exited PAY ATTENTION! Use with incomplete or defective... -
Page 14: Removing Transport Locks
NLSet up and connect installation site WARNING To demand Risk of injury! kitchen The device al- When used on a plinth, the device can borrow under a tip over. continuous work The device feet for commissioning ▶ place sheet, on a plinth must be absolutely that fixed with the with the fixings adjacent... -
Page 15: Connecting The Device
Set up and connectNL Loosen and remove all bolts of the 4 Install the 4 cover caps. transport locks with a SW13 open- end wrench Push the 4 cover caps down. Remove the mains connection cable from the holder. 4.5 Connecting device Connect water supply hose Remove the 4 sleeves. -
Page 16: Adjusting The Device
NLSet up and connect Connect the water inlet hose to the plastic stand the water drainage tap (26.4 mm = 3/4"). pipe with rubber feeding hose with run muff or a a bend floor drain fixate and gene. 4.6 Adjusting the device To reduce noises and vibrations and to prevent the device from walking, place Open the tap carefully and check... -
Page 17: Connecting The Appliance Electrically
Set up and connectNL To adjust the appliance, turn the Insert the mains plug of the appliance feet. Check the horizontal appliance's connecting cable into adjustment of the appliance with a a socket in the vicinity of the spirit level. appliance. -
Page 18: Getting To Know Your Device
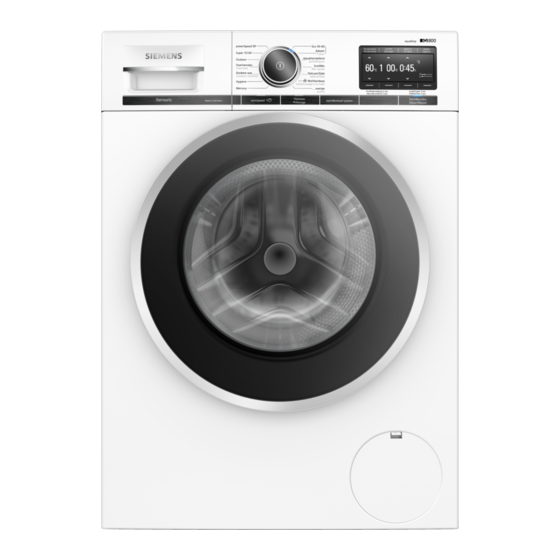
NLGetting to know your device 5 Getting to know your device 5.1 Device Here you will find an overview of the components of your device. Depending on the device type, details in the picture may differ, e.g. the color and o m. the V and pump Transport protections... -
Page 19: Control Panel
Getting to know your deviceNL note in the program descriptions. Dosing aid for liquid detergent → "Programs", Page 27 → "Insert the dosing aid for liquid detergent", Page 34 Detergent compartment II: detergent for the main wash Detergent dispenser: fabric softener Detergent compartment I: detergent for prewash and soak... -
Page 20: Before Using For The First Time
NLusage select ma settings in the main menu and settings in the submenus. Main menu To choose program settings, press the buttons above or below the symbols. When a setting is activated, the display shows . The selection does not need to be confirmed again. - Page 21 usageNL Fill powder detergent into compartment II. To avoid foaming, use only half the amount recommended by the detergent manufacturer for light soiling. Do not use wool or delicate detergent. Slide the detergent drawer into the appliance. To start the program, press Start/ Refillto press.
-
Page 22: Display
NLDisplay 7 Display The display shows the current setting values, options or information texts. Example display indication name Display More information 0:40 h Approximate expected program duration Program duration / remaining time of or time remaining in the program. the program →... - Page 23 DisplayNL name Display More information Save a program → Page 34 . Other Program on- programs → Page 33 Set up. to beat other program moms Child lock slights up: the child lock is activated. s flashes: the child lock is activated and the device was operated.
- Page 24 NLDisplay name Display More information The stain type is activated. The stain type is activated. tomatoes Energy consumption for the set Energy consumption programme. : lower energy consumption : higher energy consumption Water consumption for the set water consumption program. : lower water consumption : higher water consumption Dosage:_ 50...
- Page 25 TestsNL 8 Keys With the buttonOptionsopen the submenu for further program settings. The other program settings are listed in the overview for the buttons. The selection of the program settings depends on the program set. Knob Choice More information Start/Refill sstart Start, cancel or pause program.
- Page 26 NLTests Knob Choice More information Multiple se- Activate other program settings. Options reading → "Adjust other program settings", page 34 Other program settings can be found in this overview. Forward sactivate Activate or deactivate prewash, e.g. for washing heavily soiled laundry. sdeactivate Extra rinse Activate or deactivate up to three additional...
-
Page 27: Programs
ProgramsNL 9 Programs Remark:The care labels on the laundry give you additional information on program selection. Max. Program Description bela- thing (kg) Cotton Wash hard-wearing cotton, linen and blended fabrics. Also suitable as a shortened program for normally soiled laundry if you activate varioSpeed. Program setting: smax. - Page 28 NLPrograms Max. Program Description bela- thing (kg) Fast mix Wash textiles made of cotton, linen, synthetic materials and blended fabrics. Suitable for lightly soiled laundry. Program setting: smax. 60 °C smax. 1400 rpm Delicate/Silk Wash delicate, washable textiles made of silk, viscose and synthetics.
- Page 29 ProgramsNL Max. Program Description bela- thing (kg) Program setting: max. 1400 rpm – Save a desired program and the individual program memory settings. – Set other programs. … remaining You will find the other programs in this program overview. The program settings that can be selected depend on the program set.
- Page 30 NLPrograms Max. Program Description bela- thing (kg) outdoor Wash outdoor textiles with membrane technology and water-repellent equipment. Use a detergent for outdoor textiles. Do not use fabric softener. Program setting: smax. 40 °C smax. 800 rpm Wash synthetic fiber filled pillows, duvets or fillings blankets with down.
- Page 31 ProgramsNL Max. Program Description bela- thing (kg) Remark:If you have not used a program with a temperature of 60 °C or higher for a long time, the drum cleaning indicator flashes as a reminder. Super 15'/30' Wash cotton, synthetic and blended fabrics. Short program for lightly soiled small items of laundry.
-
Page 32: Accessories
NLaccessories 10 Accessories Use only original accessories. These are adapted to the device. Remark:Some accessories are available in other colours. Contact the → "Customer Service", page 52 . Usage Order number Cold water or Aquastop WZ10131 Extension water supply water inlet hose feeding hose lengthen (2.50 m). -
Page 33: Detergent And Care Ginger
QR code in connecting", Page 13 the table of contents or at Press . ▶ siemens-home.bsh-group.com . The power-on process takes a few seconds. sTake the information regarding Safe- ness → Page 4 and Avoid material Remark:The drum lighting switches damage →... -
Page 34: Adjust Program Settings
NLService Start the program. 13.5 Filling the drum with → "Starting the program", Page laundry Remark:To avoid creasing, observe the 13.3 Adjust program settings maximum load of the programs. → "Programs", Page 27 Required:A program is set. Required:The laundry is prepared. →... -
Page 35: Using The Dosing Aid For Liquid
ServiceNL Place the dosing aid. Fold the dosing aid downwards and click into place. Insert the detergent drawer. Slide in the detergent drawer. 13.7 Using the dosing aid for 13.8 Dosing detergent and care liquid detergent agent know Comments You can use a dosing aid in the sUse the dosing aid for liquid detergent drawer to dose liquid Do not use with gel-like detergents,... -
Page 36: Adding Laundry
NLService aThe display shows the program 13.12 Resume program at duration function ready in time. rinse hold 13.10 Adding laundry Requirements sThe rinse hold is activated. → "Buttons", Page 26 After the program has started, you can remove or add laundry sThe last rinse of the depending on the program status. -
Page 37: Child Lock
Child lockNL Basic setting Description 14 Child Lock Key signal Signal volume when operating Secure your device against unwanted of the buttons operation via the controls. Info Drum travel Reminder for nig. the drum cleaning 14.1 Activating child lock went to activate or deactivate Both keysChild lock 3 sec.press for ▶... -
Page 38: Cleaning And Maintenance
NLCleaning and maintenance Pull out the insert from bottom to 16.1 Cleaning the drum top. CAREFULLY Risk of injury! Permanent washing at low temperatures and lack of ventilation of the appliance can damage the drum and cause injuries. Regularly run a drum cleaning ▶... -
Page 39: Cleaning The Drain Pump
Cleaning and maintenanceNL Clean the opening for the detergent Place a sufficiently large drawer. container under the opening. Slide the detergent drawer into the Remove the drain hose from the holder. appliance. 16.3 Cleaning the drain pump Clean the drain pump in the event of malfunctions, e.g. - Page 40 NLCleaning and maintenance Press the stopper back on. As there may still be residual water in the pump, carefully unscrew the lid. Large impurities can cause the filter element to get stuck in the pump housing. Loosen impurities and remove filter element. Clamp the drain hose in the holder.
-
Page 41: Cleaning The Inlet Opening In The Rubber Sleeve
Cleaning and maintenanceNL Make sure that both wing wheels Install and close the service door. can be turned. 16.4 Cleaning the inlet opening Install the pump cover. in the rubber sleeve Check that the pump cover Regularly check the inlet opening in components are correctly the rubber sleeve for blockages and assembled. -
Page 42: Troubleshooting
NLTroubleshooting 17 Troubleshooting You can remedy minor faults on the device yourself. Before contacting customer service, please refer to the troubleshooting information. This way you avoid unnecessary costs. WARNING Risk of electric shock! Improper repairs are dangerous. Only trained specialist personnel may carry out repairs on the device. ▶... - Page 43 TroubleshootingNL Cause and Troubleshooting Malfunction "E:30 / -80" Remove any unauthorized extensions from the ▶ water drain hose. → "Connecting the device", page 15 Pump cover is not fully screwed in. Make sure that the pump cover is screwed into the ▶...
- Page 44 NLTroubleshooting Cause and Troubleshooting Malfunction Device not working. Mains plug of the power cable is not plugged in. Connect the appliance to the mains. ▶ The fuse in the fuse box has tripped. Check the fuse in the meter box. ▶...
- Page 45 TroubleshootingNL Cause and Troubleshooting Malfunction Drain pipe or water drain hose is clogged. Washing water is not pumped out. Clean the drain pipe and the water drain hose. ▶ Drain pipe or water drain hose is kinked or pinched. Make sure that the drain pipe and the water ▶...
- Page 46 NLTroubleshooting Cause and Troubleshooting Malfunction No water flows into Make sure that the water supply hose is not ▶ the device. The kinked or pinched. detergent was not washed in. Start several times The imbalance control system eliminates the imbalance by distributing the laundry several times. with centrifugation.
- Page 47 TroubleshootingNL Cause and Troubleshooting Malfunction → "Remove transport locks", page 14 . of the device Vibration and movement ▶ during the centrifuge run. Load recognition is active. Drum is spinning, er no water flows into No error, no action necessary. ▶...
- Page 48 NLTroubleshooting Cause and Troubleshooting Malfunction Program centrifugal Remark:If possible, place large and small items of laundry together in the drum. Different sized laundry run does not start. is more evenly distributed during the spin cycle. Start the programCentrifuge. ▶ fizzing, hissing Water is flushed into the detergent drawer under pressure.
- Page 49 TroubleshootingNL Cause and Troubleshooting Malfunction Spin result is Clean the drain pipe and the water drain hose. ▶ not to satisfaction- Drain pipe or water drain hose is kinked or ness. The laundry is pinched. too wet / too damp. Make sure that the drain pipe and the water ▶...
- Page 50 NLTroubleshooting Cause and Troubleshooting Malfunction Odor has formed in Humidity and detergent residue can encourage the appliance bacterial growth. → "Cleaning the drum", page 38 ▶ Pine tree. ▶ When you are not using the appliance, leave the door and detergent drawer open to allow the residual water to dry out.
-
Page 51: Emergency Release
Transport, storage and disposalNL Let the suds drain. 17.1 Emergency release → "Cleaning the drain unlock door pump", page 39 Disassemble the hoses. Required:The drain pump is empty. → Page 39 18.2 Installing transport locks 1. ATTENTION!Running water can lead to material damage. ▶... -
Page 52: Disposal Of Your Old Appliance
NLcustomer service 18.4 Disposal of your old chemical equipment (waste electrical and electronic appliance equipment - WEEE). Environmentally friendly disposal The directive sets the allows valuable raw materials to be framework for the take- reused. back valid in the EU and disposal of old appliances. -
Page 53: Aqua-Stop Guarantee
customer serviceNL son the inside of the bottom picture if you go on holiday for a few weeks, the tap should be turned holding valve. son the back of the device off. honeycomb. In order to quickly find your device data and the service telephone numbers, you can write down the data. -
Page 54: Consumption Values
NLConsumption values 20 Consumption values The following information is provided in accordance with the EU Ecodesign Regulation. The specified values for other programs asEco 40-60are only guide values and have been determined in accordance with the applicable standard EN60456. Pro- Program bela- Water-... - Page 55 Technical dataNL peplaat. Alternatively, you will also find Maximum load 9.0 kg the model identifier in the first line of thing the EU energy label. 220-240V, mains voltage 50-60 Hz 10 A Minimum input installation fuse Rated power 2300W gene Recorded Ver- sOff state: 0.10W...
- Page 56 BSH Hausgeräte GmbH Carl-Wery-Straße 34 81739 Munich, GERMANY siemens-home.bsh-group.com Manufactured by BSH Hausgeräte GmbH under the trademark license of Siemens AG * 9001753731* 9001753731 (020525)
Need help?
Do you have a question about the WM14VG0CFG and is the answer not in the manual?
Questions and answers