Table of Contents
Advertisement
Quick Links
Advertisement
Table of Contents

Related Manuals for Siemens WM14VK0CFG


Summary of Contents for Siemens WM14VK0CFG
- Page 1 Translated from Dutch to English - www.onlinedoctranslator.com Washing machine WM14VK0CFG User manual and installation instructions Register your product on My Siemens and discover exclusive services and offers. siemens-home.bsh-group.com/welcome The future moving in. Siemens Home Appliances...
-
Page 2: Table Of Contents
Table of contents 1 Safety..........4 10 Before using for the first time ..33 1.1 General instructions ....4 10.1 Washing cycle without washing good start ........ 33 1.2 Destination of the device rate ........4 11 Laundry........34 1.3 Restriction of users .. - Page 3 16 Basic Settings ....43 16.1 Overview of the basic settings ........ 43 16.2 Changing basic settings..44 17 Cleaning and maintenance..44 17.1 Tips for maintenance of the unit ........44 17.2 Cleaning the drum ....44 17.3 Cleaning the detergent drawer ........
-
Page 4: Safety
NL Safety 1 Safety Observe the following safety instructions. 1.1 General instructions s Read this manual carefully. s Keep the operating instructions and product information for later use or for subsequent owners. s Do not connect the device in case of transport damage. 1.2 Destination of the device Only use the device: s to wash machine washable textiles and wool for hand washing... -
Page 5: Safe Installation
Safety NL 1.4 Secure installation Observe the safety regulations when installing the device. WARNING ‒ Risk of electric shock! Improper installations are dangerous. ▶ Connect and operate the device only in accordance with the information on the type plate. ▶ Only connect the device to a mains supply with alternating current via a properly installed earthing socket. - Page 6 NL Safety ▶ If the power cord is too short, contact customer service. ▶ Only use adapters approved by the manufacturer. WARNING ‒ Risk of injury! The high weight of the device can cause injuries when lifted. ▶ Do not lift the device alone. If this appliance is installed incorrectly in a washer-dryer column, the installed appliance may fall.
-
Page 7: Safer Use
Safety NL If the appliance is moved by protruding parts, such as the loading door, the parts can break off. ▶ Do not move the appliance by protruding parts. CAUTION ‒ Risk of cutting! Sharp edges on the device can lead to cuts if touched. ▶... - Page 8 NL Safety ▶ In the case of discarded appliances, remove the plug of the mains cable from the socket, then cut the mains cable and damage the lock of the appliance door so that the appliance door no longer closes. WARNING ‒...
-
Page 9: Safe Cleaning And Maintenance
Safety NL CAUTION ‒ Risk of burns! The glass of the appliance door gets hot when washing at high temperatures. ▶ Do not touch the hot appliance door. ▶ Keep children away from the hot appliance door. CAUTION ‒ Risk of burns! The suds get hot when washing at high temperatures. - Page 10 NL Safety WARNING ‒ Risk of injury! The use of non-original spare parts and non-original accessories is dangerous. ▶ Only use original spare parts and original accessories from the manufacturer. WARNING ‒ Risk of poisoning! Toxic fumes can be generated when using solvent-based cleaning agents.
-
Page 11: Avoiding Material Damage
Avoid material damage NL Make sure that the inner diameter ▶ Material damage of the water tap is at least 17 avoid Make sure that the length of the ▶ thread on the connection to the Observe this instruction to avoid water tap is at least 10 mm. -
Page 12: Environmental Protection And Savings
NL Environmental protection and saving Only clean the appliance ▶ Dose the detergent according to the degree of soiling of the laundry → with water and a soft, damp cloth. Page 36 . Direct contact with the device ▶ a For a light to normal degree remove all detergent, spray mist of contamination, a small amount or residue. -
Page 13: Energy Saving Mode
Set up and connect NL → "Disposal of the packaging", The device has an aqua sensor. Page 12 . Check the device for visible a The aquasensor monitors during damage. the flush adjusts the turbidity of the Open the appliance door. flush water and adjusts the duration →... -
Page 14: Installation Site Requirements
NL Set up and connect s Bend for fixing installation site To demand the water drain hose Floor with wooden Place the appliance guess at a beams 4.3 Installation site resistant requirements wooden plate (thick- too minimal Remark: Take the information 30mm) which regarding Safety →... -
Page 15: Connecting The Device
Set up and connect NL s Keep the screws of the Remove the 4 sleeves. transport locks and the sleeves for later transport → Page 64 . Pull the hoses out of the holders. Install the 4 cover caps. Loosen and remove all bolts of the 4 transport locks with a SW13 open-end wrench Push the 4 cover caps down. -
Page 16: Adjusting The Device
NL Set up and connect WARNING The connection position tie with a Risk of electric shock! hose clamp The device contains live parts. (24-40 mm) bore Touching live parts is dangerous. gene. The electric Aquastop valve ▶ do not immerse in water. washbasin the water drainage Connect the water inlet hose to the... -
Page 17: Connecting The Appliance Electrically
Set up and connect NL Loosen the lock nuts with a SW17 Tighten the lock nuts hand-tight open-end wrench. against the housing with a SW17 open-end wrench. To adjust the appliance, turn the Hold the appliance foot while appliance feet. Check the horizontal doing so and do not adjust the adjustment of the appliance with a height. -
Page 18: Getting To Know Your Device
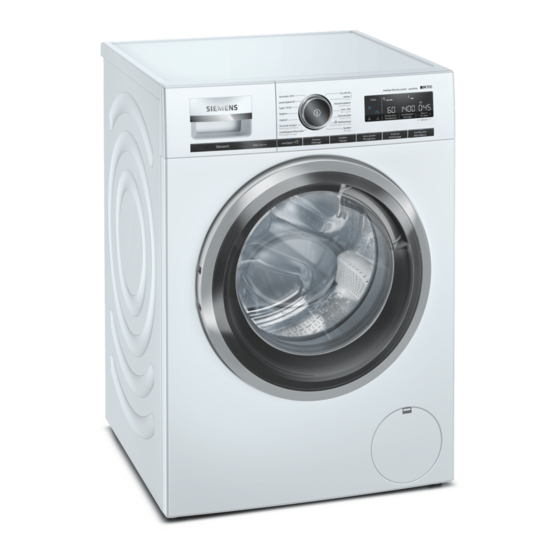
NL Getting to know your device 5 Getting to know your device 5.1 Device Here you will find an overview of the components of your device. Depending on the device type, details in the picture may differ, e.g. the color and the shape. Transport protections Service valve and pump →... -
Page 19: Detergent Drawer
Getting to know your device NL 5.2 Detergent drawer Manual Dosing Compartment / : Dosing container for fabric softener or detergent : Detergent dispenser 5.3 Control panel You can use the control panel to set all the functions of your device and gain information about the condition of use. -
Page 20: Display
NL Display 6 Display The display shows the current setting values, options or instructions. song lyrics. name More information Indication 0:40 Program duration / Approximate expected program time or remaining time of program time remaining. the program → "Buttons", Page 23 Ready in time 9 kg Recommended load Maximum load amount for the... - Page 21 Display NL name More information Indication - 0- Program end Program status Child lock s lights up: the childproof lock is activated. s flashes: the child lock is activated and the device was operated. → "Deactivate child lock", page 39 Energy consumption for the set Energy consumption programme.
- Page 22 NL Display name More information Indication E:35 / -10 Error code, error indication, signal. Wrong Example...
-
Page 23: Keys
Tests NL 7 Keys The selection of the program settings depends on the program set. The selection options for each program are shown in the front view → "Programs", Page 25 . Choise More information Start/Refill s start Start, cancel or pause program. s Cancel s pause varioSpeed... - Page 24 NL Tests Choise More information Centrifuge Adjust the spin speed or - 1400 (rinse hold). The selection turns the water not drained at the end of the wash cycle and the spin deactivated. The laundry remains in the rinse water. (mains switch) s Switch Turn the device on or off.
-
Page 25: Programs
Programs NL Anti wrinkle soak prewash Centrifuge (Rinse hold) Extra rinse varioSpeed max. spin speed 1400 rental (rpm) max. temperature (°C) 90 Max. load (kg) - Page 26 NL Programs – Anti wrinkle – soak – prewash Centrifuge – (Rinse hold) – Extra rinse – varioSpeed max. spin speed 1400 rental (rpm) max. temperature (°C) – Max. load (kg)
- Page 27 Programs NL Anti wrinkle soak prewash Centrifuge (Rinse hold) Extra rinse – varioSpeed max. spin speed 1200 1400 rental (rpm) max. temperature (°C) Max. load (kg)
- Page 28 NL Programs – – – – – Anti wrinkle – – – soak – – – prewash Centrifuge – (Rinse hold) – – Extra rinse – – – varioSpeed max. spin speed 1400 1400 rental (rpm) – – max. temperature (°C) 40 Max.
- Page 29 Programs NL – – – – Anti wrinkle – – soak – – prewash Centrifuge – (Rinse hold) – – Extra rinse – – varioSpeed max. spin speed – 1200 rental (rpm) – max. temperature (°C) – Max. load (kg)
- Page 30 NL Programs – – – Anti wrinkle – soak – prewash Centrifuge (Rinse hold) Extra rinse – varioSpeed max. spin speed rental (rpm) max. temperature (°C) Max. load (kg)
- Page 31 Programs NL Anti wrinkle soak prewash Centrifuge (Rinse hold) Extra rinse – varioSpeed max. spin speed 1400 1400 rental (rpm) max. temperature (°C) Max. load (kg)
- Page 32 NL Programs – Anti wrinkle – soak – prewash Centrifuge (Rinse hold) Extra rinse varioSpeed max. spin speed 1200 rental (rpm) max. temperature (°C) 40 Max. load (kg)
-
Page 33: Accessories
accessories NL 9 Accessories Use only original accessories. These are adapted to the device. Usage Order number Cold water or Aquastop WZ10131 Extension water supply water supply hose feeding hose lengthen (2.50 m). The device higher WZWP20W Booster with drawer places so that it is easily filled and can be emptied. -
Page 34: Laundry
1 1 Laundry – some stubborn, dried-on stains Remark: Detailed instructions for use can be removed by washing can be found at www.siemens- several times home.bsh-group.com or by scanning the QR code on the title page of these – wash large and small items of operating instructions. -
Page 35: Degree Of Contamination
Detergent and laundry care product NL 11.3 Degree of contamination Degree of pollution Contamination Examples s no contaminants light light summer clothes or or spots visible sports clothing, which has only s Laundry has odors been worn for a few hours accepted normal Contaminants or light... -
Page 36: Detergent Recommendation
NL Detergent and laundry care product s Use dyes in moderation s No vinegar in the dosing container fill → Page 41 for the intelligent salt can affect stainless steel dosing system s no decolorizing agent in the appliance ready to use 12.1 Detergent Recommendation Textile Program-... -
Page 37: The Ministry In Essentials
The Ministry in essence NL These example values refer to a Example of manufacturer information standard load of 4 - 5 kg. for detergent Pollution light normal strong 55ml 80ml Water hardness: soft / medium - 40 ml deld 55ml 80ml 105 ml Water hardness: hard / very... -
Page 38: Filling The Drum With Detergent
NL The Ministry in essence Remark: Keep the directions for 13.4 Filling the drum with detergent and care agent → Page laundry 35 at. Remarks Pull out the detergent drawer. s Take the information regarding Fill with detergent. ness → Page 4 and Avoid material →... -
Page 39: Program Cancel
Child lock NL Press Start/Refill. Wipe the rubber sleeve dry and remove any foreign objects. 13.8 Program Cancel Remark: Take the information regarding Safety → Page 4 and Avoid material damage → Page 11 heed. on Start/Refill to press. Open the appliance door. At high temperature and high water level, the appliance door remains locked for safety reasons. -
Page 40: Intelligent Dosing System
NL Intelligent dosing system In order not to cancel the program in s If you use the intelligent dosing system tem, do not add additional progress, the program selector must be detergent or fabric softener to the set to the output programme manual dosing dispenser. -
Page 41: Filling The Dosing Container
Intelligent dosing system NL Filling the dosing container Open the filling cover. → Page 41 . To replace the contents of the dispensers with another product, clean the detergent drawer → Page 45 . If necessary, the contents of the dosing containers →... -
Page 42: Contents Of The Dosing
NL Intelligent dosing system Remark: To adjust the basic dosing 15.3 Content of the dosing amount for, re- container passes the steps with . Remarks s When you view the contents of the If the dosing reservoir changes, the basic dosing for this dosing reservoir is reset. -
Page 43: Basic Settings
Basic settings NL 1 6 Basic settings You can set up your device according to your needs. 16.1 Overview of the basic settings Basic setting Description program position Where the Signal 0 (off) The volume of 1 (soft) the signal after 2 (average) the program end Set up. -
Page 44: Changing Basic Settings
NL Cleaning and maintenance 16.2 Changing basic settings Recent deposit Delete immediately all detergent gene can make residues, spray lighter and sun- Set the program selector to skin residues or residues remaining position 1. behind worter residues are removed. aunts. The door of the residual water can device and the... -
Page 45: Cleaning The Detergent Drawer
Cleaning and maintenance NL 17.3 Cleaning the detergent Remove the pump unit. drawer If you want to replace liquid detergent or fabric softener in the dispenser with another product or if the detergent drawer is dirty, clean the detergent drawer. PAY ATTENTION! The pump unit contains electrical components. -
Page 46: Descaling
NL Cleaning and maintenance Clean the pump unit with a damp cloth. Clean the housing of the detergent drawer in the appliance. Clean the detergent drawer and lid with a soft, damp cloth or hand shower. Slide the detergent drawer into the appliance. -
Page 47: Cleaning The Drain Pump
Cleaning and maintenance NL Place a sufficiently large 17.5 Cleaning the drain pump container under the opening. Clean the drain pump in the event of malfunctions, e.g. blockages or chattering. Emptying the drain pump Remark: Take the information on the topic of safety →... - Page 48 NL Cleaning and maintenance Press the stopper back on. As there may still be residual water in the pump, carefully unscrew the lid. Clamp the drain hose in the holder. Clean the interior, screw thread of the pump cover and pump housing.
-
Page 49: Cleaning The Inlet Opening In The Rubber Sleeve
Cleaning and maintenance NL Install the pump cover. 17.6 Cleaning the inlet opening Check that the pump cover in the rubber sleeve components are correctly Regularly check the inlet opening in assembled. the rubber sleeve for blockages and clean the inlet opening. Open the appliance door. -
Page 50: Cleaning The Strainer In The Water Supply
NL Cleaning and maintenance Clean the water drain hose and the Cleaning the strainer of the water tap siphon connection. Remark: Take the information on the topic of safety → Page 4 and prevent material damage → Page 11 heed. Required: The water supply hose is empty. - Page 51 Cleaning and maintenance NL Connect the water inlet hose and check for leaks.
-
Page 52: Troubleshooting
NL Troubleshooting 1 8 Troubleshooting You can remedy minor faults on the device yourself. Before contacting customer service, please refer to the troubleshooting information. This way you avoid unnecessary costs. WARNING Risk of electric shock! Improper repairs are dangerous. Only qualified personnel may carry out repairs on the device ▶... - Page 53 Troubleshooting NL Cause and Troubleshooting Malfunction "E:30 / -80" When dosing manually, reduce to the full ▶ next wash with the same load the amount of detergent. Unauthorized extension mounted on the water drain hose. Remove unauthorized extensions to the wa- ▶...
- Page 54 NL Troubleshooting Cause and Troubleshooting Malfunction "E:35 / -10" Water in the bottom tray. Close the tap. ▶ Please contact customer service. ▶ → "Customer Service", page 65 Device is leaking. Close the tap. ▶ Please contact customer service. ▶ →...
- Page 55 Troubleshooting NL Cause and Troubleshooting Malfunction flashes. Door is not closed. Close the door. To start the program, press Start/Refill. All other error codes. Malfunction Please contact customer service. ▶ → "Customer Service", page 65 Device not working. Mains plug of the power cable is not plugged in. Connect the appliance to the mains.
- Page 56 NL Troubleshooting Cause and Troubleshooting Malfunction Clean the pump unit. Program does not start. → "Cleaning the detergent drawer", Page 45 If the indication reappears, enable the service. → "Customer Service", page 65 Remark: You can start the washing program if you deactivate the intelligent dosing system and dose manually.
- Page 57 Troubleshooting NL Cause and Troubleshooting Malfunction Washing water is not Immediate measure: mix a tablespoon of fabric softener ▶ pumped out. ter with 0.5 l of water and pour this mixture into the manual dosing compartment (not for outdoor, sportswear and down textiles). When the intelligent dosing is activated, re- ▶...
- Page 58 NL Troubleshooting Cause and Troubleshooting Malfunction The foam control system provides an extra rinse if The program duration the foam is too high. changes during the wash cycle. No error - no action required. ▶ The water is not The water is below visible range. visible in the drum No error - no action required.
- Page 59 Troubleshooting NL Cause and Troubleshooting Malfunction High spin speed Select a suitable program for the type of fabric. ▶ → "Programs", Page 25 rental is not reached. Unbalance control system compensates for imbalance through reduced spin speed. Redistribute the laundry in the drum. ▶...
- Page 60 NL Troubleshooting Cause and Troubleshooting Malfunction Loud noise during transport Transport protections have not been removed. Remove transport locks centrifugation. ▶ Clapping, clattering A foreign object has entered the pump. → "Cleaning the drain pump", page 47 in the pump. ▶...
- Page 61 Troubleshooting NL Cause and Troubleshooting Malfunction Spin result is Redistribute the laundry in the drum. ▶ not to satisfaction- Remark: If possible, place large and small items of ness. The laundry is laundry together in the drum. Different sized laundry too wet / too damp.
- Page 62 NL Troubleshooting Cause and Troubleshooting Malfunction When the intelligent dosing is activated, re- Detergent residue on ▶ the dry laundry. then induce the basic dosing amount → Page 42 . Basic dosing amount not set correctly. Insufficient cleaning next operation. When the intelligent dosing is activated, set ▶...
- Page 63 Troubleshooting NL Cause and Troubleshooting Malfunction Odor has formed in Humidity and detergent residue can encourage the appliance bacterial growth. → "Cleaning the drum", Page 44 ▶ Pine tree. When not using the appliance, leave the door ▶ and detergent drawer open so that the residual water can dry out.
-
Page 64: Emergency Release
19.1 Dismantling the device Remark: Detailed instructions for use For more information, see ▶ can be found at www.siemens- → "Set up and connect" home.bsh-group.com or by scanning Page 13 and the QR code on the title page of these →... -
Page 65: Disposal Of Your Old
customer service NL 19.4 Disposal of your old chemical equipment (waste electrical and electronic device equipment - WEEE). Environmentally friendly disposal The directive sets the allows valuable raw materials to be framework for the take- reused. back valid in the EU and disposal of old appliances. -
Page 66: Product Number (E No.) And Production Number (Fd)
NL customer service Check for defective supply lines or 20.1 Product number (E no.) fittings up to the AquaStop and production number connection on the tap. (FD) s While using an appliance In principle, with AquaStop you do The product number (E-Nr.) and the not have to keep up with it or. -
Page 67: Consumption Values
Consumption values NL 1 Consumption values The following information is provided in accordance with the EU Ecodesign Regulation. The specified values for other programs asEco 40-60 are only guide values and have been determined in accordance with the applicable standard EN60456. -
Page 68: Technical Data
NL Technical data divide up. The model identification 2 2 Technical data consists of the slash character of the E number (E-No.) on the type plate. Alternatively, you can also find the Device height 84.8 cm model identifier in the first line of the EU Device width 59.8cm energy label. - Page 72 BSH Hausgeräte GmbH Carl-Wery-Straße 34 81739 Munich GERMANY www.siemens-home.bsh-group.com Manufactured by BSH Hausgeräte GmbH under the trademark license of Siemens AG * 9001653635* 9001653635 (010614)
Need help?
Do you have a question about the WM14VK0CFG and is the answer not in the manual?
Questions and answers