Table of Contents
Advertisement
Quick Links
Advertisement
Table of Contents
Troubleshooting

Subscribe to Our Youtube Channel
Related Manuals for Garmin FUSION APOLLO MS-WB675


Summary of Contents for Garmin FUSION APOLLO MS-WB675
- Page 1 APOLLO MS-WB675 ™ Marine Entertainment System...
- Page 2 © 2022 Garmin Ltd. or its subsidiaries All rights reserved. Under the copyright laws, this manual may not be copied, in whole or in part, without the written consent of Garmin. Garmin reserves the right to change or improve its products and to make changes in the content of this manual without obligation to notify any person or organization of such changes or improvements. Go to www.garmin.com...
-
Page 3: Table Of Contents
Table of Contents Controlling Music Playback on a Connected Apple Device....... 12 USB Source Settings......12 Getting Started......... 1 Stereo Buttons and Status LEDs.... 1 Radio..........13 Controls........... 2 Setting the Tuner Region...... 13 Entering Text........4 Changing the Radio Station....13 Using the Dial to Select Items.....4 Stereo Screen.......... - Page 4 Presets...........22 Update Options........31 Saving a Station or Channel as a Additional Stereo Control Options...31 Preset............. 22 Connecting to a Garmin Watch.... 31 Selecting a Preset from a List....22 Connecting to an ARX70 Remote Removing Presets......... 22 Control........... 32 Fusion PartyBus Networking...22...
- Page 5 The stereo is not finding my connected Apple device....35 My Apple AirPlay audio is interrupted by short breaks........36 The stereo does not receive DAB stations..........36 Specifications........36 Stereo Dimension Drawings....37 Side Dimensions........ 37 Top Dimensions........ 38 Table of Contents...
-
Page 7: Getting Started
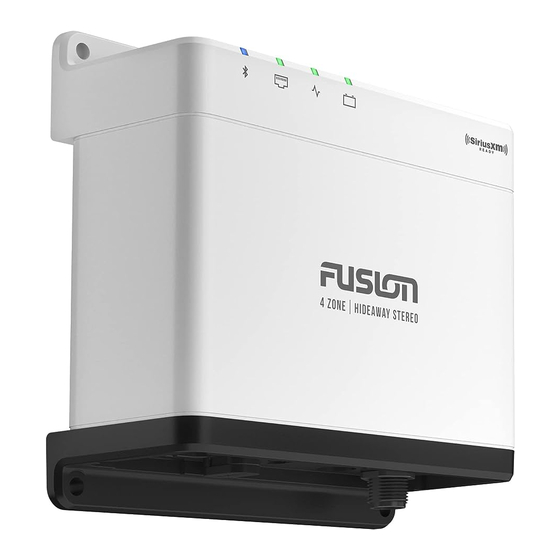
Getting Started WARNING See the Important Safety and Product Information guide in the product box for product warnings and other important information. Stereo Buttons and Status LEDs Because this device is designed to be installed in a location that may not be easily accessible, almost all playback and device interaction is done through a network-connected remote control, stereo, or chartplotter. -
Page 8: Controls
Controls NOTE: These stereo controls are available when you use a connected remote control, such as a Fusion ® ERX400. If you control the stereo using a chartplotter, an NRX remote control, or another stereo on the network, you should see the owner's manual for that device for more information. Getting Started... - Page 9 • Turn to adjust the volume. • When adjusting the volume, press to switch between zones. • Turn to move through the menus or adjust a setting. Dial • When in a menu, press to select the highlighted option. • Press and hold to activate certain functions such as opening the radio presets or muting all connected stereos from the mute screen (Muting all Connected Stereos, page 6).
-
Page 10: Entering Text
◦ Press to tune to the next station or preset. ◦ Press and hold for faster tuning (manual mode only). • AUX: Press to increase the gain. • SiriusXM source: ◦ In Live Mode, press to tune to the next station or preset. ◦... -
Page 11: Naming The Device
Source name Active zone and status icons (Network Status Icons, page 35) Track details (if available) Album art (if available from a compatible source) Elapsed time, track duration, and the current track number out of the total number of tracks in the playlist (if available) Naming the Device You should provide a unique name for this device so you can easily identify it when viewing devices on the... -
Page 12: Audio Control
Audio Control Adjusting the Volume Using this remote control, you can control the volume of any zone on any stereo connected to the Fusion PartyBus network. 1 Turn the dial to adjust the volume for the home zone on the stereo. 2 If necessary, press the dial to switch between zones. -
Page 13: Adjusting The Gain For An Auxiliary Device
Adjusting the Gain for an Auxiliary Device You can adjust the gain for a connected auxiliary device to achieve a volume level similar to that of other media sources. You can adjust the gain in 1 dB increments. You can also adjust the gain for digital sources using an optical audio connection. -
Page 14: Automatic Volume Adjustment Based On Speed
NOTICE It is the user's responsibility to comply with all applicable laws and ordinances associated with the use of this device. Garmin ® is not responsible for any fines, penalties, or damages that you may incur for failing to abide by any such laws and ordinances. -
Page 15: Connecting A Compatible Bluetooth Device
Connecting a Compatible Bluetooth Device You can play media from a compatible Bluetooth device using the Bluetooth wireless connection. You can control the music playback with the media app on a Bluetooth device or using the Fusion-Link remote control app (Fusion-Link Wireless Remote Control App, page 32). -
Page 16: Bluetooth Source Menu And Settings
Bluetooth Source Menu and Settings With the BLUETOOTH source selected, select > BLUETOOTH. NOTE: The options in this menu vary based on the connected device. CONNECTIONS > DISCOVERABLE: Allows the stereo to be visible to Bluetooth devices. You can turn off this setting to prevent possible interruption to audio after pairing a Bluetooth device to the stereo. -
Page 17: Usb Device Playback
USB Device Playback You can connect various USB media players, USB flash drives, and smartphones to the stereo. How you access the USB source depends on the type of connected media player or smartphone. Media Player Source Selections Android device Apple device iPod USB flash drive... -
Page 18: Controlling Music Playback On A Usb Flash Drive Or Media Player
Controlling Music Playback on a USB Flash Drive or Media Player 1 Connect a compatible USB flash drive or media player to the stereo. 2 Select the USB source. 3 Select > USB. 4 Select the name of the USB device. 5 Browse the music files on the device and begin playback. -
Page 19: Radio
Radio To listen to AM or FM radio, you must have a suitable marine AM/FM antenna properly connected to the stereo and be within range of a broadcasting station. For instructions on connecting an AM/FM antenna, see the stereo installation instructions. To listen to SiriusXM ®... -
Page 20: Apple Airplay
Apple AirPlay Connecting an Apple Device Using AirPlay 1 From the settings menu on your Apple device, connect to the same wireless network as your compatible Fusion stereo. NOTE: You can connect some Apple devices to the network using a wired Ethernet connection, if applicable. Go to the Apple website for more information. -
Page 21: Connecting An Auxiliary Device
Connecting an Auxiliary Device You can connect various auxiliary devices to the stereo. These devices have either RCA connectors, a line output, or a headphone output jack. 1 Locate the auxiliary connectors on the wiring harness. 2 If necessary, connect an RCA-to-3.5 mm adapter cable to the auxiliary device. 3 Connect the auxiliary device to the AUX IN RCA connectors on the wiring harness. -
Page 22: Selecting A Category
Selecting a Category You can control which categories of channels are available when using the CATEGORY tuning method. 1 With the SiriusXM source selected, select > SiriusXM > CATEGORY. 2 Select a category. Using Replay Mode You can use Replay Mode to control playback of a SiriusXM broadcast. NOTE: The device enables Replay Mode automatically when playing saved preset channels. -
Page 23: Viewing Active Alerts
Viewing Active Alerts You can review active Artist, Song, and Game Alerts. 1 Select > SiriusXM > ACTIVE ALERTS. 2 Select a category. Managing Alerts You can manage your saved alerts to select which ones you want to receive. You can delete saved alerts you do not want. -
Page 24: Sportsflash Feature
SportsFlash Feature WARNING Use caution when using the stereo or media player while operating the vessel, because doing so can cause distraction which could lead to an accident causing serious personal injury or death. The SportsFlash feature alerts you to key plays from your favorite teams during a live game. When an exciting play happens, a SportsFlash alert appears, and you can tune to the broadcast and hear the play. -
Page 25: Unlocking The Parental Controls
Unlocking the Parental Controls You can unlock the parental controls to access locked channels. 1 With the SiriusXM source selected, select > SiriusXM > PARENTAL. 2 Select UNLOCK. 3 Enter the passcode. TIP: The default passcode is 0000. The parental controls remain unlocked until you turn off the vehicle or until you lock them again. Locking Channels 1 With the SiriusXM source selected, select >... -
Page 26: Siriusxm Troubleshooting
SiriusXM Troubleshooting Advisory Description Resolutions • Verify the antenna cable is connected to the The radio has detected a fault SiriusXM Connect Vehicle Tuner. Check with the SiriusXM antenna. The • Inspect the antenna cable for damage and kinks. Antenna antenna cable may be disconnected Replace the antenna if the cable is damaged. -
Page 27: Dab Playback
DAB Playback When you connect the MS-DAB100A module and antenna to the Apollo WB675 stereo, you can tune in to and play DAB stations. For instructions on connecting the DAB adapter and antenna, see the installation instructions provided with your adapter and antenna. DAB broadcasts are not available in all regions. -
Page 28: Presets
Presets You can save your favorite AM stations and FM stations as presets for easy access. You can save your favorite SiriusXM channels if the stereo is connected to an optional SiriusXM tuner and antenna. You can save your favorite DAB stations if the stereo is connected to the proper DAB equipment and set to the correct tuner region. -
Page 29: Creating A Group
Creating a Group Before you can create a group, you must connect multiple compatible stereos to the Fusion PartyBus network. See the installation instructions provided with your stereo for information about installing and configuring the network. NOTE: There are some limitations and other considerations when using stereos in groups. See Grouped Stereo Source Considerations, page 24for more information. -
Page 30: Grouped Stereo Source Considerations
Grouped Stereo Source Considerations When selecting sources to play over the network, you should observe these considerations. • A zone stereo, such as the Apollo SRX400, can create or join a group to control and play sources from other stereos, but it cannot share its sources with the group. •... -
Page 31: Enabling Group Synchronization
Enabling Group Synchronization You must remove the stereo from an existing group before you can enable the GROUP SYNC setting. You cannot update settings when a stereo is part of a group. You must enable this setting on each stereo that you want to retain group settings after a power cycle. 1 Select >... -
Page 32: Setting The Home Zone
Setting the Home Zone The home zone is the speaker zone that you adjust by default when you turn the dial on the remote control. 1 Select > SETTINGS. 2 Select the name of the remote control you plan to use with this stereo. 3 Select ASSIGN HOME ZONE. -
Page 33: Automatic Volume Control Settings
Automatic Volume Control Settings Select > SETTINGS, select the name of the stereo, then select ZONE > SPEED VS VOLUME. ENABLED: Enables the automatic volume control feature. SPEED SOURCE: Sets the source that the stereo uses to determine the speed (Speed Source Information, page 27). -
Page 34: Setting A Zone Name
Setting a Zone Name You can set a name for a speaker zone to make it easier to identify. 1 Select > SETTINGS. 2 Select the name of the stereo. 3 Select ZONE. 4 Select a zone. 5 SelectZONE NAME, and select an option: •... -
Page 35: Adjusting Additional Audio Settings For A Zone
(Setting a Static IP Address, page 30). GARMIN MARINE NETWORK: Allows the device to be used on a Garmin Marine Network so it can be viewed and controlled by connected Garmin chartplotters (Configuring the Stereo for use with a Garmin Marine Network, page 30). -
Page 36: Setting The Stereo As The Dhcp Server
END IP: Sets the final IP address in the IP-address range of the DHCP server. Configuring the Stereo for use with a Garmin Marine Network You can connect this stereo to a Garmin Marine Network in order to view and control the stereo using a compatible Garmin chartplotter. -
Page 37: Resetting Network Settings
DAB MODULE: Updates an optional DAB module connected to the SIRIUS XM port. Additional Stereo Control Options Connecting to a Garmin Watch For more information about the watch, see the watch manual at garmin.com/manuals. 1 Following the instructions in the watch manual, install the Fusion-Link Lite app from the Connect IQ store ™... -
Page 38: Connecting To An Arx70 Remote Control
Connecting to an ARX70 Remote Control 1 On the stereo, select the BLUETOOTH source. 2 Select > BLUETOOTH > CONNECTIONS > DISCOVERABLE. TIP: You can also press the button on the stereo to make it discoverable. 3 Bring the ARX70 remote control within 10 m (33 ft.) of the stereo. NOTE: Stay 10 m (33 ft.) away from other ANT devices while pairing. -
Page 39: Appendix
• You can program only newer versions of software on the device. 1 Go to the page for your device on support.garmin.com, and download the update file. 2 Extract the contents of the .zip file to the root of your USB storage device. -
Page 40: Updating The Software Using The Fusion Link App
Updating the Software Using the Fusion Link App You must connect the Fusion-Link app to the network using a wireless router or wireless access point to update the software. You cannot update the software using a Bluetooth connection. NOTE: If the stereo you want to update is in a group, you must remove it from the group (Leaving a Group, page 23). -
Page 41: Network Troubleshooting
• Make sure you have the latest version of iTunes and the latest operating software on your Apple device. • Make sure you have the latest version of the Fusion-Link application on your Apple device. • Reset the Apple device. Go to www.apple.com for more information. • Contact your Fusion dealer or go to support.garmin.com. Appendix... -
Page 42: My Apple Airplay Audio Is Interrupted By Short Breaks
• Ensure the stereo is set to a tuner region where DAB stations are broadcast. Setting the Tuner Region, page 21 • Connect a third-party powered DAB antenna to improve DAB reception. • For additional information, go to support.garmin.com and contact Product Support. Specifications Weight 475 g (16.75 oz.) -
Page 43: Stereo Dimension Drawings
Tuner frequencies Tuner Europe and Australasia Japan FM radio frequency range 87.5 to 108 MHz 87.5 to 107.9 MHz 76 to 95 MHz FM frequency step 50 kHz 200 kHz 50 kHz AM radio frequency range 522 to 1620 kHz 530 to 1710 kHz 522 to 1620 kHz AM frequency step 9 kHz 10 kHz 9 kHz... -
Page 44: Top Dimensions
Top Dimensions 130 mm (5.10 in.) 130 mm (5.10 in.) Appendix... - Page 46 February 2023 GUID-38C8EEA6-CA0D-46DE-B7DA-A3AC6EDE85DE v1...
Need help?
Do you have a question about the FUSION APOLLO MS-WB675 and is the answer not in the manual?
Questions and answers