
Related Manuals for Garmin STRIKER PLUS


Summary of Contents for Garmin STRIKER PLUS
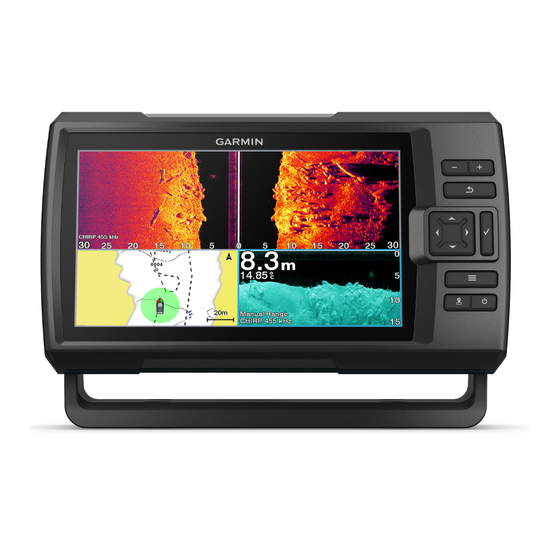
- Page 1 User Manual of Product 1: Garmin 010-01870-00 Striker Plus 4 with Dual-Beam transducer...
- Page 2 STRIKER PLUS ™ Owner’s Manual...
- Page 3 © 2017 Garmin Ltd. or its subsidiaries All rights reserved. Under the copyright laws, this manual may not be copied, in whole or in part, without the written consent of Garmin. Garmin reserves the right to change or improve its products and to make changes in the content of this manual without obligation to notify any person or organization of such changes or improvements. Go to www.garmin.com...
-
Page 4: Table Of Contents
Scale............14 Device Keys..........1 Sonar Setup........... 14 Home Screen...........2 Showing and Adjusting the Depth Zooming on the STRIKER Plus 4.... 2 Line............ 14 Panning on the STRIKER Plus 4..... 2 Setting the Scroll Speed....14 GPS Satellite Signal Acquisition.... 2 Setting the Bottom Search Limit.. - Page 5 Deleting All Waypoints...... 22 Sharing and Managing User Data... 30 Routes........... 22 Connecting to a Garmin Device to Share Creating and Navigating a Route User Data..........30 Using the Map........22 User Data Sharing Cable Wiring Creating and Saving a Route.... 23 Diagram..........
-
Page 6: Introduction
Introduction WARNING See the Important Safety and Product Information guide in the product box for product warnings and other important information. Device Keys Item Icon Description Returns to the previous screen. Returns to the home screen when held. Scrolls, highlights options, and moves the cursor. Zooms in and out of a view. -
Page 7: Home Screen
When the fishfinder acquires satellite signals, appears at the top of the Home screen. When the fishfinder loses satellite signals, disappears and a flashing question mark appears over on the screen. For more information about GPS, go to www.garmin.com/aboutGPS. Introduction... -
Page 8: Customizing The Chartplotter
Some pages combine two or more functions on one page. The number of options available for combination pages depends on the optional devices you have connected to your STRIKER Plus device. You can edit the combination pages and create new combination pages. -
Page 9: Creating A New Combination Page With The Striker Plus 4
Creating a New Combination Page with the STRIKER Plus 4 You can create a custom page to suit your needs. 1 Select Customize > Add > Add Combo. 2 Select the first function. 3 Select the second function. 4 Select Split to choose the direction of the split screen (optional). -
Page 10: Activecaptain App
® You can connect a mobile device to the STRIKER Plus device using the ActiveCaptain app. The app provides a quick and easy way for you to interact with your chartplotter and complete such tasks as sharing data, registering, updating the device software, and receiving mobile device notifications. -
Page 11: Enabling Smart Notifications
Do not read or reply to notifications while operating the vessel. Failure to pay attention to the conditions on the water can result in vessel damage, personal injury, or death. Before your STRIKER Plus device can receive notifications, you must connect it to your mobile device and to the ActiveCaptain app. -
Page 12: Traditional Sonar View
Traditional Sonar View There are several full-screen views available, depending on the transducer that is connected. The full-screen Traditional sonar view shows a large image of the sonar readings from a transducer. The range scale along the right side of the screen shows the depth of detected objects as the screen scrolls from the right to the left. -
Page 13: Garmin Clearvü Sonar View
NOTE: To receive Garmin ClearVü scanning sonar, you need a compatible transducer. For information about compatible transducers, go to garmin.com/transducers. Garmin ClearVü high-frequency sonar provides a detailed picture of the fishing environment around the boat in a detailed representation of structures the boat is passing over. -
Page 14: Sidevü Sonar View
NOTE: To receive SideVü scanning sonar, you need a compatible SideVü transducer. For information about compatible transducers, go to garmin.com/transducers. SideVü scanning sonar technology shows you a picture of what lies to the sides of the boat. You can use this as a search tool to find structures and fish. -
Page 15: Split-Screen Frequency
Split-Screen Frequency You can view two frequencies from the split frequency screen. Flasher The flasher shows sonar information on a circular depth scale, indicating what is beneath your boat. It is organized as a ring that starts at the top and progresses clockwise. Depth is indicated by the scale inside the ring. -
Page 16: Split-Zoom View
Before connecting the transducer, you should select the transducer type. The transducer name should be listed on the label on the transducer cable, near the connector. This device is compatible with a range of accessory transducers, including Garmin ClearVü ™... -
Page 17: Sonar Frequencies
Sonar Frequencies NOTE: The frequencies available depend on the device and trandsucers being used. Adjusting the frequency helps adapt the sonar for your particular goals and the present depth of the water. Higher frequencies use narrow beam widths, and are better for high-speed operation and rough sea conditions. Bottom definition and thermocline definition can be better when using a higher frequency. -
Page 18: Adjusting The Zoom
Adjusting the Zoom You can adjust the zoom manually by specifying the span and a fixed starting depth. For example, when the depth is 15 m and the starting depth is 5 m, the device displays a magnified area from 5 to 20 m deep. You also can allow the device to adjust the zoom automatically by specifying a span. -
Page 19: Adjusting The Range Of The Depth Scale
The Auto setting selects a scroll rate to match the boat speed, so targets in the water are drawn with the correct aspect ratio and appear less distorted. When viewing Garmin ClearVü or SideVü sonar views, it is recommend to use the Auto setting. -
Page 20: Sonar Appearance Settings
Sonar Appearance Settings From a sonar view, select > Sonar Setup > Appearance. Color Scheme: Sets the color scheme. Edge: Highlights the strongest signal from the bottom to help define the hardness or softness of the signal. A-Scope: Displays a vertical flasher along the right side of the screen that shows instantaneously the range to targets along a scale. -
Page 21: Sonar Noise Rejection Settings
Sonar Noise Rejection Settings From a sonar view, select > Sonar Setup > Noise Reject. Interference: Adjusts the sensitivity to reduce the effects of interference from nearby sources of noise. When you adjust the interference setting from off through low , medium , and high , noise is... -
Page 22: Overlay Number Settings
GPS position, and a speed above 32 km/h (20 mph). You can view Garmin Quickdraw Contours in a combination screen or as a single view on the map. The amount of saved data depends on the memory available in the device, your sonar source, and the speed of your boat as you record data. -
Page 23: Adding A Label To A Garmin Quickdraw Contours Map
Community (Connecting to the Garmin Quickdraw Community with ActiveCaptain, page 18). NOTE: The Garmin device must have a memory card slot or Wi‑Fi technology to participate in the Garmin Quickdraw Community. Connecting to the Garmin Quickdraw Community with ActiveCaptain 1 From your mobile device, open the ActiveCaptain app and connect to the STRIKER Plus device... -
Page 24: Map Settings
Survey Coloring: Sets the color of the Garmin Quickdraw Contours display. When this setting is turned on, the colors indicate the quality of the recording. When this setting is turned off, the contour areas use standard map colors. -
Page 25: Depth Range Shading
From 3 to 4.5 m (from 10 to 15 ft.) Green From 4.5 to 7.6 m (from 15 to 25 ft.) Navigation with the STRIKER Plus WARNING When navigating, the course may pass over land or shallow water. Use visual sightings, and steer to avoid land, shallow water, and other dangerous objects. -
Page 26: Creating A Waypoint On The Map
• To create the waypoint using a range (distance) and bearing, select Enter Range/Bearing, and enter the information. Marking and Navigating to a Man Overboard Location From any screen, select > Man Overboard > Yes. The device sets a direct course back to the location. Navigation with the STRIKER Plus... -
Page 27: Measuring Distance On The Map
2 Pan the map to select the starting location of the route. 3 Select to add a turn to the route. 4 Repeat to add all of the turns in the route. 5 Select > Navigate To. 6 Select an option. Navigation with the STRIKER Plus... -
Page 28: Creating And Saving A Route
6 Follow the magenta line along each leg in the route, steering to avoid land, shallow water, and other obstacles. 7 If you are off course, follow the purple line (corrected course) to go to your destination, or steer back to the magenta line (direct course). Navigation with the STRIKER Plus... -
Page 29: Browsing For And Navigating Parallel To A Saved Route
A trailing line on the chart indicates your track. Clearing the Active Track Select User Data > Tracks > Clear Active Track. The track memory is cleared, and the active track continues to be recorded. Navigation with the STRIKER Plus... -
Page 30: Saving The Active Track
Deleting a Saved Track 1 Select User Data > Tracks > Saved Tracks. 2 Select a track. 3 Select Delete. Deleting All Saved Tracks Select User Data > Manage Data > Clear User Data > Saved Tracks. Navigation with the STRIKER Plus... -
Page 31: Retracing The Active Track
Retracing the Active Track The track currently being recorded is called the active track. 1 Select User Data > Tracks > Follow Active Track. 2 Select an option: • Select the time the active track began. • Select Entire Log. 3 Review the course indicated by the colored line. -
Page 32: System Information
Event Log: Allows you to view a log of system events. Software Information: Provides information about the device and the software version. Garmin Devices: Provides information about connected Garmin devices. Reset: Restores the device to factory settings. NOTE: This deletes any setting information you have entered. -
Page 33: Setting The Keel Offset
Setting the Keel Offset You can enter a keel offset to compensate the water depth reading for the transducer installation location. This allows you to view the depth of the water below the keel or the true depth of the water, depending on your needs. -
Page 34: Setting Alarms
Setting Alarms CAUTION The Beeper setting must be turned on to make alarms audible (Setting the Beeper, page 4). Failure to set audible alarms could lead to injury or property damage. Navigation Alarms Select Settings > Alarms > Navigation. Arrival: Sets an alarm to sound when you are within a specified distance or time from a turn or a destination. Anchor Drag: Sets an alarm to sound when you exceed a specified drift distance while anchored. -
Page 35: Navigation Settings
Connecting to a Garmin Device to Share User Data You can connect the STRIKER Plus device to a compatible Garmin device to share user data, such as waypoints. If the devices are mounted near each other, you can connect the blue and brown wires. If the devices are mounted too far apart for the wires to reach, you can connect the devices using a User Data Sharing Cable (010-12234-06). -
Page 36: User Data Sharing Cable Wiring Diagram
2 Select an option. NOTICE If you select All, all the data you have saved will be removed, except Garmin Quickdraw contours data. If you are connected to another device and User Data Sharing is enabled, data is removed from all connected devices. -
Page 37: Appendix
• If the device is receiving enough power but does not turn on, contact Garmin product support. The device withstands incidental exposure to water of up to 1 m for up to 30 min. For more information, go to www.garmin.com/waterrating. -
Page 38: My Device Will Not Acquire Gps Signals
Changing the Fuse in the Power Cable 1 Open the fuse housing 2 Twist and pull the fuse to remove it 3 Insert a new 3 A fast-blow fuse. 4 Close the fuse housing. My device will not acquire GPS signals If the device is not acquiring satellite signals, there could be a few causes. -
Page 39: Index
30 flasher 10 fishfinder. See sonar frequencies 10–12 gain 13 Garmin ClearVü 8 Garmin ClearVü 8 interference 16 To 20, 21 SideVü 9 GPS 33 surface noise 16 settings 26 suspended targets 15 signals 2 views 7, 10–12 accuracy 29 waypoint 12 zoom 11, 13 SOS 21... - Page 41 September 2021 GUID-A511BBA3-36BB-4303-8A1F-A676E13CB451 v4...
Need help?
Do you have a question about the STRIKER PLUS and is the answer not in the manual?
Questions and answers
Здравствуйте. Эхолот Striker Plus 4. В нем есть 2-х лучевой трансдьюсер.Как эти лучи падают по отношению ко дну? И на экране можно различить рыбу?