
Subscribe to Our Youtube Channel
Related Manuals for Unverferth BRENT V700


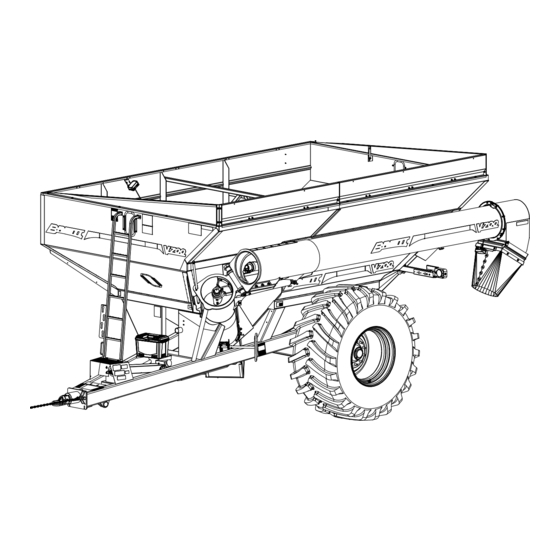
Summary of Contents for Unverferth BRENT V700
- Page 1 Grain Handling CORNER-AUGER GRAIN CART MODEL V700 Serial Number B36120100 & Higher Part Number 272867...
- Page 2 — Introduction Brent V700 Foreword This symbol identifies important safety messages. When you see it, read the message that follows and be alert to the possibility of personal injury. Remember, safety instructions stated in this manual are for your protection. Read them care- fully and follow them closely when working around or using this machine.
- Page 3 The information, specifications, and illustrations in the manual are based on information available at the time it was written. Due to continuing improvements in the design and manufacture of Unverferth products, all specifications and information contained herein are subject to change without notice.
-
Page 4: Table Of Contents
— Introduction Brent V700 Table of Contents Section I Safety General Hazard Information ......................1-2 Safety Decals ..........................1-3 Following Safety Instructions ......................1-5 Before Operating ..........................1-5 Before Servicing..........................1-6 During Operation ..........................1-6 Before Transporting ......................... 1-7 During Transport..........................1-7 Driveline Safety .......................... - Page 5 — Introduction Brent V700 Table of Contents Section II Set Up Set Up Checklist ..........................2-2 Basic Cart Set Up .......................... 2-3 Basic Cart Set Up - Folding Side Extension ................. 2-4 Basic Cart Set Up - SMV Emblem & SIS Decals ................. 2-4 Basic Cart Set Up - Auger Rest Retainer Removal ..............
- Page 6 — Introduction Brent V700 Table of Contents Section III Operation Operating Checklist ......................... 3-2 Preparing Tractor..........................3-3 Preparing Cart - Hardware ......................3-3 Preparing Cart - Pivot Pins......................3-3 Preparing Cart - Hitch........................3-3 Preparing Cart - Auger........................3-3 Preparing Cart - Auger Driveline Assembly ................... 3-4 Preparing Cart - Soft Start System ....................
- Page 7 — Introduction Brent V700 Table of Contents Section IV Maintenance Lubrication............................4-2 Gearbox Lubrication ........................4-3 Seasonal Storage ..........................4-3 Auger Driveline..........................4-4 Bearings............................ 4-4 Driveline Replacement ......................4-4 Auger System - Lower Auger Disassembly ................... 4-7 Auger System - Lower Auger Assembly ..................4-8 Auger System - Upper Auger Disassembly..................
- Page 8 — Introduction Brent V700 Table of Contents Section V Parts Please visit www.unverferth.com/parts/ for the most current parts listing. Final Assembly ........................... 5-2 Rigid Axle........................... 5-4 Adjustable Axle........................... 5-5 Hub & Spindle — Straddle Duals .................... 5-6 Hub & Spindle — Single Wheel ....................5-7 Single Wheels &...
- Page 9 — Safety Brent V700 Section I Safety General Hazard Information ......................1-2 Safety Decals ..........................1-3 Following Safety Instructions ......................1-5 Before Operating ..........................1-5 Before Servicing..........................1-6 During Operation ..........................1-6 Before Transporting ......................... 1-7 During Transport..........................1-7 Driveline Safety ..........................1-8 Pressurized Oil ..........................
-
Page 10: Safety
It is true that the designer, the manufacturer, and the safety engineer can help; and they will help, but their combined efforts can be wiped out by a single careless act of the operator. It is said that, “the best kind of a safety device is a careful operator.” We, at Unverferth Mfg. -
Page 11: Safety Decals
— Safety Brent V700 Safety Decals 9003477 95008 9003475 9003476 9003478 9003474 9008151 9008151 9008715 9008721 95046 95839 94094 9003475 97961 95445 97575 9003574... - Page 12 — Safety Brent V700 Safety Decals (continued) 9008714 9008720 TA510514 93459 95046 TA1-906109-0 REFLECTORS 9003125 (Fluorescent) 9003126 (Red) 9003127 (Amber) 94754...
-
Page 13: Following Safety Instructions
— Safety Brent V700 Following Safety Instructions • Read and understand this operator’s manual before operating. • All machinery should be operated only by trained and authorized personnel. • To prevent machine damage, use only attachments and service parts approved by the manufac- turer. -
Page 14: Before Servicing
— Safety Brent V700 Before Servicing • Avoid working under an implement; however, if it becomes absolutely unavoidable, make sure the implement is safely blocked. • Ensure that all applicable safety decals are installed and legible. • When working around the implement, be careful not to be cut by sharp edges. -
Page 15: Before Transporting
— Safety Brent V700 Before Transporting • Secure transport chains to towing vehicle before transporting. DO NOT transport without chains. • Install transport locks before transporting. • Check for proper function of all available transport lights. Make sure that all reflectors are clean and in place on machine. -
Page 16: Driveline Safety
— Safety Brent V700 Driveline Safety • Do not allow children near equipment that is running or engaged. • Do not exceed 1000 rpm PTO speed. • Disengage the PTO, stop the tractor engine, and remove key from ignition before making inspec- tions, or performing maintenance and repairs. -
Page 17: Pressurized Oil
— Safety Brent V700 Pressurized Oil • Relieve pressure before disconnecting hydraulic lines from tractor, loosening any hydraulic fittings or servicing hydraulic system. See hydraulic power unit manual for procedure to relieve pressure. • High-pressure fluids can penetrate the skin and cause serious injury or death. Use a piece of cardboard or wood to detect leaks of hydraulic fluid under pressure. -
Page 18: Preparing For Emergencies
— Safety Brent V700 Preparing for Emergencies • Keep a first aid kit and properly rated fire extinguisher nearby. • Keep emergency numbers for fire, rescue, and poison control personnel near the phone. Wearing Protective Equipment • Wear clothing and personal protective equipment appropriate for the job. -
Page 19: Set Up
— Set Up Brent V700 Section II Set Up Set Up Checklist ..........................2-2 Basic Cart Set Up .......................... 2-3 Basic Cart Set Up - Folding Side Extension ................. 2-4 Basic Cart Set Up - SMV Emblem & SIS Decals ................. 2-4 Basic Cart Set Up - Auger Rest Retainer Removal .............. -
Page 20: Set Up Checklist
— Set Up Brent V700 Set Up Checklist After the cart has been completely assembled, use the following checklist and inspect the cart. Check off each item as it is found satisfactory or after proper adjustment is made. o Torque wheel nuts and check tire pressure as specified in MAINTENANCE section. -
Page 21: Basic Cart Set Up
— Set Up Brent V700 Basic Set Up FIG. 2-1 Sideboards Downspout Wheels/Tires Wheel Nuts Due to shipping requirements and various dealer-installed options, some initial cart set up will be required after it arrives from the factory. Use the following procedures as needed for initial cart set up. - Page 22 — Set Up Brent V700 Basic Set Up (continued) Folding Side Extensions 1. Rotate extensions up into position and se- cure at corner holes. Assemble extension panel bases to top edge of hopper with included fasteners. 2. Attach center support hardware.
- Page 23 See federal regulation 49 CFR 562; available at www.govinfo.gov for US federal law require- AMBER REFLECTOR ments. TO FRONT OF CART See your Unverferth dealer for additional brackets, reflectors, or lights to meet your requirements. FIG. 2-7 Driveline Storage Storage brackets are located on the rear of the frame rail. Secure the PTO shaft to these brackets for extended transporting or seasonal storage.
- Page 24 — Set Up Brent V700 Basic Set Up (continued) Wheel/Tire Set Up Tire Pressure Tire pressure must be verified before first use and adjusted as necessary. Refer to MAINTE- NANCE section of this manual for information on tire pressure. Wheel Nuts •...
- Page 25 — Set Up Brent V700 Basic Set Up (continued) (continued) Dual Wheel Installation 3. Align and install the dual wheels and rein- FIG. 2-10 forcing ring over the guide pins (FIG. 2-10). Reinforcing Ring FIG. 2-11 4. Secure the wheel and reinforcing ring with 8 flat washers and 8 bolts provided.
- Page 26 — Set Up Brent V700 Basic Set Up (continued) Adjustable Axle (Optional) • FALLING OBJECTS CAN CAUSE SERIOUS INJURY OR DEATH. DO NOT WORK UNDER THE MACHINE AT ANY TIME WHILE BEING HOISTED. BE SURE ALL LIFTING DEVICES AND SUPPORTS ARE RATED FOR THE LOADS BEING HOISTED. THESE ASSEMBLY INSTRUCTIONS WILL REQUIRE SAFE LIFTING DEVICES UP TO 16,000 LBS.
-
Page 27: End Caps, Bows
— Set Up Brent V700 Weather Guard Tarp Installation (Optional) • TO PREVENT PERSONAL INJURY OR DEATH, ALWAYS ENSURE THAT THERE ARE PEOPLE WHO REMAIN OUTSIDE THE CART TO ASSIST THE PERSON WORKING INSIDE, AND THAT ALL SAFE WORKPLACE PRACTICES ARE FOLLOWED. THERE IS RESTRICTED MOBILITY AND LIMITED EXIT PATHS WHEN WORKING INSIDE THE CART. - Page 28 — Set Up Brent V700 Weather Guard Tarp Installation (Optional) (continued) 2. Assemble the bow brackets (283425B) to the inside, right-hand side of the cart with 5/16”-18UNC x 3/4” large flange screws (91256) and 5/16”-18UNC flange nuts (91257). (FIG. 2-15) FIG.
- Page 29 — Set Up Brent V700 Weather Guard Tarp Installation (Optional) (continued) 3. Secure the front latch plate (286829) to the FIG. 2-16 front of the panel with eyebolt (9004548), Eyebolt 3/8” flat washer (9405-074) and 3/8”-16UNC (9004548) large flange nut (91263).
- Page 30 — Set Up Brent V700 Weather Guard Tarp Installation (Optional) (continued) 7. Install five long tarp bows (283424B) across the top of the cart, using bracket (283425B), 3/8”- 16UNC x 3” capscrew (902703-046), 3/8”-16UNC (91263), 5/16”-18UNC x 3/4” flange screw (91256) and 5/16”-18UNC flange nut (91257).
-
Page 31: Cables, Tarp, Tubes
— Set Up Brent V700 Weather Guard Tarp Installation (Optional) (continued) Cables, Tarp, Tubes 9. Attach the cable assemblies (9007675) to Run Cable (9007675) the front end cap (286839B) slotted holes, through hole in End see FIG. 2-21. Run the cables over the top Caps (286839B) of the bows (283424B). - Page 32 — Set Up Brent V700 Weather Guard Tarp Installation (Optional) (continued) 10. (2-person operation) On a clean floor, lay the tarp out flat with the raw edge of the hems and pock- ets down and the exterior side facing up.
- Page 33 — Set Up Brent V700 Weather Guard Tarp Installation (Optional) (continued) 13. Insert knotted stretch rope (221722) through TA806225 flat washer (9405-074), plastic tube (221668), 9405-074 end plug (9004947) and hose (TA806225). 9001396 Place these items as an assembly into front end of 2”...
-
Page 34: Hand Crank
— Set Up Brent V700 Weather Guard Tarp Installation (Optional) (continued) Hand Crank 17. Locate the mounting bracket underneath the rear perimeter, centered on the box. FIG. 2-30 Use capscrews (9390-099) and flange nuts (9002058) to attach the crank holder tube (265706B). -
Page 35: For Scale Information, Please Refer To Your Scale Manual
— Operation Brent V700 Section III Operation Operating Checklist ......................... 3-2 Preparing Tractor..........................3-3 Preparing Cart - Hardware ......................3-3 Preparing Cart - Pivot Pins......................3-3 Preparing Cart - Hitch........................3-3 Preparing Cart - Auger........................3-3 Preparing Cart - Auger Driveline Assembly ................... 3-4 Preparing Cart - Soft Start System .................... -
Page 36: Operating Checklist
— Operation Brent V700 Operating Checklist o Read and understand all safety precautions before operating cart. Check axle spacing to be sure axle is adjusted from shipping position to desired operating width. (If applicable) Check to be sure all the reflective decals, the SMV sign and SIS decals are clearly visible with the cart attached to the tractor. -
Page 37: Preparing Tractor
— Operation Brent V700 Preparing Tractor Before operating cart, read the tractor Operator’s Manual and gain an understanding of its safe methods of operation. Check the tractor brakes and transport lights. Make sure they are in proper working order. Check the tractor hydraulic oil reservoir and add oil if needed. -
Page 38: Preparing Cart - Hitch
— Operation Brent V700 Preparing Cart (continued) Auger Driveline Assembly NOTE: Ends of driveshaft are symmetrical. Universal Joint Drill Dimple 1. Slide driveshaft down into the universal joint Orientaton in Line on Driveshaft attached to the gearbox until the end of the shaft extends into the universal joint about 2 3/8”. -
Page 39: Preparing Cart - Auger
— Operation Brent V700 Preparing Cart (continued) Soft Start System Check for wear or damage. Lubricate as recommended. Do not over lubricate. Hydraulic System Check all hoses and cylinders for signs of leakage. Hoses should not be kinked, twisted or rubbing against sharp edges. -
Page 40: Hitching To Tractor - Drawbar Connection
— Operation Brent V700 Hitching to Tractor Drawbar Connection This cart is intended to be hitched to a tractor drawbar. Do not attempt to hitch to any other location on the tractor other than the drawbar. Height Adjustments The cart is equipped standard with a single tang hitch. - Page 41 — Operation Brent V700 Hitching to Tractor (continued) Jack Usage • UNHITCHING A LOADED CART CAN CAUSE SERIOUS INJURY OR DEATH DUE TO THE TONGUE RISING OR FALLING. ALWAYS HAVE A LOADED CART ATTACHED TO A TRACTOR. THE JACK IS INTENDED TO SUPPORT AN EMPTY CART ONLY.
- Page 42 — Operation Brent V700 Hitching to Tractor (continued) Hydraulic Connections FIG. 3-6 • When coupling hydraulic hoses to ports on the tractor, be sure that the coupler ends are clean of dust, dirt and debris. Failure to do so could contaminate hydraulic system resulting in excessive wear and possible failure.
- Page 43 Compliance with all lighting and marking laws is the responsibility of the operator at the time of travel. See federal regulation 49 CFR 562; available at www.govinfo.gov for US federal law require- ments. See your Unverferth dealer for additional brackets, reflectors, or lights to meet your require- ments.
-
Page 44: Towing
— Operation Brent V700 Towing This cart is not equipped with brakes. Ensure that the towing vehicle has adequate weight and braking capacity to tow this implement. See towing vehicle’s operators manual for tow- ing capacity. Never tow a loaded grain cart over public roads. -
Page 45: Auger Operation Pto Driven Auger
— Operation Brent V700 Auger Operation PTO Driven Auger • ELECTROCUTION WILL CAUSE SERIOUS INJURY OR DEATH. THE GRAIN CART IS NOT INSULATED. KEEP AWAY FROM ALL ELECTRI- CAL LINES AND DEVICES. ELECTROCUTION CAN OCCUR WITHOUT DIRECT CONTACT. • ENTANGLEMENT WITH THE DRIVELINE WILL CAUSE SERIOUS INJURY OR DEATH. -
Page 46: Optional Equipment Hydraulic Drive
— Operation Brent V700 Optional Equipment Hydraulic Drive The optional hydraulically-driven auger permits cart operation using tractors that are not equipped with a PTO. However, due to the power requirements of a grain cart, it should be expected that a hydraulically-driven grain cart will not unload as quickly as a PTO driven cart. - Page 47 — Operation Brent V700 Optional Equipment (continued) Hydraulic Drive (continued) NOTE: For complete assembly and operation details for the Hydraulic Drive, please refer to the Hydraulic Drive manual (282894). 1. Before loading cart or operating auger, verify that the flow control door is closed.
-
Page 48: Weather Guard Tarp
— Operation Brent V700 Weather Guard Tarp (Optional) • TO PREVENT PERSONAL INJURY OR DEATH, DO NOT ALLOW ANYONE ON A CLOSED TARP. TARP SYSTEM IS NOT DESIGNED TO SUPPORT A PERSON. • FALLING OBJECTS CAN CAUSE SERIOUS INJURY OR DEATH. REMOVE ACCUMULATED WATER/SNOW/ICE OR ANY OTHER OBJECTS FROM TARP BEFORE OPENING TARP. - Page 49 — Operation Brent V700 Weather Guard Tarp (continued) Procedure 1. Using both hands, carefully remove crank handle from holder. 2. Roll tarp to the desired location, choosing either a fully open or fully closed position. 3. To close the tarp, roll the main tarp tube clockwise up under the latch plate. Next, bring the crank handle down perpendicular to the ground.
- Page 50 — Operation Brent V700 Notes 3-16...
- Page 51 — Maintenance Brent V700 Section IV Maintenance Lubrication............................4-2 Gearbox Lubrication ........................4-3 Seasonal Storage ..........................4-3 Auger Driveline..........................4-4 Bearings............................ 4-4 Driveline Replacement ......................4-4 Auger System - Lower Auger Disassembly ................... 4-7 Auger System - Lower Auger Assembly ..................4-8 Auger System - Upper Auger Disassembly..................
-
Page 52: Lubrication
— Maintenance Brent V700 Lubrication To keep your grain cart in top operating condition and to assure its proper performance and reliability for a long period of time, periodic inspection and lubrication is a must. 281294 (281294) Refer to Gearbox Lubrication... -
Page 53: Gearbox Lubrication
— Maintenance Brent V700 Gearbox Lubrication Gearbox check/fill plug is located on the right hand front side of the housing. To check oil fluid level, place cart on a level surface with the tongue elevated to hitch height and remove the plug. -
Page 54: Auger Driveline
— Maintenance Brent V700 Auger Driveline Bearings It is important to periodically check setscrews in all bearings of the driveline for tightness. Driveline Replacement Flangette Bearings FIG. 4-1 1. Shut off engine and apply parking brake before disconnecting driveline assembly and bearing hardware. - Page 55 — Maintenance Brent V700 Auger Driveline (continued) Driveline Replacement (continued) 7. Slide new 1 3/8” dia. shaft collars (9008675) to both sides of new bearing (92916) closest to the U-Joint, when installing bearings onto new driveshaft (9007640). 8. Assemble new PVC driveshaft cover (286848) between new bearings (92916), when installing bear- ings onto new driveshaft (9007640).
- Page 56 — Maintenance Brent V700 Auger Driveline (continued) Driveline Replacement (continued) 12. Tighten all flangette mounting hardware. Universal Joint Drill Dimple 13. With bearing mounting hardware completely Orientaton in Line on Drive Shaft tightened, drill a setscrew dimple in the driveshaft by going through the bearing setscrew threaded hole to dimple the drive- shaft being careful to not damage threads.
- Page 57 — Maintenance Brent V700 Auger System • TO PREVENT PERSONAL INJURY OR DEATH, ALWAYS ENSURE THAT THERE ARE PEOPLE WHO REMAIN OUTSIDE THE CART TO ASSIST THE PERSON WORKING INSIDE, AND THAT ALL SAFE WORKPLACE PRACTICES ARE FOLLOWED. THERE IS RESTRICTED MOBILITY AND LIMITED EXIT PATHS WHEN WORKING INSIDE THE IMPLEMENT.
- Page 58 — Maintenance Brent V700 Auger System (continued) Lower Auger Assembly 1. For the lower auger, use the top edge of the flighting as a 12 o’clock reference. Po- FIG. 4-2 FLIGHTING AT sition the drive dog so the driving edge is 12 O’CLOCK...
- Page 59 — Maintenance Brent V700 Auger System (continued) Lower Auger Assembly 3. When engaged, the top flighting should immediately follow the bottom flighting as FIG. 4-4 pictured in (Fig. 4-4). 4. Using a safe lifting device rated for a mini- Capscrew (9390-056), Flat Washers (9405-076), mum of 700 lbs., install the lower auger sub-...
- Page 60 — Maintenance Brent V700 Auger System (continued) Lower Auger Assembly (continued) 6. Rotate auger 360 degrees to ensure it is FIG. 4-6 centered on the drive bushing weldment (286436) and the five pins are engaged with auger end. Check for flighting interference or binding along housing and at lower end.
- Page 61 — Maintenance Brent V700 Auger System (continued) Upper Auger Disassembly 1. Support the upper auger assembly using a 2-ton hoist and two straps rated for 2000 lbs. 2. Remove auger tube cylinder pin and carefully swing cylinder down without breaking hose connec- tions.
- Page 62 — Maintenance Brent V700 Auger System (continued) Upper Auger Assembly 1. Install upper bearing and spring assembly if previously removed. 2. Insert auger in auger tube. Back out bearing setscrews and insert auger stub shaft through bear- ing. Retain auger with 5/16” x 2” machine screw and nut.
- Page 63 — Maintenance Brent V700 Auger System (continued) Auger Flow Door Cylinder Replacement • TO PREVENT PERSONAL INJURY OR DEATH ALWAYS ENSURE THAT THERE ARE PEOPLE WHO REMAIN OUTSIDE THE CART TO ASSIST THE PERSON WORKING INSIDE, AND THAT ALL SAFE WORKPLACE PRACTICES ARE FOLLOWED. THERE IS RESTRICTED MOBILITY AND LIMITED EXIT PATHS WHEN WORKING INSIDE THE IMPLEMENT.
- Page 64 — Maintenance Brent V700 Auger System (continued) Auger Flow Door Cylinder Replacement (continued) 2. On the inside of the cart, open the screen FIG. 4-11 service access panel shown in Fig. 4-11. Screen Service Access Panel 3. Remove the cotter pins from the lower cylinder pin then remove the pin.
- Page 65 — Maintenance Brent V700 Auger System (continued) Auger Flow Door Cylinder Replacement (continued) 6. Label the hydraulic hoses to indicate upper and lower. Disconnect them from the cyl- Remove Lower inder, along with the lower hydraulic fitting Hose & Fitting (Fig.
-
Page 66: Verify Telescoping Pto Shaft Length
— Maintenance Brent V700 Verify Telescoping PTO Shaft Length • PROPERLY EXTENDED AND COLLAPSED LENGTHS OF THE TELESCOPING PTO SHAFT MUST BE VERIFIED BEFORE FIRST OPERATION WITH EACH AND EVERY DIFFERENT TRACTOR. IF THE EXTENDED LENGTH OF THE PTO SHAFT IS NOT SUFFICIENT, IT... - Page 67 — Maintenance Brent V700 Verify Telescoping PTO Shaft Length (continued) 4. Hitch tractor drawbar to cart, ensuring that tractor and cart are on level ground and coupled as straight as practical. 5. Connect PTO shaft to tractor, and measure length “L” from same points as used in step 1. Ensure that this measurement does not exceed the maximum recommended extended length calcu- lated in step 3 above.
-
Page 68: Pto Shaft And Clutch - Benzi Pto (Sn B41980100 & Higher)
— Maintenance Brent V700 PTO Shaft and Clutch - Benzi PTO For SN B41980100 & Higher Lubrication Lubricate with NLGI grade 2 grease before starting work and every 8 operating hours. Clean and grease PTO drive shaft before each prolonged period of non-use. - Page 69 — Maintenance Brent V700 PTO Shaft and Clutch - Benzi PTO (continued) For SN B41980100 & Higher Shear-Bolt and Friction Clutches (Figs. H1 - H3) 1. Shear bolt clutches: When the set torque value is exceeded, power flow is interrupted due to the bolt shearing.
- Page 70 — Maintenance Brent V700 PTO Shaft and Clutch - Benzi PTO (continued) For SN B41980100 & Higher To Dismantle Guard (Figs. J1 - J3) 1. Pull the guard tube backwards and, using a screwdriver, disengage the three bearing ring tabs by pushing them inward. (FIG. J1) 2.
- Page 71 — Maintenance Brent V700 PTO Shaft and Clutch - Benzi PTO (continued) For SN B41980100 & Higher To Assemble Guard (Figs. K1 - K3) 1. Clean and grease the bearing ring, yoke groove and inner profile tube. (FIG. K1) 2. Fit bearing ring in groove with three bearing ring tabs positioned as shown.
-
Page 72: Pto Locking Systems - Benzi Pto (Sn B41980100 & Higher)
— Maintenance Brent V700 PTO Locking Systems - Benzi PTO For SN B41980100 & Higher Ball-Type Collar Coupling Slide clamp yoke or clutch onto connecting shaft. Pull in the coupler collar to release the balls and simultaneously push PTO driveshaft into the connecting shaft until the coupler collar locks onto the connecting shaft annular grooves. -
Page 73: Pto Shaft And Clutch - Gkn Walterscheid Pto (Sn B41980099 & Lower)
— Maintenance Brent V700 PTO Shaft and Clutch - GKN Walterscheid PTO For SN B41980099 & Lower Lubrication (Figs. D1 - D6) Lubricate with quality grease before starting work and every 8 operating hours. Clean and grease PTO drive shaft before each prolonged period of non-use. - Page 74 — Maintenance Brent V700 PTO Shaft and Clutch - GKN Walterscheid PTO (continued) For SN B41980099 & Lower Coupling the PTO drive shaft (Figs. E1 - E2) Clean and grease the PTO and implement input connection (IIC) AS-Lock 1. Pull locking collar and simultaneously push PTO drive shaft onto PTO shaft until the locking device engages.
- Page 75 — Maintenance Brent V700 PTO Shaft and Clutch - GKN Walterscheid PTO (continued) For SN B41980099 & Lower Chains (Figs. G1 - G3) NOTE: The chain is intended to prevent the shield from rotating against non-moving parts and there- by preventing shield damage. A properly installed chain will increase the service life of the shield.
- Page 76 — Maintenance Brent V700 PTO Shaft and Clutch - GKN Walterscheid PTO (continued) For SN B41980099 & Lower To Dismantle Guard (Figs. J1 - J4) 1. Remove locking screw. 2. Align bearing tabs with cone pockets. 3. Remove half-guard. 4. Remove bearing ring.
-
Page 77: Pto Quick Disconnect - Gkn Walterscheid Pto (Sn B41980099 & Lower)
— Maintenance Brent V700 PTO Shaft and Clutch - GKN Walterscheid PTO (continued) For SN B41980099 & Lower To Assemble Cone (Figs. L1 - L3) 1. Dismantle guard (Figs. J1 - J3). Remove old cone (e.g. cut open with knife). Take off chain. - Page 78 — Maintenance Brent V700 PTO Quick Disconnect - GKN Walterscheid PTO (continued) For SN B41980099 & Lower Quick Disconnect Disassembly 1. Compression Spring 2. Ball 3. Lock Collar 4. Back-up ring 5. Snap ring * Back-up ring * (For some clutch types, place additional back up ring first).
- Page 79 — Maintenance Brent V700 PTO Quick Disconnect - GKN Walterscheid PTO (continued) For SN B41980099 & Lower Clutch Disassembly Tighten the four hex nuts uniformly until the clutch pack and hub are loose. Use special tool 9002007 to bend all four retaining lugs back on the edge of the clutch housing. Remove the thrust plate with Belleville springs to get at the friction disks, drive plates and hub for inspection and service.
-
Page 80: Tarp Troubleshooting Inspection & Maintenance
— Maintenance Brent V700 Tarp Troubleshooting Inspection & Maintenance PROBLEM SOLUTION TARP SAGS IN MIDDLE AREAS BOWS MAY BE BENT OR ADJUSTED TOO LOW MISSING OR LOOSE RIDGE STRAP REPLACE OR RETIGHTEN TENSION MAY BE TOO LOOSE. U-JOINT MAY NEED TO BE ADJUSTED ON SPLINED SHAFT... -
Page 81: Electrical System Schematic
— Maintenance Brent V700 Electrical System Schematic — Overall To Right-Side of Right-Hand Side Cart Interior Work Light #9008957 Tail Light RH Sub Assembly #286977B Red Tail/Turn Amber Light - Micro Dot Light #9006107 #9006282 Rear Wiring To Tractor Harness... - Page 82 — Maintenance Brent V700 Electrical System Schematic — Plug #92450 GRAIN CART WIRES White -- Ground Green -- Right amber flashing lamp Yellow -- Left amber flashing lamp Brown -- Tail light Black -- Interior & Auger Lights Red -- Brake Lights...
- Page 83 — Maintenance Brent V700 Electrical Schematic — Front Wiring Harness #9007662 4-33...
- Page 84 — Maintenance Brent V700 Electrical Schematic — Rear Wiring Harness #9007663 4-34...
- Page 85 — Maintenance Brent V700 Electrical Schematic — Auger Wiring Harness #9009087 - For SN B40910100 & Higher #9007664 - For SN B40910099 & Lower 4-35...
- Page 86 — Maintenance Brent V700 Electrical Schematic — Proximity Sensor #9007472 Electrical Schematic — Work Light #9008957 For SN B40910100 & Higher 2 PIN INTEGRATED DEUTSCH CONNECTOR POWER (PIN #1) GROUND (PIN #2) Electrical Schematic — Work Light #9007186 For SN B40910099 & Lower...
- Page 87 — Maintenance Brent V700 Electrical Schematic — Red Tail/Turn Light #9006282 Electrical Schematic — Amber Light - Micro Dot #9006107 Electrical Schematic — Amber Lamp Double Face #9005142 4-37...
-
Page 88: Hydraulic System Schematic
— Maintenance Brent V700 Hydraulic System Schematic Flow Door Closed Flow Door Open 4-38... - Page 89 — Maintenance Brent V700 Wheels and Tires Wheel Nut Torque Requirements • IMPROPERLY TORQUED WHEEL NUTS/BOLTS CAN CAUSE A LOSS OF IMPLEMENT CONTROL AND MACHINE DAMAGE. TORQUE WHEEL NUTS/BOLTS TO VALUES IN TABLE. CHECK TORQUE BEFORE USE, AFTER ONE HOUR OF UNLOADED USE OR AFTER FIRST LOAD, AND EACH LOAD UNTIL WHEEL NUTS/BOLTS MAINTAIN TORQUE VALUE.
- Page 90 — Maintenance Brent V700 Wheels and Tires (continued) Tire Pressure The following is to be used as a general guide for tire inflation and figures can vary depend- ing on specific brand of tire used. It is important that tires are inspected after unit is loaded.
- Page 91 — Maintenance Brent V700 Wheels and Tires (continued) Tire Pressure (continued) Tire Pressure for Grain Carts Load Index / Ply Max. PSI Tire Make Part Number Tire Size Rating Titan/Goodyear 94286 23.1x26 R-3 99364 23.1x26 R-1 99307 24.5R32 R-1 169A8/B (5-Star) 94289 24.5x32 R-3...
- Page 92 — Maintenance Brent V700 Wheels and Tires (continued) Tire Warranty For questions regarding new tire warranty, please contact your local original equipment tire dealer. USED TIRES CARRY NO WARRANTY. Following are phone numbers and Websites for your convenience: Firestone www.firestoneag.com...
- Page 93 — Maintenance Brent V700 Complete Torque Chart Capscrews - Grade 5 NOTE: • Grade 5 capscrews can be identified by three radial dashes on the head. • For wheel torque requirements, refer to Wheels and Tires. • Tighten U-bolts evenly and equally to have the same number of threads exposed on each end.
- Page 94 — Maintenance Brent V700 Complete Torque Chart Capscrews - Grade 8 NOTE: • Grade 8 capscrews can be identified by six radial dashes on the head. • For wheel torque requirements, refer to Wheels and Tires. • Tighten U-bolts evenly and equally to have the same number of threads exposed on each end.
- Page 95 — Maintenance Brent V700 Hydraulic Fittings – Torque and Installation SAE Flare Connection (J. I. C.) 1. Tighten nut with finger until it bottoms the seat. 2. Using a wrench, rotate nut to tighten. Turn nut 1/3 turn to apply proper torque.
- Page 96 — Maintenance Brent V700 Notes 4-46...
- Page 97 — Parts Brent V700 Section V Parts Please visit www.unverferth.com/parts/ for the most current parts listing. Please visit www.unverferth.com/parts/ for the most current parts listing. Final Assembly ........................... 5-2 Rigid Axle........................... 5-4 Adjustable Axle........................... 5-5 Hub & Spindle — Straddle Duals .................... 5-6 Hub &...
-
Page 98: Final Assembly
— Parts Brent V700 Final Assembly Please visit www.unverferth.com/parts/ for the most current parts listing. - Page 99 — Parts Brent V700 Final Assembly Please visit www.unverferth.com/parts/ for the most current parts listing. ITEM DESCRIPTION PART NUMBER QTY. NOTES Bracket, Window Retainer 250461B Ladder Weldment 286831B Ladder Bracket Weldment 286845B Window Molding 271951 Tension Bushing 2 OD x 1.516 ID x 2...
-
Page 100: Rigid Axle
— Parts Brent V700 Rigid Axle Please visit www.unverferth.com/parts/ for the most current parts listing. ITEM ITEM DESCRIPTION PART NUMBER QTY. NOTES Rigid Axle Assembly w/out Scales (Green) 286627G Rigid Axle Assembly w/out Scales (Red) 286627R Rigid Axle Assembly w/Scales (Green) -
Page 101: Adjustable Axle
— Parts Brent V700 Adjustable Axle Please visit www.unverferth.com/parts/ for the most current parts listing. PART NUMBER ITEM DESCRIPTION Straddle Single Wheel Single Wheel NOTES Duals M22 Hardware 3/4” Hardware Adjustable Axle Assembly w/out Scales (Green) 286691G 286695G 286690G Adjustable Axle Assembly w/out Scales (Red) -
Page 102: Hub & Spindle - Straddle Duals
— Parts Brent V700 Hub & Spindle — Straddle Duals Please visit www.unverferth.com/parts/ for the most current parts listing. ITEM DESCRIPTION PART NUMBER QTY. NOTES Hub & Spindle Assembly w/out Scales (Green) 284269G Hub & Spindle Assembly w/out Scales (Red) 284269R Includes 2 through 15 &... -
Page 103: Hub & Spindle - Single Wheel
— Parts Brent V700 Hub & Spindle — Single Wheel Please visit www.unverferth.com/parts/ for the most current parts listing. PART NUMBER ITEM DESCRIPTION NOTES 3/4" Stud M22 Stud Hub & Spindle Assembly w/out Scales (Green) 280634G 284268G Includes 2 through 16 Hub &... -
Page 104: Single Wheels & Tires
— Parts Brent V700 Single Wheels & Tires Please visit www.unverferth.com/parts/ for the most current parts listing. TIRES For questions regarding new tire warranty, please contact your lo- cal original equipment tire dealer. Used tires carry no warranty. ITEM DESCRIPTION PART NUMBER QTY. -
Page 105: Dual Wheels & Tires
— Parts Brent V700 Dual Wheels & Tires Please visit www.unverferth.com/parts/ for the most current parts listing. TIRES For questions regarding new tire warranty, please contact your lo- cal original equipment tire dealer. Used tires carry no warranty. ITEM DESCRIPTION PART NUMBER QTY. -
Page 106: Decals
— Parts Brent V700 Decals Please visit www.unverferth.com/parts/ for the most current parts listing. 9008151 5-10... - Page 107 — Parts Brent V700 Decals Please visit www.unverferth.com/parts/ for the most current parts listing. ITEM DESCRIPTION PART NUMBER QTY. NOTES Fluorescent Strip 9003125 2 x 9" Red Reflector 9003126 2 x 9" Amber Reflector 9003127 2 x 9" SMV Sign TA510514 Decal, WARNING “Read &...
-
Page 108: Sideboards
— Parts Brent V700 Sideboards Please visit www.unverferth.com/parts/ for the most current parts listing. ITEM DESCRIPTION PART NUMBER QTY. NOTES Tube, Angle Brace/Sideboard Support 220032B Sideboard Leg =Black= 285818B Sideboard Front Weldment, Left-Hand =Black= 286822B Sideboard Rear Weldment, Left-Hand =Black=... -
Page 109: Drive Components
— Parts Brent V700 Drive Components Please visit www.unverferth.com/parts/ for the most current parts listing. ITEM DESCRIPTION PART NUMBER QTY. NOTES 1 3/8 Flange Bearing 92916 Capscrew, 3/8-16UNC x 1 Gr.5 9390-055 Lock Washer 3/8 9404-021 Hex Nut, 3/8-16UNC Gr.5... -
Page 110: Electrical
— Parts Brent V700 Electrical Please visit www.unverferth.com/parts/ for the most current parts listing. To Right-Side of Cart Interior Right-Hand Side To Tractor Left-Hand Side To Directional Spout 5-14... - Page 111 — Parts Brent V700 Electrical Please visit www.unverferth.com/parts/ for the most current parts listing. ITEM DESCRIPTION PART NUMBER QTY. NOTES Wiring Harness, Front 180" 9007662 Includes Items 3A, 4 through 12, 13A, Tail Light RH Sub Assembly 286977B 14, 15...
-
Page 112: Upper Auger Components
— Parts Brent V700 Upper Auger Components Please visit www.unverferth.com/parts/ for the most current parts listing. 5-16... - Page 113 — Parts Brent V700 Upper Auger Components Please visit www.unverferth.com/parts/ for the most current parts listing. ITEM PART NUMBER DESCRIPTION NOTES 92563 Decal, Flow Control 9006360 Decal, Brent Logo 9006361 Decal, Stripe 9004263 Pad-Stop (Rubber) 903171-662 Flat Head Phillips Screw 5/16”-18UNC x 1 1/4”...
-
Page 114: Lower Auger Components
— Parts Brent V700 Lower Auger Components Please visit www.unverferth.com/parts/ for the most current parts listing. 5-18... - Page 115 — Parts Brent V700 Lower Auger Components Please visit www.unverferth.com/parts/ for the most current parts listing. ITEM PART NUMBER DESCRIPTION NOTES 9006107 Amber Light - Micro Dot - LED 286850B Cover, Joint =BLACK= 95585 Capscrew/Large Flange 3/8”-16UNC x 3/4” Grade 5...
-
Page 116: Cleanout Door Assembly
— Parts Brent V700 Cleanout Door Assembly Please visit www.unverferth.com/parts/ for the most current parts listing. ITEM DESCRIPTION PART NUMBER QTY. NOTES Plate - Lock =BLACK= 268313B Plate - Door Rack =BLACK= 268316B Door Weldment =BLACK= 286799B Pad - Wear... -
Page 117: Flow Door Seals
— Parts Brent V700 Flow Door Seals Please visit www.unverferth.com/parts/ for the most current parts listing. ITEM DESCRIPTION PART NUMBER QTY. NOTES Seal - Poly 281312 Seal - Poly 281313 Spacer Bushing =Green= 281257G Spacer Bushing =Red= 281257R Spring Bracket =Green=... -
Page 118: Internal Bracing
— Parts Brent V700 Internal Bracing Components Please visit www.unverferth.com/parts/ for the most current parts listing. ITEM PART NO. DESCRIPTION NOTES 281943B Cross Brace Weldment =Black= 9002058 Flange Nut 1/2-13UNC 91266 Flange Screw 1/2-13UNC x 1 1/2 Gr.5 5-22... - Page 119 — Parts Brent V700 Notes Please visit www.unverferth.com/parts/ for the most current parts listing. 5-23...
-
Page 120: Cylinders
— Parts Brent V700 Cylinders — 3 1/2” x 20” (Auger Fold) Please visit www.unverferth.com/parts/ for the most current parts listing. ITEM DESCRIPTION PART NUMBER QTY. NOTES Cylinder, Complete 9007639 Seal Kit 9006942 Cylinders — 2 1/2” x 36” (Flow Door) -
Page 121: Touch-Up Paint
— Parts Brent V700 Touch-Up Paint Please visit www.unverferth.com/parts/ for the most current parts listing. PAINT SPRAY Black 97013 Green 97015 97301 Primer, Gray 9500082 Off White 97016 5-25... -
Page 122: Hydraulics
— Parts Brent V700 Hydraulics Please visit www.unverferth.com/parts/ for the most current parts listing. Port B Spout Out Spout In Port A Flow Door Closed Flow Door Open Auger Raise Auger Lower Spout Tilt Out Spout Tilt In ITEM DESCRIPTION... - Page 123 — Parts Brent V700 Hydraulics Please visit www.unverferth.com/parts/ for the most current parts listing. ITEM DESCRIPTION PART NUMBER QTY NOTES Sleeve, Hose Marker (GREEN, Auger Raise) 9003997 Sleeve, Hose Marker (GREEN, Auger Lower) 9003998 Sleeve, Hose Marker (YELLOW, Spout Out)
-
Page 124: Directional Spout
— Parts Brent V700 Directional Spout Please visit www.unverferth.com/parts/ for the most current parts listing. For SN B37940099 and Lower 5-28... -
Page 125: Directional Spout (Sn B37940100 And Higher)
— Parts Brent V700 Directional Spout - SN B37940100 and Higher Please visit www.unverferth.com/parts/ for the most current parts listing. 5-29... - Page 126 — Parts Brent V700 Directional Spout Please visit www.unverferth.com/parts/ for the most current parts listing. ITEM DESCRIPTION PART NUMBER QTY. NOTES Lock Washer 1/4” 9404-017 Lock Washer 5/16” 9404-019 Hex Nut 5/16”-18UNC 9394-004 Nut/Large Flange 3/8”-16UNC 91263 Pad-Pivot, 20 1/2” ID x 3/16”...
- Page 127 — Parts Brent V700 Directional Spout (continued) Please visit www.unverferth.com/parts/ for the most current parts listing. ITEM DESCRIPTION PART NUMBER QTY. NOTES Adapter 9/16-18 JIC Female x 9/16-18 JIC Male w/Restrictor 95193 Bushing-Sleeve 2.0625” Long 285290 Snap Ring 3/4" 9003810 9007186 For SN B40910099 &...
-
Page 128: Pto Assembly Shear-Bolt Clutch (Sn B41980100 & Higher)
— Parts Brent V700 PTO Assembly Shear-Bolt Clutch - For SN B41980100 & Higher Please visit www.unverferth.com/parts/ for the most current parts listing. 1 3/4-20 Spline Shown 5-32... - Page 129 — Parts Brent V700 PTO Assembly Shear-Bolt Clutch - For SN B41980100 & Higher Please visit www.unverferth.com/parts/ for the most current parts listing. ITEM DESCRIPTION PART NO. NOTES 1 3/4”-20 Spline PTO Assembly Complete 9008526 Includes Front and Rear Half Assemblies (Benzi America PTO) 1 3/8”-21 Spline (Optional)
- Page 130 — Parts Brent V700 PTO Assembly Shear-Bolt Clutch - For SN B41980099 & Lower Please visit www.unverferth.com/parts/ for the most current parts listing. 1 3/4-20 Spline Shown Optional 1 3/8-21 Spline Shown 5-34...
- Page 131 — Parts Brent V700 PTO Assembly Shear-Bolt Clutch - For SN B41980099 & Lower Please visit www.unverferth.com/parts/ for the most current parts listing. ITEM DESCRIPTION PART NUMBER NOTES 1 3/4-20 Spline PTO Assembly Complete 9004767 (GKN Walterscheid PTO) 1 3/8-21 Spline (Optional)
-
Page 132: Shear-Bolt Clutch Assembly (Sn B41980100 & Higher)
— Parts Brent V700 Shear-Bolt Clutch Assembly - For SN B41980100 & Higher Please visit www.unverferth.com/parts/ for the most current parts listing. NOTE: Clutch Assembly (9009034) must be used with the Complete PTO Assembly (9008526) or (9009253 - optional). •... -
Page 133: Shear-Bolt Clutch Assembly (Sn B41980099 & Lower)
Brent V700 Shear-Bolt Clutch Assembly - For SN B41980099 & Lower Please visit www.unverferth.com/parts/ for the most current parts listing. • USE GENUINE OEM REPLACEMENT PART. Incorrect part may cause shear function to oc- cur too soon causing inconvenience or too late resulting in damage to driveline and auger components. -
Page 134: Pto Assembly Friction Clutch (Sn B41980100 & Higher)
— Parts Brent V700 PTO Assembly Friction Clutch - For SN B41980100 & Higher Please visit www.unverferth.com/parts/ for the most current parts listing. 1 3/4-20 Spline Shown 5-38... -
Page 135: Pto Assembly Friction Clutch (Sn B41980099 & Lower)
— Parts Brent V700 PTO Assembly Friction Clutch - For SN B41980100 & Higher Please visit www.unverferth.com/parts/ for the most current parts listing. ITEM DESCRIPTION PART NO. NOTES 1 3/4”-20 Spline PTO Assembly Complete 9009258 Includes Front and Rear Half Assemblies (Benzi America PTO) 1 3/8”-21 Spline... - Page 136 — Parts Brent V700 PTO Assembly Friction Clutch - For SN B41980099 & Lower Please visit www.unverferth.com/parts/ for the most current parts listing. 1 3/4-20 Spline Shown Optional 1 3/8-21 Spline Shown 5-40...
- Page 137 — Parts Brent V700 PTO Assembly Friction Clutch - For SN B41980099 & Lower Please visit www.unverferth.com/parts/ for the most current parts listing. ITEM DESCRIPTION PART NO. NOTES 1 3/4-20 Spline PTO Assembly Complete 9004769 (GKN Walterscheid PTO) 1 3/8-21 Spline (Optional)
-
Page 138: Friction Clutch Assembly (Sn B41980100 & Higher)
— Parts Brent V700 Friction Clutch Assembly - For SN B41980100 & Higher Please visit www.unverferth.com/parts/ for the most current parts listing. NOTE: Clutch Assembly (9009256) must be used with the Complete PTO Assembly (9009258) or (9009257 - optional). NOTE: The clutch is preset at the factory and should not require adjustment. -
Page 139: Friction Clutch Assembly (Sn B41980099 & Lower)
— Parts Brent V700 Friction Clutch Assembly - For SN B41980099 & Lower Please visit www.unverferth.com/parts/ for the most current parts listing. NOTE: Clutch Assembly (9004275) must be used with the Complete PTO Assembly (9004769) or (9004768 - optional). NOTE: The clutch is preset at the factory and should not require adjustment. -
Page 140: 45 Degree Gearbox
— Parts Brent V700 45 Degree Gearbox Please visit www.unverferth.com/parts/ for the most current parts listing. ITEM DESCRIPTION PART NUMBER QTY. NOTES Gearbox, Complete 9002812 Includes Items 1 thru 17 Shaft, Input 9001131 1.8:1 Gear Shaft, Output 9001132 1.8:1 Gear... -
Page 141: Driveline U-Joint Assembly
— Parts Brent V700 Driveline U-Joint Assembly Please visit www.unverferth.com/parts/ for the most current parts listing. ITEM DESCRIPTION PART NUMBER QTY. NOTES Complete U-Joint Assembly 95012 Yoke 95010 Grease Zerk, 1/4-28 UNF 91160 Yoke, 1-3/8-6 Spline 95011 Quick Disconnect Pin Kit 92362 Cross &... -
Page 142: Weather Guard Tarp (Optional)
— Parts Brent V700 Weather Guard Tarp (Optional) Please visit www.unverferth.com/parts/ for the most current parts listing. ITEM DESCRIPTION PART NUMBER QTY. NOTES Tarp Kit w/End Caps 289679B PVC Tube 221668 Bungee-3/8" x 204" 221722 Crank, Roll-Over Tarp 221749 Handle Retainer (Metal - Pinless) - Page 143 — Parts Brent V700 Weather Guard Tarp (Optional) Please visit www.unverferth.com/parts/ for the most current parts listing. ITEM DESCRIPTION PART NUMBER QTY. NOTES Crank Holder Tube 265706B Stop 266689B Bracket & U-Nut Assembly 281712B Bow Weldment 283424B Bow Bracket on Latch Plate Side...
-
Page 144: Video System Option
— Parts Brent V700 Video System Option Please visit www.unverferth.com/parts/ for the most current parts listing. 5-48... - Page 145 — Parts Brent V700 Video System Option Please visit www.unverferth.com/parts/ for the most current parts listing. ITEM PART NUMBER DESCRIPTION NOTES 265770 Video System Kit for Front View Includes Items 1,3,4,5,7,8 9004506 Additional Camera for Rear View Includes Item 7...
- Page 146 MANUALS\\272867//January 2017-0//July 2017-1//May 2018-2//November 2018-3//March 2019-4//November 2019-5//July 2020-6//March 2021-7//November 2021-8...
Need help?
Do you have a question about the BRENT V700 and is the answer not in the manual?
Questions and answers