
Related Manuals for Bally CineVision MK2A-CINEV-0001


Summary of Contents for Bally CineVision MK2A-CINEV-0001
- Page 1 CineVision™ Installation and Maintenance MK2A-CINEV-0001 [B] 6601 S. Bermuda Rd, Las Vegas, NV 89119 1-877- GO BALLY www.ballytech.com...
- Page 2 All other product names and trademarks are the intellectual property of their respective owners. This documentation contains confidential and proprietary information of Bally Gaming, Inc. No portion of this document may be reproduced or transmitted in any form or by any means, electronic or mechanical, for any purpose, without the express written permission of Bally Gaming, Inc.
-
Page 3: Table Of Contents
CineVision™ Installation and Maintenance Contents Reader Comment Form Chapter 1: Overview Installation Requirements ..............1 - 2 CineVision Specifications . - Page 4 Contents CineVision™ Installation and Maintenance Chapter 4: Periodic Maintenance Periodic Maintenance Schedule ..............4 - 2 Cabinet .
- Page 5 CineVision™ Installation and Maintenance Contents Printer ..................4 - 12 EPROM or EEPROM (Flash Upgrade) .
- Page 6 Contents CineVision™ Installation and Maintenance MK2A-CINEV-0001 [B]...
-
Page 7: Reader Comment Form
CineVision™ Installation and Maintenance Reader Comment Form Reader Comment Form FAX this form to: 1-702-584-7710 ATTN: Technical Publications Dept. Report an Error Page ______ Description (Use additional pages as needed.) __________________________________ _________________________________________________________________________________ _________________________________________________________________________________ _________________________________________________________________________________ Provide Feedback Usefulness of This Guide How do you use this guide? (Circle one.) Only as a reference All the time... - Page 8 Reader Comment Form CineVision™ Installation and Maintenance viii MK2A-CINEV-0001 [B]...
-
Page 9: Chapter 1: Overview
CineVision™ Installation and Maintenance Chapter 1 Overview This section includes the following topics: • Installation Requirements • Required Parts • Required Tools • Installation Checklist MK2A-CINEV-0001 [B] 1 - 1... -
Page 10: Installation Requirements
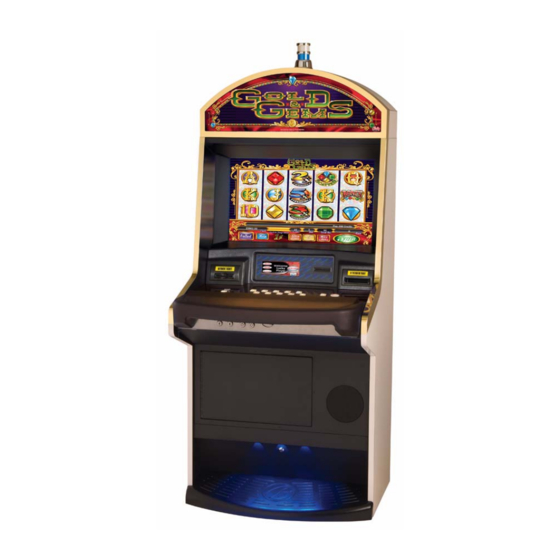
Chapter 1: Overview CineVision™ Installation and Maintenance Installation Requirements This document applies to the CineVision™ cabinet. CineVision Specifications Digital Image The following figure is an example of the CineVision™. Figure 1: CineVision™ Image 1 - 2 MK2A-CINEV-0001 [B]... -
Page 11: Physical Specifications
CineVision™ Installation and Maintenance Chapter 1: Overview Physical Specifications Specification Summary for CineVision™ Description Value Electrical Specifications Line Voltage at 60 Hz 120 VAC Current @ 120 VAC Idle State 1.3 Amp Operating State 2.6 Amp Fuse Limited Rated Current 6.3 Amp Power Consumption BTU/Hr... -
Page 12: Flammable Weights
Chapter 1: Overview CineVision™ Installation and Maintenance Flammable Weights Flammable Weights for CineVision™ Item Description Flammable Weight Pounds Kilograms Bezel, Arm Rests, Coin Chute, and Miscellaneous Items 5.90 2.68 Boards 4.80 2.18 Cables 2.80 1.27 Buttons, (Quantity of 13) 0.20 0.09 Monitor 4.80... -
Page 13: Required Parts
CineVision™ Installation and Maintenance Chapter 1: Overview Required Parts This installation may require the following additional parts: • Locks (quantity 5 to 7, depending on your machine configuration). • Category 5 network cables, for linking game controllers, if required (quantity and length depending on your machine configuration and your floor plan). -
Page 14: Installation Checklist
Chapter 1: Overview CineVision™ Installation and Maintenance Installation Checklist Use the following checklist to prepare to install the machine: Pre-Installation Steps Complete the following steps before installing the machine. Purchase, assemble, and install power and network cabling for the desired floor plan. Purchase and receive locks. -
Page 15: Chapter 2: Installation
CineVision™ Installation and Maintenance Chapter 2 Installation Installation Instructions This section includes the following installation instructions: • Unpacking and Inspecting the Machine • Installing the Machine Installing Locks Reseating Operating System (OS) and Game Software Powering On the Machine MK2A-CINEV-0001 [B] 2 - 1... -
Page 16: Unpacking And Inspecting The Machine
TIP: During shipping, cables may become disconnected and circuit boards may become unseated. Ensure they are firmly attached before proceeding. STEP 9. If there is damage to the machine or there are any missing parts, then contact your Bally Technologies Distributor or Customer Service Representative for Return Merchandise Authorization (RMA) information. -
Page 17: Installing The Machine
CineVision™ Installation and Maintenance Chapter 2: Installation Installing the Machine Use the following instructions to move and plug in the machine: STEP 1. If the tower light has been installed, then go to the next step. If the tower light has not been installed, then install the tower light in the top box. Tower Light Figure 1: Tower Light STEP 2. -
Page 18: Installing Locks
Chapter 2: Installation CineVision™ Installation and Maintenance STEP 7. Securely fasten the machine to the wall, floor, or adjacent object. NOTE: To increase stability when mounting games back to back, remove the Top Box Front Cover and use the provided cut-out holes to fasten two games back to back with bolts. -
Page 19: Reseating Operating System (Os) And Game Software
CineVision™ Installation and Maintenance Chapter 2: Installation Reseating Operating System (OS) and Game Software Use the following instructions to reseat loose CompactFlash® cards: STEP 1. Locate and open the logic door. Logic Door Figure 2: CineVision™ Logic Door Location STEP 2. Reseat the OS CompactFlash®... -
Page 20: Powering On The Machine
Chapter 2: Installation CineVision™ Installation and Maintenance Powering On the Machine Use the following instructions to start the machine: STEP 1. Press the main power switch to supply power to the system. STEP 2. Press the cabinet power switch to supply power to the cabinet components. Cabinet Power Switch Main Power Switch Figure 4: CineVision™... -
Page 21: Chapter 3: Relocating The Cabinet
CineVision™ Installation and Maintenance Chapter 3 Relocating the Cabinet Relocate a Machine Use the following instructions to relocate a machine: STEP 1. Ensure the new location has appropriate power and network cabling installed. NOTE: Changes in floor configuration may require rerunning power and Category 5 network cables. - Page 22 Chapter 3: Relocating the Cabinet CineVision™ Installation and Maintenance STEP 12. Press the cabinet power switch to supply power to the cabinet components. STEP 13. Flip the µ-ATX power switch on to supply power to the logic board. 3 - 2 MK2A-CINEV-0001 [B] Relocate a Machine...
-
Page 23: Chapter 4: Periodic Maintenance
CineVision™ Installation and Maintenance Chapter 4 Periodic Maintenance This section provides periodic maintenance information for all machine models and the following components: NOTE: Machine configurations may vary. • Cabinet • Machine Door • Coin Entry • Coin Hopper • Bill Acceptor •... -
Page 24: Periodic Maintenance Schedule
Chapter 4: Periodic Maintenance CineVision™ Installation and Maintenance Periodic Maintenance Schedule The following table indicates the recommended periodic maintenance schedule: Service Interval (Days) Assembly Maintenance Item Door Switch Optic (detector) Cabinet Interior Cabinet Lamps Cabinet Exterior Locks and Key Switches Player Panel Buttons Machine Door All Glass... -
Page 25: Cabinet
CineVision™ Installation and Maintenance Chapter 4: Periodic Maintenance Cabinet Use the following instructions to maintain the cabinet components: Door Switch Optic (detector) Clean optical door switches with a lint-free cloth. Cabinet Interior • Vacuum the inside of the cabinet. • Remove all dust and debris from the coin chutes. -
Page 26: Machine Door
Chapter 4: Periodic Maintenance CineVision™ Installation and Maintenance Machine Door Use the following instructions to maintain the machine door components: Player Panel Buttons Use a dry, lint-free cloth to clean the buttons. If a cleaning solution is necessary, use a mild glass cleaner. Avoid abrasive cleansers. -
Page 27: Coin Entry
CineVision™ Installation and Maintenance Chapter 4: Periodic Maintenance Coin Entry Use the following instructions to maintain the coin entry components: Coin Acceptor • Disassemble and clean to remove metal coin fragments. • Adjust and calibrate according to the manufacturer specifications. •... -
Page 28: Coin Hopper
Chapter 4: Periodic Maintenance CineVision™ Installation and Maintenance Coin Hopper Use the following instructions to maintain the coin hopper components: Coin Switch Upright and Bartop machines use optical switches to count coins from the hopper. Use a dry, lint-free cloth to clean the lenses. Check the adjustment of the micro switch on slant machines. -
Page 29: Bill Acceptor
CineVision™ Installation and Maintenance Chapter 4: Periodic Maintenance Bill Acceptor Use the following instructions to maintain the bill acceptor components: EPROM or EEPROM (Flash Upgrade) Verify the EPROM or EEPROM (flash upgrade) version is correct and is the latest revision. For example, there may be a newer version available for the changing currency. -
Page 30: Handle Mechanism
Chapter 4: Periodic Maintenance CineVision™ Installation and Maintenance Handle Mechanism Use the following instructions to maintain the handle mechanism components: Release Solenoid and Ratchet The handle mechanism consists of a ratchet assembly, an optic sensor, a release solenoid, and an arm assembly. -
Page 31: Reel Drive
CineVision™ Installation and Maintenance Chapter 4: Periodic Maintenance Reel Drive Use the following instructions to maintain the reel drive components: Reel Optics Optical sensors monitor the reel positions. Clean the reel optics with a dry lint-free cloth or swab. Dirty reel optics can cause reel movement tilts on some machine configurations. -
Page 32: Monitor
Chapter 4: Periodic Maintenance CineVision™ Installation and Maintenance Monitor Use the following instructions to maintain the monitor components: Viewable Area Abrasive or ammonia-based cleaners can damage the material bonding the Micro Touch® touch screen to the monitor. Clean the monitor with an antistatic nonabrasive cloth and a cleaner recommended for laptop computer screens. -
Page 33: Cd-Rom Drive
CineVision™ Installation and Maintenance Chapter 4: Periodic Maintenance CD-ROM Drive Use the following instructions to maintain the CD-ROM drive components: Lens The CD-ROM Drive reads data with a laser. Dust, smoke, and airborne particles can cloud the lens that the laser is focused through, causing “freezing” and other machine malfunctions. A commercial lens cleaner can help maintain optimum performance from the 5 and ½... -
Page 34: Printer
Chapter 4: Periodic Maintenance CineVision™ Installation and Maintenance Printer Use the following instructions to maintain the printer components: EPROM or EEPROM (Flash Upgrade) Verify the firmware, EPROM or EEPROM (flash upgrade) version is correct and is the latest revision. Replace, if necessary. Ribbon (Impact) Frayed and worn ribbons can damage the print head by snagging and bending the pins. -
Page 35: Main Processing Unit (Mpu)
CineVision™ Installation and Maintenance Chapter 4: Periodic Maintenance Main Processing Unit (MPU) Use the following instructions to maintain the MPU components: EPROM or CompactFlash Verify the EPROM or CompactFlash (Operating System and Game) software version is correct. Replace, if necessary. Periodic Maintenance Schedule MK2A-CINEV-0001 [B] 4 - 13... - Page 36 Chapter 4: Periodic Maintenance CineVision™ Installation and Maintenance 4 - 14 MK2A-CINEV-0001 [B] Periodic Maintenance Schedule...
-
Page 37: Chapter 5: Spare Parts
Spare Parts Ordering Spare Parts To order replacement parts and spare parts, see your CineVision™Assemblies, Parts, and Hardware guide. Parts and manuals can be ordered through Bally Customer Service at 1-877-GO-BALLY, (outside the United States, 702-584-7755). MK2A-CINEV-0001 [B] 5 - 1... - Page 38 Chapter 5: Spare Parts CineVision™ Installation and Maintenance 5 - 2 MK2A-CINEV-0001 [B] Ordering Spare Parts...
- Page 39 CineVision™ Installation and Maintenance Index Symbols contact information 5-1 µ-ATX 2-6, 3-1 dents 2-2 digital image 1-2 Bally Customer Service 5-1 dimensions 1-3 Bally Technologies Distributor 2-2 dual lock configuration 1-5 bill acceptor component maintenance 4-7 broken glass 2-2 BTU 1-3...
- Page 40 Index CineVision™ Installation and Maintenance door switch optic 4-3 CD-ROM drive components 4-11 hand truck 2-3 coin entry components 4-5 handle mechanism component maintenance 4-8 coin hopper components 4-6 handle mechanism components 4-8 machine door 4-4 monitor components 4-10 MPU components 4-13 installation 1-6 printer components 4-12 checklist 1-6...
- Page 41 CineVision™ Installation and Maintenance Index required parts 1-5 required tools 1-5 reseating the operating system and game software cards 2-5 Return Merchandise Authorization (RMA) 2-2 scratches 2-2 serial numbers 2-2 service interval 4-2 shipping damage 2-2 shipping documents 2-2 single lock configuration 1-5 software 2-3 spacers 1-5 spare parts 5-1...
- Page 42 Index CineVision™ Installation and Maintenance IX - 4 MK2A-CINEV-0001 [B]...
Need help?
Do you have a question about the CineVision MK2A-CINEV-0001 and is the answer not in the manual?
Questions and answers