Table of Contents
Advertisement
Quick Links
Start | Start | Début | Comienzo | Inizio
PrimeLab
2.0
Settings | Einstellungen | Paramètres
Ajustes | Impostazioni
Sampling Points | Messquellen
Points de prélèvement | Fuentes de
medición | Punti di campionamento
Camera | Kamera | Caméra | Cámara
Telecamera
USB
Parameters | Parameter | Paramètres
Parámetros | Parametri
TEST
Favourites | Favoriten | Favoris
Favoritas | Preferite
Cloud
Chemistry | Chemie | Chimie
Química | Chimica
Software | Logiciel
DEVELOPED
in GERMANY
Support | Hilfe | Soutien | Apoyo
Supporto
Advertisement
Table of Contents

Related Manuals for Water I.D. PrimeLab 2.0


Summary of Contents for Water I.D. PrimeLab 2.0
- Page 1 Start | Start | Début | Comienzo | Inizio PrimeLab Settings | Einstellungen | Paramètres Ajustes | Impostazioni Sampling Points | Messquellen Points de prélèvement | Fuentes de medición | Punti di campionamento Camera | Kamera | Caméra | Cámara Telecamera Parameters | Parameter | Paramètres Parámetros | Parametri...
- Page 2 Highly accurate readings on 18 parallel wavelengths, Bluetooth®-USB-WiFi-4G*-connections, powerful LabCOM® software and app, synchronized via a free cloud service, large HD touch display and the option to connect test probes are just some features** of the new PrimeLab 2.0 which supersedes the well-established PrimeLab 1.0.
-
Page 3: Table Of Contents
Content Parts list 3 – 8 The PrimeLab 2.0 Vial adapters Charging the battery Icons 11 – 15 First Setup Home-Screen Status-bar Lock Screen Settings Operators Calibration PrimeLab 21 – 22 PTSA Turbidity (NTU) Indexing a cuvette 23 – 24... -
Page 4: Parts List
Parts list PrimeLab 2.0 PL02B... Light shield PL2Sp-LS PL2Sp-DC / USBcable Charger/cable/plugs 24mm vial PLSp-Kv2410 PLSp-Kv1610 16mm vial* 1ml semi-micro-vial PLSp-Kv1 (rectangle)* *not included in the basic equipment (PL02B) PrimeLab... - Page 5 Parts list 24mm vial adapter PL2Sp-Adk24 16mm vial adapter* PL2Sp-Adk16 1ml semi-micro-vial PL2Sp-AdkEp (rectangle) vial adapter* Stirring rod (10.5/13 cm) PLSp-str / SPstr1 Cleaning brush PLSp-clb1 *not included in the basic equipment (PL02B) PrimeLab...
- Page 6 Parts list Tablets* Tbs... PP... Powder Pillow* Liquid reagents* PL... Powder in can* Plpow... Graduated syringe PLSp-inj... *not included in the basic equipment (PL02B) PrimeLab...
- Page 7 Parts list Lab-Pipette* PLSp-PIP... Filter-holder* PLSp-Filtad1 Filter paper in a can* PLSp-Filt... Calibration standards* PL2Sp-Ref in vials EM...buf... Calibration standards* in bottles or sachets *not included in the basic equipment (PL02B) PrimeLab...
- Page 8 Parts list Micro bre cleaning cloth PL2Sp-mft-1 Measuring/dilution cup* SVZdev100 Glass-bottle w. stopper* PLSp-GlsBot50ml Digital thermometer* PLSp-DCthermContr Mini-refrigerator* PLSp-Leg-Fridge *not included in the basic equipment (PL02B) PrimeLab...
- Page 9 Parts list Heat block* PLSp-CODheatblock-... USB A-C switch* PLSp-USBac GSM-modem** PLSp-GSM USB-hub* PLSp-USBhub Electrode* PLSp-Ele... *not included in the basic equipment (PL02B) **may be subject to costs for connection PrimeLab...
-
Page 10: The Primelab 2.0
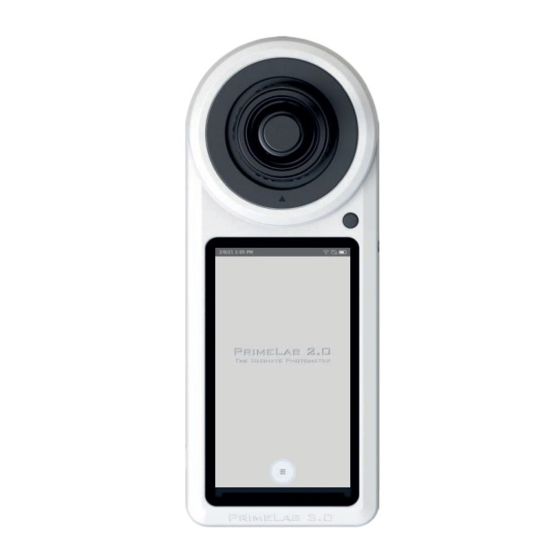
The PrimeLab 2.0 Please note: In sleep- and off-mode, wait several seconds after pressing the power button for 1 second until the system has booted up and the screen has switched on. Please also note that there may generally be a time delay between pressing the button and the response of the device. -
Page 11: Vial Adapters
USA socket. For the fastest charging results, connect the charger to the PrimeLab 2.0 while the PrimeLab 2.0 is switched on. Switch on your PrimeLab 2.0 off after plugging it in to charge. More about the charging procedure and the adapters of PrimeLab 2.0... -
Page 12: Icons
Icons Bluetooth WiFi Display General Settings Sound Device Information Cloud Sampling Points PrimeLab... - Page 13 Icons Favourites Calculator Main Menu Battery Searc (General) Create New Account Edit Return PrimeLab...
- Page 14 Icons Delete (General) Settings Operator GSM* connection Dosage-recommendation Parameter Ideal ranges Index calculation *via USB Internet Stick / accessories / may be subject to costs for connection PrimeLab...
- Page 15 Icons Active Chlorine Calculation Water treatment products Calibration Save Test Request parameter code > Activate parameter Add new... PrimeLab...
- Page 16 Icons Filter Check for updates / update available Refresh Log Out QR Scanner/Camera (Available for you soon) PrimeLab...
- Page 17 EMPTY due to technical reasons PrimeLab...
-
Page 18: First Setup
First Setup Prior first use, you must connect the PrimeLab 2.0 with a USB cable to either the charger or your computer, to wake it up from shipping mode! Shipping mode is terminated immediately after the PrimeLab is connected to the charger (after less than 1s). -
Page 19: Home-Screen
▶ Home Screen The home screen of your PrimeLab 2.0 is the screen which appears after switching on the device. You can individualize your PrimeLab 2.0 home screen. Enter main menu To enter the main menu, tap on the 3-lines symbol at the lower end of the home screen. -
Page 20: Status-Bar
▶ Status bar The status bar of your PrimeLab 2.0 is always visible on top of the PrimeLab 2.0 display: 15:33 AM It can be extended by swiping it down. 9:34 AM Wednesday, November 3, 2021 ... -
Page 21: Lock Screen
▶ Lock Screen To protect the PrimeLab 2.0 from unauthorized access to the device's settings and applications, you have the option of activating a lock screen. If set up, the lock screen becomes active as soon as the PrimeLab 2.0 screen turns off (e.g. after standby and after restarting the device). -
Page 22: Calibration
Each measurement file does not only show the test result in connection with the tested sampling points plus time stamp, but also the operator who conducted the test. When receiving your PrimeLab 2.0, there already is a ‘Default‘ operator in place, but you can add as many operators as you like. - Page 23 PTSA calibration Please perform a PrimeLab calibration prior to the PTSA calibration. A step-by-step procedure is displayed on the screen of your PrimeLab 2.0. Please make sure that: • The measuring chamber of the PrimeLab 2.0 is clean, • The 24mm cuvette adapter is correctly inserted, •...
- Page 24 • Fill a dry, residue-free cuvette up to the mark with turbidity-free water (see below) and replace the lid. • Hold the cuvette by the lid and remove all dirt residues with a microfiber cloth. • Switch on the PrimeLab 2.0 and place the cuvette in the measuring shaft. 1. Make sure that the "0" (zero) on...
- Page 25 • Wrong solution: Make sure that you use a solution below 0.5 NTU. • The light passage in the measuring chamber (PrimeLab 2.0) is dirty or wet: Make sure that the transparent part (behind the cuvette adapter) is clean and that the cuvettes used have no fingerprints, dirt or scratches.
-
Page 26: Data Scheme
All test results are stored under “Sampling Point“ to keep track of your test results in connection with the sampling point you performed the test for. When receiving your PrimeLab 2.0, a “default“ sampling point is already active. You can define as many individual sampling points as you wish (in ‘sampling point‘... -
Page 27: Connections
An internet-connection can be established by Wi-Fi or by a GSM-modem*. Your PrimeLab 2.0 also offers a Bluetooth®-connection which, by the date of printing this manual, is without use. To manage connections, tap on the ‘Connections‘ symbol from the ‚Settings‘ menu. -
Page 28: General Settings
• Change the language by tapping on ‘Language‘ and select the preferred one. • Activate ‘automatic‘ to receive date and time from the network, as long as PrimeLab 2.0 has established a working internet connection. Deactivating allows you to change date and time manually. - Page 29 OK/LOW/HIGH. With a tap on the search button, you can filter the parameters list. If you set an ideal range, the PrimeLab 2.0 automatically saves this rule for the selected parameter. Therefore the comments OK/LOW/HIGH will be automatically added.
-
Page 30: News
This service is free of charge but requires the PrimeLab 2.0 to be connected to the internet. If you do not wish to be informed about PrimeLab 2.0 news, here you have the option to deactivate the news-ticker. - Page 31 EMPTY due to technical reasons PrimeLab...
-
Page 32: Sampling Points
Your PrimeLab 2.0 makes testing and managing data comfortable and easy! One of the main features of your PrimeLab 2.0 is that you are able to connect test results to sampling points. By that, you always keep track of your test results in conjunction with the sampling point that was tested. - Page 33 • Start a new measurement: By tapping on the 3-bar menu button, followed by a tap on ‘New Measurement‘, PrimeLab 2.0 switches automatically to the measurement menu with this sampling point pre-selected as the sampling point to be tested.
- Page 34 To edit a saved measurement, just swipe the measurement result to the right, followed by tapping on the edit button. You can then tap in the fields shown and edit the information. Note that PrimeLab 2.0 will mark those manually edited test results as ‘changed‘ and will provide a history of the changes made, also showing the original values.
- Page 35 EMPTY due to technical reasons PrimeLab...
- Page 36 QR-Scanner / Camera Available for you soon! The in-built camera of the PrimeLab 2.0 is designed to make your life easier by scanning QR- codes. So far, PrimeLab 2.0 offers three options to scan QR-codes: • Reagents • Sampling points •...
- Page 37 EMPTY due to technical reasons PrimeLab...
-
Page 38: Usb
Some peripherals might have a USB type A plug (e.g. GSM- modem) which does not match the USB type C plug of your PrimeLab 2.0. In this case, just use the USB type C to USB type A adapter. PrimeLab comes with an in-built Wi-Fi option. Nevertheless, there might be no Wi-Fi network available in field but still you want to have full connectivity and instant upload to the LabCOM®... - Page 39 ProbeBOX & electrodes PrimeLab allows the connection of the Water-i.d. ProbeBOX via USB. Electrodes can then also be connected via the ProbeBOX. This option was not yet available at the time of printing this user manual. PrimeLab...
-
Page 40: Parameter
Parameter Most probably, your PrimeLab 2.0 has been factory setup with just those parameters you ordered / need. Nevertheless, your PrimeLab 2.0 always offers you the latest list of all parameters developed which can be activated at any time. The ‘Parameters‘ menu allows you to: •... - Page 41 EMPTY due to technical reasons PrimeLab...
- Page 42 Almost every test requires a ZERO measurement. The ZERO value determines the colour/turbidity of your water sample in order to eliminate any pre-colouration or turbidity. PrimeLab 2.0 stores the last ZERO value to be able to perform more than one test with the same undiluted water source (!) without having to repeat the ZERO measurement each time.
- Page 43 Test Please read the following instructions carefully because these must be strictly observed to ensure accurate measurements: Before inserting the cuvette into the sampling chamber please ensure that the cuvette is absolutely dry and clean, that there is no soiling by fingerprints etc., so that the light ray transmitted by the device for testing is not refracted or blocked.
- Page 44 Test The device must be acclimatised to the ambient temperature. Great differences between the device temperature and that of the environment can lead to the formation of condensation obstructing the optical system, which in turn will lead to incorrect measurements. The sampling chamber must be free from water or humidity, otherwise there will be the risk of damage to the electronics inside the device.
- Page 45 EMPTY due to technical reasons PrimeLab...
-
Page 46: Super Otz
To ensure a faster measurement process for repetitive measuring of sapmles (e.g. COD), there is now the option of Super OTZ (One Time ZERO). With this function, a ZERO measurement is stored in the PrimeLab 2.0 and can be recalled for each measurement. - Page 47 Super OTZ Use Super OTZ in a measurement To use the Super OTZ in a measurement, the parameter of the Super OTZ and the parameter of the measurement must be identical. (To perform a measurement, see chapter "Test", page 41). •...
- Page 48 TEST/Parameter list/Measurement method group/method parameter range unit λ switch reagent Active Oxygen 01-Act-oxi-MPS-tab Active Oxygen 0.0 - 40.0 mg/l ppm (MPS) Tablet (MPS) Alkalinity 05-Alkalinit-M-tab Alkalinity-M 5 - 200 mg/l ppm (CaCO₃) Tablet (CaCO₃) °dH °eH °fH mmol/l mval/l mg/l (HCO₃⁻) ppm (HCO₃⁻) 06-Alkalinit-P-tab Alkalinity-P...
- Page 49 group/method parameter range unit λ switch reagent Carbohydrazide 71-Carbohydra-liq Carbohydrazide 0.00 - 1.30 mg/l Liquid Chloride 10-Chloride-tab Chloride 0.5 - 25.0 mg/l (Cl⁻) ppm (Cl⁻) Tablet mg/l (NaCl) ppm (NaCl) 124-Chloride-liq Chloride 0.0 - 100.0 mg/l (Cl⁻) ppm (Cl⁻) Liquid mg/l (NaCl) ppm (NaCl) 167-Chloride-in-...
- Page 50 group/method parameter range unit λ switch reagent Copper 18-Copper-tab Copper (free/ 0.00 - 5.00 mg/l (fCu) ppm (fCu) Tablet combinded/total) 19-Copper-pow Copper 0.00 - 5.00 mg/l (fCu) ppm (fCu) Powder Can Cyanide 158-Cyanide-pow Cyanide 0.01 - 0.50 mg/l (CN⁻) Reagent-Kit Cyanuric Acid 20-Cyanur-Acid-tab Cyanuric Acid...
- Page 51 group/method parameter range unit λ switch reagent mval/l 166-Hard-Cal-liq Calcium hardness 0 - 500 mg/l ppm (CaCO₃) Liquid (CaCO₃) °dH °eH °fH mmol/l mval/l Hydrazine 23-Hydrazine-liq Hydrazine 5 - 600 µg/l (N₂H₄) ppb (N₂H₄) Liquid Hydrocarbons 160-Hydrocarbons Hydrocarbons 0 - 1 (Turb) Hydrogen Peroxide 24-Hydr-Per-LR-tab...
- Page 52 group/method parameter range unit λ switch reagent Magnesium 93-Magnesium-tab Magnesium 0 - 100 mg/l (Mg) ppm (Mg) Tablet mg/l (CaCO₃) ppm (CaCO₃) Manganese 31-Manganese-LR- Manganese 0.20 - 5.00 mg/l (Mn) ppm (Mn) Powder Pack mg/l (MnO₄⁻) ppm (MnO₄⁻) mg/l (KMnO₄) ppm (KMnO₄) 161-Manganese- Manganese VLR...
- Page 53 group/method parameter range unit λ switch reagent mg/l (NO₂⁻) ppm (NO₂⁻) Nitrogen 151-NitroTotLR-pre Nitrogen-total LR 0.5 - 25.0 mg/l (N) ppm (N) Reagent-Kit (all steps) mg/l (NH₄⁺) ppm (NH₄⁺) mg/l (NH₃) ppm (NH₃) 152-NitroTotHR-pre Nitrogen-total HR 5 - 150 mg/l (N) ppm (N) Reagent-Kit (all Steps)
- Page 54 group/method parameter range unit λ switch reagent ppm (P₂O₅) Phosphonate 87-Phosphonate-liq Phsphonate 0.0 - 20.0 mg/l ppm (PO₄³⁻) Powder Can (PO₄³⁻) mg/l (PBTC) ppm (PBTC) mg/l (NTP) ppm (NTP) mg/l (HEDPA) ppm (HEDPA) mg/l (EDTMPA) ppm (EDTMPA) mg/l (HMDTMPA) ppm (HMDTMPA) mg/l (DETPMPA) ppm (DETPMPA) mg/l (HPA)
- Page 55 group/method parameter range unit λ switch reagent Sod.-Hypochlorite 51-Sodium-Hypo- Sodium 0.2 - 40.0 % (NaOCl) Powder Pack Hypochlorite 68-Sodium-Hypo-liq Sodium 0.2 - 40.0 % (NaOCl) Liquid Hypochlorite Sulphate 54-Sulphate-tab Sulphate 5 - 100 mg/l ppm (SO₄²⁻) Powder Pack (SO₄²⁻) 55-Sulphate-pow Sulphate 5 - 100 mg/l...
- Page 56 (01) Tablet Active Oxygen 0.0 - 40.0 mg/l (MPS) Internal Name: 01-Act-oxi-MPS-tab DPD N°4 Photometer (TbsPD4) Measurement procedure: Fill 10 ml test water into a clean 24 mm cuvette. Screw the lid back on the cuvette. Insert the cuvette into the PrimeLab. Pay attention to the arrow on the front of the cuvette. Start ZERO measurement.
- Page 57 The DPD reagent buffers the pH value of the sample water in the range of 6.2 to 6.5, which is essential for colour development. If the sample water is very alkaline or acidic, this must be adjusted to a pH within the range of 6 to 7 by addition of 0.5 mol/l sulphuric acid or 1 mol/l caustic soda, respectively, before the DPD reagent is added.
- Page 58 (05) Tablet Alkalinity-M 5 - 200 mg/l (CaCO₃) Internal Name: 05-Alkalinit-M-tab Alkalinity-M Photometer (TbsPTA) Measurement procedure: Fill 10 ml test water into a clean 24 mm cuvette. Screw the lid back on the cuvette. Insert the cuvette into the PrimeLab. Pay attention to the arrow on the front of the cuvette. Start ZERO measurement.
- Page 59 (06) Tablet Alkalinity-P 25 - 300 mg/l (CaCO₃) Internal Name: 06-Alkalinit-P-tab Alkalinity-P Photometer (TbsPAP) Measurement procedure: Fill 10 ml test water into a clean 24 mm cuvette. Screw the lid back on the cuvette. Insert the cuvette into the PrimeLab. Pay attention to the arrow on the front of the cuvette. Start ZERO measurement.
- Page 60 (121) Tablet Alkalinity-M HR 0 - 500 mg/l (CaCO₃) Internal Name: 121-Alka-M-HR-tab Alkalinity-M HR Photometer (TbsPTAHR) Measurement procedure: Fill 10 ml test water into a clean 24 mm cuvette. Screw the lid back on the cuvette. Insert the cuvette into the PrimeLab. Pay attention to the arrow on the front of the cuvette. Start ZERO measurement.
- Page 61 (04) Tablet Aluminium 0.00 - 0.30 mg/l (Al) Internal Name: 04-Aluminium-tab Aluminium N°1 Photometer (TbsHAlm1) Aluminium N°2 Photometer (TbsPAlm2) Measurement procedure: Fill 10 ml test water into a clean 24 mm cuvette. Screw the lid back on the cuvette. Insert the cuvette into the PrimeLab. Pay attention to the arrow on the front of the cuvette. Start ZERO measurement.
- Page 62 (02) Powder Pack Ammonia LR 0.00 - 1.00 mg/l (N) Internal Name: 02-Ammonia-LR-pow Ammonia N°1 Photometer (PPHAM1) Ammonia N°2 Photometer (PPPAM2) Measurement procedure: Fill 10 ml test water into a clean 24 mm cuvette. Screw the lid back on the cuvette. Insert the cuvette into the PrimeLab.
- Page 63 (155) Reagent-Kit Ammonia HR 1.0 - 50.0 mg/l (N) Internal Name: 155-AmmoniaHR-pre Ammonia HR Kit (PL155-Kit) Measurement procedure: Prepare 2 Ammonia HR cuvettes (16 mm). Label one as a ZERO cuvette. Open the first cuvette (ZERO cuvette). Fill 0.1 ml distilled water into the cuvette, using a pipette. Open the second vial (sample vial).
- Page 64 In presence of iron, measure the iron content of the sample water and add iron standard solution of the same concentration to the ZERO vial instead of DI water (step 3). T9/204 T9/204...
- Page 65 (07) Tablet Boron 0.00 - 2.00 mg/l (B) Internal Name: 07-Boron-tab Boron N°1 Photometer (TbsHBo1) Boron N°2 Photometer (TbsPBo2) Measurement procedure: Fill 10 ml test water into a clean 24 mm cuvette. Screw the lid back on the cuvette. Insert the cuvette into the PrimeLab. Pay attention to the arrow on the front of the cuvette. Start ZERO measurement.
- Page 66 (08) Bromine Tablet (in absence of Chlorine) 0.00 - 9.00 mg/l (tBr₂) Internal Name: 08-Bromine-tab DPD N°1 Photometer (TbsPD1) Measurement procedure: Fill 10 ml test water into a clean 24 mm cuvette. Screw the lid back on the cuvette. Insert the cuvette into the PrimeLab. Pay attention to the arrow on the front of the cuvette. Start ZERO measurement.
- Page 67 If the sample water contains further oxidizing agents, these will react like bromine and contribute to the measurement result. The DPD reagent buffers the pH value of the sample water in the range of 6.2 to 6.5, which is essential for colour development. If the sample water is very alkaline or acidic, this must be adjusted to a pH within the range of 6 to 7 by addition of 0.5 mol/l sulphuric acid or 1 mol/l caustic soda, respectively, before the DPD reagent is added.
- Page 68 (08) Bromine Tablet (in presence of chlorine) 0.00 - 9.00 mg/l (tBr₂) Internal Name: 08-Bromine-tab DPD N°1 Photometer (TbsPD1) Glycine (TbsHGC) Measurement procedure: Fill 10 ml test water into a clean 24 mm cuvette. Screw the lid back on the cuvette. Insert the cuvette into the PrimeLab.
- Page 69 Do not clean glassware and equipment with household detergents, as these could greatly reduce the measurement result. To prevent any contamination, the cuvette, lid and stirrer should be stored in a 0.1 % sodium hypochlorite solution for one hour. Then rinse with distilled water, thoroughly.
- Page 70 (63) Bromine Liquid + Powder (in absence of chlorine) 0.00 - 9.00 mg/l (fBr₂) Internal Name: 63-Bromine-liq 30ml PL DPD 1 A (PL30DPD1A) 30ml PL DPD 1 B (PL30DPD1B) PL DPD Nitrite Powder (PLpow20DPDNitr) Measurement procedure: Fill 10 ml test water into a clean 24 mm cuvette. Screw the lid back on the cuvette.
- Page 71 Screw the lid back on the cuvette. Gently swirl the cuvette to mix the liquid well. Insert the cuvette into the PrimeLab. Pay attention to the arrow on the front of the cuvette. Tap TEST to perform the measurement. The measured value for fBr₂ = free bromine; cBr₂ = combined bromine and tBr₂ = total bromine is immediately displayed.
- Page 72 (63) Bromine Liquid + Powder (in presence of chlorine) 0.00 - 9.00 mg/l (fBr₂) Internal Name: 63-Bromine-liq 30ml PL DPD 1 A (PL30DPD1A) 30ml PL DPD 1 B (PL30DPD1B) PL DPD Nitrite Powder (PLpow20DPDNitr) 30ml PL DPD Glycine (PL30DPDGlycine) Measurement procedure: Fill 10 ml test water into a clean 24 mm cuvette.
- Page 73 The measured value for fBr₂ = free bromine; cBr₂ = combined bromine; tBr₂ = total bromine is immediately displayed. Notes: DPD 1 A and DPD 1 B reagent MUST be added to the vial BEFORE water sample is added to avoid misreadings! Do not clean glassware and equipment with household detergents, as these could greatly reduce the measurement result.
- Page 74 (128) Powder Pack Bromine 0.00 - 4.50 mg/l (Br₂) Internal Name: 128-Bromine-pp DPD N°1 Photometer (PPPD1) Measurement procedure: Fill 10 ml test water into a clean 24 mm cuvette. Screw the lid back on the cuvette. Insert the cuvette into the PrimeLab. Pay attention to the arrow on the front of the cuvette. Start ZERO measurement.
- Page 75 Do not clean glassware and equipment with household detergents, as these could greatly reduce the measurement result. To prevent any contamination, the cuvette, lid and stirrer should be stored in a 0.1 % sodium hypochlorite solution for one hour. Then rinse with distilled water, thoroughly.
- Page 76 (71) Liquid Carbohydrazide 0.00 - 1.30 mg/l Internal Name: 71-Carbohydra-liq PL Oxygen Scavenger 1 (65 ml) (PL65OxyScav1) PL Oxygen Scavenger 2 (65 ml) (PL65OxyScav2) Measurement procedure: Fill 10 ml test water into a clean 24 mm cuvette. Screw the lid back on the cuvette. Insert the cuvette into the PrimeLab.
- Page 77 (10) Tablet Chloride 0.5 - 25.0 mg/l (Cl⁻) Internal Name: 10-Chloride-tab Chloride N°1 Photometer (TbsHCRD1) Chloride N°2 Photometer (TbsPCRD2) Measurement procedure: Fill 10 ml test water into a clean 24 mm cuvette. Screw the lid back on the cuvette. Insert the cuvette into the PrimeLab. Pay attention to the arrow on the front of the cuvette. Start ZERO measurement.
- Page 78 (124) Liquid Chloride 0.0 - 100.0 mg/l (Cl⁻) Internal Name: 124-Chloride-liq 65ml PL Chloride N°1 (PL65Chloride1) 65ml PL Chloride N°2 (PL65Chloride2) Measurement procedure: Fill 10 ml test water into a clean 24 mm cuvette. Screw the lid back on the cuvette. Insert the cuvette into the PrimeLab.
- Page 79 (167) Liquid Chloride in MeOH 0.0 - 20.0 mg/l (Cl⁻) Internal Name: 167-Chloride-in-MeOH 30ml Chloride in Methanol (PL30CLMEOH) Measurement procedure: Fill 10 ml test water into a clean 24 mm cuvette. Screw the lid back on the cuvette. Insert the cuvette into the PrimeLab. Pay attention to the arrow on the front of the cuvette. Start ZERO measurement.
- Page 80 (11) Chlorine Tablet (free/combined/total) 0.00 - 8.00 mg/l (fCl₂) Internal Name: 11-Chlorine-tab DPD N°1 Photometer (TbsPD1) DPD N°1 High Calcium Photometer (TbsPD1HC) DPD N°3 Photometer (TbsPD3) Measurement procedure: Fill 10 ml test water into a clean 24 mm cuvette. Screw the lid back on the cuvette. Insert the cuvette into the PrimeLab.
- Page 81 Notes: Turbidity caused by high concentration of calcium ions will affect the measurement result. To prevent that, please use DPD HC (High Calcium) reagents. If the sample water contains further oxidizing agents, these will react like chlorine and contribute to the measurement result. Make sure no chlorine escapes while preparing the sample.
- Page 82 (12) Chlorine Liquid (free/combined/total) 0.03 - 4.00 mg/l (fCl₂) Internal Name: 12-Chlorine-liq 30ml PL DPD 1 A (PL30DPD1A) 30ml PL DPD 1 B (PL30DPD1B) 30ml PL DPD 3 C (PL30DPD3C) Measurement procedure: Fill 10 ml test water into a clean 24 mm cuvette. Screw the lid back on the cuvette.
- Page 83 DPD 1 A and DPD 1 B reagent MUST be added to the vial BEFORE water sample is added to avoid misreadings! Turbidity caused by high concentration of calcium ions will affect the measurement result. To prevent that, please use DPD HC (High Calcium) reagents. Liquid reagents should be stored at temperatures of 5 - 10 °C in securely closed bottles.
- Page 84 (14) Chlorine HR Powder Pack (KI) 5 - 200 mg/l (Cl₂) Internal Name: 14-Chlorine-HR-PP Chlorine HR (KI) Photometer (PPPClHR) Acidifying GP (PPHAFG) Measurement procedure: Fill 10 ml test water into a clean 24 mm cuvette. Screw the lid back on the cuvette. Insert the cuvette into the PrimeLab.
- Page 85 (15) Liquid Chlorine HR 0 - 200 mg/l (Cl₂) Internal Name: 15-Chlorine-HR-liq 65ml PL Chlorine HR N°1 (PL65ClHR1) 65ml PL Chlorine HR N°2 (PL65ClHR2) Measurement procedure: Fill 10 ml test water into a clean 24 mm cuvette. Screw the lid back on the cuvette. Insert the cuvette into the PrimeLab.
- Page 86 (95) Chloramines Tablet (Mono-/Di-) 0.00 - 8.00 mg/l (fCl) Internal Name: 95-Chloramines-tab DPD N°1 Photometer (TbsPD1) DPD N°2 Photometer (TbsPD2) DPD N°3 Photometer (TbsPD3) Measurement procedure: Fill 10 ml test water into a clean 24 mm cuvette. Screw the lid back on the cuvette. Insert the cuvette into the PrimeLab.
- Page 87 Screw the lid back on the cuvette. Gently swirl the cuvette to mix the liquid well. Insert the cuvette into the PrimeLab. Pay attention to the arrow on the front of the cuvette. Tap TEST to perform the measurement. After the lapse of a 120 second(s) countdown the measured value for fCl₂, NH₂Cl, NHCl₂ is displayed.
- Page 88 (108) Liquid Total Oxidants 0.03 - 4.00 mg/l (tCl₂) Internal Name: 108-Total-Oxid-liq 30ml PL DPD 1 A (PL30DPD1A) 30ml PL DPD 1 B (PL30DPD1B) 30ml PL DPD 3 C (PL30DPD3C) 30ml PL DPD Acidifying (PL30DPDAcidif) 30ml PL DPD Neutralising (PL30DPDNeutr) Measurement procedure: Fill 10 ml test water into a clean 24 mm cuvette.
- Page 89 Tap TEST to perform the measurement. The measured value is immediately displayed. Notes: DPD 1 A and DPD 1 B reagent MUST be added to the vial BEFORE water sample is added to avoid misreadings! Do not clean glassware and equipment with household detergents, as these could greatly reduce the measurement result.
- Page 90 (122) Chlorine MR Tablet (free/combined/total) 0.00 - 10.00 mg/l (fCl₂) Internal Name: 122-ChlorineMR-tab DPD N°1 MR Photometer (TbsPD1MR) DPD N°3 MR Photometer (TbsPD3MR) Measurement procedure: Fill 10 ml test water into a clean 24 mm cuvette. Screw the lid back on the cuvette. Insert the cuvette into the PrimeLab.
- Page 91 Notes: If the sample water contains more than 20 mg/l chlorine, a measured value of 0 mg/l can be displayed. In that case, a dilution is recommended. If the sample water contains further oxidizing agents, these will react like chlorine and contribute to the measurement result.
- Page 92 (129) Chlorine Powder Pack (free) 0.00 - 8.00 mg/l (fCl₂) Internal Name: 129-Chlorine-pp DPD N°1 Photometer (PPPD1) Measurement procedure: Fill 10 ml test water into a clean 24 mm cuvette. Screw the lid back on the cuvette. Insert the cuvette into the PrimeLab. Pay attention to the arrow on the front of the cuvette. Start ZERO measurement.
- Page 93 If the sample water contains further oxidizing agents, these will react like chlorine and contribute to the measurement result. Make sure no chlorine escapes while preparing the sample. The measurement must be performed directly after sampling. Do not clean glassware and equipment with household detergents, as these could greatly reduce the measurement result.
- Page 94 (16) Chlorine Dioxide Tablet (in absence of Chlorine) 0.00 - 15.00 mg/l (ClO₂) Internal Name: 16-Chlorin-Dio-tab DPD N°1 Photometer (TbsPD1) Measurement procedure: Fill 10 ml test water into a clean 24 mm cuvette. Screw the lid back on the cuvette. Insert the cuvette into the PrimeLab.
- Page 95 Make sure no chlorine dioxide escapes while preparing the sample. The measurement must be performed directly after sampling. If the sample water contains further oxidizing agents, these will react like chlorine dioxide and contribute to the measurement result. If the sample water contains more than 30 mg/l chlorine dioxide, a measured value of 0 mg/l can be displayed.
- Page 96 (16) Chlorine Dioxide Tablet (in presence of chlorine) 0.00 - 15.00 mg/l (ClO₂) Internal Name: 16-Chlorin-Dio-tab DPD N°1 Photometer (TbsPD1) Glycine (TbsHGC) Measurement procedure: Fill 10 ml test water into a clean 24 mm cuvette. Screw the lid back on the cuvette. Insert the cuvette into the PrimeLab.
- Page 97 The DPD reagent buffers the pH value of the sample water in the range of 6.2 to 6.5, which is essential for colour development. If the sample water is very alkaline or acidic, this must be adjusted to a pH within the range of 6 to 7 by addition of 0.5 mol/l sulphuric acid or 1 mol/l caustic soda, respectively, before the DPD reagent is added.
- Page 98 (64) Chlorine Dioxide Liquid (in absence of chlorine) 0.00 - 7.60 mg/l (ClO₂⁻) Internal Name: 64-Chlorin-Dio-liq 30ml PL DPD 1 A (PL30DPD1A) 30ml PL DPD 1 B (PL30DPD1B) 30ml PL DPD Glycine (PL30DPDGlycine) Measurement procedure: Fill 10 ml test water into a clean 24 mm cuvette. Screw the lid back on the cuvette.
- Page 99 Make sure no chlorine dioxide escapes while preparing the sample. The measurement must be performed directly after sampling. If the sample water contains further oxidizing agents, these will react like chlorine dioxide and contribute to the measurement result. If the sample water contains more than 30 mg/l chlorine dioxide, a measured value of 0 mg/l can be displayed.
- Page 100 (64) Chlorine Dioxide Liquid (in presence of chlorine) 0.00 - 7.60 mg/l (ClO₂⁻) Internal Name: 64-Chlorin-Dio-liq 30ml PL DPD 1 A (PL30DPD1A) 30ml PL DPD 1 B (PL30DPD1B) Measurement procedure: Fill 10 ml test water into a clean 24 mm cuvette. Screw the lid back on the cuvette.
- Page 101 The DPD reagent buffers the pH value of the sample water in the range of 6.2 to 6.5, which is essential for colour development. If the sample water is very alkaline or acidic, this must be adjusted to a pH within the range of 6 to 7 by addition of 0.5 mol/l sulphuric acid or 1 mol/l caustic soda, respectively, before the DPD reagent is added.
- Page 102 (130) Liquid + Powder Pack Chlorine Dioxide 0.00 - 5.00 mg/l (ClO₂) Internal Name: 130-Chl-Diox-pp 30ml PL DPD Glycine (PL30DPDGlycine) DPD N° 1 Photometer (PPPD150) Measurement procedure: Fill 10 ml test water into a clean 24 mm cuvette. Screw the lid back on the cuvette. Insert the cuvette into the PrimeLab.
- Page 103 Turbidity caused by high concentration of calcium ions will affect the measurement result. To prevent that, please use DPD HC (High Calcium) reagents. Do not clean glassware and equipment with household detergents, as these could greatly reduce the measurement result. To prevent any contamination, the cuvette, lid and stirrer should be stored in a 0.1 % sodium hypochlorite solution for one hour.
- Page 104 (106) Liquid Chlorite 0.00 - 8.00 mg/l (ClO₂⁻) Internal Name: 106-Chlorite-liq 30ml PL DPD Glycine (PL30DPDGlycine) 30ml PL DPD 3 C (PL30DPD3C) 30ml PL DPD 1 B (PL30DPD1B) 30ml PL DPD 1 A (PL30DPD1A) 30ml PL DPD Acidifying (PL30DPDAcidif) 30ml PL DPD Neutralising (PL30DPDNeutr) Measurement procedure: Fill 10 ml test water into a clean 24 mm cuvette.
- Page 105 Remove the cuvette again. Unscrew the lid from the cuvette. Add 3 drop(s) of PL DPD Acidifying into the cuvette. Screw the lid back on the cuvette. Gently swirl the cuvette to mix the liquid well. Insert the cuvette into the PrimeLab. Pay attention to the arrow on the front of the cuvette. Tap TEST to perform the measurement.
- Page 106 (94) Chromium Tablet + Powder Pack (hexavalent) 0.00 - 2.20 mg/l (Cr⁶⁺) Internal Name: 94-chromium-tab Chromium N°1 Photometer (TbsHChro1) Chromium N° 2 (PPHChro250) Measurement procedure: Fill 10 ml test water into a clean 24 mm cuvette. Screw the lid back on the cuvette. Insert the cuvette into the PrimeLab.
- Page 107 (103) Chromium Powder Can + Liquid (hexavalent) 0.00 - 1.00 mg/l (Cr⁶⁺) Internal Name: 103-Chromium-liq PL Chromate 1 (PLpow40Chromate1) PL Chromate 2 (PL65Chromate2) Measurement procedure: Fill 10 ml test water into a clean 24 mm cuvette. Screw the lid back on the cuvette. Insert the cuvette into the PrimeLab.
- Page 108 (17) Reagent-Kit COD HR 0 - 15000 mg/l (O₂) Internal Name: 17-COD-HR-pre COD HR (tubetest) (COD-17-HR) Measurement procedure: Prepare 2 COD-HR cuvettes (16 mm). Label one as a ZERO cuvette. Open the first cuvette (ZERO cuvette). Fill 0.2 ml distilled water into the cuvette. Open the second vial (sample vial).
- Page 109 Suspended particles in the zero cell and / or the sample cell lead to wrong test results. Make sure that any existing suspended solids have settled to the bottom of the cell and are not disturbed by the insertion into the PrimeLab. Both cells used for the measurement (ZERO / sample) must be from the same production batch.
- Page 110 (79) Reagent-Kit COD LR 0 - 150 mg/l (O₂) Internal Name: 79-COD-LR-pre COD LR (tubetest) (COD-79-LR) Measurement procedure: Prepare 2 COD-LR cuvettes (16 mm). Label one as a ZERO cuvette. Open the first cuvette (ZERO cuvette). Fill 2 ml distilled water into the cuvette. Open the second vial (sample vial).
- Page 111 Suspended particles in the zero cell and / or the sample cell lead to wrong test results. Make sure that any existing suspended solids have settled to the bottom of the cell and are not disturbed by the insertion into the PrimeLab. Both cells used for the measurement (ZERO / sample) must be from the same production batch.
- Page 112 (80) Reagent-Kit COD MR 0 - 1500 mg/l (O₂) Internal Name: 80-COD-MR-pre COD MR (tubetest) (COD-80-MR) Measurement procedure: Prepare 2 COD-MR cuvettes (16 mm). Label one as a ZERO cuvette. Open the first cuvette (ZERO cuvette). Fill 2 ml distilled water into the cuvette. Open the second vial (sample vial).
- Page 113 Suspended particles in the zero cell and / or the sample cell lead to wrong test results. Make sure that any existing suspended solids have settled to the bottom of the cell and are not disturbed by the insertion into the PrimeLab. Both cells used for the measurement (ZERO / sample) must be from the same production batch.
- Page 114 (107) Colour (apparent) 15 - 500 mg/l (Pt-Co) Internal Name: 107-Colour (Hazen/APHA) Measurement procedure: Fill 10 ml distilled water in a clean 24 mm cuvette. Screw the lid back on the cuvette. Insert the cuvette into the PrimeLab. Pay attention to the arrow on the front of the cuvette. Start ZERO measurement.
- Page 115 (107) Colour (true) 15 - 500 mg/l (Pt-Co) Internal Name: 107-Colour (Hazen/APHA) Measurement procedure: Separate the two halves of the filter holder. Insert a 0.45 µm filter. Screw the filter holder back together, making sure that the O-ring is correctly seated. Fill the syringe again with distilled water.
- Page 116 The measured value for mg/l (Pt-Co) is immediately displayed. Notes: Special accessories required / not included as standard equipment! The sample water needs to have a yelowish to yellowish-brown coloration to be tested with this method. The method is based on the "HAZAN Standard", developed by A. Hazen (EN ISO 7887:1994).
- Page 117 (18) Copper Tablet (free/combinded/total) 0.00 - 5.00 mg/l (fCu) Internal Name: 18-Copper-tab Copper N°1 Photometer (TbsHCu1) Copper N°2 Photometer (TbsPCu2) Measurement procedure: Fill 10 ml test water into a clean 24 mm cuvette. Screw the lid back on the cuvette. Insert the cuvette into the PrimeLab.
- Page 118 For the analysis of total copper the following procedure is necessary:i) Add concentrated sulfuric acid to the test sample (1 ml per 100 ml of test sample). By boiling it for 10 minutes, everything is dissolved. Now cool down the test sample. Then add ammonia and bring the sample to a pH value of 3 –...
- Page 119 (19) Powder Can Copper 0.00 - 5.00 mg/l (fCu) Internal Name: 19-Copper-pow 20g PL Copper N°1 (PLpow20Cu1) Measurement procedure: Fill 10 ml test water into a clean 24 mm cuvette. Screw the lid back on the cuvette. Insert the cuvette into the PrimeLab. Pay attention to the arrow on the front of the cuvette. Start ZERO measurement.
- Page 120 Disorders: i) Cyanides (CN⁻): To ensure full color development, the test sample has to be enriched with 0.2 ml of formaldehyde and wait 4 minutes. The analysis can now be performed as described. The test result must be multiplied by 1.02.ii) Silver (Ag⁺): Silver can cause blackening of the test sample.
- Page 121 (158) Reagent-Kit Cyanide 0.01 - 0.50 mg/l (CN⁻) Internal Name: 158-Cyanide-pow Cyanide Kit (PL158-Kit) Measurement procedure: Fill 8 ml of distilled water into a clean 24 mm cuvette. Add exactly 2 ml sample water to the same cuvette. Screw the lid back on the cuvette. Swivel the cuvette back and forth for 5 times.
- Page 122 (20) Tablet Cyanuric Acid 0 - 160 mg/l (CYA) Internal Name: 20-Cyanur-Acid-tab CYA Photometer (TbsPCAT) Measurement procedure: Fill 10 ml test water into a clean 24 mm cuvette. Screw the lid back on the cuvette. Insert the cuvette into the PrimeLab. Pay attention to the arrow on the front of the cuvette. Start ZERO measurement.
- Page 123 (65) Liquid DBNPA 0.00 - 13.00 mg/l (DBNPA) Internal Name: 65-DBNPA-liq 30ml PL DPD 1 A (PL30DPD1A) 30ml PL DPD 1 B (PL30DPD1B) 30ml PL DPD 3 C (PL30DPD3C) Measurement procedure: Fill 10 ml test water into a clean 24 mm cuvette. Screw the lid back on the cuvette.
- Page 124 The DPD reagent buffers the pH value of the sample water in the range of 6.2 to 6.5, which is essential for colour development. If the sample water is very alkaline or acidic, this must be adjusted to a pH within the range of 6 to 7 by addition of 0.5 mol/l sulphuric acid or 1 mol/l caustic soda, respectively, before the DPD reagent is added.
- Page 125 (82) Tablet DBNPA 0.00 - 13.00 mg/l (DBNPA) Internal Name: 82-DBNPA-tab DPD N°1 Photometer (TbsPD1) DPD N°3 Photometer (TbsPD3) Measurement procedure: Fill 10 ml test water into a clean 24 mm cuvette. Screw the lid back on the cuvette. Insert the cuvette into the PrimeLab. Pay attention to the arrow on the front of the cuvette. Start ZERO measurement.
- Page 126 (21) Liquid DEHA 20 - 1000 µg/l (DEHA) Internal Name: 21-DEHA-liq PL Oxygen Scavenger 1 (30 ml) (PL30OxyScav1) PL Oxygen Scavenger 2 (65 ml) (PL65OxyScav2) Measurement procedure: Fill 10 ml test water into a clean 24 mm cuvette. Screw the lid back on the cuvette. Insert the cuvette into the PrimeLab.
- Page 127 (163) Liquid Dissolved Oxygen 0.0 - 10.0 mg/l (O₂) Internal Name: 163-Dis.Oxygen 30ml PL Dissolved Oxygen N°1 (PL30DO1) 30ml PL Dissolved Oxygen N°2 (PL30DO2) 30ml PL Dissolved Oxygen N°3 (PL30DO3) Measurement procedure: Fill 10 ml test water into a clean 24 mm cuvette. Screw the lid back on the cuvette.
- Page 128 Add 10 ml of solution into the previously used ZERO cuvette. Insert the cuvette into the PrimeLab. Pay attention to the arrow on the front of the cuvette. Tap TEST to perform the measurement. The measured value is immediately displayed. Notes: Make sure the 50 ml glass bottle is really filled up to the top and the water will run out when applying the stopper.
- Page 129 (70) Liquid Erythorbic Acid 0.00 - 3.50 mg/l (EA) Internal Name: 70-Erythorbic-Acid PL Oxygen Scavenger 1 (65 ml) (PL65OxyScav1) PL Oxygen Scavenger 2 (65 ml) (PL65OxyScav2) Measurement procedure: Fill 10 ml test water into a clean 24 mm cuvette. Screw the lid back on the cuvette. Insert the cuvette into the PrimeLab.
- Page 130 (113) Fluorescein 0 - 500 µg/l (C₂₀H₁₂O₅) Internal Name: 113-Fluorescein-Ad Prime L ab Measurement procedure: Fill 10 ml distilled water in a clean 24 mm cuvette. Screw the lid back on the cuvette. Insert the cuvette into the PrimeLab. Pay attention to the arrow on the front of the cuvette. Start ZERO measurement.
- Page 131 (180) Fluoride Liquid (in absence of chlorine) 0.00 - 2.00 mg/l (F⁻) Internal Name: 180-Fluoride PL SPADNS Fluoride Reagent (PL100SPADNSF) Measurement procedure: Fill 10 ml distilled water in a clean 24 mm cuvette. Add 2 ml of PL SPADNS Fluoride Reagent to the cuvette. Screw the lid back on the cuvette.
- Page 132 (09) Tablet Hardness-Calcium HR 50 - 1000 mg/l (CaCO₃) Internal Name: 09-Hard-Cal-HR_tab Calcium Hardness Photometer (TbsPCH) Measurement procedure: Fill 10 ml distilled water into the cuvette. Add 1 Calcium Hardness Photometer tablet(s) to the test water in the cuvette. Crush the tablet with a clean stirring rod. Stir with the stirring rod for about 20 seconds until the reagent is completely dissolved.
- Page 133 (56) Tablet Hardness-total LR 2.0 - 50.0 mg/l (CaCO₃) Internal Name: 56-Hard-tot-LR-tab Total Hardness Photometer (TbsPTH) Measurement procedure: Fill 10 ml test water into a clean 24 mm cuvette. Screw the lid back on the cuvette. Insert the cuvette into the PrimeLab. Pay attention to the arrow on the front of the cuvette. Start ZERO measurement.
- Page 134 (57) Tablet Hardness-total HR 20 - 500 mg/l (CaCO₃) Internal Name: 57-Hard-tot-HR-tab Total Hardness Photometer (TbsPTH) Measurement procedure: Fill 9 ml distilled water in a clean 24 mm cuvette. Fill 1 ml sample water in the same cuvette. Screw the lid back on the cuvette. Insert the cuvette into the PrimeLab.
- Page 135 (78) Tablet Hardness-Calcium 0 - 500 mg/l (CaCO₃) Internal Name: 78-Hard-Cal-tab Calcium Hardness N°2 Photometer (TbsPCH2) Calcium Hardness N°1 Photometer (TbsHCH1) Measurement procedure: Fill 10 ml test water into a clean 24 mm cuvette. Screw the lid back on the cuvette. Insert the cuvette into the PrimeLab.
- Page 136 (148) Liquid Hardness-total HR 0 - 500 mg/l (CaCO₃) Internal Name: 148-Total-Hardness-liq Total Hardness (POL20TH1) Total Hardness (POL10TH2) Measurement procedure: Fill 10 ml test water into a clean 24 mm cuvette. Screw the lid back on the cuvette. Insert the cuvette into the PrimeLab. Pay attention to the arrow on the front of the cuvette. Start ZERO measurement.
- Page 137 (166) Liquid Calcium hardness 0 - 500 mg/l (CaCO₃) Internal Name: 166-Hard-Cal-liq Calcium Hardness N° 1 (POL20CH1) Calcium Hardness N° 2 (POL20CH2) Measurement procedure: Fill 5 ml distilled water in a clean 24 mm cuvette. Fill 5 ml sample water in the same cuvette. Screw the lid back on the cuvette.
- Page 138 (23) Liquid Hydrazine 5 - 600 µg/l (N₂H₄) Internal Name: 23-Hydrazine-liq 65ml PL Hydrazine N°1 (PL65Hydraz1) Measurement procedure: Fill 10 ml test water into a clean 24 mm cuvette. Screw the lid back on the cuvette. Insert the cuvette into the PrimeLab. Pay attention to the arrow on the front of the cuvette. Start ZERO measurement.
- Page 139 (160) Hydrocarbons 0 - 1 NTU (Turb) Internal Name: 160-Hydrocarbons Prime L ab Measurement procedure: Fill 7.5 ml distilled water in a clean 24 mm cuvette. Fill 2.5 ml sample water in the same cuvette. Screw the lid back on the cuvette. Gently swirl the cuvette to mix the liquid well.
- Page 140 (24) Tablet Hydrogen Peroxide LR 0.00 - 3.80 mg/l (H₂O₂) Internal Name: 24-Hydr-Per-LR-tab Hydrogen Peroxide LR Photometer (TbsPHP) Measurement procedure: Fill 10 ml test water into a clean 24 mm cuvette. Screw the lid back on the cuvette. Insert the cuvette into the PrimeLab. Pay attention to the arrow on the front of the cuvette. Start ZERO measurement.
- Page 141 Do not clean glassware and equipment with household detergents, as these could greatly reduce the measurement result. To prevent any contamination, the cuvette, lid and stirrer should be stored in a 0.1 % sodium hypochlorite solution for one hour. Then rinse with distilled water, thoroughly.
- Page 142 (25) Liquid Hydrogen Peroxide HR 0 - 200 mg/l (H₂O₂) Internal Name: 25-Hydr-Per-HR-liq 65ml PL Hydrogen Peroxide HR N°1 (PL65HydHRP1) 65ml PL Hydrogen Peroxide HR N°2 (PL65HydHRP2) Measurement procedure: Fill 10 ml test water into a clean 24 mm cuvette. Screw the lid back on the cuvette.
- Page 143 (66) Liquid Hydrogen Peroxide LR 0.00 - 1.90 mg/l (H₂O₂) Internal Name: 66-Hydr-Per-LR-liq 30ml Hydrogen Peroxide LR N°1 (PL30HydLRP1) 30ml PL Hydrogen Peroxide LR N°2 (PL30HydLRP2) Measurement procedure: Fill 10 ml test water into a clean 24 mm cuvette. Screw the lid back on the cuvette. Insert the cuvette into the PrimeLab.
- Page 144 Turbidity caused by high concentration of calcium ions will affect the measurement result. To prevent that, please use DPD HC (High Calcium) reagents. Do not clean glassware and equipment with household detergents, as these could greatly reduce the measurement result. To prevent any contamination, the cuvette, lid and stirrer should be stored in a 0.1 % sodium hypochlorite solution for one hour.
- Page 145 (109) DEWAN-50 Liquid (Range 0 - 150 mg/l DW-50) 0 - 300 mg/l (DW50) Internal Name: 109-DEWAN50-liq PL-DX DEWAN-50 (KTES0302400007) Measurement procedure: Fill 10 ml test water into a clean 24 mm cuvette. Screw the lid back on the cuvette. Insert the cuvette into the PrimeLab.
- Page 146 (109) DEWAN-50 Liquid (Range 150 - 300 mg/l DW-50) 0 - 300 mg/l (DW50) Internal Name: 109-DEWAN50-liq PL-DX DEWAN-50 (KTES0302400007) Measurement procedure: Fill 10 ml test water into a clean 24 mm cuvette. Screw the lid back on the cuvette. Insert the cuvette into the PrimeLab.
- Page 147 (162) Tablet Hydrogen Peroxide HR 0 - 200 mg/l (H₂O₂) Internal Name: 162-HydrPer-HR-tab Acidifying PT Photometer (TbsHAFPP) Hydrogen Peroxide HR Photometer (TbsPHPHR) Measurement procedure: Fill 10 ml test water into a clean 24 mm cuvette. Screw the lid back on the cuvette. Insert the cuvette into the PrimeLab.
- Page 148 If your sample water is very alkaline or acidic this must be adjusted to a pH range between 6 and 7 by the addition of 0.5 mol/l sulphuric acid or resp. 1 mol/l caustic soda before the reagent is added. T93/204 T93/204...
- Page 149 (173) Liquid Sanosil Super25 Ag 0 - 400 mg/l (Sanosil) Internal Name: 173-Sanosil-liq 65ml PL Hydrogen Peroxide HR N°1 (PL65HydHRP1) 65ml PL Hydrogen Peroxide HR N°2 (PL65HydHRP2) Measurement procedure: Fill 10 ml test water into a clean 24 mm cuvette. Screw the lid back on the cuvette.
- Page 150 (26) Liquid Hydroquinone 0.00 - 2.50 mg/l (C₆H₆O₂) Internal Name: 26-Hydroquinon-liq PL Oxygen Scavenger 1 (65 ml) (PL65OxyScav1) PL Oxygen Scavenger 2 (65 ml) (PL65OxyScav2) Measurement procedure: Fill 10 ml test water into a clean 24 mm cuvette. Screw the lid back on the cuvette. Insert the cuvette into the PrimeLab.
- Page 151 (27) Tablet Iodine 0.00 - 28.00 mg/l (I₂) Internal Name: 27-Iodine-tab DPD N°1 Photometer (TbsPD1) Measurement procedure: Fill 10 ml test water into a clean 24 mm cuvette. Screw the lid back on the cuvette. Insert the cuvette into the PrimeLab. Pay attention to the arrow on the front of the cuvette. Start ZERO measurement.
- Page 152 The DPD reagent buffers the pH value of the sample water in the range of 6.2 to 6.5, which is essential for colour development. If the sample water is very alkaline or acidic, this must be adjusted to a pH within the range of 6 to 7 by addition of 0.5 mol/l sulphuric acid or 1 mol/l caustic soda, respectively, before the DPD reagent is added.
- Page 153 (67) Liquid Iodine 0.00 - 28.00 mg/l (I₂) Internal Name: 67-Iodine-liq 30ml PL DPD 1 A (PL30DPD1A) 30ml PL DPD 1 B (PL30DPD1B) Measurement procedure: Fill 10 ml test water into a clean 24 mm cuvette. Screw the lid back on the cuvette. Insert the cuvette into the PrimeLab.
- Page 154 The DPD reagent buffers the pH value of the sample water in the range of 6.2 to 6.5, which is essential for colour development. If the sample water is very alkaline or acidic, this must be adjusted to a pH within the range of 6 to 7 by addition of 0.5 mol/l sulphuric acid or 1 mol/l caustic soda, respectively, before the DPD reagent is added.
- Page 155 (28) Tablet Iron LR 0.00 - 1.00 mg/l (Fe²⁺/Fe³⁺) Internal Name: 28-Iron-LR-tab Iron LR Photometer (TbsPILR) Measurement procedure: Fill 10 ml test water into a clean 24 mm cuvette. Screw the lid back on the cuvette. Insert the cuvette into the PrimeLab. Pay attention to the arrow on the front of the cuvette. Start ZERO measurement.
- Page 156 (29) Iron MR Powder Can (dissolved) 0.0 - 10.0 mg/l (Fe²⁺/Fe³⁺) Internal Name: 29-Iron-MR-pow 20g PL Iron MR N°1 (Plpow20IronMR1) Measurement procedure: Separate the two halves of the filter holder. Insert a 25 mm (0.45 µm) filter. Screw the filter holder back together, making sure that the O- ring is correctly seated.
- Page 157 If your sample contains visible rust, extend countdown to 05:00 minutes manually by waiting 02:00 minutes before pressing TEST. T102/204 T102/204...
- Page 158 (29) Iron MR Powder Can (total) 0.0 - 10.0 mg/l (Fe²⁺/Fe³⁺) Internal Name: 29-Iron-MR-pow 20g PL Iron MR N°1 (Plpow20IronMR1) Measurement procedure: Fill 10 ml unfiltered sample water into a clean 24 mm cuvette. Screw the lid back on the cuvette. Insert the cuvette into the PrimeLab.
- Page 159 (30) Iron HR Liquid (dissolved) 0.0 - 30.0 mg/l (Fe²⁺/Fe³⁺) Internal Name: 30-Iron-HR-liq 65ml PL Iron HR N°1 (PL65IronHR1) PL Iron HR 2 (PL65IronHR2) Measurement procedure: Separate the two halves of the filter holder. Insert a 25 mm (0.45 µm) filter. Screw the filter holder back together, making sure that the O- ring is correctly seated.
- Page 160 (30) Iron HR Liquid (total) 0.0 - 30.0 mg/l (Fe²⁺/Fe³⁺) Internal Name: 30-Iron-HR-liq 65ml PL Iron HR N°1 (PL65IronHR1) PL Iron HR 2 (PL65IronHR2) Measurement procedure: Fill 10 ml unfiltered sample water into a clean 24 mm cuvette. Screw the lid back on the cuvette. Insert the cuvette into the PrimeLab.
- Page 161 High nitrite values influence the measurement. If the sample water turns red or pink after adding "PL Iron HR 1", prepare a new sample and add with 0.1 g "TN1" powder. Wait for 2 minutes and start the measurement procedure as described. T106/204 T106/204...
- Page 162 (127) Powder Can Iron MR 0.0 - 10.0 mg/l (Fe²⁺) Internal Name: 127-Iron-MR-Fe-pow 20g PL Iron MR N°2 (PLpow20IronMR2) Measurement procedure: Fill 10 ml test water into a clean 24 mm cuvette. Screw the lid back on the cuvette. Insert the cuvette into the PrimeLab. Pay attention to the arrow on the front of the cuvette. Start ZERO measurement.
- Page 163 (132) Iron LR Powder Pack (total) 0.00 - 3.00 mg/l (Fe²⁺/Fe³⁺) Internal Name: 132-Iron-tot-LR-pp FerroVer Iron (PP) (ppFerVer1) Measurement procedure: Fill 10 ml test water into a clean 24 mm cuvette. Screw the lid back on the cuvette. Insert the cuvette into the PrimeLab. Pay attention to the arrow on the front of the cuvette. Start ZERO measurement.
- Page 164 (88) Liquid Isothiazolinone 0.0 - 10.0 mg/l (C₃H₃NOS) Internal Name: 88-Isothiazol-liq 30ml PL Isothiazolinone N°1 (PL30Isoz1) 65ml PL Isothiazolinone N°2 (PL65Isoz2) 65ml PL Isothiazolinone N°3 (PL65Isoz3) 65ml PL Isothiazolinone N°4 (PL65Isoz4) 30ml PL Isothiazolinone N°5 (PL30Isoz5) Measurement procedure: Fill 10 ml test water into a clean 24 mm cuvette. Screw the lid back on the cuvette.
- Page 165 Insert the cuvette into the PrimeLab. Pay attention to the arrow on the front of the cuvette. Tap TEST to start a 02:00 minute(s) countdown. Remove the cuvette again. Unscrew the lid from the cuvette. Add 3 drop(s) of PL Isothiazolinone 5 into the cuvette. Screw the lid back on the cuvette.
- Page 166 (147) Legionella Reagent-Kit (Countdown + Test) 60 - 1000000 cfu/test (Leg) Internal Name: 147-Legionella-liq (Countdown + Test) Legipid Kit 10 (LGP-10) Measurement procedure: Perform the measuring procedure according to the Biótica instructions. Eluate filtered particles by shaking for 02:00 minute(s). Tap TEST to start a 02:00 minute(s) countdown.
- Page 167 Avoid contact with eyes. Wear protective gloves. Certain isolates cannot be detected below 106 cfu. Disposal of product according to local regulations. Products are stable and unlikely to react in a hazardous manner under normal conditions of use. Do NOT re-use semi-micro vials (LG-CB). Leave at least 12 cm space between multiple LG-MH (magnetic holders).
- Page 168 (147) Legionella Reagent-Kit (ZERO + Test) 60 - 1000000 cfu/test (Leg) Internal Name: 147-Legionella-liq (ZERO + Test) Legipid Kit 10 (LGP-10) Measurement procedure: Insert the filled 1 ml LG-CB cuvette into the PrimeLab. Put on the lightshield. Start ZERO measurement. Insert the filled 1 ml LG-CB cuvette into the PrimeLab.
- Page 169 (93) Tablet Magnesium 0 - 100 mg/l (Mg) Internal Name: 93-Magnesium-tab Magnesium Photometer (TbsPMag) Measurement procedure: Fill 9 ml distilled water in a clean 24 mm cuvette. Fill 1 ml sample water in the same cuvette. Screw the lid back on the cuvette. Insert the cuvette into the PrimeLab.
- Page 170 (31) Powder Pack Manganese 0.20 - 5.00 mg/l (Mn) Internal Name: 31-Manganese-LR-tab Manganese LR N°1 Photometer (PPHMGNSLR1) Manganese LR N°2 Photometer (PPPMGNSLR2) Measurement procedure: Fill 10 ml test water into a clean 24 mm cuvette. Screw the lid back on the cuvette. Insert the cuvette into the PrimeLab.
- Page 171 (161) Tablet Manganese VLR 0.000 - 0.030 mg/l (Mn) Internal Name: 161-Manganese-VLR Manganese VLR N°1 Photometer (TbsHMagVLR1) Manganese VLR N°2 Photometer (TbsPMagVLR2) Measurement procedure: Fill 10 ml test water into a clean 24 mm cuvette. Screw the lid back on the cuvette. Insert the cuvette into the PrimeLab.
- Page 172 (69) Liquid Methylethylketoxime 0.00 - 4.10 mg/l (C₄H₉NO) Internal Name: 69-Methylethyl-liq PL Oxygen Scavenger 1 (65 ml) (PL65OxyScav1) PL Oxygen Scavenger 2 (65 ml) (PL65OxyScav2) Measurement procedure: Fill 10 ml test water into a clean 24 mm cuvette. Screw the lid back on the cuvette. Insert the cuvette into the PrimeLab.
- Page 173 (32) Tablet Molybdate 1.0 - 100.0 mg/l (MoO₄²⁻) Internal Name: 32-Molybdat-HR-tab Molybdate N°1 HR Photometer (TbsHMDH1) Molybdate N°2 HR Photometer (TbsPMDH2) Measurement procedure: Fill 10 ml test water into a clean 24 mm cuvette. Screw the lid back on the cuvette. Insert the cuvette into the PrimeLab.
- Page 174 (33) Liquid Molybdate HR 5.0 - 200.0 mg/l (MoO₄²⁻) Internal Name: 33-Molybdat-HR-liq 65ml PL Molybdate N°1 (PL65Moly1) Measurement procedure: Fill 10 ml test water into a clean 24 mm cuvette. Screw the lid back on the cuvette. Insert the cuvette into the PrimeLab. Pay attention to the arrow on the front of the cuvette. Start ZERO measurement.
- Page 175 (96) Tablet Molybdat LR 0.0 - 15.0 mg/l (MoO₄²⁻) Internal Name: 96-Molybd-LR-tab Molybdate LR N°1 Photometer (TbsHMDL1) Molybdate LR N°2 Photometer (TbsPMDL2) Measurement procedure: Fill 10 ml test water into a clean 24 mm cuvette. Screw the lid back on the cuvette. Insert the cuvette into the PrimeLab.
- Page 176 (134) Powder Pack Molybdate HR 0.0 - 40.0 mg/l (MoO₄²⁻) Internal Name: 134-Molybd-HR-pp MolyVer 1 (PP) (ppMolyVer1) MolyVer 2 (PP) (ppMolyVer2) MolyVer 3 (PP) (ppMolyVer3) Measurement procedure: Fill 10 ml test water into a clean 24 mm cuvette. Screw the lid back on the cuvette. Insert the cuvette into the PrimeLab.
- Page 177 (90) Tablet Nickel HR 0.0 - 7.0 mg/l (Ni) Internal Name: 90-Nickel-HR-tab Nickel HR N°1 Photometer (TbsHNickHR1) Nickel HR N°2 Photometer (TbsPNickHR2) Measurement procedure: Fill 10 ml test water into a clean 24 mm cuvette. Screw the lid back on the cuvette. Insert the cuvette into the PrimeLab.
- Page 178 (100) Liquid Nickel HR 0.0 - 10.0 mg/l (Ni) Internal Name: 100-Nickel-HR-liq 65ml PL Nickel HR N°1 (PL65NickHR1) 30ml PL Nickel HR N°2 (PL30NickHR2) 30ml PL Nickel HR N°3 (PL30NickHR3) Measurement procedure: Fill 10 ml test water into a clean 24 mm cuvette. Screw the lid back on the cuvette.
- Page 179 Cobalt levels above > 0.5 mg/l will interfere with this test and can influence the reading (high reading). T124/204 T124/204...
- Page 180 (34) Powder Can + Liquid Nitrate 0.00 - 11.00 mg/l (N) Internal Name: 34-Nitrate-pow 20g PL Nitrate N°1 (PLpow20Nitra1) 65ml PL Nitrate N°2 (PL65Nitra2) Measurement procedure: Fill 10 ml test water into a clean 24 mm cuvette. Screw the lid back on the cuvette. Insert the cuvette into the PrimeLab.
- Page 181 (169) Powder Pack Nitrate HR 1 - 100 mg/l (NO₃⁻) Internal Name: 169-Nitrate-HR-pp Nitrate N°1 Photometer (PPHNitra1) Nitrate N°2 Photometer (PPPNitra2) Measurement procedure: Fill 10 ml test water into a clean 24 mm cuvette. Screw the lid back on the cuvette. Insert the cuvette into the PrimeLab.
- Page 182 A small amount of solid may remain undissolved in the shaker and should not be transferred to the cuvette. Test should be carried out at a temperature of 20 °C. Lower temperatures may decrease the reading. T127/204 T127/204...
- Page 183 (35) Powder Pack Nitrite LR 0.00 - 0.50 mg/l (N) Internal Name: 35-Nitrite-LR-tab Nitrite LR Photometer (PPPNiLR) Measurement procedure: Fill 10 ml test water into a clean 24 mm cuvette. Screw the lid back on the cuvette. Insert the cuvette into the PrimeLab. Pay attention to the arrow on the front of the cuvette. Start ZERO measurement.
- Page 184 (36) Powder Can Nitrite HR 5 - 200 mg/l (NaNO₂) Internal Name: 36-Nitrite-HR-pow PL Nitrite HR N°1 (PLpow40NitriHR1) Measurement procedure: Fill 10 ml test water into a clean 24 mm cuvette. Screw the lid back on the cuvette. Insert the cuvette into the PrimeLab. Pay attention to the arrow on the front of the cuvette. Start ZERO measurement.
- Page 185 (97) Tablet Nitrite HR 0 - 1500 mg/l (NaNO₂) Internal Name: 97-Nitrite-HR-tab Nitrite HR N°1 Photometer (TbsHNiHR1) Nitrite HR N°2 Photometer (TbsPNiHR2) Measurement procedure: Fill 9 ml distilled water in a clean 24 mm cuvette. Fill 1 ml sample water in the same cuvette. Screw the lid back on the cuvette.
- Page 186 DO NEVER SHAKE THE VIAL! For expected readings below 400 mg/l, it is strongly recommended to use ID 36 (Nitrite with powder reagents 0 - 200 mg/l; extended range 0 - 400 mg/l by 1:1 dilution). T131/204 T131/204...
- Page 187 (101) Liquid Nitrite HR 0 - 3000 mg/l (NaNO₂) Internal Name: 101-Nitrite-HR-liq 65ml PL Nitrite HR N°2 (PL65NitriteHR2) Measurement procedure: Fill 9 ml distilled water in a clean 24 mm cuvette. Fill 1 ml sample water in the same cuvette. Screw the lid back on the cuvette.
- Page 188 (151) Nitrogen-total LR Reagent-Kit (all steps) 0.5 - 25.0 mg/l (N) Internal Name: 151-NitroTotLR-pre Nitrogen LR Kit (PL151-Kit) Measurement procedure: Prepare 2 Hydroxide LR cuvettes (16 mm). Label one as a ZERO cuvette. Add 1 x Persulfate powder pillow into both cuvettes. Open the first cuvette (ZERO cuvette) and add 2 ml distilled water.
- Page 189 Screw the lid back on both cuvettes. Gently swirl both cuvettes to mix the liquids well. Caution, heat development! Place the 16 mm adapter in the PrimeLab. Place the ZERO cuvette in the PrimeLab. Put on the lightshield. Start ZERO measurement. Remove the cuvette again.
- Page 190 (151) Nitrogen-Total LR Reagent-Kit (only ZERO and TEST) 0.5 - 25.0 mg/l (N) Internal Name: 151-NitroTotLR-pre Nitrogen LR Kit (PL151-Kit) Measurement procedure: Place the 16 mm adapter in the PrimeLab. Place the ZERO cuvette in the PrimeLab. Put on the lightshield. Start ZERO measurement.
- Page 191 (152) Nitrogen-total HR Reagent-Kit (all Steps) 5 - 150 mg/l (N) Internal Name: 152-NitroTotHR-pre Nitrogen HR Kit (PL152-Kit) Measurement procedure: Prepare 2 Hydroxide HR cuvettes (16 mm). Label one as a ZERO cuvette. Add 1 x Persulfate powder pillow into both cuvettes. Open the first cuvette (ZERO cuvette).
- Page 192 Open 2 Acid LR/HR cuvette and add 2 ml sample water from the previous ZERO cuvette. This is your new ZERO cuvette. Add 2 ml from the previous test cuvette into a new cuvette. This is your new test cuvette. Screw the lid back on both cuvettes.
- Page 193 (152) Nitrogen-Total HR Reagent-Kit (only ZERO and TEST) 5 - 150 mg/l (N) Internal Name: 152-NitroTotHR-pre Nitrogen HR Kit (PL152-Kit) Measurement procedure: Place the 16 mm adapter in the PrimeLab. Place the ZERO cuvette in the PrimeLab. Put on the lightshield. Start ZERO measurement.
- Page 194 (171) Iron in Oil 20 - 450 mg/l (Fe²⁺) Internal Name: 171-IronInOil-tab Measurement procedure: Take a semi-micro vial cuvette and label it as "ZERO". Transfer approx. 1 ml of Reagent S into the cuvette. Place the ZERO cuvette into the cuvette holder of the photometer. Put on the light shield and press "ZERO".
- Page 195 (37) Ozone Tablet (in absence of chlorine) 0.00 - 5.40 mg/l (O₃) Internal Name: 37-Ozone-tab DPD N°1 Photometer (TbsPD1) DPD N°3 Photometer (TbsPD3) Measurement procedure: Fill 10 ml test water into a clean 24 mm cuvette. Screw the lid back on the cuvette. Insert the cuvette into the PrimeLab.
- Page 196 Do not clean glassware and equipment with household detergents, as these could greatly reduce the measurement result. To prevent any contamination, the cuvette, lid and stirrer should be stored in a 0.1 % sodium hypochlorite solution for one hour. Then rinse with distilled water, thoroughly.
- Page 197 (37) Ozone Tablet (in presence of chlorine) 0.00 - 5.40 mg/l (O₃) Internal Name: 37-Ozone-tab DPD N°1 Photometer (TbsPD1) DPD N°3 Photometer (TbsPD3) Glycine (TbsHGC) Measurement procedure: Fill 10 ml test water into a clean 24 mm cuvette. Screw the lid back on the cuvette. Insert the cuvette into the PrimeLab.
- Page 198 Stir with the stirring rod for about 20 seconds until the reagent is completely dissolved. Screw the lid back on the cuvette. Insert the cuvette into the PrimeLab. Pay attention to the arrow on the front of the cuvette. Tap TEST to start a 02:00 minute(s) countdown. After the lapse of a 02:00 minute(s) countdown the total result is displayed, divided in O₃...
- Page 199 (92) Ozone Liquid (in absence of chlorine) 0.00 - 2.70 mg/l (O₃) Internal Name: 92-Ozone-liq 30ml PL DPD 1 A (PL30DPD1A) 30ml PL DPD 1 B (PL30DPD1B) 30ml PL DPD 3 C (PL30DPD3C) 30ml PL DPD Glycine (PL30DPDGlycine) Measurement procedure: Fill 10 ml test water into a clean 24 mm cuvette.
- Page 200 If the sample water contains more than 30 mg/l ozone, a measured value of 0 mg/l can be displayed. In that case, a dilution is recommended. Turbidity caused by high concentration of calcium ions will affect the measurement result. To prevent that, please use DPD HC (High Calcium) reagents.
- Page 201 (92) Ozone Liquid (in presence of chlorine) 0.00 - 2.70 mg/l (O₃) Internal Name: 92-Ozone-liq 30ml PL DPD 1 A (PL30DPD1A) 30ml PL DPD 1 B (PL30DPD1B) 30ml PL DPD 3 C (PL30DPD3C) 30ml PL DPD Glycine (PL30DPDGlycine) Measurement procedure: Fill 10 ml test water into a clean 24 mm cuvette.
- Page 202 Gently swirl the cuvette to mix the liquid well. Insert the cuvette into the PrimeLab. Pay attention to the arrow on the front of the cuvette. Tap TEST to start a 02:00 minute(s) countdown. After the lapse of a 02:00 minute(s) countdown the measured value is displayed. Notes: DPD 1 A and DPD 1 B reagent MUST be added to the vial BEFORE water sample is added to avoid misreadings!
- Page 203 (164) Tablet Peracetic Acid LR 0.00 - 10.00 mg/l (PAA) Internal Name: 164-Peracetic-Acid-LR DPD N°4 Photometer (TbsPD4) Measurement procedure: Fill 10 ml test water into a clean 24 mm cuvette. Screw the lid back on the cuvette. Insert the cuvette into the PrimeLab. Pay attention to the arrow on the front of the cuvette. Start ZERO measurement.
- Page 204 (165) Powder Pack Peracetic Acid HR 0.0 - 300.0 mg/l (PAA) Internal Name: 165-Peracetic-Acid-HR Chlorine HR (KI) Photometer (PPPClHR) Acidifying GP (PPHAFG) Measurement procedure: Fill 10 ml test water into a clean 24 mm cuvette. Screw the lid back on the cuvette. Insert the cuvette into the PrimeLab.
- Page 205 (159) Liquid Permanganate Time Test 0 - 100 %T (PTT) Internal Name: 159-PTT-tab Potassium Permanganate Solution °F °C °F °C (PL10PTT) Measurement procedure: Set the refrigerator to 15 °C using the thermostat and according to the instructions. Fill 10 ml test water into a clean 24 mm cuvette. Screw the lid back on the cuvette.
- Page 206 (38) Tablet pH-value MR 6.50 - 8.40 (pH) Internal Name: 38-pH-MR-tab Phenol Red Photometer (TbsPph) Measurement procedure: Fill 10 ml test water into a clean 24 mm cuvette. Screw the lid back on the cuvette. Insert the cuvette into the PrimeLab. Pay attention to the arrow on the front of the cuvette. Start ZERO measurement.
- Page 207 (39) Liquid pH-value MR 6.50 - 8.40 (pH) Internal Name: 39-pH-MR-liq 65ml PL pH 6.5 - 8.4 (PL65PhenRed) Measurement procedure: Fill 10 ml test water into a clean 24 mm cuvette. Screw the lid back on the cuvette. Insert the cuvette into the PrimeLab. Pay attention to the arrow on the front of the cuvette. Start ZERO measurement.
- Page 208 (40) Tablet pH-value LR 5.20 - 6.80 (pH) Internal Name: 40-pH-LR-tab pH-LR Photometer (TbsPpHLR) Measurement procedure: Fill 10 ml test water into a clean 24 mm cuvette. Screw the lid back on the cuvette. Insert the cuvette into the PrimeLab. Pay attention to the arrow on the front of the cuvette. Start ZERO measurement.
- Page 209 (41) Tablet pH Universal 5.0 - 11.0 (pH Univ) Internal Name: 41-pH-univ-tab Universal pH Photometer (TbsPUPH) Measurement procedure: Fill 10 ml test water into a clean 24 mm cuvette. Screw the lid back on the cuvette. Insert the cuvette into the PrimeLab. Pay attention to the arrow on the front of the cuvette. Start ZERO measurement.
- Page 210 (42) Liquid pH Universal 4.0 - 11.0 (pH Univ) Internal Name: 42-pH-univ-liq 65ml PL pH 4-11 (PL65UnivpH) Measurement procedure: Fill 10 ml test water into a clean 24 mm cuvette. Screw the lid back on the cuvette. Insert the cuvette into the PrimeLab. Pay attention to the arrow on the front of the cuvette. Start ZERO measurement.
- Page 211 (98) Tablet Phenol 0.00 - 5.00 mg/l (C₆H₅OH) Internal Name: 98-Phenol-tab Phenol N°1 Photometer (TbsHPhen1) Phenol N°2 Photometer (TbsPPhen2) Phenol N°3 Photometer (TbsPPhen3) Measurement procedure: Fill 10 ml test water into a clean 24 mm cuvette. Screw the lid back on the cuvette. Insert the cuvette into the PrimeLab.
- Page 212 (43) Tablet PHMB 2 - 60 mg/l (PHMB) Internal Name: 43-PHMB-tab PHMB Photometer (TbsPPB) Measurement procedure: Fill 10 ml test water into a clean 24 mm cuvette. Screw the lid back on the cuvette. Insert the cuvette into the PrimeLab. Pay attention to the arrow on the front of the cuvette. Start ZERO measurement.
- Page 213 (44) Phosphate Powder Pack + Tablet (-ortho-) LR 0.00 - 4.00 mg/l (PO₄³⁻) Internal Name: 44-Phosphat-LR-tab Phosphate LR N°1 Photometer (PPHPPLR1) Phosphate LR N°2 Photometer (TbsPPPLR2) Measurement procedure: Fill 10 ml test water into a clean 24 mm cuvette. Screw the lid back on the cuvette. Insert the cuvette into the PrimeLab.
- Page 214 (45) Phosphate Liquid + Powder (-ortho-) LR 0.00 - 4.00 mg/l (PO₄³⁻) Internal Name: 45-Phosphat-LR-liq 65ml PL Phosphate LR N°1 (PL65PPLR1) PL Phosphate LR 2 (PLpow20PPLR2) Measurement procedure: Fill 10 ml test water into a clean 24 mm cuvette. Screw the lid back on the cuvette. Insert the cuvette into the PrimeLab.
- Page 215 (46) Phosphate Powder Pack + Tablet (-ortho-) HR 0.0 - 80.0 mg/l (PO₄³⁻) Internal Name: 46-Phosphat-HR-tab Phosphate HR N°1 Photometer (PPHPPHR1) Phosphate HR N°2 Photometer (TbsPPPHR2) Measurement procedure: Separate the two halves of the filter holder. Insert a 25 mm (GF/C) filter. Screw the filter holder back together, making sure that the O-ring is correctly seated.
- Page 216 Filter process is only needed in case of any suspended insoluble phosphate expected in your water sample (applicable for boiler water testing) With this procedure ortho-phosphate ions are detected. Other phosphates/phosphonates must therefore be converted into ortho-phosphates before the test is begun. The pH value of the sample water should be between 6 and 7.
- Page 217 (47) Phosphate Liquid (-ortho-) HR 0.0 - 100.0 mg/l (PO₄³⁻) Internal Name: 47-Phosphat-HR-liq 65ml PL Phosphate HR N°1 (PL65PPHR1) 65ml PL Phosphate HR N°2 (PL65PPHR2) Measurement procedure: Separate the two halves of the filter holder. Insert a 25 mm (GF/C) filter. Screw the filter holder back together, making sure that the O-ring is correctly seated.
- Page 218 The pH value of the sample water should be between 6 and 7. The following contents of substances in the sample water can - at the respective concentration - falsify the measurement results: Chromium (> 100 mg/l), copper (> 10 mg/l), iron (> 100 mg/l), nickel (>...
- Page 219 (87) Powder Can + Liquid Phsphonate 0.0 - 20.0 mg/l (PO₄³⁻) Internal Name: 87-Phosphonate-liq 20g PL Phosphonate N°1 (PLpow20PPHON1) 20g PL Phosphonate N°2 (PLpow20PPHON2) 65ml PL Phosphonate N°3 (PL65PPHON3) 20g PL Phosphonate N°4 (PLpow20PPHON4) Measurement procedure: Fill 10 ml test water into a clean 24 mm cuvette. Screw the lid back on the cuvette.
- Page 220 Press the 10 ml prepared sample liquid in the filter syringe through the filter adapter into a clean 24 mm cuvette. Add 10 drop(s) of PL Phosphonate 3 into the cuvette. Screw the lid back on the cuvette. Gently swirl the cuvette to mix the liquid well. Insert the cuvette into the PrimeLab.
- Page 221 (110) Tablet Phosphonate 0.0 - 20.0 mg/l (PO₄³⁻) Internal Name: 110-Phosphon-tab Oxidising OP Photometer (TbsHOXOP) OP-A Photometer (TbsPOPA) OP-B Photometer (TbsPOPB) OP-AX Photometer (TbsHOPAX) Measurement procedure: Fill 8 ml of distilled water into a clean 24 mm cuvette. Add exactly 2 ml sample water to the same cuvette. Screw the lid back on the cuvette.
- Page 222 Fill the 20 ml filter syringe (clean and residue-free) with the sample water from the cuvette just used. Separate the two halves of the filter holder. Insert a filter. Screw the filter holder back together, making sure that the O-ring is correctly seated.
- Page 223 (153) Powder Pack + Tablet Phosphorus-total LR 0.00 - 2.60 mg/l (P) Internal Name: 153-PsphrTotLR-tab Phosphate LR N°1 Photometer (PPHPPLR1) Phosphate LR N°2 Photometer (TbsPPPLR2) Measurement procedure: Fill 5 ml sample water in a fresh, clean Phosphorus LR cuvette. Add 2 x 0.05 ml PL Phosphorus 2 to the test water in the cuvette. Screw the lid back on the cuvette IMMEDIATELY.
- Page 224 Notes: The test result can be converted into the following unit(s): mg/l PO₄³⁻. Remove powder from vial edges, lid and tube threads after adding powder. The pH value of the sample water should be between 6 and 7. The following contents of substances in the sample water can - at the respective concentration - falsify the measurement results: Chromium (>...
- Page 225 (154) Powder Pack + Tablet Phosphorus-total HR 0.0 - 52.0 mg/l (P) Internal Name: 154-PsphrTotHR-tab Phosphate HR N°1 Photometer (PPHPPHR1) Phosphate HR N°2 Photometer (TbsPPPHR2) Measurement procedure: Fill 5 ml sample water in a fresh, clean Phosphorus HR cuvette. Add 2 x 0.05 ml PL Phosphorus 2 to the test water in the cuvette. Screw the lid back on the cuvette IMMEDIATELY.
- Page 226 Notes: The test result can be converted into the following unit(s): mg/l PO₄³⁻. Remove powder from vial edges, lid and tube threads after adding powder. The pH value of the sample water should be between 6 and 7. The following contents of substances in the sample water can - at the respective concentration - falsify the measurement results: Chromium (>...
- Page 227 (85) Liquid Polyacrylate 1.0 - 30.0 mg/l (Polyac.) Internal Name: 85-Polyacryl-liq 65ml PL Polyacrylate N°1 (PL65PLYA1) 65ml PL Polyacrylate N°2 (PL65PLYA2) Measurement procedure: Fill 10 ml test water into a clean 24 mm cuvette. Screw the lid back on the cuvette. Insert the cuvette into the PrimeLab.
- Page 228 (48) Tablet Potassium 0.7 - 12.0 mg/l (K) Internal Name: 48-Potassium-tab Potassium Photometer (TbsPPTST) Measurement procedure: Fill 10 ml test water into a clean 24 mm cuvette. Screw the lid back on the cuvette. Insert the cuvette into the PrimeLab. Pay attention to the arrow on the front of the cuvette. Start ZERO measurement.
- Page 229 (111) PTSA 0 - 1000 µg/l (PTSA) Internal Name: 111-PTSA-Ad Prime L ab Measurement procedure: Fill 10 ml distilled water in a clean 24 mm cuvette. Screw the lid back on the cuvette. Insert the cuvette into the PrimeLab. Pay attention to the arrow on the front of the cuvette. Start ZERO measurement.
- Page 230 (156) Watch Products 0 - 1000 µg/l (Watch) Internal Name: 156-Watch-Ad Prime L ab Measurement procedure: Fill 10 ml distilled water in a clean 24 mm cuvette. Screw the lid back on the cuvette. Insert the cuvette into the PrimeLab. Pay attention to the arrow on the front of the cuvette. Start ZERO measurement.
- Page 231 (157) TRACER 0 - 1000 µg/l (TraceR) Internal Name: 157-TraceR-Ad Prime L ab Measurement procedure: Fill 10 ml distilled water in a clean 24 mm cuvette. Screw the lid back on the cuvette. Insert the cuvette into the PrimeLab. Pay attention to the arrow on the front of the cuvette. Start ZERO measurement.
- Page 232 (83) Powder Pack + Tablet 25 - 150 mg/l (QAC) Internal Name: 83-QAC-tab Acidifying GP (PPHAFG) QAC HR Photometer (TbsPQAC) Measurement procedure: Fill 10 ml test water into a clean 24 mm cuvette. Screw the lid back on the cuvette. Insert the cuvette into the PrimeLab.
- Page 233 (49) Liquid + Powder Can Silica LR 0.00 - 5.00 mg/l (SiO₄⁴⁻) Internal Name: 49-Silica-LR-liq 65ml PL Silica LR N°1 (PL65SiLR1) 65ml PL Silica LR N°2 (PL65SiLR2) 40g PL Silica LR N°3 (PLpow40SiLR3) Measurement procedure: Fill 10 ml test water into a clean 24 mm cuvette. Screw the lid back on the cuvette.
- Page 234 (50) Powder Can Silica HR 0 - 100 mg/l (SiO₄⁴⁻) Internal Name: 50-Silica-HR-pow 20g PL Silica HR N°1 (PLpow20SilHR1) 60g PL Silica HR N°2 (PLpow60SilHR2) 10g PL Silica HR N°3 (PLpow10SilHR3) Measurement procedure: Fill 10 ml test water into a clean 24 mm cuvette. Screw the lid back on the cuvette.
- Page 235 Sulfide in the water sample will influence the measurement result. Larger amounts of iron falsify the measurement result. Phosphate content in the water higher than 60 mg/l will falsify the measurement result. T180/204 T180/204...
- Page 236 (51) Powder Pack Sodium Hypochlorite 0.2 - 40.0 % (NaOCl) Internal Name: 51-Sodium-Hypo-tab Chlorine HR (KI) Photometer (PPPClHR) Acidifying GP (PPHAFG) Measurement procedure: Rinse a dosing syringe several times with the sample water. Fill 5 ml into a clean measuring cup (100 ml). Fill 95 ml distilled water in the same measuring cup.
- Page 237 The precision of the test results depends upon the precision of the diluting procedure. T182/204 T182/204...
- Page 238 (68) Liquid Sodium Hypochlorite 0.2 - 40.0 % (NaOCl) Internal Name: 68-Sodium-Hypo-liq 65ml PL Chlorine HR N°1 (PL65ClHR1) 65ml PL Chlorine HR N°2 (PL65ClHR2) Measurement procedure: Rinse a dosing syringe several times with the sample water. Fill 5 ml into a clean measuring cup (100 ml). Fill 95 ml distilled water in the same measuring cup.
- Page 239 (54) Powder Pack Sulphate 5 - 100 mg/l (SO₄²⁻) Internal Name: 54-Sulphate-tab Sulphate Photometer (PPPSULP) Measurement procedure: Fill 10 ml test water into a clean 24 mm cuvette. Screw the lid back on the cuvette. Insert the cuvette into the PrimeLab. Pay attention to the arrow on the front of the cuvette. Start ZERO measurement.
- Page 240 (55) Powder Can Sulphate 5 - 100 mg/l (SO₄²⁻) Internal Name: 55-Sulphate-pow 10g PL Sulphate N°1 (PLpow10SULPHA1) Measurement procedure: Fill 10 ml test water into a clean 24 mm cuvette. Screw the lid back on the cuvette. Insert the cuvette into the PrimeLab. Pay attention to the arrow on the front of the cuvette. Start ZERO measurement.
- Page 241 (52) Tablet Sulphide 0.04 - 0.50 mg/l (S²⁻) Internal Name: 52-Sulphide-tab Sulphide N°1 Photometer (TbsHSULFD1) Sulphide N°2 Photometer (TbsPSULFD2) Measurement procedure: Fill 10 ml test water into a clean 24 mm cuvette. Screw the lid back on the cuvette. Insert the cuvette into the PrimeLab. Pay attention to the arrow on the front of the cuvette. Start ZERO measurement.
- Page 242 (140) Liquid Sulphide 0.00 - 0.70 mg/l (S²⁻) Internal Name: 140-Sulphide-Ha Sulfide 1 (HaSulfide1) Sulfide 2 (HaSulfide2) Measurement procedure: Fill 10 ml test water into a clean 24 mm cuvette. Screw the lid back on the cuvette. Insert the cuvette into the PrimeLab. Pay attention to the arrow on the front of the cuvette. Start ZERO measurement.
- Page 243 (53) Tablet Sulphite LR 0.0 - 5.0 mg/l (SO₃²⁻) Internal Name: 53-Sulphite-LR-tab Sulphite LR Photometer (TbsPSULFTLR) Measurement procedure: Fill 10 ml test water into a clean 24 mm cuvette. Screw the lid back on the cuvette. Insert the cuvette into the PrimeLab. Pay attention to the arrow on the front of the cuvette. Start ZERO measurement.
- Page 244 (105) Tablet Sulphite HR 0 - 300 mg/l (Na₂SO₃) Internal Name: 105-Sulphite-HR-tab Sulphite HR N°1 Photometer (TbsHSULFHR1) Sulphite HR N°2 Photometer (TbsPSULFHR2) Measurement procedure: Fill 10 ml test water into a clean 24 mm cuvette. Screw the lid back on the cuvette. Insert the cuvette into the PrimeLab.
- Page 245 (174) Liquid Sulphite HR 0 - 200 mg/l (SO₃²⁻) Internal Name: 174-Sulphite-HR-liq PL Oxygen Scavenger 1 (65 ml) (PL65OxyScav1) PL Oxygen Scavenger 2 (65 ml) (PL65OxyScav2) Measurement procedure: Fill 10 ml test water into a clean 24 mm cuvette. Screw the lid back on the cuvette. Insert the cuvette into the PrimeLab.
- Page 246 (81) Suspended Solids 10 - 750 mg/l (TSS) Internal Name: 81-Suspended-Sol Measurement procedure: Mix a larger amount of test water (> 0.5 litres) in a mixer at the highest level for at least 2 minute(s). Fill 10 ml distilled water in a clean 24 mm cuvette. Screw the lid back on the cuvette.
- Page 247 (91) Liquid Tannic acid 0 - 200 mg/l (Tan. Ac.) Internal Name: 91-Tannic-acid-liq 65ml PL Tannin N°1 (PL65Tannin1) 30ml PL Tannin N°2 (PL30Tannin2) Measurement procedure: Fill 9 ml distilled water in a clean 24 mm cuvette. Fill 1 ml sample water in the same cuvette. Screw the lid back on the cuvette.
- Page 248 (170) Transmission 0.0 - 100.0 % (Trnsm) Internal Name: 170-Transmission Measurement procedure: Select the desired wavelength. Fill 10 ml test water into a clean 24 mm cuvette. Screw the lid back on the cuvette. Insert the cuvette into the PrimeLab. Pay attention to the arrow on the front of the cuvette. Start ZERO measurement.
- Page 249 (59) Turbidity 20 - 1000 FAU (Turb) Internal Name: 59-Turbidity Measurement procedure: Fill 10 ml distilled water in a clean 24 mm cuvette. Screw the lid back on the cuvette. Insert the cuvette into the PrimeLab. Pay attention to the arrow on the front of the cuvette. Start ZERO measurement.
- Page 250 The turbidity test measures the optical value of the sample which results from the scattering and absorption of light particles. The amount of turbidity depends on variables such as size, shape, colour and the refractive nature of the particles.This test is calibrated using Formazin Turbidity Standards and the readings are in terms of FAU (Formazin Attenuation Units).
- Page 251 The turbidity measurement method ID 112 uses, is based on the nephelometric principle, which is described in DIN EN ISO 7027. Make sure the PrimeLab 2.0 is calibrated correctly (see: "Settings - Calibration > Turbidity (NTU)".) Make sure that you use the cuvette specifically selected for this test, which has been prepared according to chapter: "Settings - Calibration >...
- Page 252 NTU standards should be stored at 5 - 25 °C. T197/204 T197/204...
- Page 253 (120) Powder Pack + Liquid Urea 0.1 - 2.5 mg/l ((NH₂)₂CO) Internal Name: 120-Urea-tab-liq Ammonia N°1 Photometer (PPHAM1) Ammonia N°2 Photometer (PPPAM2) 30ml PL Urea N°1 (PL30Urea1) 10ml PL Urea N°1 (PL10Urea2) Measurement procedure: Fill 10 ml test water into a clean 24 mm cuvette. Screw the lid back on the cuvette.
- Page 254 Ammonia N°1 will only dissolve completely after adding Ammonia N°2. Samples with concentrations above 2 mg/l urea may lead to results in between the measurement range. If so, please dilute sample with urea-free water and re-do the test. Ammonia and chloramines will be detected together. The result displayed will show the sum of both.
- Page 255 (150) Powder Pack + Liquid Urea HR 0.2 - 5.0 mg/l ((NH₂)₂CO) Internal Name: 150-UreaHR-tab-liq Ammonia N°1 Photometer (PPHAM1) Ammonia N°2 Photometer (PPPAM2) 30ml PL Urea N°1 (PL30Urea1) 10ml PL Urea N°1 (PL10Urea2) Measurement procedure: Fill 5 ml distilled water into a clean 24 mm cuvette. Add 5 ml test water to the same cuvette.
- Page 256 Ammonia N°1 will only dissolve completely after adding Ammonia N°2. Samples with concentrations above 2 mg/l urea may lead to results in between the measurement range. If so, please dilute sample with urea-free water and re-do the test. Ammonia and chloramines will be detected together. The result displayed will show the sum of both.
- Page 257 (62) Zinc Tablet (in absence of chlorine) 0.00 - 1.00 mg/l (Zn) Internal Name: 62-CoZinc-tab Copper/Zinc LR Photometer (TbsPCZ) EDTA (TbsHED) Measurement procedure: Fill 10 ml test water into a clean 24 mm cuvette. Screw the lid back on the cuvette. Insert the cuvette into the PrimeLab.
- Page 258 (62) Zinc Tablet (in presence of chlorine) 0.00 - 1.00 mg/l (Zn) Internal Name: 62-CoZinc-tab Copper/Zinc LR Photometer (TbsPCZ) EDTA (TbsHED) Dechlor (TbsHDC) Measurement procedure: Fill 10 ml test water into a clean 24 mm cuvette. Screw the lid back on the cuvette. Insert the cuvette into the PrimeLab.
- Page 259 Tap TEST to start a 01:00 minute(s) countdown. After the lapse of a 01:00 minute(s) countdown the measured value is displayed. T204/204 T204/204...
-
Page 260: Favourites
‘Favourite‘ on your home-screen As with all icons of your PrimeLab 2.0, you can also create shortcuts for each "Favourite". To do this, tap on "Favourites" in the main menu and then on the star to link your desired measurement on the start screen. - Page 261 EMPTY due to technical reasons PrimeLab...
-
Page 262: Cloud
General One of the key-benefits of your PrimeLab 2.0 is its connectivity (Wi-Fi, USB, Bluetooth, GSM*) to enable you to share and synchronize all measurement results, connected to sampling points which were tested. By synchronizing with the LabCOM® cloud, all data will be available (password protected) to be used with the LabCOM®... - Page 263 Cloud ☁ www.labcom.cloud ® Log off from the LabCOM cloud To sign out from the LabCOM® cloud, tap on the icon on the right upper screen of the ‘Cloud‘ menu. 9:34 AM Wednesday, November 3, 2021 ...
-
Page 264: Chemistry (Indexes, Water Treatment Products, Conversions)
Water Treatment Products PrimeLab 2.0 offers you to store your individual water treatment products on the PrimeLab 2.0 database to use it for individual dosage recommendation (see: ‘Sampling Point‘ -> ‘Dosage recommendation‘). - Page 265 Chemistry Hardness Conversion Hardness can be expressed in different units, such as ppm CaCO , °dH etc. The ‘Hardness Conversion‘ menu under ‘Chemistry‘ offers you to cross-calculate such values. PrimeLab...
-
Page 266: Software (Labcom )
General One of the benefits of your PrimeLab 2.0 is the option to upload all sampling point data, test-data and individual water treatment products to the LabCOM® cloud to have it available on the LabCOM® app (Android and iOS), software (Windows and Mac) and website (www.labcom.cloud). - Page 267 EMPTY due to technical reasons PrimeLab...
- Page 268 • Update incomplete: Due to the ability to connect your PrimeLab 2.0 to the internet, you will be offered to download and install the latest update, which may contain additional parameters (requiring an activation code), bug fixes or additional features. Updates are requested through a pop-up window. If your PrimeLab 2.0 has problems during the download or installation of the update, the message 'Update...
- Page 269 elds; if data is missing, you must enter it manually. All input elds must contain data. Please make sure that the necessary data (sampling point volume and water treatment chemicals) are entered before a dosage recommendation is launched. If your PrimeLab 2.0 does not nd any products, this will be indicated accordingly.
-
Page 270: Update
Always up to date One of the benefits of being able to connect your PrimeLab 2.0 with the internet is that you can receive updates for your device. Updates can be necessary to benefit from new test methods / parameters, new features or even to get rid of some bugs that have not been noticed when your device was manufactured. -
Page 271: Assistance
Even if the PrimeLab 2.0 is designed intuitive, you might be faced with questions that cannot be answered by this user manual. As a first step, please check if there is an update available for your PrimeLab 2.0. You might be dealing with a bug which already got fixed by an update. -
Page 272: News
Keep yourself informed As your PrimeLab 2.0 can be connected to the internet, you are able to receive the latest news, such as new parameters and new functions. As soon as messages are published, you will see an envelope in the status bar. -
Page 273: Cleaning The Device
Please keep your PrimeLab 2.0 clean! Do not use detergents to clean your PrimeLab 2.0 but solely use little water and a soft cloth. Make sure the transparent part (behind the vial-adapter) is properly clean and the vials used are without fingerprints, dirt, scratches. -
Page 274: Technical Data
– – Environment: 5°C 45°C / 30 90% rel. humidity Water-proof rating: PrimeLab 2.0 is splash-water-proof (IP WiFi frequency: 2.4 GHz and 5 GHz Transmit power: max. 16 dBm. Reagents: The calibration curves are adjusted to the reagents offered by Water-i.d.® Using reagents from other manufacturers may lead to wrong readings! - Page 275 Compliance Statement CERTIFICATE OF COMPLIANCE We, Water-i.d. GmbH Germany, hereby certify that your device PrimeLab 2.0 has passed intensive visual and technical checks as part of our Quality-Management documentation. We confirm the device got factory-calibrated. Water-i.d. GmbH (Germany) Andreas Hock, Managing Director Water-i.d.
-
Page 276: Guarantee Policy
Guarantee Policy Guarantee Policy For this product, if bought new from an authorized distributor of the manufacturer, we grant a two year warranty, as required by law, starting from the date of purchase as shown on the purchase receipt. This guarantee does not cover any parts installed in the device that were not purchased from the manufacturer of the device. -
Page 277: Safety Instructions
Safety Instructions Do not lick or eat reagents Doing so may cause deathly poisoning depending on the type of reagent. Please read the warnings on the packaging/the MSDS and follow the instructions. Do not use damaged power cords or plugs, or loose electrical sockets Unsecured connections can cause electric shock or fire. - Page 278 Safety Instructions Protect the device, battery and charger from damage • Avoid exposing your device and battery to very cold or very hot temperatures. • Extreme temperatures can damage the device and reduce the charging capacity and life of your device and battery. •...
- Page 279 For your safety and the safety of others, use your common sense and remember the following tips: • Do not use your PrimeLab 2.0 while driving. You could be distracted from the road and cause a car accident.
- Page 280 Safety Instructions Avoid contact with device when it is overheating. Failure to do so may cause low temperature burns, redness and skin pigmentation • Be careful of overheating of the device when using it for extended periods and avoid prolonged skin contact. •...
- Page 281 When using the device, mind the following • For testing please place your PrimeLab 2.0 on a flat surface. Otherwise measurement results can be inaccurate or dangerous liquids could run over your skin.
- Page 282 Safety Instructions Protect your personal data and prevent leakage or misuse of sensitive information • While using your device, be sure to back up important data. Water-i.d. is not responsible for the loss of any data. • When disposing of your device, back up all data and then reset your device to factory settings (‘Settings -> ‚Device Information‘) to prevent misuse of your personal information.
- Page 283 EMPTY due to technical reasons PrimeLab...
-
Page 284: Disposal
(!) to the following address: Water-i.d. GmbH Daimlerstrasse 20 D-76344 Eggenstein-Leopoldshafen Germany PrimeLab 2.0 battery certifications and shipping conformity statements are available upon request (support@water-id.com). PrimeLab... - Page 285 Federal Republic of Germany represented by the general manger Dipl. Ec. Andreas Hock herewith declares as follows: The product “PrimeLab 2.0" complies with the requirements of the following standards for: • USB • BT 4.2 (BLE) + BT 2.1 • EDR •...
- Page 286 Certifications EU/EC regulatory conformance Body worn operation The device complies with RF specifications when used at a distance of 0 mm from your body. Ensure that the device accessories, such as a device case and device holster, are not composed of metal components.
- Page 287 RoHS Declaration RoHS Declaration of Conformity “Directive 2011/65/EU (the RoHS Directive) OF THE EUROPEAN PARLIAMENT AND OF THE COUNCIL of 8 June 2011 on the restriction of the use of certain hazardous substances in electrical and electronic equipment” superseding “Directive 2002/95/EC (the RoHS Directive) OF THE EUROPEAN PARLIAMENT AND OF THE COUNCIL of 27 January 2003.
- Page 288 FCC-Certification FCC Part 15 compliance statement IC licence-exempt RSS compliance statement This device complies with part 15 of the FCC Rules. Operation is subject to the following two conditions: (1) This device may not cause harmful interference, and (2) this device must accept any interference received, including interference that may cause undesired operation.
- Page 289 2ALRR-PRIMELAB20 22610-PRIMELAB20 Model: PrimeLab 2.0 The SAR limit adopted by USA and Canada is 1.6 watts/kilogram (W/kg) averaged over one gram of tissue. The highest SAR value reported to the Federal Communications Commission (FCC) and the Industry Canada (IC) for this device type when it is properly worn on the body is 0.704 watts/kilogram (W/Kg).
- Page 290 TELEC-Certification TELEC (MIC) / IMDA Declaration of Conformity (Japan / Singapore) We, Water-i.d. GmbH Germany, hereby declare that the product/model PrimeLab 2.0 was certified for type certification pursuant to Article 2, paragraph 1, item 19. Tests performed: • Band U-NII-2A •...
- Page 291 UK Conformity Assessed We, Water-i.d. GmbH Germany, hereby certify our responsibility, that the following product: PrimeLab 2.0 Photometer, is tested to and conforms with the essential test suites included in the following standards, which are in force within the EEA:...
- Page 292 Certifications The technical documentation as required by the conformity assessment procedure is kept at the following address for a period ending at least 10 years after the last product has been manufactured at the disposal of the relevant national authorities of any Member State for inspection: Water-i.d.
- Page 293 EMPTY due to technical reasons PrimeLab...
- Page 294 Application means the software program provided by the Company downloaded by You on any electronic device or pre-installed on your PrimeLab 2.0, named LabCOM® or Cloud. Business refers to the Company as the legal entity that collects Consumers' personal information and determines the...
- Page 295 ® Privacy Policy for LabCom Personal Data is any information that relates to an identified or identifiable individual. For the purposes for GDPR, Personal Data means any information relating to You such as a name, an identification number, location data, online identifier or to one or more factors specific to the physical, physiological, genetic, mental, economic, cultural or social identity.
- Page 296 ® Privacy Policy for LabCom When You access the Service by or through a mobile device, We may collect certain information automatically, including, but not limited to, the type of mobile device You use, Your mobile device unique ID, the IP address of Your mobile device, Your mobile operating system, the type of mobile Internet browser You use, unique device identifiers and other diagnostic data.
- Page 297 ® Privacy Policy for LabCom • With Business partners: We may share Your information with Our business partners to offer You certain products, services or promotions. • With other users: when You share personal information or otherwise interact in the public areas with other users, such information may be viewed by all users and may be publicly distributed outside.
- Page 298 ® Privacy Policy for LabCom Disclosure of Your Personal Data Business Transactions If the Company is involved in a merger, acquisition or asset sale, Your Personal Data may be transferred. We will provide notice before Your Personal Data is transferred and becomes subject to a different Privacy Policy. Law enforcement Under certain circumstances, the Company may be required to disclose Your Personal Data if required to do so by law or in response to valid requests by public authorities (e.g.
- Page 299 ® Privacy Policy for LabCom Your Rights under the GDPR The Company undertakes to respect the confidentiality of Your Personal Data and to guarantee You can exercise Your rights. You have the right under this Privacy Policy, and by law if You are within the EU, to: •...
- Page 300 ® Privacy Policy for LabCom CCPA Privacy Your Rights under the CCPA. Under this Privacy Policy, and by law if You are a resident of California, You have the following rights: • The right to notice. You must be properly notified which categories of Personal Data are being collected and the purposes for which the Personal Data is being used.
- Page 301 ® Privacy Policy for LabCom Do Not Sell My Personal Information We do not sell personal information. However, the Service Providers we partner with (for example, our advertising partners) may use technology on the Service that "sells" personal information as defined by the CCPA law.
Need help?
Do you have a question about the PrimeLab 2.0 and is the answer not in the manual?
Questions and answers