Broan BCSD Series Installation Use And Care Manual
Hide thumbs
Also See for BCSD Series:
- User manual ,
- Installation use and care manual (26 pages) ,
- Installation use and care manual (27 pages)
Table of Contents
Advertisement
Quick Links
Advertisement
Table of Contents

Related Manuals for Broan BCSD Series


Summary of Contents for Broan BCSD Series
- Page 1 RANGE HOOD INSTALLATION, USE AND CARE MANUAL...
-
Page 2: Table Of Contents
1. CONTENT 1.1 Your safety 1.2 Installation Warning .................1 1.3 During use ....................2 1.4 Electric Cord ..................2 2. VENTILATION 2.1 DUCTED MODE ..................2 2.2 RECIRCULATING MODE ..............2 3. INSTRUCTIONS ON CONTROL BOARD 3.1.1 Gesture sensor control ................. 3 3.1.2 Touch control ..................3 3.2 Button control ..................4 4. -
Page 3: Your Safety
From the Manufacturer Please read this user manual carefully before attempting to operate the appliance and store it in a safe place for future reference. This appliance and its packaging are produced by processes that minimize waste and respect the environment. Please help us to continue this effort to protect the environment by using the appliance efficiently and dispose of the packaging in a responsible manner. -
Page 4: Ventilation
2. Ventilation Ducted or Re-circulating mode Depending on your requirement, this appliance can be configured to operate in the ducted or re-circulating modes. 2.1 Ducted Mode: Fire proof ducting system of 6inch diameter vent the fumes through a suitable outlet. In the ducted mode, only the grease filters are installed. 2.2 Recirculating Mode: Fumes are filtered for grease and odour through the grease filters and the charcoal filters respectively and re-introduced into the kitchen environment. -
Page 5: Instructions On Control Board
3 Instructions on control board Use the low speed for simmering, medium speed for light cooking. Use the high speed for frying or heavy cooking. The range hood can be operated in two ways which are gesture sensor control and touch control. -
Page 6: Button Control
When the fan is working at low speed (LED screen shows”F1”), Left Motor Press C once, the fan runs at mid speed (LED screen shows “F2”). Press C again, the fan runs at high speed (LED Screen shows “F3”). When the fan is working at low speed (LED screen shows”F1”), Right Motor Press D once, the fan runs at mid speed (LED screen shows “F2”). -
Page 7: Cleaning Exterior Surfaces
4. Cleaning & Maintenance Guide SAFETY WARNING: ALWAYS SWITCH OFF AND UNPLUG FIRST! NEVER PUT YOUR HAND INTO AREA HOUSING OF THE FAN WHILE THE FAN IN OPERATING! For optimal operation, clean range hood and all baffle/spacer/filter/grease tunnel/oil container regularly. Regular care will help preserve the appearance of the range hood. -
Page 8: Replacing Filters
Make sure that the following items are included: ment filters. (Note: Also replace damaged filter that has punctured or broken mesh, bent or broken frame.) BCSD Series : 4.4 Replacing the light bulb CAUTION: LAMP UNIT MAY BY HOT! WAIT UNTIL THE UNIT IS COOL. BEFORE ATTEMPTING TO REPLACE THE LED LAMPS, MAKE SURE THE UNIT IS POWERED OFF AND UNPLUGGED. -
Page 9: Range Hood Installation
5.Range Hood Installation 5.1 Wall mounted range hood 5.1.1 Parts Diagram Main Parts 5.1.2Installation requirement 1. Do not install the range hood near open doors and windows to avoid reduced performance. (Fig. 1) 2. Install the range hood directly above the cooktop. The optimal distance between the cooktop and lower edge of the range hood is 24”... - Page 10 3.For optima performance, do not over extend the exhaust tube and avoid unnecessary bending. (Fig. 3) 4.After hanging the unit on the wall, ensure the range hood is straight and leveled. (Fig. 4) 5.The air outlet must be connected to chimney flumes or combustion gas ducts. Under no circumstances should be air outlet be connected to ventilation ducts for rooms in which fuel- burning appliances are installed...
-
Page 11: Parts Diagram
Parts diagram Main parts... - Page 12 5.1.3Installation Step 1: Find the center of the wall where you are installing the hood. Make sure there is sufficient bracing to hold the weight of the hood. Mark your center line and measure out from center to find your two mounting points.
- Page 13 Step 6: Install the 2 part chimneys on top of the hood by sliding the inside section up Until the vertical vent slots are visible. Then put both pieces on top of the hood and secure the lower portion with the provided screw at the bottom. fig. 5 Step 7: Slide the upper portion up and over the top mounting bracket aligning the holes and securing with the screws provided.
- Page 14 5.2 Stainless Steel Insert Range Hood 5.2.1 Parts Diagram Main Parts...
-
Page 15: Installation Requirement
5.2.2 Installation requirement • Vent system must terminate to the outside (roof or side wall). • Do not terminate the vent system in an attic or other enclosed area. • Do not use 4” (10.2 cm) laundry-type wall caps. • Use metal/aluminum vent only. Rigid metal/aluminum vent is recommended. -
Page 16: Installation
5.2.3 Installation There are two optional installation ways. You may choose one of the ways depending on your cabinet. WAY ONE Step 1 Pleas make sure the cut out size is correct before installing the range hood. Install the back draft base to the range hood. Step 2 Secure the undermount into cavity Using screws, all screws are installed From the bottom of the range hood into... -
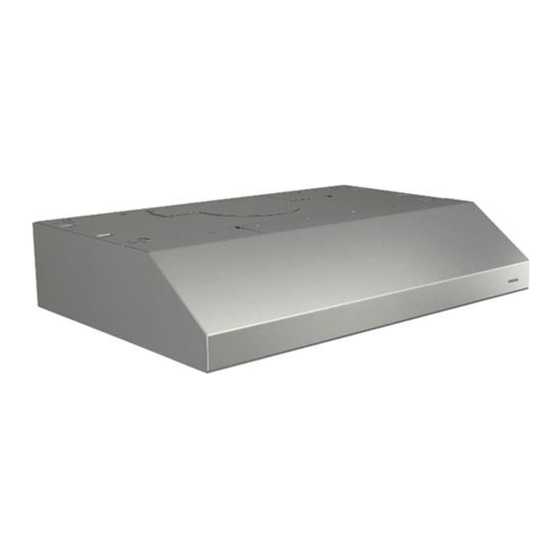
Page 17: Under Cabinet Range Hood
5.3 Under Cabinet Range Hood 5.3.1 Parts Diagram Main Parts Single motor Double motor... -
Page 18: Installation
5.3.2 Installation Way one: Step 1. Fix the two pieces of hangings by using the screws where are already screwed on the two sides of the range hood. Step 2. Drill 2 holes on the wall, use two iron expansions to fix the range hood onto the wall. -
Page 19: Troubleshooting
6.2. Troubleshooting Fault Possible Cause Solution Fan switch turned off Select a fan switch position. Light on, but motor Fan switch failed Contact service center. does not work Motor failed Contact service center. House fuses blown Reset/Replace fuses. Light does not work, Refit mains power cable to power Mains power cable is loose or motor does not work... -
Page 20: Wiring Diagram
7. Wiring diagram 7.1.1 Three speed touch control wiring diagram 7.1.2 Six speed touch control wiring diagram... -
Page 21: Button Control Wiring Diagram
7.1.3Touch control control wiring diagram 7.2 Button control wiring diagram...
Need help?
Do you have a question about the BCSD Series and is the answer not in the manual?
Questions and answers