Broan BCS3 Series Installation Instructions & Use And Care
Hide thumbs
Also See for BCS3 Series:
- Installation use and care manual (32 pages) ,
- Installation use and care manual (58 pages)
Table of Contents
Advertisement
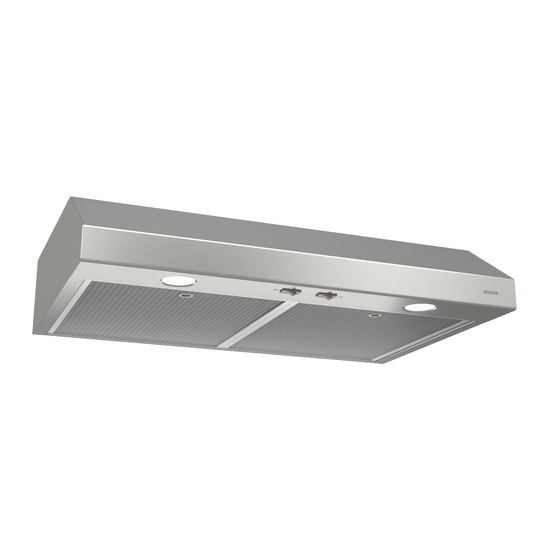
BCS3 AND NCS3 SERIES RANGE HOODS
INSTALLATION INSTRUCTIONS - USE AND CARE
!
!
INTENDED FOR DOMESTIC COOKING ONLY
READ AND SAVE THESE INSTRUCTIONS
INSTALLER: LEAVE THIS MANUAL WITH HOMEOWNER.
HOMEOWNER: USE AND CARE INFORMATION ON PAGES 10
11.
AND
Register your BCS range hood
Register your NCS range hood
online at www.broan.ca
online at www.nutone.ca
99045457B
Advertisement
Table of Contents

Related Manuals for Broan BCS3 Series


Summary of Contents for Broan BCS3 Series
- Page 1 INTENDED FOR DOMESTIC COOKING ONLY READ AND SAVE THESE INSTRUCTIONS INSTALLER: LEAVE THIS MANUAL WITH HOMEOWNER. HOMEOWNER: USE AND CARE INFORMATION ON PAGES 10 Register your BCS range hood Register your NCS range hood online at www.broan.ca online at www.nutone.ca 99045457B...
-
Page 2: To Reduce The Risk Of Fire, Electric Shock Or Injury To Persons, Observe The Following
WARNING WARNING TO REDUCE THE RISK OF FIRE, ELECTRIC TO REDUCE THE RISK OF INJURY TO SHOCK OR INJURY TO PERSONS, OBSERVE PERSONS IN THE EVENT OF A RANGE TOP THE FOLLOWING: GREASE FIRE, OBSERVE THE FOLLOWING*: 1. Use this unit only in the manner intended by the 1. -
Page 3: About This Manual
WARRANTIES OF MERCHANTABILITY OR FITNESS FOR A PARTICULAR PURPOSE. During this one year period, Broan-NuTone will, at its option, repair or replace, without charge, any product or part which is found to be defective under normal use and service. THIS WARRANTY DOES NOT EXTEND TO FLUORESCENT LAMP STARTERS, TUBES, HALOGEN AND INCANDESCENT BULBS, FUSES, FILTERS, DUCTS, ROOF CAPS, WALL CAPS AND OTHER ACCESSORIES FOR DUCTING. -
Page 4: Install Ductwork
1. INSTALL DUCTWORK ( DUCTED INSTALLATIONS ONLY OOF CAP 3¼" 10" 7" ROUND DUCT OR VERTICAL DISCHARGE OFFIT OUSE WIRING OP OR BACK OF HOOD ABINET ALL CAP 3¼" 10" DUCT 18" - 24" OR HORIZONTAL DISCHARGE ABOVE COOKING SURFACE NOTE: Distances over 24”... - Page 5 2. PREPARE THE INSTALLATION ( CONT If present, remove all protective polyfilm from the hood and/or parts. Using the finger cup, remove the Grease Filters from the hood by pushing down B and tilting filters out C. SCR EW Remove the Screw holding Damper Assembly to hood.
-
Page 6: Prepare The Hood Location
3. PREPARE THE HOOD LOCATION Use the proper diagram below and or next page for placement of ductwork and electrical cutout in cabinet or wall. For a non-ducted installation, DO NOT cut a duct access hole. 3¼” 10” HOOD MOUNTING SCREWS (5) VERTICAL DUCTING 10½"... -
Page 7: Prepare The Hood
3. PREPARE THE HOOD LOCATION ( CONT 7-IN. ROUND HOOD MOUNTING SCREWS (5) DUCTING 10½" (24" 10½" (24" HOOD HOOD 13½" (30" 13½" (30" HOOD HOOD 2¼" 10⅛" 7½" 7-IN. ROUND 7-IN. ROUND 7-IN. ROUND 11" DUCT DUCT DUCT 2" ACCESS ACCESS ACCESS... - Page 8 4. PREPARE THE HOOD ( CONT NON-DUCTED INSTALLATION ONLY: Remove 3 screws retaining the RECIRCULATION SCREWS recirculation cover plate (shaded COVER PLATE part in illustration at right) to the hood. Discard this plate with its screws. Purchase two non-ducted filters (model HPF24 for 24”...
-
Page 9: Install The Hood
5. INSTALL THE HOOD Run House Power Cable between service panel and hood location. Attach power cable to hood using appropriate clamp (not included). Hang hood from (4) mounting screws driven part-way into cabinet locations (shown in illustrations under step 3 PREPARE THE HOOD LOCATION). -
Page 10: Install Light Bulbs
INSTALL LIGHT BULBS Install two shielded Halogen Bulbs (120 V, 50 W max., MR16 or PAR16 with GU10 base, not included). WARNING Do not touch lamps during or soon after operation. Burns may occur. In order to prevent the risk of personal injury, only install shielded halogen lamps. Also, never install a cool beam, a dichroic lamp, a lamp not suitable for use in recessed luminaires or identified for use in enclosed fixtures. -
Page 11: Cleaning And Maintenance
10. CLEANING AND MAINTENANCE Motor The motor is permanently lubricated and never needs oiling. If the motor bearings make excessive or unusual noise, replace the motor with the exact service motor. The fan blade should also be replaced. Grease Filters The grease filters should be cleaned frequently. -
Page 12: Service Parts
11. SERVICE PARTS ➁ ➀ ➂ ➈ ➄ ➃ ➅ ➇ ➆ HL0242... - Page 13 11. SERVICE PARTS ( CONT...
-
Page 14: Wiring Diagram
12. WIRING DIAGRAM...
Need help?
Do you have a question about the BCS3 Series and is the answer not in the manual?
Questions and answers