Table of Contents

Related Manuals for ESAB SWARM A-20


Summary of Contents for ESAB SWARM A-20
- Page 1 SWARM A-20 WELDING HELMET USER MANUAL PLEASE READ AND UNDERSTAND ALL INSTRUCTION BEFORE USE. RETAIN THIS MANUAL FOR FUTURE REFERENCE. Complete User Manual at: Manual Number: 0-NEW Revision Date: 02-16-2022 Revision Number: AA Language: ENGLISH...
- Page 2 Denton, TX 76208 (940) 566-2000 www.esab.eu Copyright 2022 by ESAB. All rights reserved. Reproduction of this work, in whole or in part, without written permission of the publisher is prohibited. The publisher does not assume and hereby disclaims any liability to any party for any loss or damage caused by any error or omission in this Manual, whether such error results from negligence, accident, or any other cause.
-
Page 3: Fires And Explosions
Always provide adequate ventilation in the work area by natural or mechanical means. Do not weld, cut or gouge on materials such as galvanized steel, stainless steel, copper, zinc, lead beryllium or cadmium unless positive mechanical ventilation is provided. Do not breathe fumes from these materials. Do not operate near degreasing and spraying operations. -
Page 4: Specifications
California to cause cancer and birth defects or other reproductive harm. Wash hands after use. For more information, go to www.P65Warnings.ca.gov. ESAB has an assortment of welding accessories and personal protection equipment for purchase. For ordering information contact your local ESAB dealer or visit us on our website. SPECIFICATIONS Viewing Area 93×43mm... -
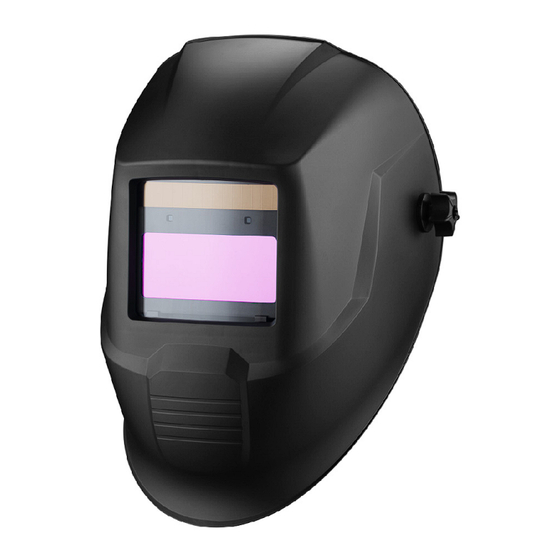
Page 5: Parts Breakdown
PARTS BREAKDOWN Parts List - ADF Part # Description Shade control Self-test Button Low Voltage Indicator Delay Control Knob Sensitivity Control Knob Lithium Battery Arc Sensor Solar Panel UV/IR Filter... - Page 6 Parts List Part # Description Front cover lens Helmet shell Shade control ADF holder Inside cover lens Headband angle Adjusting Knob Headband diameter Adjusting Knob Headband Height Adjusting Pin...
-
Page 7: Operation
Shade Control The Swarm A-20 uses a variable Shade 9 to 13, and is adjustable based upon the required welding. Please refer to the table below to determine the correct shade setting for your application. The welding helmet can also be used as a face protector when grinding. -
Page 8: Delay Control
and HIGH are suitable for most indoor and outdoor welding operations. Delay Control When welding ceases, the viewing window automatically changes from dark back to light but with a preset delay to compensate. The delay time can be set to MIN (0.1 sec), MAX (0.8 sec), or any setting in between by using the adjustable “DELAY”... - Page 9 Front Cover Lens Replacement Replace the front cover lens if it is damaged (cracked, scratched, pitted or dirty). Remove the old front cover lens by pressing the locking tab. Take the old front cover lens out and remove any protective film before installing the new one. Push the locking tab out of the ADF holder.
- Page 10 1. Lift up one edge of the inner cover lens and pull the cover lens away from the filter 2. Remove the protective film on the new inner lens cover, feed one side of the lens cover ADF installation and removal Remove the ADF bracket by first removing the front cover lens and then push the side of the ADF holder to remove the ADF from the bracket.
- Page 11 PUSH Headgear Adjustment Adjust the headgear diameter with the ratcheting twist knob on the back. Push the knob in to unlock the mechanism and twist clockwise to tighten and counterclockwise to loosen. The height of the headgear can be adjusted by using the pinlock strap (2). Simply push the pin out, slide the strap into position and push the pin into the nearest pin hole location.
-
Page 12: Maintenance
MAINTENANCE Please use tissues, lens wiping paper or clean cotton cloth and detergent to clean filter. Please use neutral detergent to clean out shell of weld cap and sweatband. Please replace outside and inside protector and sweatband regularly. Please do not use corrosive solvent or gasoline to dilute detergent. Instructions for cleaning and disinfection: Clean the welding filter with a clean lint- free tissue or cloth,Do not immerse the helmet into water. - Page 13 MARKINGS 1. Markings on the ADF 3/11 GX 1/1/1/2/379 Definition: 3=light state, 11= dark state, GX=manufacturer identification, 1=optical class, 1=diffusion of light class, 1=Variation in Luminous transmittance class, 2=angle dependence class, all according to the EN379 testing standard GX Z87 W3/11 Definition: GX=manufacturer identification, Z87 refers to the ANSI testing standard, W3/11=light state/dark states GX Z94.3 W3/11...
- Page 14 WARNING! Materials which may come into contact with the wearer’s skin could cause allergic reactions to some individuals WARNING! Safety eye wear must be worn to protect against high speed particles. Approved, impact-resistant over-the-glass safety eye wear must be worn over standard ophthalmic spectacles to protect against impacts.
Need help?
Do you have a question about the SWARM A-20 and is the answer not in the manual?
Questions and answers