Advertisement
Intended use
This pedometer records the number of steps you have taken, the distance covered, the required time and the calorie consumption. The device is not suitable for the recording of medical data.
Parts description


Device:
- LC display
- MODE button
- SET button
- Battery compartment cover
- Battery compartment
- Anti-shock ring
- Belt clip
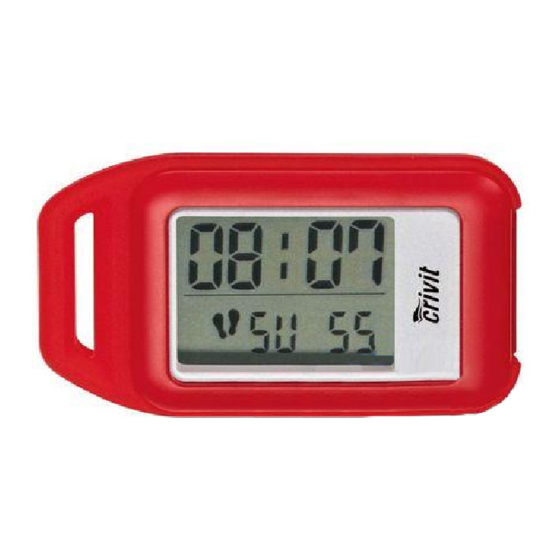
Display:
- Week display
- Calorie display
- km / m per hour
- Grams symbol (fat burn)
- Pedometer on / off
- Day display
- PM symbol (afternoon in 12hr format)
- Display for low battery warning
- Number of steps
NOTE: The LC display  of the device cannot be switched off. However, the power consumption required to operate the LCD is very low and comparable to that of a wristwatch.
Technical Data
| Measuring method: | sensor |
| Step display: | 0–99999 steps |
| Distance display: | 0–9999 km |
| Calorie display: | 0–99999 kcal |
| Adjustable user weight: | 30–219 kg (can be set to 1 kg accuracy) |
| Default: | 50 kg |
| Body height: | 100–249 cm |
| Default: | 150 cm |
| Adjustable step length: | 25–249 cm |
| Default: | 62 cm |
| Time unit: | 12 / 24 hr |
| Battery: | 1 battery CR2032 (3 V  , Lithium) , Lithium) |
| Permissable temperature range | 0–50°C |
Scope of delivery
1 Pedometer
1 Battery CR2032 (3 V , Lithium)
1 Set of operating instructions
Before Initial Use
- Remove the protective film from the LC display
![]() before you use the device for the first time.
before you use the device for the first time. - Then place a battery type CR2032 (3 V
![]() , lithium) in the battery compartment
, lithium) in the battery compartment ![]() (see Ill. B).
(see Ill. B).
 before you use the device for the first time.
 (see Ill. B).
 Note: The device will now perform a brief display check. All displays will be shown for approx.1 second. The device then switches into the set-up mode.
Your pedometer is now ready to be configured.
Setting the mode
You must enter your personal data before you use the pedometer for the first time. You can change the following values successively:
- Press the MODE button
![]() repeatedly to browse through the different modes.
repeatedly to browse through the different modes. - Press the SET button
![]() to set the desired value.
to set the desired value. - Set the distance unit (km / mile).
 repeatedly to browse through the different modes.
 to set the desired value.
 Note: Changing the distance unit (km / mile) will also change the unit for weight (kg / lb) and height (cm / inch) and step length accordingly.
- Set the time format (12 / 24 hr).
- Set the hour (HR).
- Set the minutes (MIN).
- Set the seconds (SEC).
- Set the day of the week.
- Set your weight.
Note: Ensure when entering that you take additional weight into consideration such as clothing or a backpack.
- Set your height.
- Set your step length.
- Confirm your setting by pressing the SET button.
Selecting the mode
- Press the MODE button
![]() repeatedly to browse through the different modes (TIME, STEP and 7-day storage modes).
repeatedly to browse through the different modes (TIME, STEP and 7-day storage modes).
 repeatedly to browse through the different modes (TIME, STEP and 7-day storage modes).
 The pedometer is equipped with the following modes:
Time Mode
The LC-Display  indicates the current time and the day of the week.
STEP Mode:
The number of the measured steps of the current day, as well as the trip time, are displayed.
Note: This device is equipped with 10-step-filter to enhance the step count accuracy. This requires at least 10 steps for the sensor to gather user's trip behavior for speed and distance calculation. Hence the initial display of the step count will be above 10.
- Press the SET button
![]() repeatedly to browse through Trip time / Trip distance / Calories used/ Fat burnt in STEP mode.
repeatedly to browse through Trip time / Trip distance / Calories used/ Fat burnt in STEP mode.
 repeatedly to browse through Trip time / Trip distance / Calories used/ Fat burnt in STEP mode.
Trip time
The activity time of the pedometer for the current day is displayed.
Trip distance
The distance covered on the current day (in km).
Calories used and fat burnt:
The calories used and fat burnt (in g) on the current day are displayed.
Previous Day Mode and 7-day storage:
The number of steps, exercise time, distance completed, calorie counter and fat burnt per day is saved automatically by the device. The values are re-set respectively at 0:00 o'clock.
- Press the SET button
![]() repeatedly to browse through the saved data from the last 7 days, total week record for the last 7 days and the accumulated total trip distance ODO (km).
repeatedly to browse through the saved data from the last 7 days, total week record for the last 7 days and the accumulated total trip distance ODO (km).
 repeatedly to browse through the saved data from the last 7 days, total week record for the last 7 days and the accumulated total trip distance ODO (km).
Activating background lighting
- Press the MODE button
![]() for approx. 3 seconds. The backlight illuminates for 3 seconds.
for approx. 3 seconds. The backlight illuminates for 3 seconds.
 for approx. 3 seconds. The backlight illuminates for 3 seconds.
Energy savings mode
If the pedometer is not used for approx. three minutes, it switches automatically to the energy savings mode. The LC-display  only indicates the time.
- Press any button to end the energy savings mode.
Re-set
Complete re-set
- Keep the MODE
![]() and SET button
and SET button ![]() simultaneously pressed. All stored data will be deleted. The device then switches back into the set-up mode.
simultaneously pressed. All stored data will be deleted. The device then switches back into the set-up mode.
 and SET button
  simultaneously pressed. All stored data will be deleted. The device then switches back into the set-up mode.
Setting Clock
Note: You may also change the time without losing the stored training data.
- In the time mode, keep the SET button pressed until TIME is displayed on the LC-display.
- To change the time, proceed as described in the chapter „Set mode".
Replacing batteries
Note: All stored data will be deleted when you remove the batteries.
Note: Please ensure the LC-Display is protected from scratches when replacing batteries.
- Proceed with changing the batteries as illustrated in Ill. B.
- Ensure correct polarity. This is indicated in the battery compartment.
Start-up
Using the device
Wear the pedometer as described below:
You can securely attach the pedometer to your trouser belt by means of the belt clip  (see fig. C, E), put in your trouser pocket, or hang it around your neck. Read the following instructions to obtain an accurate measurement:
- Put the pedometer in your front trouser pocket and not in your back pockets.
- Ensure that the pedometer lies securely against your body / clothing in order to obtain an accurate measurement.
- Add a cord to hang the pedometer around your neck. Use the fastening eye on the left of the pedometer.
Note: Do not hang the pedometer around your neck when you are jogging or running.
The pedometer now registers the impacts of the body and records the number of steps covered, the distance covered, the calories burnt and the time required. You can read the values in the LC display  , as described in chapter „Prior to start-up". You can also read the data from the last 7 days and the entire number of steps walked during the last 7 days.
Note: The recorded values are approximate. A varying step length and external factors such as clothing, terrain etc. can hinder exact measurement.
Troubleshooting
The device contains electronic components. Therefore, interference may occur when it is near devices, which transmit radio signals.
If error messages appear in the display, remove these devices from the proximity of the product. In the event of such malfunctions, remove the batteries briefly and reinsert them.
Cleaning and Care
- Never use liquids or abrasive cleaning agents as they could damage the device.
- Only the exterior of the device should be cleaned with a soft, dry and lint-free cloth.

Documents / ResourcesDownload manual
Here you can download full pdf version of manual, it may contain additional safety instructions, warranty information, FCC rules, etc.
Download Crivit Sports Z31351A, Z31351B, Z31351C - Pedometers Manual
Advertisement

Need help?
Do you have a question about the Z31351A and is the answer not in the manual?
Questions and answers