
Subscribe to Our Youtube Channel
Related Manuals for Idmed NeuroLight


Summary of Contents for Idmed NeuroLight
- Page 1 USER MANUAL USER MANUAL NeuroLight Version 3.2 - EN Last Update 2021/03/01 Ref: NL-IFU_EN User Manual NeuroLight...
-
Page 3: Table Of Contents
About this manual ....................4 Indications of use ....................4 Expected performance ..................4 Clinical Benefits ..................... 4 Important information about the use of NeuroLight ......4 I SAFETY MEASURES ....................5 I.1 Warnings .........................5 I.2 Caution ...........................6 I.3 Symbols definition ....................7 II GENERAL DESCRIPTION .................. -
Page 4: About This Manual
There is one part of the NeuroLight that is or may be applied to the patient: the eyecup. Expected performance The following features are the essential performance characteristics of the NeuroLight: - Measure the average diameter of a patient’s pupil to an accuracy of +/- 0.1 mm (simulated... -
Page 5: I Safety Measures
Explosion risk: do not use the NeuroLight in a flammable atmosphere or in places where flammable anaesthetic products may accumulate. The NeuroLight is not designed to operate in the environment of a SCANNER, M.R.I or any other appliance creating powerful magnetic fields. -
Page 6: Caution
The use of the NeuroLight should not result in any significant pressure of its eye cup on the patient’s face but only putting it in contact. If too much pressure is applied, light marks or red patches may appear on the skin in the contact area due to pressure points. -
Page 7: Symbols Definition
These limits provide reasonable protection against electromagnetic interferences when operated in the intended environments (e.g. hospitals) Known contraindications to use the NeuroLight: orbit structure damaged, surrounding soft tissue oedematous, abraded skin. I.3 Symbols definition Symbols are on the labels... - Page 8 Symbols on NeuroLight screen Main button Home button Settings menu Previous step Confirmation of the record- Delete measurements or file ing of the measurement Pause activated Show records Patient menu / Access to Add new patient’s file patient records Battery Charge level...
-
Page 9: General Description
Main menu Touch Screen The NeuroLight is designed in such a way that all controls are accessible with a simple touch of a symbol or icon. The touch screen is designed to work even if the operator is wearing gloves for the examination. -
Page 10: General Use
Before each use, the operator must clean this part. For more information about cleaning, refer to the “CLEANING AND DISINFECTION” chapter. This eyecup is the only part in contact with the patient. The eyecup is to be placed on the NeuroLight by simply pushing it onto the black lens. ... -
Page 11: Settings Menu
The NeuroLight has also 20 pre-set files numbered 1 to 20. If there is no barcode scanning, the user will either choose one of those files or create additional files numbered 21 and above to save the measurement results. -
Page 12: Using The Neurolight
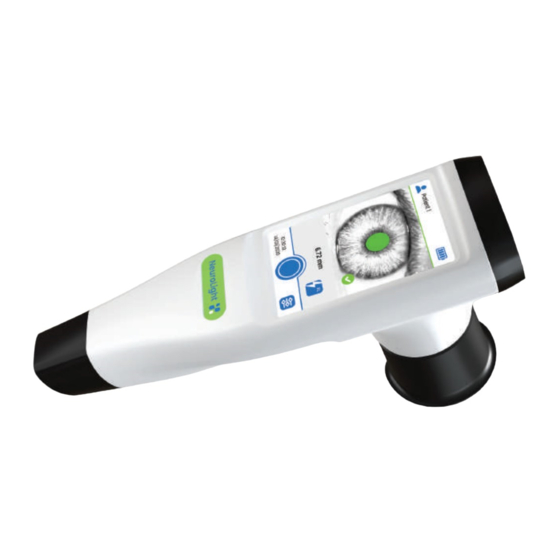
The patient’s pupil should be centered on the screen and totally in green color. Only the pupil will be colored in the image displayed by the NeuroLight. If this is not the case, reposition or position differently the NeuroLight. -
Page 13: Hold Function
Hold function It is possible to freeze the analysed image of the pupil by putting the NeuroLight on pause. To pause press on the video image. It freezes the pupil size and the image. Press again on to deactivate the pause mode. - Page 14 Amplitude of the photomotor reflex RPM >=30% 20%<=RPM<30% 12%<=RPM<20% 5%<=RPM<12% RPM<5% (RPM) (in %) Reactivity Reactivity Reactivity Reactivity Reactivity Commentary and VERY GOOD WEAK VERY WEAK NULL colour GOOD (green) (orange) (red) (red) (green) User Manual NeuroLight...
-
Page 15: Review Saved Files / Trend Charts
28.0 % (-1.08 mm) (-0.85 mm) (mm) 3.60 2.05 Flash Anisocoria 0.7mm This screen shows the pupil reaction curve to the light stimulus and a table comparing baseline sizes, photomotor reflex amplitude for the left and right eye. User Manual NeuroLight... -
Page 16: Selecting A Patient Registration File
• Check the absolute values measured • Check the light stimulation • Battery replacement The lifetime of the NeuroLight, under the required conditions of use and maintenance, is 5 years (2 years for accessories). Caution: Only technicians trained by IDMED are authorised to carry out repairs or maintenance... -
Page 17: Battery And Battery Charging
NeuroLight must be recharged immediately (Battery red) The battery has a 6-month warranty. Note : Only qualified technicians trained by IDMED or IDMED personnel are authorised to carry out repairs or maintenance operations on the battery. Battery recharging and maintenance The battery can be recharged using IDMED wireless charger (ref: STA-W2). -
Page 18: Cleaning And Disinfection
The eyecup, the only part in contact with the patient, will be removed from the NeuroLight and cleaned in the same way as the NeuroLight and then put back in place on the clean NeuroLight. It can also be cleaned by autoclaving (maximum temperature 135°C). The eyecup can withstand 50 autoclave washing cycles. -
Page 19: Troubleshooting
(see « Cleaning / Disinfection») Note : All other malfunctions must be handled by the manufacturer (IDMED) or by qualified biomedical technicians trained by IDMED and authorised to carry out repairs or maintenance operations on the NeuroLight. VI APPENDIX 2... -
Page 20: Technical Specifications
Explosion risk: do not use the NeuroLight in a flammable atmosphere or in places where flammable anaesthetic products could concentrate. The NeuroLight is not designed to operate in the environment of a SCANNER, M.RI or any other appliance creating powerful magnetic fields. - Page 21 In bursts frequency frequency that case, the NeuroLight will maintain the safety of the patient and the user. Mains power quality should be that of Surges ± 0,5 kV, ± 1 kV ± 0,5 kV, ± 1 kV...
- Page 22 Power Supply • 3,7V DC Lithium-Ion battery 2900 mAh or above (with in-built thermal and short-circuit protection), autonomy approx. one week in normal use (20 measurements per day). • IDMED STA-W2 charging base: - Qi standards compliant 5W min ...
-
Page 23: Appendix 3: Accessories
VII APPENDIX 3: ACCESSORIES The NeuroLight (reference : NL-MU) can be delivered with a number of accessories. Here is the list of the main accessories with their names and IDMED references. Medical accessories of the NeuroLight Reference Description STA-W2 Wireless charging station for NeuroLight... - Page 24 User Manual NeuroLight...
Need help?
Do you have a question about the NeuroLight and is the answer not in the manual?
Questions and answers