Plum MacR6 N User Manual
Gsm telemetry water volume and pressure logger
Hide thumbs
Also See for MacR6 N:
- Installation manual (4 pages) ,
- Installation manual (2 pages) ,
- Installation manual (2 pages)

Related Manuals for Plum MacR6 N


Summary of Contents for Plum MacR6 N
- Page 1 MacR6 N GSM telemetry water volume and pressure logger USER MANUAL DOCUMENT REVISION: 3.1 RELATED TO FIRMWARE: PROGRAM VERSION: V1307 PROGRAM SERIES: S018.XX HARDWARE VERSION: H1.7.x...
-
Page 2: Troubleshooting (H)
MAIN MENU SAFETY (A) MACR6 N CONFIGURATION (D) TRANSMISSION (G) TECHNICAL DATA (B) OPERATION (E) TROUBLESHOOTING (H) INSTALLATION (C) REMOTE ACCESS (F) ACCESSORIES (I) MacR6 N – user manual – v3.1... - Page 3 MacR6 N – user manual – v3.1...
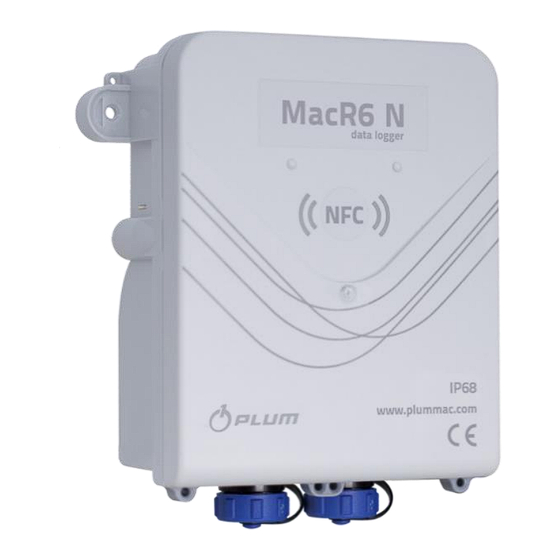
- Page 5 Please pay particular attention if this documentation can be applied to the current device version, including firmware version and series. Depending on the design of the device, the housing provides dustproofness and protection against the effects of continuous immersion (protection class IP68). MacR6 N – user manual – v3.1...
- Page 7 GSM 2G network. The device is designed to work completely submerged and is IP68 certified. Installation of the MacR6 N on the water meter is short and simple, and it does not require specialized tools. The data logger can simultaneously record the flow from two water meters and the pressure from one pressure sensor.
- Page 8 It has a geolocation position register for synchronizing the installation location with the associated telemetry system · It has a local communication interface in the NFC standard enabling local configuration of the device and local reading of recorded data and alarms in CSV format. MacR6 N – user manual – v3.1...
- Page 9 Switching point „ON”: R < 100 kΩ, U < 0,27 V; „OFF”: R > 270 kΩ, U > 0,7 V Maximum pulse inputs frequency: 40 Hz Pulse length duration: >12,5 ms; pause between pulses: >12,5 ms Sockets compatible with male type plug SP1310/P6IN WEIPU MacR6 N – user manual – v3.1...
- Page 10 • 2G: 900 and 1800 MHz Modem operates at full range of device operation temperature. MacR6 N consumes about 0.5 kB of mobile data transfer, assuming: period registration 60 minutes, data sent every 24 hours, registration of V1 meter Data Usage only.
- Page 11 Maximum Mac-PW permited boundary error is ±0,5% of the measurement sensor range. Approx. 500 g (depends on version) Weight 117 x 110 x 45 mm (without WEIPU connectors 109 x 110 x 45 mm) Dimensions MacR6 N – user manual – v3.1...
- Page 13 Make sure, that in the installation area a signal of GSM network operator, SIM card of which is placed in the device, is available. 1. Take off the housing cover. 2. Take off SIM card socket cover and take out card SIM holder. MacR6 N – user manual – v3.1...
- Page 14 SIM card socket, its circuit board and cover. Place the cover on the socket. Each piece of data logger has a sealing sillicone SIM card installation must be done in the area with gel included. low air humidity. MacR6 N – user manual – v3.1...
- Page 15 After SIM card installation is finished select how the logger will be connected to water meter. If you connect it via internal inductive sensors read C2 DIRECT INSTALLATION (ADAPTERS) sub-section. If you connect via external pulse transmitter read C3 INSTALLATION USING EXTERNAL… sub-section. MacR6 N – user manual – v3.1...
- Page 16 Proper installation of the antenna is key for proper device operation. The cable cannot be coiled up, twisted. It should be as straight as possible with no loops MacR6 N – user manual – v3.1...
- Page 17 Direct installation on counter of water meter is possible by using PLUM dedicated adapters. Volume counting is performed by proximity of inductive coils with water meter rotating wheel. Each adapter is signed by the first two letters of manufacturer’s name which the adapter is designed for.
- Page 18 The adapters have diffeent shapes and mounting techniques DI - DIEHL IT - ITRON MA – MADDALENA (JANZ) AP - APATOR MacR6 N – user manual – v3.1...
- Page 19 • 1x ANTI-LOSS M4,0x0,8 spacer. 1. Place the screw in the adapter and block it with a spacer according to figure below – it will prevent the screw from losing or falling out. MacR6 N – user manual – v3.1...
- Page 20 2. Install the adapter on water meter counter adjusting it to fit the marked sliders. Slide the adapter right to place the adapter rigidly as in the figures. Tighten the screw to the fitting hole. Triangular window in the adapter must be tangent to the rotating indicator of the totalizer. MacR6 N – user manual – v3.1...
- Page 21 3. Make sure, that the adapter is installed in parallel to the surface of the counter. C-10 MacR6 N – user manual – v3.1...
- Page 22 Adapter kit includes: • DIEHL adapter, • 1x M3,0x12,0 screw, • 1x rectangular M3 nut – installed in the adapter. C-11 MacR6 N – user manual – v3.1...
- Page 23 2. Tighten the screw until both edges of the rings will join reducing the space between them. Make sure, that the adapter in installed correctly – parallel to the surface of counter. C-12 MacR6 N – user manual – v3.1...
- Page 24 Adapter kit includes: • JANZ/MADDALENA adapter, • 1x B3,0x8,0 screw, • 1x ANTI-LOSS M3 spacer. C-13 MacR6 N – user manual – v3.1...
- Page 25 1. Place the screw in the adapter – screw it in preliminarily using spacer according as in the figure. 2. Remove the cover from the totalizer, if there is any. Attach the adapter to a free hinge and tighten the screw. C-14 MacR6 N – user manual – v3.1...
- Page 26 Adapter for the Apator Smart D+ water meter series is translucent. 1. Firmly snap on the adapter on the water meter. It should click in place 2. Make sure that the adapter is secured properly and its surface is directly C-15 MacR6 N – user manual – v3.1...
- Page 27 After proper mounting of the selected adapter install the logger using 2 plastic rivets. On example of ITRON water meter: Upewnij się, że nity i rejestrator są zamontowane poprawnie! Jest warunek prawidłowego działania MacR6 N. C-16 MacR6 N – user manual – v3.1...
- Page 28 MacR6 N in its full hardware version allows connection of two pulse transmitters. To do so, set contact inputs into counting inputs mode. See available MacR6N inputs configurations in MACR6 N INPUTS CONFIGURATIONS section to get more information. 1. DI1 A, DI1 –...
- Page 29 5. AI1 A, AI1 – analog inputs: measurement of 0 – 5V DC pressure sensor voltage. 6. Vp – 5V DC pressure sensor supply. PLUM provides the following accessories to connect pulse transmitters: • 6-pin IP68 plug, • heat-shrinkable tubing, •...
- Page 30 See configuration examples of logger inputs under the following link. Z komentarzem [DŁ5]: Link potrafi “znikać” przy próbie użycia. C-19 MacR6 N – user manual – v3.1...
- Page 31 Attaching adapter to the logger is done, as a standard, using mounting rivets. Z komentarzem [MSi6]: To zdanie będzie niepotrzebne jak pojawi się rozdział o montażu rejestratora na adapterze C-20 MacR6 N – user manual – v3.1...
-
Page 32: Pressure Sensor
MacR6 N can work with external pressure sensors. Pressure sensors provided by PLUM are available in the following ranges: 1. 0 – 10 bar, PRESSURE SENSOR 2. 0 – 26 bar. activate pressure sensor support selected socket sub-section D4.1.3 INPUTS CONFIGURATION. - Page 33 Wiring type 3-wires Cable length 3 meters Supply voltage 5 V DC Output signal 0,5 ÷ 4,5V DC Operational temperature +125°C ÷ Impact (11 ms) 100g Dimensions 109,2 x 109,3 x 44,7 mm C-22 MacR6 N – user manual – v3.1...
- Page 34 Mac-PW pressure sensors provided by PLUM have plugs installed and are ready for direct installation. It is highly recommended to install the pressure sensor behind the shut-off valve. C-23 MacR6 N – user manual – v3.1...
-
Page 36: Mobile Application
For software configuration of logger the following are necessary: smartphone with Android system with NFC standard and ConfIT! Data loggers application. Application is available free of charge under following address: https://play.google.com/store/apps/details?id=com.plum.pl.confit&hl=pl Full application description can be found in sub-section: MOBILE APPLICATION CONFIT!..MacR6 N – user manual – v3.1... - Page 37 2. Select NFC option. 3. Place phone near the MacR6 N. Data readout will start. 4. If the time on the device does not match the time set on the phone, you will be automatically prompted to set the correct date and time on the device MacR6 N –...
- Page 38 5. Go options -> Inputs configuration. 6. Configure inputs depending on your application MacR6 N – user manual – v3.1...
- Page 39 7. Counter V1 and V1 Impulse Factor according to you water meter. Scan or enter water meter serial number MacR6 N – user manual – v3.1...
- Page 40 8. Select Options-> Connection settings 9. Enter Sim Card PIN Code Configure Correct APN Select Radio Access Technology (2G/CAT.M1/NB- IoT -> depends on your device model) MacR6 N – user manual – v3.1...
- Page 41 Press Save to device and place phone near the logger. The device entered into water meter detection mode. Select Read Device to make sure data transferred correctly device will start detection of the water meter MacR6 N – user manual – v3.1...
- Page 42 1. Read the device after a few water meter pulses. Compare logger counter with water meter totalizer. 2. Check if the logger reported to the readout system (e.g. eWebTEL). MACR6 N INSTALLATION COMPLETED SUCCESSFULLY MacR6 N – user manual – v3.1...
- Page 43 1. Launch ConfIT! data loggers application. 2. Select NFC option. 3. Place phone near the MacR6 N. Data readout will start. MacR6 N – user manual – v3.1...
- Page 44 4. Select More button Inputs configuration tab. 5. Disable Direct installation configure selected socket. D-10 MacR6 N – user manual – v3.1...
- Page 45 6. Select More button Mobile communication tab. 7. Enter card PIN code. D-11 MacR6 N – user manual – v3.1...
- Page 46 8. Return Basic parameters tab. 9. Set V Counter and Pulse factor according to the socket configuration (unused counter will be highlighted with yellow). D-12 MacR6 N – user manual – v3.1...
- Page 47 10. Press Save to device, to program parameters. 11. Place phone near logger. D-13 MacR6 N – user manual – v3.1...
- Page 48 1. Read the device after a few water meter pulses. Compare logger counter with water meter totalizer. 2. Check if the logger reported to the readout system (e.g. eWebTEL). MACR6 N INSTALLATION COMPLETED SUCCESSFULLY D-14 MacR6 N – user manual – v3.1...
-
Page 49: Direct Installation
MacR6 N enables precise configuration of input clamps operation. Detailed description of A and B sockets can be found here. DIRECT INSTALLATION LEFT SOCKET (A) RIGHT SOCKET (B) – inductive sensors V2 / P2 / DI2 V1 / P1 / DI1... - Page 50 • water meter 1 connected to socket A via external • water meter 2. connected to socket B via external pulse transmitter pulse transmitter • water meter 2 connected to socket B via external pulse transmitter D-16 MacR6 N – user manual – v3.1...
- Page 51 • direct installation disabled, • direct installation on water meter • pressure registration via A socket • pressure registration via A socket • pressure registration via B socket • pressure registration via B socket D-17 MacR6 N – user manual – v3.1...
- Page 52 • pressure registration on socket A, • water meter connected to socket A via external • water meter connected to socket B via external pulse transmitter, pulse transmitter. • pressure registration on socket B. D-18 MacR6 N – user manual – v3.1...
- Page 53 Flooding water meter well and opening well’s lid Counting volume with detection of flow direction Pressure registration Flow registration in both directions Z komentarzem [AK7]: Tragiczna jakość obrazków D-19 MacR6 N – user manual – v3.1...
- Page 54 Flow registration with continuity check Flow registration without continuity check Z komentarzem [AK8]: Tak samo jakośc obrazków tragiczna D-20 MacR6 N – user manual – v3.1...
- Page 55 ABB AquaMaster3 DI1 – pulse input DI1 – pulse input DI2 – detection of pulse direction (short circuit to DI2 – continuity check GND: backward flow) GND - grounding GND - grounding D-21 MacR6 N – user manual – v3.1...
- Page 56 ITRON Cyble Sensor DI1 – pulse input DI1 – pulse input DI2 – flow direction GND - grounding GND - grounding D-22 MacR6 N – user manual – v3.1...
- Page 57 DI1 – pulse input DI1 – pulse input DI2 – flow direction signalization DI2 – wire continuity check GND – ground GND – ground D-23 MacR6 N – user manual – v3.1...
- Page 58 Example of S1 and S1+S3 inputs activation. Position in ZD table Byte in NBC Decimal number 0100 0000 0000 10000000000(NBC) = 1024(dec) 10 + 12 0001 0100 0000 0000 1010000000000(NBC) = 5120(dec) D-24 MacR6 N – user manual – v3.1...
-
Page 59: Application Functions
To configure and program MacR6N data logger a free of charge application is available in Google Play Store: APPLICATION FUNCTIONS Inputs operation mode configuration Setting counters, pulse weight Setting device location Data transmission schedules Basic network settings Data transmission on demand D-25 MacR6 N – user manual – v3.1... - Page 60 APPLICATION MINIMUM REQUIREMENTS Android 4.1 or newer NFC standard D-26 MacR6 N – user manual – v3.1...
- Page 61 Below, in form of a flow chart, the full application structure has been shown – all available program options. All changes in the application have to be saved by pressing Save to device button: D-27 MacR6 N – user manual – v3.1...
-
Page 62: Exiting Standby Mode
The brand new MacR6 N data logger is protected against undesired battery consumption. Standby mode means inactivity of all functions and serves only to store the device. Only direct communication with the device via NFC is active. The application indicates via main screen prompt, that the recognized device is in standby mode: EXITING STANDBY MODE 1. - Page 63 After exiting standby mode, if MacR6 N operates in direct installation mode, water meter detection process will start. Detection will start after counting two pulses. Logger during counting first pulses will activate the process of After setting counter the logger enters into water learning water meter characteristics.
- Page 64 (CSQ), or (2)numerically under Device information tab (CSQ: from 0 to 31). Each refresh of the indications requires device readout: • Force remote firmware update Request send to FTP server to download D-30 MacR6 N – user manual – v3.1...
- Page 65 GSM error Modem could not log into GSM network – possible SIM card problem or housing opening detection sensor is open Data sending error Logger connected to the server but did not send data Inactive Modem is inactive – the device is in standby mode D-31 MacR6 N – user manual – v3.1...
- Page 66 Thanks to application and also eWebTEL, there is a possibility to set an access password to the logger. Device password change requires re-logging in the application. device password parameter is available in Basic parameters tab. D-32 MacR6 N – user manual – v3.1...
- Page 67 A 2. Socket A function • Water meter: Counter Direct installation is deactivated • Contacts • Pressure 3. Socket B function • Water meter: Counter V2 • Contacts • Pressure D-33 MacR6 N – user manual – v3.1...
- Page 68 4. More parameters Flow meter With tamper switch • Water meter Counting forwards With direction D-34 MacR6 N – user manual – v3.1...
- Page 69 D-35 MacR6 N – user manual – v3.1...
- Page 70 1- NC/2- NO: DI1 active – normally closed; DI2 active – normally open 1- NO/2- NC: DI1 active, normally open; DI2 active – normally closed 1,2- NO: DI1, DI2 active – normally open D-36 MacR6 N – user manual – v3.1...
- Page 71 Mac-PW pressure sensors available at PLUM: • Pressure • 0 – 10 bar, • 0 – 26 bar. D-37 MacR6 N – user manual – v3.1...
- Page 72 To gain access to additional Advanced parameters enter Settings panel and press a switch – Show additional parameters – then enter Options panel, by sliding a tab from left side of the screen. D-38 MacR6 N – user manual – v3.1...
- Page 73 • status: read only data. DP table parameters can be edited only by advanced users. Improper modification may cause undesirable and unstable logger operation and eventually make it unable to operate. D-39 MacR6 N – user manual – v3.1...
- Page 74 D-40 MacR6 N – user manual – v3.1...
- Page 75 Socket A: N – off; V1 – counter V1 for external pulse transmitter; P1 – pressure sensor. c. Socket B: N – off; V2 – Counter V2 for external pulse transmitter; P2 – pressure sensor. 2G, 3G – GSM modem type. D-41 MacR6 N – user manual – v3.1...
- Page 76 9. Service parameter describing inductive sensors. 10. GSM network range (from last modem session). Value from 0 to 31. 11. GSM network, where SIM card is logged in. 12. Level of battery charge expressed in percentages. D-42 MacR6 N – user manual – v3.1...
- Page 78 Properly installed MacR6 N does not require any further assistance. Periodically it is required to do the maintenance and replace the battery. Logger operation period mainly depends on the frequency of data sending. PLUM declares continuous operation for 7 years under the following conditions: sufficiently high level of GSM network range and data sending once per day.
- Page 79 A and B support. If you are using two sockets to measure pressure disable inductive sensors used for direct operation. It will extend operating time on battery. Inputs configuration change: D4.1.3 INPUTS CONFIGURATION. MacR6 N – user manual – v3.1...
- Page 81 To readout measurement data from MacR6 N loggers PLUM company has made a special internet platform eWebTEL 2.0. It has been created as fully functional supervision and maintenance system over devices from the level of PC and mobile devices. eWebTEL works as a billing system monitoring operation of water supply networks, as a supervising system over devices installed at specific locations.
- Page 83 Transmission protocol implemented into MacR6 N data logger is GAZMODEM3. The protocol is characterized by sending such data as: measured data, data registered with programmed registration period, alarms and events, current date and time. Data sending is done in tables system: AP table – Available Parameters – include full list of data saved in memory, including: service counters, GSM network parameters, configuration data.
- Page 84 Each request received from server extends modem operation time in this mode by another minute. If during 1 minute MacR6 N will not receive requests from server, modem switches off until next report that is in accordance with data sending schedule.
- Page 86 This paragraph presents the most common problems of MacR6 N along with possible cause and solutions. MALFUNCTION REASON SOLUTION Device does not count pulses when Input is turned off Direct installation Turn on Direct installation in Inputs directly installed on water meter configuration tab.
- Page 87 Switch wires between DI1 and GND. The device does not measure the Pressure measurement inputs Make sure, that P input is present in Device pressure configuration is disabled information tab: MacR6 N – user manual – v1.0...
- Page 88 It is required to have phone with NFC for communication. NFC is disabled Turn on the NFC in smartphone. Device is frozen Reset the device. Remove SIM holder and connect marked pins 2 and 8 together for a time of 1s. MacR6 N – user manual – v1.0...
- Page 89 Antenna is damaged or causes are not Especially refers to the situation when the visible. GSM signal was high and suddenly dropped. Check the antenna and replace if needed. Check another device at the same location. MacR6 N – user manual – v1.0...
- Page 90 • Check logger alarms in ewebtel.com naturally without strong bends, and is system. If alarm REPORT ERROR is undamaged. send with each report from the MacR6 N – user manual – v1.0...
- Page 91 In case of integrated antenna replace the antenna. Compare operation with another logger at the same location. Device in standby mode Start device configuration or manually switch off STANDBY MODE MacR6 N – user manual – v1.0...
- Page 93 • Mac-PW 0÷10 bar • Mac-PW 0÷26 bar...
- Page 94 DI – DIEHL IT – ITRON MA – MADDALENA (JANZ) AP – APATOR...
Need help?
Do you have a question about the MacR6 N and is the answer not in the manual?
Questions and answers