Table of Contents
Advertisement
Quick Links
XPJ-1682D
Operation Manual
Operations and Maintenance Methods
• Unauthorized copying or duplication of the whole or part of the contents of this manual is prohibited.
• Every care has been taken in writing the contents of this manual, but please contact MUTOH or the dealer you purchased the
product from if you find any unclear, erroneous or otherwise unsatisfactory content in the manual.
• Please be aware that MUTOH will not be liable in any way for failures or accidents that result from handling or operating the
printer according to any procedures other than those set forth in this manual.
• Company names and product names that appear in this manual are registered trademarks of the respective companies.
Advertisement
Table of Contents
Troubleshooting

Related Manuals for Muton XPJ-1682D


Summary of Contents for Muton XPJ-1682D
- Page 1 XPJ-1682D Operation Manual Operations and Maintenance Methods • Unauthorized copying or duplication of the whole or part of the contents of this manual is prohibited. • Every care has been taken in writing the contents of this manual, but please contact MUTOH or the dealer you purchased the product from if you find any unclear, erroneous or otherwise unsatisfactory content in the manual.
- Page 2 For Users in Europe The CE marking is a mandatory European marking for certain product groups to indicate conformity with the essential health and safety requirements set out in European Directives. By affixing the CE marking, the manufacturer, his authorized representative, or the person placing the product on the market or putting it into service ensures that the item meets all the essential requirements of all applicable EU directives and that the applicable conformity assessment procedures have been applied.
-
Page 3: Table Of Contents
Contents Chapter 1 Basic Operations Introduction ..............9 Main components of your printer . - Page 4 Menu 1: Setup ............. . 59 Setup 1: User Type .
- Page 5 Sleep Mode 1: Cleaning Setting ................101 Sleep Mode 2: Start .
- Page 6 Replacing absorption material for the flushing box ............136 Replacing Cutter .
- Page 7 Chapter 1 Basic Operations Introduction ........... . . 9 Main components of your printer .
-
Page 9: Introduction
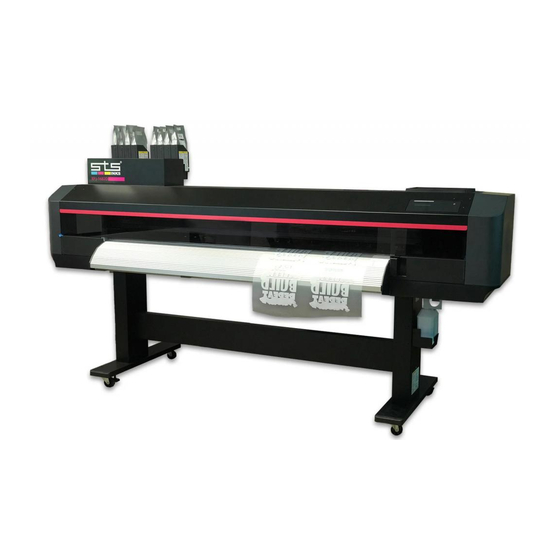
Introduction Introduction Main components of your printer Front side Internal LED lights Front cover The lights allows you to Open this cover when loading a roll Media feed lever inspect inside of the printer media or removing a media jam. Push the lever to lower the or your print during It is normally closed. - Page 10 Rear side Media feed lever Media guide Ink slots Hold down or release the Pass a roll media through Insert a high-capacity ink media. This lever is interlocked the media guide. pack adapter into the slot. with the media feed lever on the front side.
- Page 11 Front panel Status Bar Indicates the printer status by LED light. • Working normally: Solid green • Error/Alert state: Solid red (error) or flash red (alert) Display Displays the printer status, setting menu, errors and so on. [Home] key: Access to or exit the menu. [Cancel] key: •...
-
Page 12: Connecting To A Computer
Connecting to a Computer Important! Make sure your computer meets the following requirements. • OS: Windows 11, Windows 10, Windows 8.1 • CPU: Intel (R) Core (TM) i5 / i7 • Memory: 8GB minimum • Network: Use a network port that supports Gigabit Ethernet, and an Ethernet cable that supports Category 6 Gigabit Ethernet or later. Connect the Gigabit Ethernet cable to the printer. - Page 13 Use the cable tie to secure the Ethernet cable to the printer. Connect the Gigabit Ethernet cable to the computer. Use the front panel on the printer to assign the IP address, subnet mask and gateway. "Setup 23: IP Address" P. 88 "Setup 24: Subnet Mask"...
-
Page 14: System Configurations Of This Product
System configurations of this product MUTOH Status Monitor (MSM) Offers wide range of service including - monitor printer status, ink level and media remaining in real time. - control your printer through remote panel. - perform printer maintenance - access to MUTOH Print Server (MPS) By signing up for MUTOH Club, you can get the latest service. -
Page 15: Launching/Displaying/Exiting Mutoh Status Monitor (Msm)
Launching/Displaying/Exiting MUTOH Status Monitor (MSM) Launching MSM Windows 11 / Windows 10 Double click the MSM icon on the Desktop. Windows 8.1 • In the [Start] screen, click [Desktop]. • Double click the MSM icon on the Desktop. Note Launching from the Start Menu of Windows •... - Page 16 Displaying remote panel The remote panel allows you to view the printer status or remotely operate your printer. Click [Remote Panel]. • The remote panel opens. Exiting MSM Right click the MSM icon in the task tray, and click [Exit]. Note While using your printer, do not exit MSM.
-
Page 17: Printing Area
Printing area Printing is always started from Origin position (print start point) with following margin on all sides of a page as shown here. a=5 mm * b=5 mm to 25 mm c=5 mm d=5 mm to 25 mm The value of “a” will be 15 mm in the following cases: •... - Page 18 Cautions on handling media Note the following points when handling the media. • Use the media under an appropriate environment. The appropriate temperature and humidity for printing are as follows. Recommended Printing Temperature 22 to 30 °C Environment Humidity 40 to 60%, No condensation Change rate Temperature: No more than 2 °C per 1 hour Humidity: No more than 5% per 1 hour...
-
Page 19: Precautions
Precautions Do not turn the power off Use the printer with its power turned permanently on. When you are not using the printer, always leave the power on and put the printer into the sleep mode while not in use. In the sleep mode, the printer will periodically circulate the ink inside the printer and carry out head cleaning automatically. - Page 20 Conduct periodic maintenance This product requires regular user maintenance. • Run a nozzle check before and after printing. If nozzle missing is found, run a head cleaning. • Clean the cleaning wiper and around the print head once a week. •...
-
Page 21: Powering On / Off
Powering ON / OFF Powering ON / OFF Turning the power ON Close the front cover. Long press the Power button. • The Power LED (above the Power button) lights up. • The printer will start mechanical initialization. Note Once the Power LED lights up, release the Power button. Turning the power OFF Important! Use the printer with its power turned permanently on. -
Page 22: Loading A Roll Media
Loading a roll media Loading a roll media Important! Depending on the size of media, two or more people are required. Load a roll media into the printer Items Required: • Roll media • Media flange: ×2 Attach flanges to the media (If you are using 2-inch core roll media) Remove the 3-inch adapter from the media flange. - Page 23 Twist the handle clockwise to lock the flange. Important! Check that the flange is firmly locked. If not, the media can be removed from the flanges, affecting the print quality. Enable torque on media holders If you want to apply torque to the media holders, follow the steps below. Twist the knob bolt on the right side of the media holder anticlockwise to loosen.
- Page 24 (When looking from the rear side of the printer) Use the screwdriver to loosen two screws securing the roller shaft guide plate to the right media holder. Slide up the roller shaft guide plate as far as it will go and tighten the screws.
- Page 25 Place the roll media onto the left media holder. Carefully and gently place it on the holder. (If torque is enabled) : When looking from the left side, check that the protrusion on the roller shaft guide plate is fitted into between two protrusions on the flange end cap.
- Page 26 Slide the right side of the media holder to place the right side of the flange onto the holder. Place the roll media onto the right media holder. Carefully and gently place it on the holder. (If torque is enabled) ...
- Page 27 Load the media into the printer Check that the printer is powered on. From the front side of the printer, pull the media feed lever towards you as much as possible to release the pressure rollers. You can access to the media feed lever from the rear side of the printer. •...
- Page 28 While one person holds the front edge of the media, the other person turns the flange to slightly rewind the media onto the roll to remove warp or skew. Note If you remove your hands from the front edge of the media while rewinding, the media can be removed from the media slot. Check that the right-hand edge of the media is located at the left side of the media guide line.
- Page 29 After loading the media... From the front side of the printer, push the media feed lever to hold the media flat with pressure rollers. Note Using this lever, the holddown pressure can be changed between High and Normal. Normally push the lever until it clicks to apply normal pressure. "Changing holddown pressure using media feed lever"...
- Page 30 Menu 1 Setup to choose the menu shown left. Setup3 • Tap Side Margin Enter the side margin. At least 10 mm margin is required. Side Margin : • Use to enter the value. (5 - 25) 10 mm • Tap Enter) to confirm the setting. Note The side margin can be set between 5 mm and 25 mm.
-
Page 31: Nozzle Check And Cleaning
Nozzle check and cleaning Nozzle check and cleaning Before you start daily printer operation, run a nozzle check. If nozzle missing is found, perform cleaning. Nozzle check Nozzle check F steps Load a roll media for Nozzle check. "Loading a roll media" P. 22 Enter) Nozzle Check F Start... -
Page 32: Cleaning
Cleaning Cleaning steps to choose the cleaning mode. Clean Print Head? (Enter). Short • The printer will start cleaning. Clean Print Head? Normal Clean Print Head? Long Run a nozzle check again. "Nozzle check" P. 31 • If the problem persists, repeat normal cleaning until all nozzles are clear. "Head cleaning"... -
Page 33: Calibrating Your Printer
Calibrating your printer Calibrating your printer Before printing an image on your printer for the first time, follow these steps to calibrate your printer to ensure accurate print quality. Head alignment You can print out the adjustment pattern in this menu to check the misalignment of the print head, and then adjust it. You can choose one of the following methods: The Standard option performs the head alignment for the print mode Adjust Head 1... - Page 34 Head alignment steps Turn the printer ON and load a roll media. "Loading a roll media" P. 22 (Home). until the menu on the left appears. Menu 2 Test Print • Tap (Enter). • Tap until the menu on the left appears. Test Print 5 •...
-
Page 35: Print Quality Calibration
Print quality calibration This menu calibrates the dot placement of bidirectional printing. Print the alignment pattern to see if dot placement is perfectly aligned. If misaligned, enter the alignment value to correct the accuracy of dot placement. You can choose one of the following methods: The Standard option performs dot placement alignment for the print ** : Adjust Print 1 mode saved in the currently selected user type. - Page 36 Print quality calibration steps Turn the printer ON and load a roll media. "Loading a roll media" P. 22 (Home). Menu 1 Setup Setup 1 User Type to choose the user type you want to use. User Type: Type 1 •...
- Page 37 Note • In Standard print quality adjustment and Custom print quality adjustment, the names in the available patterns are different. For details, refer to the page below. "Adjust Print 1: Standard" P. 62 "Adjust Print 2: Custom" P. 63 "Adjust Print 3: Auto" P. 63 •...
-
Page 38: Media Feed Adjustment
Media feed adjustment This adjustment must be performed when: • you use this product for the first time. • you use a new type of the media. • you have changed the holddown pressure on the pressure rollers. Other than above cases, move to "Nozzle check and cleaning"... -
Page 39: Advanced Setting
Advanced settings Advanced setting Changing the Head Height If you use a roll media that warps easily or perform high-density print, the print head may contact the media while printing. If you experience such problem, try changing the head height higher. After you change the head height, make sure to perform the print quality calibration. -
Page 40: Changing Holddown Pressure Using Media Feed Lever
Changing holddown pressure using media feed lever If you want to change the holddown pressure applied across the entire width of media, use the media feed lever. Depending on the position of the lever, you can choose the pressure between Normal and High. •... -
Page 41: Canceling Or Reducing Pressure Rollers Individually
Canceling or reducing pressure rollers individually When printing on thin media or media without stiffness, the media tends to cockle causing head strikes. By reducing pressure or disabling the pressure rollers individually, it helps to reduce the chance of head strike. Using the slide lock lever on the individual pressure roller, the holddown pressure can be changed between Normal, Low and Cancel. - Page 42 Push down the tab on the slider lock lever, then slide it to the front. • To reduce pressure, slide it to front until it clicks. • To cancel the pressure roller, fully slide it to the front until it clicks into place. Note First, try to reduce or cancel the rollers on both edges of the media.
-
Page 43: Operating From Front Panel
Operating from Front panel Operating from Front panel Feeding media Check that the pressure rollers hold down the media. Long-touch to feed a roll media until it reaches to the desired position. • key: Feed the media backward. • key: Feed the media forward. Note Long tap the key to feed the media with high speed. -
Page 44: Canceling Printing
Canceling printing (Cancel) while printing. • The printer will pause printing. Note To resume printing, tap [Cancel] again. (Enter) to cancel printing. (Once canceled, you cannot Pausing Print Cancel Print -> Enter resume the job again.) • The data sent to the printer will be deleted. Note You can also cancel the job from the remote panel on MSM. -
Page 45: Cutting Media
Cutting media Check that the job has been printed. • Tap (Cancel). (Enter) Cut Media? Start -> Enter • The printer will advance the media for the bottom margin and will cut it. Note • If the front edge of a new roll media is not straight, cut it before printing. •... -
Page 46: Menus You Can Access While Printing
Menus you can access while printing (Home) while one of the three messages on the left Receiving PG: Low W: 1625 mm appears on the touch panel. Printing PG: Low W: 1625 mm Converting PG: Low W: 1625 mm to choose the menu, then tap Menu 1 "Menu 1: Temperature"... - Page 47 Menu 1: Temperature You can check the temperature of the heater during printing. Menu 1 Temperature to choose the heater you want to check. Temperature 1 • It displays the current heater temperature and heater temperature setting in square brackets. Pre Heater: Temperature 2 Platen Heater:...
- Page 48 Menu 3: Platen Heater You can change the platen heater temperature setting for the current print job. • See the following related sections of Panel Setting Menus: "**>6: Dryer" P. 73 Menu 3 Platen Heater to change the value. Platen Heater: (30 - 50) 50ºC •...
- Page 49 Menu 5: PF Micro Adjustment You can change the micro adjustment value to correct media feeding for the currently print job. • See the following related sections of Panel Setting Menus: "**>3: PF Adjust" P. 68 Menu 5 PF Micro Adjust to change the value.
- Page 50 Menu 7: Job Status You can check the current status of the print job being printed. • See the following related sections of Panel Setting Menus: "Menu 8: Job Status" P. 104 Menu 7 Job Status to choose the information you want to check. Job Status •...
-
Page 51: Chapter 2 Advanced Operations
Chapter 2 Advanced Operations Introduction ........... . 53 Operating the keys to use the menus . - Page 52 Menu 3: Cleaning ..........98 Menu3: Cleaning.
-
Page 53: Introduction
Introduction Introduction Using the panel setting menus, configure various kinds of settings for the printer. Operating the keys to use the menus To access to the setup menu, tap (Home). Note You cannot access to the setup menu while printing or receiving data (the power button is flashing). to go to the previous item or next item. - Page 54 to choose the option from the sub menu or enter the Test Print 1 value. Nozzle Check F To confirm the value or execute the selected function, tap Test Print 2 (Enter) . Mode Print to return to the upper level menu. Test Print 3 (In the example on the left, the display will return to “Menu2: Test Setup List...
-
Page 55: Panel Setup Menu
Panel setup menu Menu 1: Setup Configure printer settings. Menu 1 Setup Submenus Setup 1: User Type Setup1 User Type Setup 2: Spitting Setup 2 Spitting Setup 3: Side Margin Setup 3 Side Margin Setup 4: Media Initial Setup 4 Media Initial Setup 5: Media Width Setup 5... - Page 56 Setup 15: Auto Cleaning Setup 15 Auto Cleaning Setup 16: Ink Status Setup 16 Ink Status Setup 17: Roll Length Setup 17 Roll Length Setup 18: Exhaust Fan Setup 18 Exhaust Fan Setup 19: Longstore Setup 19 Longstore Setup 20: CR Maintenance Setup 20 CR Maintenance Setup 21: Initialization...
- Page 57 Setup 32: Temporary Setup 32 Temporary Menu 2: Test Print Run a test print to check for nozzle condition, current printer settings, printer Menu 2 configuration, color palette, and print head alignment. Test Print Submenus Test Print 1: Nozzle Check F Test Print 1 Nozzle Check F Test Print 2: Mode Print...
- Page 58 Menu 5: System Information Display the system information on your printer. Menu 5 Menu 5: System Info. System Info. Menu 6: Sleep Mode Choose the head cleaning mode and timer to be performed before entering to Menu 6 or while in sleep mode. Sleep Mode Submenus Sleep Mode 1: Cleaning Setting...
-
Page 59: Menu 1: Setup
Menu 1: Setup Menu 1: Setup Setup 1: User Type You can have up to 15 groups of User Type, labeled “Type1” to “Type15”. When Setup1 User Type you select a User Type group (“Type”) and tap (Enter), that definition group will be set for the printer. - Page 60 Making media settings. User Type: Type 1 Submenus **>1: Print Mode Type ** : 1 Print Mode **>2: Adjust Print> Type ** : 2 Adjust Print **>3: PF Adjust Type ** : 3 PF Adjust **>4: Pre Heater Type ** : 4 Pre Heater **>5: Platen Heater Type ** : 5...
- Page 61 **>1: Print Mode Select a print mode for the media. Type ** : 1 • Once selected, the panel displays the effect menu. Print Mode Setting values High-quality print mode. Mode: Quality 3 The four types of mode are available: 720 x 1440 16pass Quality 3 to Quality 4.
- Page 62 **>2: Adjust Print> Sets up when adjusting the printer for the optimum quality of image print. Type ** : 2 Before adjusting this setting, enter the thickness of the media. Adjust Print Submenus Adjusts only the print mode in the user ** : Adjust Print 1 type setting which is currently set.
- Page 63 Adjust Print 2: Custom Perform adjustment for all patterns (A to C). ** : Adjust Print 2 "Confirm pattern" P. 65 Custom "Rough adjustment pattern" P. 66 "Fine adjustment pattern" P. 66 Submenus The test patterns of A to C will be printed ** : Custom 1 for Adjust print.
- Page 64 Adjustment patterns for each print mode Print mode Print mode specifications Adjustment pattern Quality 3 720 x 1440, 16 pass, Uni Quality 4 720 x 1440, 16 pass, Bi Graphics 1 720 x 1080, 12 pass, Uni Graphics 2 720 x 1080, 12 pass, Bi Banner 1 720 x 720, 8 pass, Uni Banner 2...
- Page 65 Standard or Custom Adjustment Methods Print a confirm pattern and check it for printing errors. Print “Rough pattern” and look for a place that is properly adjusted in the printing results of print head 1. • If you selected “Adjust Print 2: Custom”, select “ALL” or “A” to “C”. •...
- Page 66 Rough adjustment pattern • Tap (Enter) to carry out printing. • For Head 1, check the print results and select the number that looks most aligned between 1 and 21. • Pattern names such as “Pattern B1: 11” are shown on the display. Use to enter the number of the best-adjusted pattern, and tap (Enter).
- Page 67 Auto Adjustment Method Select the adjustment pattern from "ALL", "Standard", or any specific pattern between "Adjust Pattern A" and "Adjust Pattern C". • The selected adjustment pattern is printed. • The printer scans the print using the embedded color sensor, then automatically corrects the dot placement. Once successfully completed, the message “Auto Adjust Succeeded End->Enter”...
- Page 68 **>3: PF Adjust Sets up various settings on the Media feed correction. Type ** : 3 When the following defects are found in printing results, they may improve by PF Adjust conducting a media feed correction. • Images are overlapping. •...
- Page 69 Manual PF adjustment method using adjustment print. You will need a ruler to perform this adjustment. Select “PF Adjust 1: Initial Print”. • “Feed Length: 250 mm” is displayed on the front panel. After the initial adjustment printing, cut the media. •...
- Page 70 PF Adjust 1: Initial Print ** : PF Adjust 1 Performs Initial Print. Enter the “Feed Length” and tap (Enter). Initial Print Setting values 100 mm to <250 mm> to 500 mm ** : Initial Print : <> indicates the initial value. Feed Length: 250 mm •...
- Page 71 PF Adjust 3: Confirm Print Performs Confirm Print. ** : PF Adjust 3 Confirm Print Enter the “Feed Length” and tap (Enter). Setting values 100 mm to <250 mm> to 500 mm ** : Initial Print : <> indicates the initial value. Feed Length: 250 mm •...
- Page 72 PF Adjust 4: Micro Print Performs Micro adjustment Print. ** : PF Adjust 4 Enter the appropriate micro adjustment value according to the print result. Micro Print • Observe the pattern and verify the micro adjustment value. In the pattern, look for a place that has least white lines or overlapping in images.
- Page 73 **>4: Pre Heater Sets up Pre Heater. Type ** : 4 Pre Heater to enter the value, and tap (Enter). Setting values Off / <30°C> to 50 °C ** : Pre Heater : <> indicates the initial value. (30 - 50) 30 C **>5: Platen Heater Sets up Platen Heater.
- Page 74 **>7: Vacuum Fan Selects the vacuum level. Type ** : 7 Vacuum Fan to select the value, and tap (Enter). • If you are using a thin or delicate media and there is risk of it wrinkling due to the fan, set a lower value for the fan.
-
Page 75: Setup 2: Spitting
Setup 2: Spitting Sets up the spitting operation while printing. Setup 2 The display will shift to setting of the pass count only if “On” is set for “Spitting”. Spitting Setting values Perform the spitting operation on Spitting Spitting: box located on the origin side for every shuttle. -
Page 76: Setup 3: Side Margin
<Example of spitting operation> Spitting setting Pass Count setting Operation 1 cnt Perform the spitting operation on Spitting box every time Print head returns to the origin position. Spitting operation is not performed over the media. 5 cnt Performs the spitting operation on Spitting box on the origin side every five times Print head returns to the origin position. -
Page 77: Setup 4: Media Initial
Setup 4: Media Initial Sets whether to detect the media width while initializing the media. Setup 4 Media Initial Setting values The media will not be detected. Media Initial: Detect the media width and edge while Media Initial: initializing the media. Top&Width Detect the media width while initializing Media Initial:... - Page 78 When the “Output Mode” is set to “Take Up” When the “Output Mode” is set to “Take up”, the menu is shifted to “Page Gap”. Output Mode: In the “Page Gap menu”, you can change the margin setting between images. Take Up Setting values The default margin setting between...
-
Page 79: Setup 7: Method Of Cut
Setup 7: Method of Cut Sets the media cutting operation after printing. Setup 7 Method of Cut Setting values Cut with fewer steps than “Single Cut - 3 Method of Cut: steps”. Single Cut - 2 steps Suitable for media with narrow width. Normal cutting method. -
Page 80: Setup 8: Origin
Setup 8: Origin • Sets the print start position (origin) on the media. Setup 8 If you want to change the print start position to print an image on the blank Origin space of the media, use this menu. : Change the print start position (origin) in the PF (media feeding) direction. •... -
Page 81: Setup 9: Prevent Stick Menu
Setup 9: Prevent Stick menu Sets up to prevent media from sticking when printing starts. Setup 9 Prevent Stick Setting values The stick-prevent operation is not Prevent Stick: performed. This is the initially set value. The stick-prevent operation is performed. Prevent Stick: Feed the media back and forth to prevent from sticking. -
Page 82: Setup 12: Multi Strike
Setup 12: Multi Strike Sets up the overwrite count per line. Setup 12 Multi Strike to enter the value, and tap (Enter). Setting values <1 cnt> to 9 cnt Multi Strike: <> indicates the initial value. (1 - 9) 1 cnt Setup 13: Strike Wait Sets up the waiting time while overwrite printing. -
Page 83: Setup 15: Auto Cleaning
Setup 15: Auto Cleaning Configure the settings for the auto cleaning operation. Setup 15 Auto Cleaning Submenus Standby Mode menu Auto Cleaning 1 Standby Mode While Printing menu Auto Cleaning 2 While Printing Before Print menu Auto Cleaning 3 Before Print Standby Mode menu The display goes to the Cleaning Interval setting to set the timer for auto Auto Cleaning 1... -
Page 84: Setup 16: Ink Status
Setup 16: Ink Status Displays the percentage of ink level in each ink bag. Setup 16 To identify the ink slots corresponding to the numbers shown here, see "Main Ink Status components of your printer" P. 9 1 2 3 4 : 100 / 90 / 90 / 80 5 6 7 8 : 100 / 90 / 90 / 80... - Page 85 Print stop menu Sets whether or not to display “Roll Remain Error” and pause printing when the Length: length of the media that is counted inside the printer becomes 0. (1 - 1500) 30 m Setting values The media remaining count is not used to Print Stop: judge for pausing printing.
-
Page 86: Setup 18: Exhaust Fan
Setup 18: Exhaust Fan Sets up Exhaust fan operation. Setup 18 Ventilates the inside of the printer to stabilize the parts performance. It also Exhaust Fan decreases the contamination by ink mist inside the printer. We recommend that you use Exhaust fan, especially when printing for a long time. -
Page 87: Setup 21: Initialization
Setup 21: Initialization Restore the printer settings to the factory default. Setup 21 Initialization Setting values For initializing the settings of all the Initialization: menus. Initializes the settings in the User Type Initialization: menu. UserType Initializes the settings other than the ones Initialization: in the User Type menu. -
Page 88: Setup 23: Ip Address
Setup 23: IP Address Sets the IP address of the printer. Setup 23 • Use to increase a digit. IP Address • Use to decrease a digit. • Use to move the cursor to the previous digit. • Use to move the cursor to the next digit. (Enter) after entering each digit. -
Page 89: Setup 25: Gateway
Setup 25: Gateway Sets the gateway. Setup 25 • Use to increase a setting value. Gateway • Use to decrease a setting value. • Use to move the cursor to the previous digit. • Use to move the cursor to the next digit. (Enter) after entering each digit. -
Page 90: Setup 27: Heater Control
Setup 27: Heater Control Choose the appropriate heater mode for your media being loaded. Setup 27 If the media cockling is visible on the print, you can reduce it by selecting the Heater Control appropriate heater mode. Setting values If you are using the non-heat sensitive Heater Control: media, choose the Normal mode. -
Page 91: Setup 29: Alert Buzzer
Setup 29: Alert Buzzer Selects how to turn off the printer beep sound when an error occurs. Setup 29 For unattended printing, you can select “Off” setting to avoid continuous buzzer Alert Buzzer beep. Setting values Press any key on the front panel to turn off Alert Buzzer: beep sound. -
Page 92: Setup 32: Temporary
Setup 32: Temporary Displays the menus which have been set to hide in the “Menu4: Menu Option” Setup 32 temporarily. Temporary (Enter) to return to the previous menu with all set up items displayed. Menu 1: Setup... -
Page 93: Menu 2: Test Print
Menu 2 : Test Print Menu 2: Test Print Test Print 1: Nozzle Check F Use this menu to check that the print head and print nozzles you selected can Test Print 1 properly print without nozzle clogging and missing or too light lines. Nozzle Check F "Nozzle check F steps"... -
Page 94: Test Print 3: Setup List
Test Print 3: Setup List Setup list printing is performed. Test Print 3 Use this to check the current setting contents and the User Type. Setup List Setup List Setup List <Information> 2016/01/01 0:00 Serial No. = ********** !Error! Model = VJ-1948WX Firmware M = V X.XX 0 : None [ ] 2 :... -
Page 95: Test Print 5: Adjust Head
Test Print 5: Adjust Head This menu calibrates the dot placement between two print heads installed on Test Print 5 this printer. Adjust Head to open the submenu. Align the heads in the following cases: • If the image quality does not improve after you have used the “Adjust Print” menu. •... - Page 96 When “Adjust Head 2 Custom” is selected You can select the adjustment method.Tap to open the submenu. Adjust Head 2 When selecting “Fine Pattern X (A to C)”, select the option that corresponds to Custom the print mode used for printing. If the resolution, pass and the printing direction of the RIP print mode differ from the print mode for the User Type, select the fine pattern that is suitable for the RIP.
- Page 97 Head adjustment pattern • Press the (Enter) key to carry out printing. For the Head adjustment pattern, the same patterns will be printed on both sides and center of the media. • Check the print results and select the number that looks most aligned between 1 and 7. •...
-
Page 98: Menu 3: Cleaning
Menu 3 : Cleaning Menu 3: Cleaning Menu3: Cleaning Select the cleaning type. Menu 3 Cleaning Setting values Consumes less ink than Normal cleaning. Cleaning Type1 Short Conduct nozzle check before and after Cleaning Type2 printing, and use when nozzle missing is Normal found. -
Page 99: Menu 4: Menu Option
Menu 4 : Menu Option Menu 4: Menu Option Menu4: Menu Option You can choose whether to display the menus in “Menu 1: Setup”. Choose whether you wish to display a menu by tapping (Enter). [*]= the item will be displayed [ ]= the item will not be displayed Displays the “User Type menu”. -
Page 100: Menu 5: System Info
Menu 5 : System Info. Menu 5: System Info. Display the system information on your printer. Menu 5 System Info. Displays the versions of the firmware of Version the main side (M) and controller side (C). Ver. M / C 0.00 / 0.00 Displays the model name of your printer. -
Page 101: Menu 6: Sleep Mode
Menu 6 : Sleep Mode Menu 6: Sleep Mode Start Sleep Mode and set the head cleaning interval during Sleep Mode. Menu 6 Sleep Mode Submenu Sleep Mode 1: Cleaning Setting Sleep Mode 1 Cleaning Setting Sleep Mode 2: Start Sleep Mode 2 Start Sleep Mode 1: Cleaning Setting... -
Page 102: Sleep Mode 2: Start
Sleep Mode 2: Start When you are not using the printer, always leave the power on and put the printer into the sleep mode while not in use. If you do not put the printer into the sleep mode, the ink inside the printer could settle out and/or coagulate, causing poor image quality or printer failure. -
Page 103: Menu 7: Display
Menu 7 : Display Menu 7: Display Display 1: Language Choose the language of the front panel from the following selection. Display 1 Language Setting values Default setting. Language: English Language: Dutch Language: Spanish Language: French Language: Italian Language: Portuguese Language: German Language:... -
Page 104: Display 3: Length
Display 3: Length Choose the unit of the length displayed on the front panel. Display 3 Length Setting values Displays the length in millimeters (mm). Length: This is the initially set value. Displays the length in inches (inch). Length: inch Menu 8 : Job Status Menu 8: Job Status Various information of previous print will be displayed. -
Page 105: Menu9: Roll Length Manage
Menu 9 : Roll Length Manage Menu9: Roll Length Manage Before replacing with another roll media, you can print the remaining roll length Menu 9 information on the roll media. Roll Length Manage This information can be printed with a code that your printer can read. The next time when the roll media is loaded, your printer will read the code and will automatically specify the Roll Length settings. -
Page 106: Roll Length Manage1: Print
Roll Length Manage1: Print Print the remaining length management information with text and code on the roll media. • Roll Length Manage1 • “Do you want to cut?” is displayed. Print to choose "Yes" or "No". • Tap (Enter). Note •... -
Page 107: Roll Length Manage3: Scan
Roll Length Manage3: Scan Your printer can scan the remaining length management code that was printed on a roll media with " Roll Length Manage1: ". Print Load a roll media that the remaining length management code has been printed on it. "Load a roll media into the printer"... -
Page 108: Roll Length Manage4: Roll Length
Roll Length Manage4: Roll Length Go to the "Roll Length" settings. Roll Length Manage4 "Setup 17: Roll Length" P. 84 Roll Length Roll Length Manage5: Auto Scan The ON setting will automatically scan the remaining length management code Roll Length Manage5 when Auto Scan •... -
Page 109: Menu Chart
Menu chart Menu chart Setting menu 1 Menu 1 To Setting menu 2 Setup Menu 2 Test Print 1 Test Print Nozzle Check F Test Print 2 Mode Print Printing Test Print 3 Setup List Test Print 4 Palette Test Print 5 Adjust Head 1 Adjust Head Standard... -
Page 110: Setting Menu 2
Setting menu 2 From Setting menu 1 Setup 1 User Type: Type **: 1 Mode: Graphics 2 User Type Type * Print Mode 720 x 1080 12pass **: Effect: Setup 2 Spitting: Fine & Fog Spitting Type **: 2 Thickness: Setup 3 Adjust Print (80 - 2800) -
Page 111: Setting Menu 3
Setting menu 3 From Setting menu 2 Setup 16 Ink Status Roll Kind: Setup 17 Roll Length Roll Kind: Length: Roll * (1 - 1500) 30 m Setup 18 Exhaust Fan Print Stop: Setup 19 Longstore Print Stop: Near End: Setup 20 CR Maintenance Near End:... -
Page 112: Menu During Printing
Menu during printing Menu 1 Temperature Temperature Pre Heater: Temperature Platen Heater: 50 C Temperature Dryer: 30 C Menu 2 Pre Heater: Pre Heater Menu 3 Platen Heater: Platen Heater Menu 4 Dryer: Dryer Menu 5 PF Micro Adjust: PF Micro Adjust (-5 - 5) 5.00% Menu 6... -
Page 113: Chapter 3 Maintenance
Chapter 3 Maintenance Maintenance........... 114 Agitating ink . -
Page 114: Maintenance
Maintenance Maintenance To maintain the performance of this product, please conduct maintenance by yourself. The types of maintenance are shown next. Before and after daily operation "Nozzle check and cleaning" P. 31 Based on your usage condition "Agitating ink" P. 115 "Head cleaning"... -
Page 115: Agitating Ink
Agitating ink Agitating ink Agitating ink Agitate the ink at the following times to prevent it from settling out and/or coagulating: • Before installing new ink • When any of the messages below appears Agitate the White (Wh) ink. Shake W Cartridge •... - Page 116 Steps Remove high-capacity ink pack adapters from the ink slots. Using the paper towel provided with the printer to wipe off the ink attached to the insertion point for high-capacity ink pack adapters. Tilt high-capacity ink pack adapters, use cleaning stick provided with the printer, and absorb the ink collected around the tube connectors.
-
Page 117: Checking Ink And Replacing Ink Bag
Checking ink and replacing ink bag Checking ink and replacing ink bag Checking ink level (Home). Menu 1 Setup until the menu on the left appears. Setup 16 • Tap Ink Status The ink level is displayed from 0% to 100%. 1 2 3 4 : 100 / 90 / 90 / 80 5 6 7 8 :... -
Page 118: When It Becomes Time To Replace Ink Bag
When it becomes time to replace ink bag When the ink level becomes low, the error LED of the front panel flashes and a buzzer sounds. [4] S / C Ink Low (Enter). PG: Low W: 1625 m • The buzzer stops. •... - Page 119 Removing the high-capacity ink pack adapter (Enter). [8] Ink End • The buzzer stops. • In the figure to the left, the slot 8 ink bag must be replaced. Wear the plastic gloves, and then remove high-capacity ink pack adapters from the ink slots. Lower the lock lever on the high-capacity ink pack adapter and detach the empty ink bag.
- Page 120 Slide the S/C card into the tabs of the adapter. While lowering the lock lever of the high-capacity ink pack adapter, insert an ink bag. • Make sure to fully insert the ink bag into the high-capacity ink pack adapter. Confirm ink bag is fully seated by checking the lock mechanism is at the top of the ink delivery neck through the observation window, see proper placement in illustration left.
-
Page 121: Emptying Waste Ink Tank
Emptying waste ink tank Emptying waste ink tank Emptying waste ink tank In the following cases, drain waste ink in the waste ink tank into a container to empty the tank. • When the waste ink tank is more than half full. •... - Page 122 Important! To avoid ink splash, move the container closer to the waste ink valve while draining waste ink. Once you empty the tank, close the waste ink valve securely. • Wipe the opening of the valve with a cloth. Dispose of waste ink according to the local waste disposal regulations. Emptying waste ink tank...
-
Page 123: Cleaning
Cleaning Cleaning To maintain your printer in the best condition, cleaning must be performed as instructed. Head cleaning If you find missing or thin lines on your print or nozzle check print, perform head cleaning. Following cleaning modes are available: Short cleaning Consumes less ink than Normal cleaning. - Page 124 Performing Head cleaning to choose the cleaning mode. Clean Print Head? (Enter). Short • The printer will start cleaning. Clean Print Head? Normal Clean Print Head? Long Run a nozzle check. Performing Nozzle check Load a roll media to print the nozzle check pattern. "Loading a roll media"...
- Page 125 Check the print result. • If you find missing or thin lines on the print, go to "Performing Head cleaning" P. 124. • If all lines are clearly printed, you can start printing. Note • If nozzle missing persists after repeating normal cleaning several times, perform Long cleaning. "Cleaning of cleaning wiper"...
-
Page 126: Cleaning Of Cleaning Wiper
Cleaning of cleaning wiper Cleaning period: • Weekly • When print blurring and dot missing remain after head cleaning is done. Preparation: • Cleaning stick Important! During cleaning, please note the followings. • If it is hard to remove the stain, perform “Short” Head cleaning, and then clean again. •... - Page 127 Cleaning the cleaning wiper Open the front cover. Open the maintenance cover on the right side. Wipe the cleaning wiper with a cleaning stick. • Wipe the left side of the wiper back and forth. Important! If it is hard to remove the stain, perform “Short” Head cleaning, and then clean again.
- Page 128 Close the front cover. (Enter). CR Maintenance -> Enter (Home) to end the cleaning process. CR Maintenance Start -> Enter Note Used cleaning stick should be put in a plastic bag, etc, and dispose of it in compliance with local ordinance and instructions of local authorities. Cleaning...
-
Page 129: Cleaning Around The Capping Unit
Cleaning around the capping unit Cleaning period: • Weekly Preparation: • Cleaning stick Important! During cleaning, please note the followings. • Use a dry cleaning stick. A damp stick can cause damage to the print head. • Do not touch the tip of a cleaning stick with fingers. Skin oil will damage the print head. •... - Page 130 Close the maintenance cover. Close the front cover. (Enter). CR Maintenance -> Enter (Home) to end the cleaning process. CR Maintenance Start -> Enter Note Used cleaning stick should be put in a plastic bag, etc, and dispose of it in compliance with local ordinance and instructions of local authorities. Cleaning...
-
Page 131: Cleaning Around The Print Head
Cleaning around the print head Cleaning period: • When print blurring and dot missing remain after head cleaning is done. Preparation: • Cleaning stick Important! During cleaning, please note the followings. • Use a dry cleaning stick. A damp stick can cause damage to the print head. •... - Page 132 Close the maintenance cover. Close the front cover. (Enter). CR Maintenance -> Enter (Home) to end the cleaning process. CR Maintenance Start -> Enter Note Used cleaning stick should be put in a plastic bag, etc, and dispose of it in compliance with local ordinance and instructions of local authorities. Cleaning...
-
Page 133: Cleaning The Color Sensor
Cleaning the color sensor Cleaning period: • If you repeatedly failed to perform an auto print quality calibration (Adjust Print 3 Auto). Preparation: • Cleaning stick • Ethanol (commercially available item: Use one with a concentration of 50% or higher.) Important! During cleaning, please note the followings. - Page 134 Close the maintenance cover. Close the front cover. (Enter). CR Maintenance -> Enter (Home) to end the cleaning process. CR Maintenance Start -> Enter Important! If the problem still persists, contact your local MUTOH dealer or MUTOH customer support. Note Used cleaning stick should be put in a plastic bag, etc, and dispose of it in compliance with local ordinance and instructions of local authorities.
-
Page 135: Inside Cleaning
Inside cleaning Cleaning period: • Monthly • When dust or ink stains are visible Preparation: • Soft brush • Paper towel or Soft cloth • Ethanol (commercially available item: Use one with a concentration of 50% or higher.) • Gloves CAUTION Unplug the power cable with the power OFF, before cleaning the inside of the printer. -
Page 136: Replacing Consumable Parts
Replacing consumable parts Replacing consumable parts Replacing absorption material for the flushing box The flushing box is a part that keeps receiving ink discharged from the print head. Please replace the absorption material for the flushing box periodically. If used without replacing, it can cause damage to the print head. Replacing period: •... - Page 137 Replacing steps Put the printer into the CR maintenance mode. "Putting the printer into the CR maintenance mode" P. 126 Open the front cover. Open the maintenance cover on the right side. Cover the platen with the paper you can get dirty. Important! Ink may drip from the absorption material for the flushing box.
-
Page 138: Replacing Cutter
Close the front cover. (Enter). CR Maintenance -> Enter [10] (Home) to end the cleaning process. CR Maintenance Start -> Enter Replacing Cutter Replacing period: • When the media is not cut smoothly • When the cut surface is feathered, etc Preparation: •... - Page 139 Press the cutter cap lightly, turn Cutter holder in the direction as illustrated below. Important! Do not push down the cutter cap. It may damage the part. Remove the Cutter. Note Used Cutter should be put in a plastic bag, etc, and dispose of it in compliance with local ordinance and instructions of local authorities.
-
Page 140: Replacing The Cleaning Wiper
[10] (Enter). CR Maintenance -> Enter [11] (Home) to end the cleaning process. CR Maintenance Start -> Enter Replacing the cleaning wiper The cleaning wiper is an essential part to make printing consistent. Please replace it periodically. Replacing period: • Approx. every six months Preparation •... - Page 141 Cover the platen with the paper you can get dirty. Important! Ink may drip from the cleaning wiper. We recommend covering the floor with paper as well. Remove the cleaning wiper. • Lift the cleaning wiper hook and release the hook. Then, remove the cleaning wiper.
-
Page 142: Replacing Adapter's Plug
Replacing Adapter’s plug Replacing period: • When “[*******] Change Plug” is displayed on the Operation panel. Preparation • Plastic gloves, glasses, mask • Cleaning stick • Paper towel or Soft cloth • Adapter’s plug • Fine-tipped tool (such as precision screwdrivers) •... - Page 143 Wear the plastic gloves, and then remove high-capacity ink pack adapters to be replaced from the ink slots. Using the paper towel provided with the printer to wipe off the ink attached to the insertion point for high-capacity ink pack adapters. Tilt high-capacity ink pack adapters, use cleaning stick provided with the printer, and absorb the ink collected around the tube connectors.
- Page 144 While lowering the lock lever of the high-capacity ink pack adapter, insert the sealing jig. • Make sure to fully insert the sealing jig into the high-capacity ink pack adapter. • Confirm the sealing jig is fully seated by checking the lock mechanism is at the top of the ink delivery neck through the observation window, see proper placement in image below.
- Page 145 [10] Use a fine-tipped tool to remove the adapter’s plug from the tube connector. Note • Do not bend the tube connected to the tube connector as much as possible. The tube may be broken. • When removing the adapter’s plug, do not face the opening of tube connector downward. The remaining ink in the tube may leak. [11] Push a new adapter’s plug into the tube connector about a half way.
- Page 146 [12] Install the tube connector back to the tabs of high-capacity ink pack adapter securely. Note If the tube connector is not securely installed to the tabs, the high-capacity ink pack adapter may not be installed to the printer correctly. [13] Remove the sealing jig from the high-capacity ink pack adapter.
- Page 147 [17] When inserting the replaced adapter, the message on the left will [8] Plug Changed ? appear. • Tap [18] Tap [Enter]. [8] Plug Changed ? • The adapter’s plug lifetime counter will be reset. Important! • If the adapter’s plug is not replaced, do not choose “Yes”. •...
-
Page 148: Moving Or Transporting The Printer
Moving or transporting the printer Moving or transporting the printer This section describes how to move or transport the printer. Moving the printer This section describes how to move the printer. Important! • When moving the printer, make sure to maintain a horizontal position. •... -
Page 149: Transporting The Printer
Reinstalling Select a suitable place for installation. Startup Guide Move and install the printer to the location. Attach Cables, such as Power cord set. Perform Nozzle check, and then confirm that there is no clogging in Print head. "Nozzle check F steps" P. 31 Perform print quality adjustment. -
Page 150: Long-Term Storage
Long-term storage If not using the printer for a long time, execute [Longstore]. Preparation: • Cleaning bag: 8 Empty the waste ink tank. "Emptying waste ink tank" P. 121 (Home). Menu 1 Setup until the menu on the left appears. Setup 19 •... - Page 151 The message on the left will appear. Discharging • Ink discharging begins. When the discharge is complete, the message to the left is displayed. Insert CleaningCart. Slide the S/C card into the tabs of the adapter. While lowering the lock lever of the high-capacity ink pack adapter, insert an cleaning bag.
- Page 152 [11] Re-insert the high-capacity ink pack adapters into Ink slots. • Insert all the way to the end. The message on the left will appear. Washing Head • Charging of the cleaner begins. When charging of the cleaner is complete, the message to the left is Remove Cartridges displayed.
- Page 153 [13] Re-insert the high-capacity ink pack adapters into Ink slots. • Insert all the way to the end. The message on the left will appear. Washing Head • Charging of the cleaner begins. When charging of the cleaner is complete, the message to the left is Remove Cartridges displayed.
-
Page 154: Performing Initial Charging After Head Cleaning
Performing initial charging after head cleaning Long press the Power button. • The Power LED (above the Power button) lights up. • This product starts its initialization operations. Note Once the Power LED lights up, release the Power button. When the message to the left is displayed, tap (Enter). - Page 155 While lowering the lock lever of the high-capacity ink pack adapter, insert an ink bag. • Make sure to fully insert the ink bag into the high-capacity ink pack adapter. Confirm ink bag is fully seated by checking the lock mechanism is at the top of the ink delivery neck through the observation window, see proper placement in illustration left.
- Page 156 CAUTION During ink charging, make sure: • Not to turn OFF the printer. • Not to unplug the power cable of the printer. • Not to open the front cover. • Not to open the maintenance cover. • Not to release the pressure rollers. When ink charging is complete, the message to the left is displayed.
-
Page 157: Chapter 4 Appendix
Chapter 4 Appendix Messages and Error Messages ........158 Status messages . -
Page 158: Messages And Error Messages
Messages and Error Messages Messages and Error Messages This section describes messages displayed during normal printer operation or when errors occur, and solutions to the messages. Status messages This section describes messages displayed during printer normal operation. When the product is operating correctly, each operation status is displayed on the front panel as below. Display Description Ready to Print... - Page 159 Display Description During discharge Flushing ink from the print head in the head cleaning process. Please wait a while. User: Type ** OK? Initializing the media. Please wait a while. Media Initial (** represents the set User type.) Move To The print head is moving to the print start position to check the print origin Origin Position Please wait a while.
-
Page 160: Error Message Display And Remedies
Error message display and remedies This section describes error messages and remedies. Error messages are displayed when certain failures occur during printer operation. If an error that can be displayed occurs, the printer may display the following error messages on the front panel and stop operation. - Page 161 Display Description [*] S/C Ink Low Slot * ink is low. Get a replacement bag ready. [*] Broken Chip S/C Card has been broken. Insert new ink bag. [******] Check Ink High-capacity ink pack adapter is not correctly detected. Insert high-capacity ink pack adapter again. If there is still no improvement, contact your local MUTOH dealer.
- Page 162 Smartchip recovery When the following message is prompted on the operation panel, a smartchip error such as broken chip may have occurred in the S/C card. Check that the correct color is inserted in the slot and perform smartchip recovery. This will allow you to continue to print.
-
Page 163: Error Requiring Restart
Error requiring restart An error requiring restart is displayed if a fatal operational failure such as the following occurs. • When an obstacle that prevents printing occurs. • When a problem occurs with the electrical circuit (PCB, motor, sensor, etc.) of the printer. •... -
Page 164: Troubleshooting
Troubleshooting Troubleshooting This section describes undisplayed malfunctions and failures of the printer, possible causes and countermeasures. Note • The current status and error information of your printer can be checked from the Printer Status tab > Status Information on MSM. If your printer is not operating correctly, check this Status Information first. -
Page 165: Boot-Up Troubleshooting
Boot-up troubleshooting Symptom Possible cause and Remedy Is the power cable connected to the plug? • Connect the power cable. Does the AC power supply provide the specified voltage? • Connect the cable to another outlet. Is the front cover, or the maintenance cover open? •... -
Page 166: Media-Related Troubleshooting
Media-related troubleshooting Symptom Possible cause and Remedy Is the media loaded correctly? • Load the media correctly. "Loading a roll media" P. 22 Are there any foreign materials such as torn paper attached to Pressure rollers? • Clean Pressure rollers. "Inside cleaning"... - Page 167 Symptom Possible cause and Remedy Do you use the printer within recommended environmental conditions? • Make sure to use the printer within the specification range. “Ensuring a suitable place for installation” of the “Startup Guide” Are any curls or warps present on your media? Media jams frequently occur.
-
Page 168: Printing-Related Troubleshooting
Printing-related troubleshooting Symptom Possible cause and Remedy Is Ethernet cable connected correctly? • Securely connect the Ethernet cable to the Ethernet Port. "Connecting to a Computer" P. 12 The printer does not print. Is there any error message displayed on MSM? •... - Page 169 Symptom Possible cause and Remedy Is the media loaded correctly? • Load the media correctly. The printing position is incorrect (some "Loading a roll media" P. 22 Did you set up the origin? parts of the media cannot be printed on). •...
- Page 170 Symptom Possible cause and Remedy Did you agitate ink in the bag? • When “Shake XX Cartridge” message appears on the operation panel, agitate ink in the bag. Is Ink bag within the validity period? • Use a non-expired ink bag. Are Nozzles in good condition? •...
- Page 171 Note • If an image contains high ink density area, the area may not dry easily. • Depending on the media being used, printed area may not dry easily. Troubleshooting...
-
Page 172: The Media Is Jammed
The media is jammed When the media is jammed in the printer, follow the procedure below to remove it. Long press the Power button. • This product starts its powering off operations. • When the message “Power Off” appears on the panel, release the Power button. - Page 173 Pull the media towards you and use a cutter to cut the torn part of the media along the groove. Rewind the media a little by rolling Flange on the media holder. If paper dust or pieces of paper remain inside the printer, remove them. Turn the printer ON.
- Page 174 Note Troubleshooting...
-
Page 175: Specifications Of This Product
Specifications of this product Specifications of this product List of specifications Model Name XPJ-1682D Print method On demand piezo method Drive method Firmware servo/DC motor drive Media feed method Multipoint pressurizing Grid roller system Media hold down system Pressure roller down system by manual lever... - Page 176 Environmental conditions Printer Operation Temperature 20 to 32 °C, humidity 40 to 60% Environment No condensation Recommended Printing Temperature 22 to 30 °C, humidity 40 to 60% Environment No condensation Change rate Temperature: No more than 2 °C per 1 hour Humidity: No more than 5% per 1 hour Printer Storage Environment Storage without ink charging: up to 6 months...
- Page 177 Current consumption 100V to 120V • Printer: 9 A or below • Heater: 10 A or below 200V to 240V • Printer: 6 A or below • Heater: 5 A or below Dimensions Height 1,504 mm Width 2,770 mm Depth 895 mm Weight Main body...
-
Page 178: Options / Supply List
Options / Supply list Options / Supply list For more information about the options and the supply items, contact your local MUTOH dealer. Important! MUTOH strongly recommends to use genuine ink bags. This printer is designed to bring out the best performance when using with the MUTOH genuine ink. Non-MUTOH ink may cause print defects or damage to the printer. -
Page 179: Revision History
Revision History Revision History Date Version Manual code Supported Firmware 2022.3 XPJ1682DE-A-ES V.x.xx or later Revision History... - Page 180 XPJ1682DE-A-ES...
Need help?
Do you have a question about the XPJ-1682D and is the answer not in the manual?
Questions and answers