Table of Contents
Advertisement
Quick Links
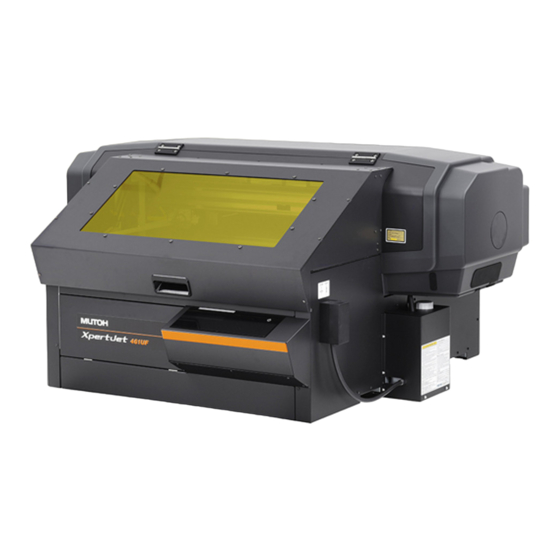
XPJ-461UF
Startup Guide
Unpacking and Initial Setup
• Unauthorized copying or duplication of the whole or part of the contents of this Guide is prohibited.
• Every care has been taken in writing the contents of this Guide, but please contact MUTOH or the dealer you purchased the
product from if you find any unclear, erroneous or otherwise unsatisfactory content in the Guide.
• Please be aware that MUTOH will not be liable in any way for failures or accidents that result from handling or operating the
printer according to any procedures other than those set forth in this Guide.
• Company names and product names that appear in this Guide are registered trademarks of the respective companies.
Site Preparation . . . . . . . . . . . . . . . . . . . . . . . . . . . . . . . 2
Unpacking . . . . . . . . . . . . . . . . . . . . . . . . . . . . . . . . . . . . 5
Installing. . . . . . . . . . . . . . . . . . . . . . . . . . . . . . . . . . . . . . 9
Leveling Printer . . . . . . . . . . . . . . . . . . . . . . . . . . . . . . 14
Printer Initial Setup . . . . . . . . . . . . . . . . . . . . . . . . . . . 19
Test printing . . . . . . . . . . . . . . . . . . . . . . . . . . . . . . . . . 31
Installing MUTOH Status Monitor . . . . . . . . . . . . . . 43
Sleep Mode . . . . . . . . . . . . . . . . . . . . . . . . . . . . . . . . . . 44
Viewing Operation Manual . . . . . . . . . . . . . . . . . . . . 46
Safety Precautions . . . . . . . . . . . . . . . . . . . . . . . . . . . . 47
Advertisement
Table of Contents

Related Manuals for Muton XPJ-461UF


Summary of Contents for Muton XPJ-461UF
-
Page 1: Table Of Contents
XPJ-461UF Startup Guide Unpacking and Initial Setup Site Preparation ....... 2 Unpacking . -
Page 2: Site Preparation
Site Preparation Site Preparation Choose the location which satisfies the requirements below. Installation Location Requirements • The table must be level. • Avoid vibration from the neighboring devices. • Low humidity and free from dust. • Less chance of temperature and humidity changes. •... - Page 3 • Choose the work table and floor that can safely support the weight of this product. CAUTION The total weight of printer is 95 kg. If the work table and floor do not have sufficient load capacity, it can lead to injury from a fall. •...
- Page 4 • Ink Storage Condition: Black / Cyan / Magenta / Yellow / White / Varnish (220 ml each) - UH21 ink: Temperature: -10°C to 50°C (The storage period between 40 ℃ and 50 ℃ should be up to one month) Humidity: 5% to 85%, non condensing - US11 ink: Temperature: 5°C to 35°C...
-
Page 5: Unpacking
Unpacking Unpacking Before unpacking, read the instructions below and prepare the necessary items. Unpacking Preparation • Minimum 4 people are required for unpacking, assembling and installation. • The items listed below are required for installation and initial setup. Phillips-head Computer: 1 Power cord: 1 Ethernet cable: 1 screwdriver: 1... - Page 6 Unpack the product. Unpacking the printer • Minimum four people are required for unpacking and moving this product. CAUTION • When taking out the product from the packing box, remove the plastic sheet wrapped around the product, then take out the product. This will prevent slip and damage to the product. •...
- Page 7 Check if the followings are included. □Startup Guide: □Instruction sheet Japanese / English for dedicated ink: □Printer: 1 □Software CD: 1 (this document) Japanese / English □Notes for printing □Notification sheet: □Daily maintenance sheet: on object: □Paper Towel Japanese / English Japanese / English Japanese / English (Lint-free cloth): 5...
- Page 8 8 Unpacking...
-
Page 9: Installing
Installing Installing Follow the steps below to install the printer. Moving to the installation site • Minimum four people are required for unpacking and moving this product. CAUTION • When taking out the product from the packing box, remove the plastic sheet wrapped around the product, then take out the product. - Page 10 Remove the screw, and remove the head fixing plate. • Slide the head fixing plate leftward to take it out. Important! Do not scratch any of the components around the UV-LED lamp with the fixing plate. This could affect print quality. ×...
- Page 11 Attach the waste ink tank to the printer. Attaching Waste Ink Tank Use four screws (M3x6) to attach the waste ink tank holder to the right side of the printer. Align the slotted holes on the holder with the mounting holes on the printer and secure with the screws. Slotted hole ×...
- Page 12 Check that the drain tube valve of the drain tube is closed. Hook the drain tube valve on the clamp, then close the clamp cover. Closed Use seven screws (M3x6) to attach the waste ink tank cover to the right side of the printer to cover the waste ink tank.
- Page 13 Plug the power cord into the wall outlet. Installing 13...
-
Page 14: 14 Leveling Printer
Adjusting left-to-right level of the printer Leveling Printer Follow these steps to adjust the left-to-right level of the printer. Checking levelness • Do not open or close the cover while you are off balance. CAUTION You may pinch your finger or get injured. •... - Page 15 Adjusting left-to-right level Using the double open end spanner, turn the lower nut of all two leveling adjusters as shown in figure left to slightly lift the printer rubber feet away from the table. Use the supplied levels to check if the printer is level left to right. Position it in the center of following two places to check for levelness: •...
- Page 16 • If the position of the bubbles are the same on both sides, move to Step 5. • If not the same, go back to Step 3 to adjust the left-to-right level again. Once the printer is leveled, tighten the upper nut of all two adjusters with the supplied spanner until it reaches to the printer.
- Page 17 Checking the levelness Hold the handle on the front cover to gently open it. Check the LED indicator on the obstacle sensor. • If the sensor lights up green, the printer is already leveled. Close the No Good front cover and move to the next step. "Printer Initial Setup"...
- Page 18 Press the Power button until the message “Power off” appears on the front panel. • The keys on the operation panel light out. Note When the message "Power off" appears on the panel, release the Power button. Wait for a few seconds, then reboot the printer. •...
-
Page 19: Printer Initial Setup
Printer Initial Setup Printer Initial Setup Here is how to get started with your printer. Note Use one of the following methods to run the initial setup. • Follow the instructions in the Startup Wizard to set up the settings via computer. "Initial Setup Flow via Startup Wizard"... - Page 20 Powering on - Installing MSM To run the initial setup through the Startup Wizard on MSM, install MSM on your computer. Then follow the Startup Wizard to run the initial setup. Note • Make sure to install MSM stored in the supplied CD. Check that the front cover is closed.
- Page 21 Initial Setup Flow via Front Panel Configure the initial settings Choose and configure the language, unit of length, temperature, and network setting from the front panel. Activate the printer Enter the activation code from the front panel. Perform initial ink charging Install ink cartridges into the printer and perform ink charging.
- Page 22 Power on the printer and configure the initial settings on the front panel. Step 1 Powering on - Initial settings on the front panel Check that the front cover is closed. to select the language. Language : English Tap [Enter]. Tap [Enter].
- Page 23 Sets the gateway. Gateway : • key: Increase the number. 192. 168. • key: Decrease the number. • key: Move the cursor to the previous digit. • key: Move the cursor to the next digit. Tap [Enter] after entering each digit. Selects how to turn off the printer beep sound when an error occurs.
- Page 24 Enter the 16-digit activation code. 0 0 0 0 - 0 0 0 0 - 0 0 0 0 - 0 0 0 0 • key: Increase the number. • key: Decrease the number. • key: Move the cursor to the previous digit. •...
- Page 25 Before performing the initial ink charging, the cleaning wiper must be installed on the printer. Step 3 Installing the cleaning wiper The message on the left appears on the front panel. Install Wiper • Tap [Enter]. Then Tap Enter The message on the left appears on the front panel. Installed Wiper? •...
- Page 26 Hold the position shown on the left and gently close the cover. • Use to choose “Installed Wiper? Yes”. Installed Wiper? • Tap [Enter]. Follow the steps below to perform initial cleaning and initial ink charging. Step 4 Initial Cleaning - Initial Ink Charging Items Required: •...
- Page 27 • Use to choose “Empty the Tank? Yes”. Empty the Tank? • Tap [Enter]. Yes The message on the left appears on the front panel. Insert Cleaning Cartridges Next -> Enter Note (When you use your printer for the first time or after you replace the waste ink tank) If no or small amount of waste fluid is collected in the waste ink tank, you may not be able to drain fluid out of the tank.
- Page 28 Note (When you use your printer for the first time or after you replace the waste ink tank) If no or small amount of waste fluid is collected in the waste ink tank, you may not be able to drain fluid out of the tank. Emptying the waste ink tank CAUTION Do not touch uncured UV ink with bare hands.
- Page 29 Put the tip of the drain tube valve in the empty container and open Open the drain tube valve to drain waste ink from the waste ink tank. Important! Waste ink may splash while draining from the waste ink tank. Make sure to put the tip of the drain tube valve in the empty container to drain waste ink.
- Page 30 Note If no or small amount of waste fluid is collected in the waste ink tank, you may not be able to drain fluid out of the tank. • Use to choose “Empty the Tank? Yes”. Empty the Tank? • Tap [Enter]. ...
-
Page 31: Test Printing
Test printing Test printing Follow the steps below to load a media into the printer. Load a media on the printer Items Required: • Media (A4 size) Place the standard table on the table base Note If place the optional vacuum table, follow the operation manual of optional vacuum table. Check that the message on the left is displayed. - Page 32 Place the standard table on the table base. • Fit the bottom of the table to the width of the table base. Slide the table to the end until the registration pins on the table base fit into the notches on the bottom of the table. Secure the table with two screws.
- Page 33 Turn the PG handwheel to raise the table to the top. • Turn the PG handle anti-clockwise. • There is 1 mm scale on the left side of the PG handwheel. The table can be raised up to 70 mm. Important! •...
- Page 34 Rotate the thumb screws on each adjuster to raise the table to the top. • Rotate them clockwise. • Raise the table until the media height guide is lifted off the plates on both sides. Note If the table does not raise smoothly, try to loosen the thumb screws of the adjusters on both sides (Once leveled, tighten the thumb screws).
- Page 35 [11] Loosen the thumb screws with nuts securing the adjusters on both sides of the table (one each). • Rotate them anti-clockwise. [12] Repeat Step 6 through Step 8 to level the back side of the table. • Use the adjusters on both sides of the table to level the back side. [13] Tighten two adjuster nuts on both sides (one each).
- Page 36 Adjusting the table’s height Place the media on the table. • Set an A4 size media in landscape orientation on the table. Note • Align the right front corner of the media with the media registration groove on the table. •...
- Page 37 • Remove the media height guide. • Close the PG handwheel cover. Hold the position shown on the left and gently close the cover. Specify the print start position Set media, then Tap [∧] key. The message on the left will appear. Please Wait • The table will move inward, and a check will be run using the obstacle sensor, to make sure that the media will not contact with the head.
- Page 38 Use the to input the media width. **:Width : Tap [Enter]. (30 - 483) 483 mm Note • These menu items will only appear if “On” is set for “Detailed-Set”. • Any value from 30 mm to 483 mm can be set for the width. Use the to input the media length.
- Page 39 The message on the left will appear. Please Wait That completes setting of the media. Print Ready Type 1 Run a nozzle check print. If nozzle missing is found, perform cleaning. Nozzle Check and Cleaning Important! If you run a nozzle check print immediately after the initial ink charging, the following symptoms may occur: •...
- Page 40 Tap [Enter]. Print Nozzle Check? • The printer will print the nozzle check pattern. Start -> Enter Look at the print. • If you find missing or thin lines on the print, go to "Perform cleaning" P. • If all lines are clearly printed, you can start printing. 4 Color 6 Color Note...
- Page 41 • Use to choose “Menu 2: Test Print”. Menu2 • Tap [Enter]. Test Print • Use to choose “Test Print 2: Nozzle Check B”. Test Print2 • Tap [Enter]. Nozzle Check B Look at the print. • If you find missing or thin lines on the print, go to "Perform cleaning"...
- Page 42 Perform cleaning Check that the message on the left is displayed. Print Ready Type 1 to choose the cleaning mode. Clean Print Head? Tap [Enter]. • The printer will start cleaning. Short Clean Print Head? Normal Clean Print Head? Long Run a nozzle check print again.
-
Page 43: Installing Mutoh Status Monitor
To view the operation manual, see "Viewing Operation Manual" P. 46 The following documents are available in the PDF format. • XPJ-461UF Operation manual “Operations and Maintenance Methods” • XPJ-461UF Startup Guide (This manual) • XPJ-461UF Driver User’s Guide • MUTOH Status Monitor Operation manual •... -
Page 44: Sleep Mode
Sleep Mode Sleep Mode When you are not using the printer, always put it into the sleep mode. Do not disconnect the power cord. If you do not put the printer into the sleep mode, the ink inside the printer could settle out and/or coagulate, causing poor image quality or printer failure. - Page 45 Tap [Enter]. Sleep Mode Start ー> Enter Tap [Enter]. Daily Maintenance Start ー> Enter The table moves to the front side of the printer. Please Wait Remove the media and the jig on the table, and then tap [Enter]. Unload Media then Tap Enter •...
-
Page 46: Viewing Operation Manual
Viewing Operation Manual Viewing Operation Manual You can view each operation manual stored in the supplied CD as follows: Insert the supplied CD into the CD-ROM drive. • The Startup Wizard will start up automatically. • If the Startup wizard does not automatically start, right click the icon of CD- ROM drive, open the contents of CD with [Open], and double click MpTotalInst.exe. -
Page 47: Safety Precautions
Safety Precautions Safety Precautions Important Notice For Users in Europe The CE marking is a mandatory European marking for certain product groups to indicate conformity with the essential health and safety requirements set out in European Directives. By affixing the CE marking, the manufacturer, his authorized representative, or the person placing the product on the market or putting it into service ensures that the item meets all the essential requirements of all applicable EU directives and that the applicable conformity assessment procedures have been applied. - Page 48 Electrical Shock, Short, and Fire Hazard WARNING DO NOT install this product in a location with high Use the designated power cord only. humidity and dust. Failure to do so could result in an electrical shock or fire. This could result in an electrical shock or fire. DO NOT use a damaged power cord.
- Page 49 Installation Precautions WARNING When installing this product, avoid the location where • the floor is not flat and level. • the product gets vibration from the neighboring devices. Failure to do so may result in injury from a fall. CAUTION DO NOT tilt or turn the product upside down.
- Page 50 Product Handling (continued) This product generates the UV light or potentially When loading a new media, make sure to place it on harmful radiation from the UV-LED lamp. an appropriate position and input correct media information. • Avoid direct skin or eye exposure to UV light. If wrong information is entered, the printer can print on •...
- Page 51 Ink Handling WARNING • You are obligated to properly dispose of waste fluid from the printer in compliance with Wastes Disposal and Public Cleansing Act and local ordinances. Delegate disposal to an industrial waste disposal contractor. • Waste fluid from this printer is harmful to aquatic organisms. Avoid the waste fluid from out flowing to sewage or natural water systems.
- Page 52 Warning Labels Warning labels are applied onto the product where special attention is required. Read the messages on the labels and always follows the instructions. If the labels are peeled off or become dirty, contact your local MUTOH dealer to get new one. Laser Caution Label for Access Panel Waste Ink Caution Label Protective equipment label...
- Page 53 Instruction Labels The following instructions labels are applied onto the printer to ensure the proper use. Ink color indicating labels Install ink cartridges that match the colors in the labels. Protective equipment label Rating plate Two-way Valve Label The serial number is written on this label. Note The following marks are for China’s safety standards.
- Page 54 Dan hab yungh youq gij dienheiq diuzgen mbouj dwg diegndat haenx ancienz sawjyungh. 54 Safety Precautions...
- Page 55 Safety Precautions 55...
- Page 56 XPJ461UFE-Q-00...
Need help?
Do you have a question about the XPJ-461UF and is the answer not in the manual?
Questions and answers