Advertisement
Quick Links
ANI-2PIP-LOGO
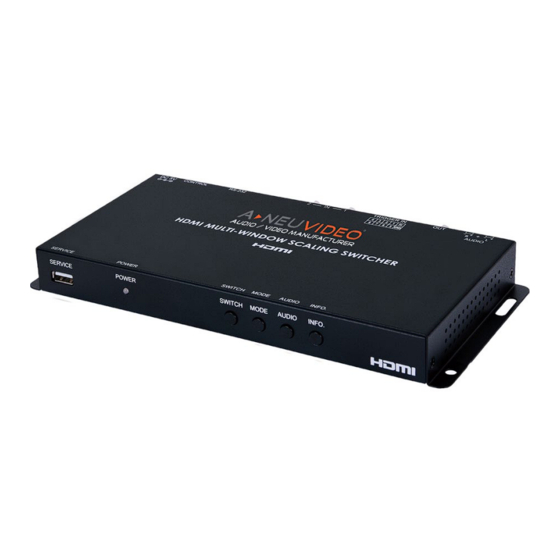
2x1 HDMI Multiviewer
PACKAGE CONTENTS
Before attempting to use this unit, please check the packaging and make sure the
following items are contained included:
• ANI-2PIP-LOGO HDMI Multiviewer
• 5V/2.6A DC Power Adapter
• (3) 5-pin Terminal Block
• Shockproof Feet (Set of 4)
A-NeuVideo.com
Frisco, Texas 75036
Advertisement

Summary of Contents for A-Neuvideo ANI-2PIP-LOGO
- Page 1 PACKAGE CONTENTS Before attempting to use this unit, please check the packaging and make sure the following items are contained included: • ANI-2PIP-LOGO HDMI Multiviewer • 5V/2.6A DC Power Adapter • (3) 5-pin Terminal Block • Shockproof Feet (Set of 4) A-NeuVideo.com...
- Page 2 NEUVIDEO SAFETY INFORMATION SAFETY PRECAUTIONS Please read all instructions before attempting to unpack, install or operate this equipment and before connecting the power 1. To ensure the best results from this product, please read this manual and all other documentation before operating your supply.
-
Page 3: Table Of Contents
INTRODUCTION • Support for Windows PC character generation software to simplify the process of generating text The ANI-2PIP-LOGO HDMI Multiviewer is capable of scaling up to (2) sources and displaying both or graphics to use with keying/overlay (Optional) simultaneously on a single HDMI output within their own windows. This is the ideal solution for •... -
Page 4: Specifications
SPECIFICATIONS / APPLICATIONS SPECIFICATIONS SPECIFICATIONS Cable Specifications • HDMI Bandwidth: 225MHz/6.75Gbps • HDMI Cable Length for 1080p - 8-bit & 12-bit: Input & Output: 32 ft/10 M • Input Ports: (2) HDMI • Output Ports: (1) HDMI / (1) Stereo (Terminal Block) Video Specifications •... -
Page 5: Operation Controls & Functions
OPERATION CONTROLS & FUNCTIONS OPERATION CONTROLS & FUNCTIONS Front Panel BACK Panel q SERVICE: This port is reserved for firmware update use only. q AUDIO OUT: Connect to powered speakers or an amplifier for balanced stereo analog audio output. w POWER LED: This LED will illuminate to indicate the unit is on and receiving power. -
Page 6: Telnet Control
RS-232 Telnet Control Before attempting to use Telnet control, please ensure that both the unit and the PC/laptop are RS-232 Pin Definition connected to the same active network. ASSIGNMENT ASSIGNMENT To Access Telnet Windows 7 Click START, type “cmd” in the search field and press ENTER. Windows 10 1. - Page 7 RS-232 & Telnet Commands RS-232 & Telnet Commands COMMAND DESCRIPTION & PARAMETERS COMMAND DESCRIPTION & PARAMETERS Show the full command list. SET IN N1 EDID N2 8 Set the EDID to use with input N1. N1 = 1 ~ 2 [Input port] HELP 8 Show the full command list.
- Page 8 RS-232 & Telnet Commands RS-232 & Telnet Commands COMMAND DESCRIPTION & PARAMETERS COMMAND DESCRIPTION & PARAMETERS GET IN N1 CONTRAST 8 Show the current contrast value for input N1. GET IN N1 TEMPERATURE 8 Show the currently set color temperature used by input N1. N1 = 1 ~ 2 [Input port] SET IN N1 CHROMA N2 8...
- Page 9 RS-232 & Telnet Commands RS-232 & Telnet Commands COMMAND DESCRIPTION & PARAMETERS COMMAND DESCRIPTION & PARAMETERS GET CHROMAKEY N1 Show the current key range set for the selected color GET IN N1 HEIGHT 8 Show the current vertical size of input N1’s window in pixels. RANGE 8 component.
- Page 10 RS-232 & Telnet Commands RS-232 & Telnet Commands COMMAND DESCRIPTION & PARAMETERS COMMAND DESCRIPTION & PARAMETERS GET OUT A OSD INFO Show the OSD’s current vertical position. SET OUT A OSD LOGO Set the horizontal position of the OSD graphical logo. VPOSITION 8 HPOSITION N1 8 = 0 ~ 100...
-
Page 11: Webgui Control
WebGUI Control WebGUI Control DEVICE DISCOVERY APP: Please obtain the “Device Discovery” software from your authorized Clicking the red “Logout” tab will automatically log the currently dealer and save it in a directory where you can easily find it. Connect the unit and your PC/Laptop connected user out of the WebGUI and return to login page. - Page 12 WebGUI Control WebGUI Control ■ Priority: Selects which input channel is on top in the multi- windowing modes. WINDOWS SETUP TAB: This tab provides access to controls for the individual windows in the multi-windowing modes (PIP, SBS, POP) of the unit including size and position. Both windows may ■...
- Page 13 WebGUI Control WebGUI Control • OSD SETTINGS: This section provides control over all OSD formatiing. • CHROMAKEY SETUP: This section provides all controls relating to the chromakeying function of the unit. ■ Timeout: Sets the length of time for the OSD to remain on the screen in seconds. ■...
-
Page 14: Connection Diagram
WebGUI Control CONNECTION DIAGRAM SYSTEM TAB: This tab provides firmware update functionality and, system configuration backup/ restore functions. • SYSTEM: This section contains all controls relating to firmware upgrades and system configuration export. ■ Firmware Upgrade: To update the unit’s firmware, click the “Choose File” button to open the file selection window and then select the firmware update file (*.bin format) located on your local PC. - Page 15 THROUGH OR UNDER A-NeuVideo, INC (COLLECTIVELY, THE “PRODUCT”). By using installing or using the Product, you unconditionally signify your agreement to these Terms and Conditions. If you do not agree to these Terms and Conditions, do not use the Product and return the Product to A-NeuVideo, Inc. at the return address set forth on the Product’s packing label at your expense.


Need help?
Do you have a question about the ANI-2PIP-LOGO and is the answer not in the manual?
Questions and answers