Kleenmaid cooking RHGV90 Instructions For Use And Warranty Details
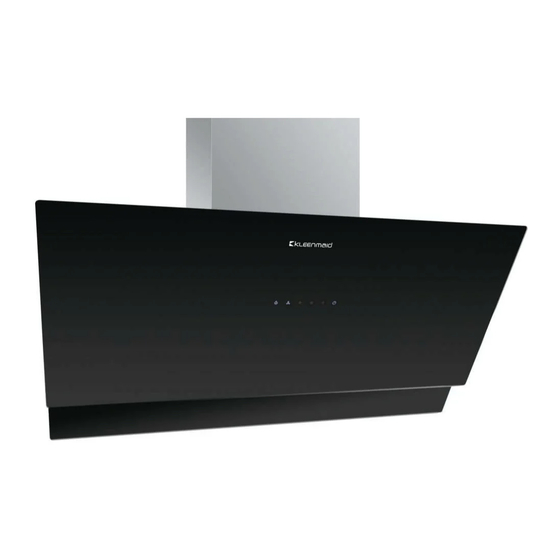
Wall mounted rangehood
Hide thumbs
Also See for cooking RHGV90:
- Instructions for use and warranty details (17 pages) ,
- Instructions for use and warranty details (17 pages)

Subscribe to Our Youtube Channel
Related Manuals for Kleenmaid cooking RHGV90


Summary of Contents for Kleenmaid cooking RHGV90
- Page 1 cooking collection Instructions for use and warranty details To register your warranty or make a warranty claim, scan this QR code: Wall Mounted Rangehood Model No.: RHGV90...
- Page 2 Once installation is complete, please read this instruction manual carefully and get to know the controls and the features of your new Kleenmaid appliance. These simple instructions will enable you to achieve excellent results from the very first time you use it.
-
Page 3: Recommendations And Suggestions
RECOMMENDATIONS AND SUGGESTIONS NOTE: Before making preparations for or commencing installation, the installer should refer to the current online version of the User Manual, which is available on the Kleenmaid website (see back cover for details). INSTALLATION The manufacturer will not be held liable for any damages resulting from incorrect or improper installation. - Page 4 COMPONENTS Ref. Qty. Product Components Hood Body, complete with: Controls, Light, Blower, Filter. Lower Decorative Chimney Upper Decorative Chimney arbon ilter (optional accessory) Qty . Ref. Installation Components Screws 5 x 50 Wall Plugs Screws Hood fixing bracket ( optional ) Chimney fixing bracket ( 0 / 1 optional ) Qty.
- Page 5 DIMENSIONS Min. Min. 00mm 00mm he safety gap between the rangehood and the hob below must comply with the recommendations of the hob manufacturer. In case of no instructions, a minimum distance of 530 mm (or other minimum distance as may be specified by S N S 0 and interpreted by a certified installer)
-
Page 6: Installation
INSTALLATION WALL DRILLING AND BRACKET FIXING As a first step, proceed with the following drawings: A vertical line up to the ceiling or up to the upper limit, at the center of the area in which the hood is to be fitted. A horizontal line A at 1320 –... -
Page 7: Ducted Version Air Exhaust System
Mark a point (3) on the horizontal line C, mm to the right of the vertical reference line. Repeat this operation on the other side, checking that the two marks are Fix the brackets Drill at the marked points (1) (2) (3), using a ɸ10 mm drill bit. Insert the Wall Plugs 11 into the holes (1) (2) (3). -
Page 8: Chimney Assembly
CHIMNEY ASSEMBLY The chimney can only be installed with rangehood. Lower Decorative Chimney Fix a Chimney fixing bracket 21 onto the Lower Decorative Chimney with 2 screws 12 x 9.5) supplied with the hood. Slightly widen the two sides of the flue and hook them onto the hood body, making sure that they are well seated. -
Page 9: Control Panel
CONTROL PANEL Button Function Remarks Turns the Motor ON. When is off. Enables shutdown of the Motor with a 3 minute delay, flashes. When is on. Turns the Motor OFF. When is flashing. W speed . Turns the Motor on at Buttons are on. -
Page 10: Maintenance
Normally these filters will last the life of the rangehood, however if they are damaged in any way, replacements may be purchased by visiting our website www.kleenmaid.com.au, emailing support@kleenmaid.com.au or calling 0 9 should... - Page 11 Open the cover panels, pulling them downwards. REMOVE Remove the metal grease filters Remove the saturated carbon filters. Fit the new filters. Replace the metal grease filters. REMOVE Close the cover panel. t must be ensured that the filters are correctly installed whenever the rangehood is operating.
-
Page 12: Light Replacement
LIGHTING LIGHT REPLACEMENT 1.5W LED light. rangehood rangehood Max Power Voltage Picture Lamp Cap ILCOS D code Disconnect the cable connector from the light. Replace the light with a new one of the same type, making sure that you correctly reconnect the cable connector. -
Page 13: Troubleshooting
TROUBLE SHOOTING Fault Cause Solution The capacitor is damaged. Replace capacitor. Light on, but The motor is damaged. Replace motor. motor does not The internal wiring of motor is cut off/ work Replace motor. disconnected. An unpleasant smell may be produced. Apart from the above mentioned, check the following: Both light and Light damaged. - Page 14 ompass apital Services ty td trading as leenmaid will provide parts and labour to you the customer as set out herein. leenmaid’s roducts come with guarantees that cannot be e cluded under the ustralian onsumer aw. ou are entitled to a replacement or refund for a ma or failure and for compensation for any other reasonably foreseeable loss or damage. ou are also entitled to have the goods repaired or replaced if the goods fail to be of acceptable quality and the failure does not amount to a ma or failure.
- Page 15 Warranty is current as at anuary 0 9 but is sub ect to variation from time to time. or the latest version of the leenmaid Warranty, please see our website https://kleenmaid.com.au/warranty/ or phone us on (0 ) 9...
- Page 16 Other products available in the Kleenmaid range of appliances Washing machines Clothes dryers Dishwashers Ovens Cooktops Steam ovens Microwave ovens Built in espresso coffee machines Rangehoods Freestanding ovens Refrigerators & Freezers Beverage Serving Cabinets Water Dispensers Vacuum Cleaners Compass Capital Services Pty Limited...
Need help?
Do you have a question about the cooking RHGV90 and is the answer not in the manual?
Questions and answers