S+S Regeltechnik AERASGARD RLQ-CO2 Operating Instructions, Mounting & Installation
Room air quality, temperature and co2 sensors respectively measuring transducers (voc), self-calibrating, with active output, series odinii
Hide thumbs
Also See for AERASGARD RLQ-CO2:
- Operating instructions, mounting & installation (16 pages) ,
- Operating and mounting instructions manual (57 pages)
Advertisement
Quick Links
Operating instructions, mounting & installation
und RCO
RLQ- ⁄ RTM- ⁄ RFF- ⁄ RFTF-CO
2
2
Room air quality ⁄ temperature ⁄ humidity
and CO2 sensor respectively measuring transducer (VOC)
und KCO
KLQ-CO
including mounting flange
2
2
Duct air quality and
CO2 sensor respectively measuring transducer (VOC)
S+S REGELTECHNIK GMBH | KLINGENHOFSTR. 11 | 90411 NUREMBERG | GERMANY |
PHONE +49(0)911 ⁄ 51947-0 | FAX +49(0)911 ⁄ 51947-70 | www.S p lusS.eu | mail@SplusS.eu
Industry-oriented solutions –
Complete control technology from one source!
Advertisement

Related Manuals for S+S Regeltechnik AERASGARD RLQ-CO2


Summary of Contents for S+S Regeltechnik AERASGARD RLQ-CO2
- Page 1 Operating instructions, mounting & installation und RCO RLQ- ⁄ RTM- ⁄ RFF- ⁄ RFTF-CO Room air quality ⁄ temperature ⁄ humidity and CO2 sensor respectively measuring transducer (VOC) und KCO KLQ-CO including mounting flange Duct air quality and CO2 sensor respectively measuring transducer (VOC) S+S REGELTECHNIK GMBH | KLINGENHOFSTR. 11 | 90411 NUREMBERG | GERMANY | PHONE +49(0)911 ⁄ 51947-0 | FAX +49(0)911 ⁄ 51947-70 | www.S p lusS.eu | mail@SplusS.eu Industry-oriented solutions – Complete control technology from one source!
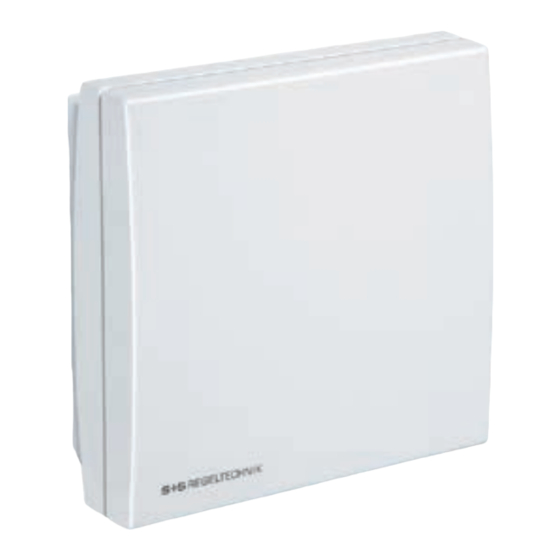
- Page 2 RLQ - C O ® AERASGARD 2 RTM - C O ® AERASGARD 2 AERASGARD ® Room air quality, temperature and CO2 sensors respectively measuring transducers (VOC), self-calibrating, with active output, series Odin I I APPLICATION: xx CO This self-calibrating microprocessor-controlled CO and mixed gas measuring instrument is used for the detection of air quality and ⁄ or CO content in air within a range of 0 ppm to 2000 ppm CO . ...
- Page 3 Dimensional drawing Enclosure Odin II xx CO xx CO 2 with display Connecting diagram Traffic light indication RTM - CO - A Range (CO - content) 2 RTM - CO - A Green 1 0 - 500 ppm with LED (traffic light CO2 indication) Green 2 500 - 800 ppm Yellow 800 - 1200 ppm Red 1 1200 - 1600 ppm Red 2 > 1600 ... > 2000 ppm Connecting diagram RTM - CO Connecting diagram RLQ - CO xx CO 2 with stainless steel enclosure Type ⁄ WG1 Measuring range Measuring range Measuring range Output ...
- Page 4 KLQ-CO ⁄ KCO including mounting flange ® AERASGARD 2 ALQ-CO ⁄ ACO AERASGARD ® 2 Duct and on-wall air quality and CO2 sensors respectively measuring transducers (VOC), self-calibrating, with active output APPLICATION: 2 KLQ-CO These self-calibrating microprocessor-controlled CO and mixed gas measuring instruments are used for the detection of air quality and ⁄ or CO content in air within a range of 0 ppm to 2000 ppm CO . Measuring signals are converted into standard signals of 0 – 10 V. Optional, this device can be supplied with switching output, with 9-point LED indication, or with a combination of various output variants. The CO content of air is determined by a NDIR sensor. Self-calibration of the CO measurement takes place in cycles of ca. 7 days. In order to ensure this function, the device must be exposed to fresh air (CO content 300...400 ppm) at least once every 7 days. The air quality detection range is calibrated for standard applications such as air quality monitoring in resi- dential and conference rooms. The lifetime of the chemical mixed gas sensor used for this purpose is limited. It depends on type and concentration of pollutant gases. When device-specific parameters are observed, the expected lifetime is at least 36 months. TECHNICAL DATA: Power supply: ...
- Page 5 Circuit diagram ⁄ KCO Dimensional drawing 2 KLQ-CO Dimensional drawing Circuit diagram ALQ - CO ⁄ KLQ - CO 2 ALQ-CO ...
- Page 6 Information for installation Mounting information RCO2 ⁄ KCO The sensor element is connected to the electronic component assembly by a plug connector. When removing the cover and internal wiring, make sure not to loosen this connector. To connect the electric leads, the terminal is pulled off the component assembly. The cable is lead through the cable union and connected to the terminal. After tightening the connections, the plug connector is put back on again (ensure correct polarity!). The connecting cable is carefully pulled back while putting the cover back on and then is fixed by the cable union. Watch for the wire connections inside the device during mounting. Automatic calibration of carbon dioxide measurement (default) The device calibrates itself at an interval of 7 days. To ensure this function, the device needs to be supplied with fresh air (CO content 300 ppm...400 ppm) at least for 10 minutes during each 7-day period. For self-calibration, the devices memorises device-internally the content minimum value measured during a 7-day period. After 7 days, this minimum value is standardised to 350 ppm CO and the output signal is corrected accordingly. The maximum amount of correction is here limited to 40 ppm ⁄ interval. Manual calibration of carbon dioxide measurement Manual calibration can be started independently from the position of jumper J3 by pushing the button. After connecting the device, a period of at least 10 minutes of continuous operation of the device at fresh air (CO content 300 ppm...400 ppm) is to be ensured. Manual calibration of the output signal to 1.75 V (350 ppm = zero-point) is started by pressing the button “Manual calibration CO “ (for ca. 5 seconds). Preparing for calibration is indicated by a blinking LED. Setting the output to 1.75 V at actual ambient conditions follows automatically thereafter. During this phase, the LED is permanently activated. After calibration is completed, the LED is deactivated. Putting in operation After switching on the device, a self-test and tempering period follows. This procedure takes 3 to 5 minutes, depending on ambient conditions. During this time, the output analog voltage differs from the actual measured value. SuPPLy VOLTAGE: Connection scheme Individual operation For operating voltage reverse polarity protection, a one-way rectifier or r everse polarity protection diode is integrated in this device variant. This ...
- Page 7 Information for installation General notes on RLQ ⁄ KLQ-CO 2 Automatic calibration of air quality (default) The minimum initial value for air quality is memorized within a period of ca. 4 weeks. After that period has lapsed, the output signal is standardised to zero-point (1.0 V). The maximum amount of correction is thereby limited to 1 V ⁄ interval. In this way, long-term drifts and operational aging effects of the sensor element are completely eliminated. Manual calibration of air quality Manual calibration can be started independently from the position of jumper J2 by pushing the button. After connecting the device, a period of at least 2 hours of continuous operation of the device at “normal“ air quality is to be ensured. Manual calibration of the output signal to 1 V (zero-point) is started by pressing the button “Manual calibration“ (for ca. 5 seconds). Preparing for calibration is indicated by a blinking LED. Setting the output to 1 V at actual ambient conditions follows automatically thereafter. During this phase, the LED is permanently activated. After calibration is completed, the LED is deactivated. General information of air quality Due to its functional principle, the lifetime of the sensor depends on nature and concentration of the pollutant gas burden. The sensitive layer of the sensor element reacts with all volatile organic compounds and is thereby modified in its electrical properties or “exhausted“. This process results in a displacement of the characteristic curve. Such characteristic curve displacement however amounts to less than 15 % ⁄ year under normal burden. In measuring air quality, the general condition of air quality is detected. Whether air quality is “good“ or “bad“ is differently interpreted by each person. Different pollution burdens and concentrations influence the air quality signal (0..10 Volt) in different ways. Examples for this are cigarette smoke, deodorant sprays, cleaning agents, or also various adhesive ma- terials for floor and wall coverings as well as dyestuffs. Increased burdens e.g. by solvents, nicotine, hydrocarbons, aerosol propellants etc. intensify consumption ⁄ aging of the sensor element. Particularly under high pollutant gas burdens – also during non-operational idle state periods of the devices (transport and storage) – zero-point drift will occur. Consequently, this must be corrected at site according to the respective circumstances or basic burdens. Air quality measuring instruments of different manufacturers cannot directly be compared because of different functional principles, preset basic burdens (zero-point), and permitted burdens (amplification ⁄ sensitivity). Devices are preset respectively calibrated according to the sensor manufacturer‘s specifications. Here, a zero-point and a final value is determined and thus a maximum burden. In particular cases, exceeding measuring ranges or excessive basic burdens on the devices will occur (outgassing floor carpeting, wall paint, etc.). In order to enable distinguishing different air qualities, devices need to be adjusted by the customer according to the conditions existing on site that do not correlate to the factory-preset definition range and calibration. Please note that factory calibration is thereby lost and compliance with technical data can no longer be guaranteed. Automatic calibration of carbon dioxide measurement (default) The device calibrates itself at an interval of 7 days. To ensure this function, the device needs to be supplied with fresh air (CO content 300 ppm...400 ppm) at least for 10 minutes during each 7-day period. For self-calibration, the devices memorises device-internally the content minimum value measured during a 7-day period. After 7 days, this minimum value is standardised to 350 ppm CO and the output signal is corrected accordingly. The maximum amount of correction is here limited to 40 ppm ⁄ interval. Manual calibration of carbon dioxide measurement Manual calibration can be started independently from the position of jumper J3 by pushing the button. After connecting the device, a ...
- Page 8 General notes Our “General Terms and Conditions for Business“ together with the “General Conditions for the Supply of Products and Services of the Electrical and Electronics Industry“ (ZVEI conditions) including supplementary clause “Extended Retention of Title“ apply as the exclusive terms and conditions. In additionIn addition, the following points are to be observed: - These instructions must be read before installation and putting in operation and all notes provided therein are to be regarded! - Devices must only be connected to safety extra-low voltage and under dead-voltage condition. To avoid damages and errors the device (e.g. by voltage induction) shielded cables are to be used, laying parallel with current-carrying lines is to be avoided, and EMC directives are to be observed. - This device shall only be used for its intended purpose. Respective safety regulations issued by the VDE, the states, their control authorities, the TÜV and the local energy supply company must be observed. The purchaser has to adhere to the building and safety regulations and has to prevent perils of any kind. - No warranties or liabilities will be assumed for defects and damages arising from improper use of this device. - Consequential damages caused by a fault in this device are excluded from warranty or liability. - These devices must be installed by authorised specialists only. - The technical data and connecting conditions of the mounting and operating instructions delivered together with the device are exclusively valid. Deviations from the catalogue representation are not explicitly mentioned and are possible in terms of technical progress and continuous improvement of our products.
Need help?
Do you have a question about the AERASGARD RLQ-CO2 and is the answer not in the manual?
Questions and answers