Speedlink XEOX SL-6566-BK-01 - Wireless Gamepad User Guide
- User manual (7 pages)
Advertisement
GET STARTED


CHARGING
First, charge the gamepad: using the mini-USB cable, connect the gamepad to any free USB port on the PC or another USB power source. The gamepad's upper-right LED will flash during charging which takes up to 3 hours; be aware, the initial charge may take longer. As soon as the LED stays lit, charging is complete and you can disconnect the cable.
DRIVER INSTALLATION
Download the driver to install the XEOX software at www.speedlink.com. Always use the latest driver version. You need to install the driver to use the vibration function.
CONNECTING
Plug the USB receiver into a free USB port on your PC. The operating system will detect the device automatically and it will be ready to use a few seconds after that.
WIRELESS CONNECTION
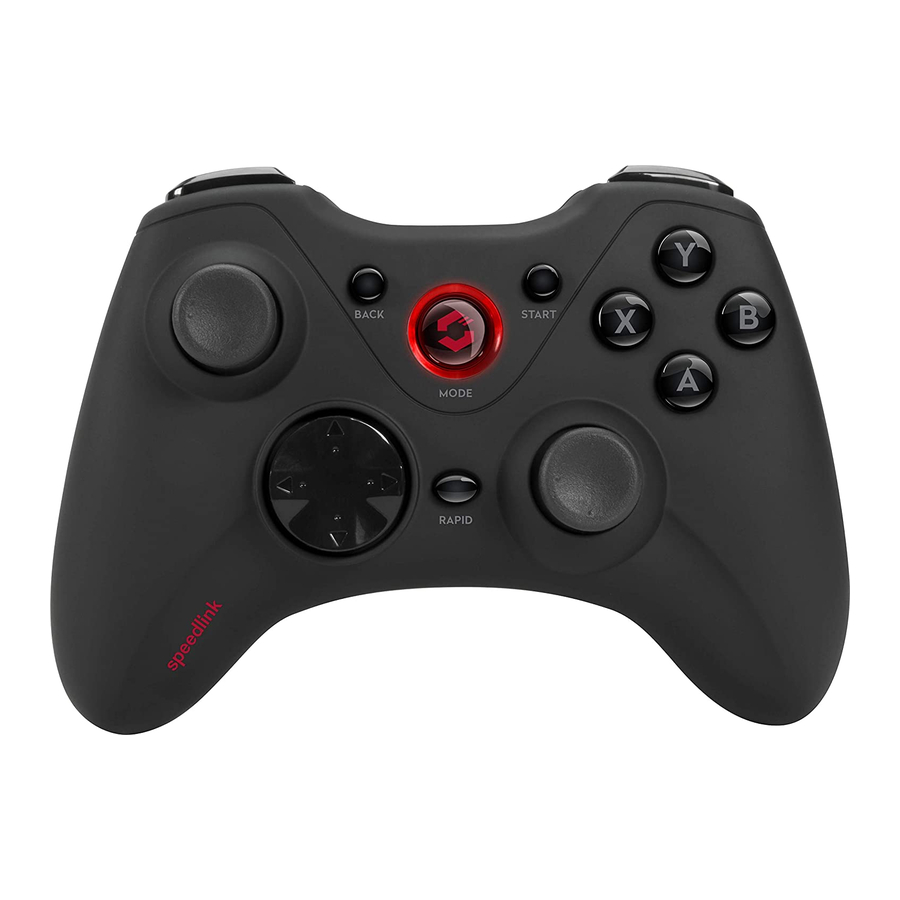
Press and hold the Mode button for three seconds to switch the gamepad on. Following that, the gamepad's upper-left LED will start to flash. When you first use the gamepad, press the Mode button again to establish the connection to the PC. When doing so, place the gamepad near the receiver. The connection process takes a few seconds and will take place automatically from now on when the gamepad is switched on. The upperleft LED will remain lit if the connection has been established successfully.
XINPUT AND DIRECTINPUT*
You can switch between the gamepad's two operating modes using the switch on the back: 'X' for XInput (for the majority of the latest games) and 'D' for DirectInput* (for all older and some newer games). Set the gamepad to the desired mode before starting a game. Switching during gameplay may stop the game identifying the controller correctly; if this happens, restart the game. Please consult the manual that accompanied the game, ask the publisher or try both modes to establish which mode works the best.
D-PAD MODE
In DirectInput* mode, press the Mode button briefly to switch between the two digital D-pad modes. If the lower-left LED is lit, coolie-hat mode is active. If this LED is not lit, the D-pad controls the axes of the left analogue stick; in addition, the right analogue stick takes over the function of buttons 1 to 4.
RAPID-FIRE FUNCTION
The rapid fire function allows a button to fire multiple times when pressed. To do this, keep the Rapid button held depressed and press the button you want to assign this function to. The lowerright LED will flash in rapid fire mode. If you press this button again while pressing and holding the Rapid button, the button will switch from rapid fire to auto fire mode. In doing so, the lower-right LED will flash and the button will fire automatically in rapid succession when pressed once. To reset the button back to single-fire mode, press and hold the Rapid button and press the relevant button again.
SETTINGS
Test the gamepad's functions by opening the Windows* Control Panel and going to the Game Controllers option (Windows* 7, 8, 10). In DirectInput* mode, you will also find the options there for the vibration function; for XInput games, configure the vibration functions in the game's options settings. Please note, vibration functions only work if supported by the game.
STANDBY MODE
After seven minutes of inactivity (or after 30 seconds if a wireless connection has not been established), the gamepad will switch to standby mode; to reactivate it, press the Mode button. If the upper-right LED starts flashing during use, charge the gamepad. You can use and charge the gamepad at the same time. You can switch it off by pressing and holding the Mode button for three seconds.

Documents / Resources
References
Download manual
Here you can download full pdf version of manual, it may contain additional safety instructions, warranty information, FCC rules, etc.
Download Speedlink XEOX SL-6566-BK-01 - Wireless Gamepad User Guide
Advertisement


Need help?
Do you have a question about the XEOX SL-6566-BK-01 and is the answer not in the manual?
Questions and answers