
Subscribe to Our Youtube Channel
Related Manuals for Electrolux Professional ESI


Summary of Contents for Electrolux Professional ESI
- Page 1 Glass and cup washer for bars Installation manual * 59566V001- 2021.07 *Original instructions...
- Page 2 Installation diagram 795* 880** 635* 715**...
- Page 3 * = Short version EQ = Equipotential screw ** = Small version D = Drain pipe with internal diameter: EI = Power supply entry ⌀ = 40 mm (Only for model with free-fall drainage) CWI = Cold water Inlet pipe with ⌀ =3/4″ G fittings ⌀...
- Page 4 Foreword Read the following instructions, including the warranty terms before installing and using the machine. Visit our website www.electroluxprofessional.com and open the Support section to: Register your product Get hints & tips of your product, service and repair information The installation, use and maintenance manual (hereinafter Manual) provides the user with information necessary for correct and safe use of the machine (or “appliance“).
-
Page 5: Table Of Contents
Contents A SAFETY INFORMATION ......................... 6 General information ........................6 General safety ..........................6 Personal protection equipment ......................7 Transport, handling and storage ...................... 7 Installation and assembly ....................... 8 Water connection.......................... 8 Electrical connection ........................8 Machine cleaning and maintenance....................9 Service............................ -
Page 6: Asafety Information
SAFETY INFORMATION General information To ensure safe use of the machine and a proper understanding of the manual it is necessary to be familiar with the terms and typographical conventions used in the documentation. The following symbols are used in the manual to indicate and identify the various types of hazards: WARNING Danger for the health and safety of operators. -
Page 7: Personal Protection Equipment
• Machine positioning, installation and disassembly must be carried out by the specialised personnel in conformity with the current safety regulations, regarding the equipment used and the operating procedures. Personal protection equipment Summary table of the Personal Protection Equipment (PPE) to be used during the various stages of the machine's service life. -
Page 8: Installation And Assembly
• For machine lifting and anchoring, do not use movable or weak parts such as: casings, electrical raceways, pneumatic parts, etc. • Do not push or pull the machine to move it, as it may tip over. Use proper tool to lift the machine. -
Page 9: Machine Cleaning And Maintenance
• To protect the power supply of the machine against short circuits and/or overloads, install a thermal fuse or a suitable automatic thermal magnetic circuit breaker, ADS (Automatic Disconnection of Supply). • To protect the power supply of the machine against current leakages, install a high- sensitivity manual reset RCD (Residual Current Device), suitable for overvoltage category III. -
Page 10: Disposal Of Packing
His professionalism covers the Electrolux Professional spa - Viale Treviso, 15 - 33170 Pordenone (Italy) mechanical, electrotechnical and elec- tronics fields. The dataplate gives the product identification and technical data;... -
Page 11: How To Identify The Technical Data
Ser.Nr. 12.1 kW Nominal 9.9 kW Made in EU 2020 IPX4 Electrolux Professional spa - Viale Treviso, 15 - 33170 Pordenone (Italy) F.Mod. Comm.Model Ser.Nr. 50 Hz Type ref. IPX5 Electrolux Professional spa - Viale Treviso, 15 - 33170 Pordenone (Italy) -
Page 12: Copyright
This manual is intended for: and can only be given to third parties with the permission of • the carrier and handling personnel; Electrolux Professional company. • installation and commissioning personnel; • specialised personnel - Customer Care service (see service Keeping the manual manual). -
Page 13: Dtransport, Handling And Storage
TRANSPORT, HANDLING AND STORAGE WARNING • check the forks and lifting procedures according to the instructions given on the packing. Refer to “Safety Information“. D.3.2 Shifting Introduction The operator must: • have a general view of the path to be followed; Transport (i. -
Page 14: Characteristics Of The Installation Place
• Adjust the equipment by turning the special adjustable feet • the equipotential connection of the workplace electrical and making sure it is perfectly level, both length wise and system to the metal structure of the machine by means of a crosswise. -
Page 15: Plumbing Circuits
connect the waste outlet pipe (detail “D“ in the Installation Appliance with pressure water supply - with drain pump - diagram) to the main drain pipe, fitting a trap, or place the with rinse booster pump - with cold rinse outlet pipe over an “S“... -
Page 16: Detergent/Rinse Aid Dispensers And Prearrangements
E.10 Detergent/rinse aid dispensers and Dishwashers with incorporated rinse-aid diaphragm dispenser pump prearrangements The pump is installed in appliances with pressure IMPORTANT hydraulic circuit. If the machine is connected to a water softener and/ To activate manually the diaphragm dispenser pump or a reverse osmosis system, contact the detergent press screw “D“. -
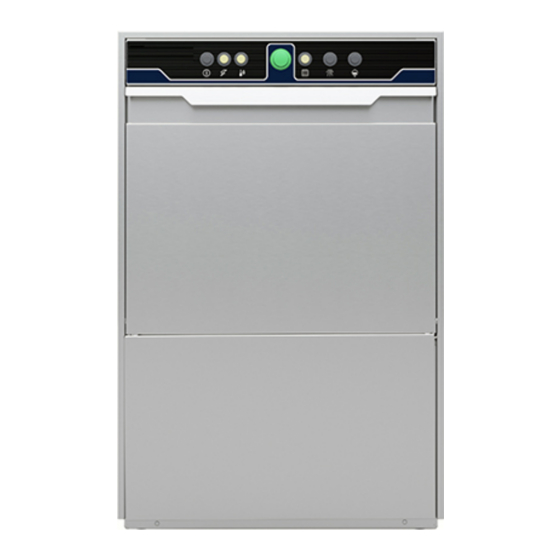
Page 17: Gcommissioning
ON/OFF button. Wash cycle indicator. This indicator is on, when you start the washing cycle. Press this button to activate the appliance. Press it again to deactivate. It is off, when the washing cycle is finished. ON indicator. Drain button. When the appliance is on, this indicator is lit up. -
Page 18: Htroubleshooting
TROUBLESHOOTING General troubleshooting Anomaly Type of Possible causes Actions anomaly The dishwasher does not Blocking The dishwasher is not connected Check if the appliance main circuit start to the main power supply. breaker is in ON position. The door is opened. Close the door The tap is close. - Page 19 Anomaly Type of Possible causes Actions anomaly Smears or spots on the Too much rinse-aid. Reduce the amount of rinse-aid. glasses. Call detergent and rinse aid service centre. Low pressure from wash Loss of The tank filter is clogged. Clean the tank filter. arms.
- Page 22 Electrolux Professional SPA Viale Treviso 15 33170 Pordenone www.electroluxprofessional.com...
Need help?
Do you have a question about the ESI and is the answer not in the manual?
Questions and answers