Advertisement
Quick Links
HIC4xxG
Preliminary operations
Check the following upon delivery and after removal
of the packaging:
• Packaging and contents are in good condition.
• The product reference corresponds to the order.
• Contents should include:
- 1 x motorised changeover switch
- 1 x emergency handle and fixing clip
- 1 x quick start instruction sheet
Accessories
• Bridging bars and connection kits
• Terminal shrouds
• Terminal shield
• Voltage sensing kit
• Sealable cover
Installation and commissioning
Step 1
Step 2
Cabinet /
Connecting the
Back Plate
power section
Installation
Clip
for storage
of the
emergency
handle
1
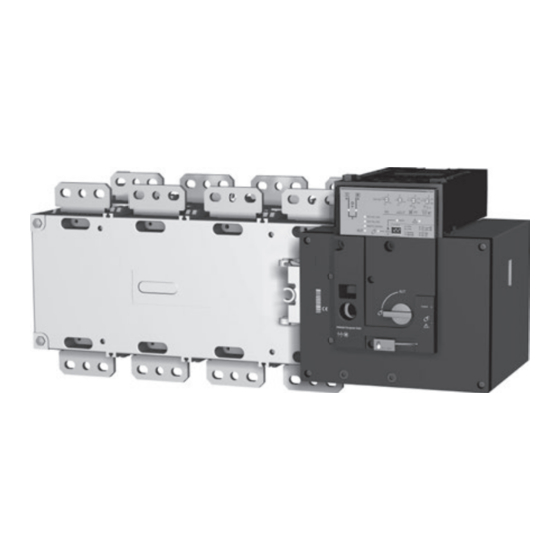
z Motorised changeover switch
800A - 3200A
This quick start is intended for personnel trained in
the installation and commissioning of this product.
For further details refer to the product instruction
manual available on the hager website.
• This product must always be installed and
commissioned by qualified and approved
personnel.
• Maintenance and servicing operations should be
performed by trained and authorised personnel.
• Do not handle any control or power cables
connected to the product when voltage may be,
or may become present on the product, directly
through the mains or indirectly through external
circuits.
• Always use an appropriate voltage detection
device to confirm the absence of voltage.
• Ensure that no metal objects are allowed to fall
in the cabinet (risk of electrical arcing).
• For 800 – 3200A (Uimp = 12kV). Terminations
must respect a minimum of 14mm clearance
from live parts to parts intended to be earthed
and between poles.
Step 3
Step 4
COMMAND /
Power SUPPLY
CONTROL
and
terminal
controller
connections
terminal
connections
Failure to observe good enginering practises as
well as to follow these safety instructions may
expose the user and others to serious injury or
death.
Risk of electrocution, burns or injury to
persons and/or damage to equipment.
Risk of damaging the device.
In case the product is dropped or
damaged in any way it is recommended
to replace the complete product.
Step 5
Step 6
Check
Programming
.
Step 7A
AUT Mode
(Automatic
Control)
Step 7B
AUT Mode
(Remote
Control)
Step 7C
Emergency
Manual
Operation
Step 7D
Padlocking
6LE007764Aa
Advertisement

Related Manuals for hager HIC4 G Series


Summary of Contents for hager HIC4 G Series
- Page 1 For further details refer to the product instruction expose the user and others to serious injury or manual available on the hager website. death. • This product must always be installed and...
- Page 2 Dimensions in mm 4. Power supply, sensing and control wiring 1. Installation 800A to 1600A 800A to 1000A 51,5 Use cables with 1,5 to 2,5 mm section. Screw M3 Tightening torque: min.: 0.5 Nm - max.: 0.6 Nm ø 9 Ensure that the product is installed on a flat rigid surface.
- Page 3 6. Programming the product For safety reasons, the READY LED will flash if any of the parameters shown on The product is programmed after wiring the front panel of the product are different from what is stored in the product. verification tests through the front of the To stop this flashing, reset the front panel parameters as stored in the product or save the product Controller in 5 steps:...
- Page 4 Auto configuration of mains voltage and frequency The product includes an “Auto Configuration” feature to detect the mains voltage and frequency nominal values, phase rotation and neutral position and saves them in the ATS controller. Note Before configuring the nominal values ensure that the product is properly wired, verified and ready for commissioning.
-
Page 5: Manual Operation
(Refer to the configuration guide sticker on the front of the product to set the V / Hz threshold. Positions 1 to 14). Hager Electro S.A.S., Boulevard d'Europe, B.P. 3, 67215 OBERNAI CEDEX, France - www.hager.com Hager 06.21 OCOM 141850 6LE007764Aa...
Need help?
Do you have a question about the HIC4 G Series and is the answer not in the manual?
Questions and answers