Servomex SERVOPRO 4900 Installation And Operation Manual

Servomex SERVOPRO 4900 Installation And Operation Manual

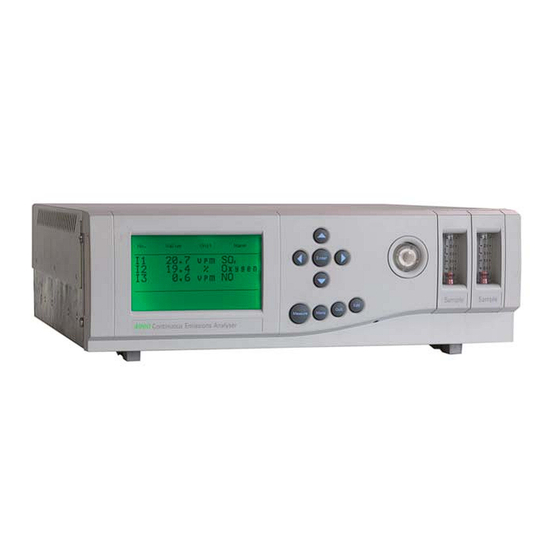
Continuous emissions analyser
Hide thumbs Also See for SERVOPRO 4900:
Table of Contents

Advertisement

Continuous Emissions Analyser
Installation and Operation
Part Number:
04900001B
Revision:
4
Language:
UK English
SERVOPRO
Manual
4900

Advertisement

Table of Contents
loading
Need help?

Need help?

Do you have a question about the SERVOPRO 4900 and is the answer not in the manual?

Questions and answers

Summary of Contents for Servomex SERVOPRO 4900

  • Page 1 SERVOPRO 4900 Continuous Emissions Analyser Installation and Operation Manual Part Number: 04900001B Revision: Language: UK English...
  • Page 2 This page intentionally blank...
  • Page 3 Xentra 4900 Continuous Emissions Analyser Installation and Operation Manual Ref:04900/001B/4 Order as part 04900 001B...
  • Page 5 _ _ _ _ _ Serial number Instrument Configuration Transducer I1 Transducer I2 Type: Type: Serial No: Serial No: Transducer I3 Transducer I4 Type: Type: Serial No: Serial No: Servomex Order Reference No: Software Revision No: Completed By: Date :...
  • Page 7 WARNINGS, CAUTIONS AND NOTES This publication includes WARNINGS, CAUTIONS AND NOTES which provide information relating to the following: WARNINGS : Hazards which could result in personal injury or death. CAUTIONS : Hazards which could result in equipment or property damage. NOTES Alert the user to pertinent facts and conditions.
  • Page 8: Table Of Contents

    LIST OF CONTENTS SECTION 1 INTRODUCTION ........1.1 Introduction .
  • Page 9 SECTION 4 CALIBRATION ........4.1 Introduction to calibration .
  • Page 10 SECTION 8 FAULT DIAGNOSIS ........8.1 Introduction .
  • Page 11 LIST OF FIGURES FIGURE PAGE Figure 1.1 Key features of xentra ........1.4 Figure 1.2 xentra measurement display .
  • Page 12 LIST OF TABLES TABLE PAGE Table 1.1 Transducer FSD values ....... 1.12 Table 2.1 Rack mount installation kit parts list .
  • Page 13 Table 6.7 Displaying alarm history ....... 6.6 Table 6.8 Displaying fault history ....... . 6.6 Table 6.9 Displaying paramagnetic gas sensor calibration history .
  • Page 14 NOTES...
  • Page 15: Glossary

    Gas filter correlation infra-red. Paramagnetic. General description The Servomex xentra chassis is a platform into which gas sensor modules may be fitted to make precise measurements. Up to three modular gas sensors, for a wide range of gases and concentration levels selected according to the customer’s needs, reside in the xentra chassis.
  • Page 16 The xentra chassis also supports two external analogue input signals. The data from the external inputs may be displayed on the screen, output to the analogue outputs and/or output via the serial RS232 output. The xentra 4900 is designed for use in modern industrial and laboratory environments. The analyser is controlled using an on-board microprocessor which gives the flexibility to configure the analyser to suit a wide range of applications.
  • Page 17 Start up and commissioning of the xentra should be performed in the order presented in this manual:- Installation (section 2) This section takes commissioning to the point where the xentra is powered and operational. The installer is advised to read this section completely before commencing installation.
  • Page 18: Location Of Components

    Location of components Figure 1.1 identifies the location of the key features of the xentra 4900 Continuous Emissions Analyser. Figure 1.1 Key features of Xentra Introduction to the xentra user interface The xentra user interface consists of a keypad with nine keys and a large edge-lit LCD display ( see Figure 1.1).
  • Page 19: The Xentra Measurement Display

    1.5.1 The xentra measurement display The measurement display is the default display that is presented to the user of the xentra 4900. The display can be user configured to show the gas concentrations measured by the gas sensor modules fitted and/or the external analogue inputs. The status of the instrument plus the occurence of an alarm or fault active are also displayed on the measurement display via icons positioned at the bottom of the screen.
  • Page 20 A module location field ( 2 characters ). A measurement value field ( 6 characters ). An engineering units field ( 3 characters ). A user defined message ( UDM ) field ( 6 characters ). The module location field defines whether the process variable represents an internal transducer or an external analogue input.
  • Page 21: The Xentra Keypad

    1.5.2 The xentra keypad User input to the xentra instrument is via the xentra keypad. A view of the keypad is given in figure 1.4. Figure 1.4 The xentra keypad The functions of the keys on the xentra keypad are as follows. Measure key Pressing the ’MEASURE’...
  • Page 22: The Xentra Screen Icons

    > ?= < keys > ? Within menu displays the user highlights the desired option using the arrow keys( = < ) and then presses the ’ENTER’ key. = < When entering numeric information or text, the left and right arrow keys ( ) are used >...
  • Page 23: The Xentra Menu Display

    Alarm icon This icon is displayed if any of the user defined alarm levels are triggered. If this icon is displayed then the nature of the alarm may be found from the user interface ( see section 6.2 ’Displaying alarms present’ ). Warm Up icon This icon is displayed if any of the transducers fitted inside of the xentra are operating at a temperature less than their normal operating temperature band.
  • Page 24: Numeric Data Input

    1.5.5 Numeric data input When numeric data input is required then a field of individual digits will be offered to the > ?= < user. Each of these digits is edited independently using the arrow keys ( ). For numeric information each digit position may be changed to :- Any number in the range 0 to 9 A decimal point iii)
  • Page 25: Transducer Site Numbering System

    Transducer site numbering system The xentra chassis may accommodate a number of internal transducers which are assigned site locations represented as I1, I2 and I3 on the display. For the 4902 analyser, the chassis may accommodate up to two internal transducers.
  • Page 26: Technical Assistance And Spare Parts

    Gfx 1210 NO High sensitivity 1000 vpm NO Technical assistance and spare parts Technical assistance and spare parts are available from Servomex outlets listed on the back cover of this manual or from their local agents (see 9.2 ’Spare parts list’). 1.12...
  • Page 27: Section 2 Installation

    SECTION 2 INSTALLATION Introduction This section provides all the information required to install the xentra 4900 Continuous Emissions Analyser. The installer is advised to read this section completely before commencing installation. Installation of the xentra requires the use of standard hand tools only. The analyser is configured for either panel mount or 19"...
  • Page 28: Figure 2.1 Recommended Handling

    Figure 2.1). Lift and remove the xentra from its packing and inspect for any damage incurred during transit. If damage has occurred, inform Servomex or its agent immediately. Retain all packing and shipping information. The shipping carton may be used for future transportation.
  • Page 29: Panel Mount Installation

    WARNING The Xentra 4900 is not suitable for use in hazardous areas. The Xentra 4900 is not suitable for use with corrosive or flammable samples. The sample gas may be toxic or asphyxiant and must be vented to a safe location. CAUTION Install the 4900 so that fan and cover vents are not obstructed.
  • Page 30: Rack Slide Mounting Installation

    Figure 2.2 Panel mounting detail. 2.4 Rack slide mounting installation See Figure 2.3 and Table 2.1. The 19" optional rack slide mount version is supplied with a mounting kit which includes either long or short slides and rack mounting brackets. Do not attempt to support or carry the analyser by the rack mount brackets. The analyser is suitable for installation in most standard rack types including Schroff and Rittall Figure 2.3 Rack installation exploded view...
  • Page 31: Table 2.1 Rack Mount Installation Kit Parts List

    Table 2.1 Rack mount installation kit parts list Item Description Telescopic slide, inner and outer Screw M5 Slide support bracket Cage nut Slide support clamp Waisted screw, brass, M5 Screw, M4 Washer, M4 Locking washer, M4 Nut, M4 Screw, chrome plated, cross head, M5 Cup washer, plastic If the instrument has been purchased with the rack mounting option then the rack slide inners will already be mounted on the analyser chassis.
  • Page 32: Electrical Power Connection

    slides in from the front. Position the rack slide outer sections (item 1) so that the front edge is 35 mm behind the rack enclosure front flange. Tighten the fixings (items 7,8,9,10). Install the analyser in the rack locating the inner slide section (item 1) inside the outer slide section (item 1).
  • Page 33: Figure 2.6 Fuse Holder Spring Clips

    operation fit fuse T3.15A HBC to IEC 127 ( Figure 2.4 ). Voltage selector position 110/120V for 85 to 132 V operation fit fuse T5.0A HBC to IEC 127 ( Figure 2.5 ). If a 20mm fuse is used then ensure that the fuse does not extend into the spring clips provided for a 1 inch fuse (see Figure 2.6).
  • Page 34: Signal Connections

    2.6 Signal connections It is recommended that the analyser is switched off while signals are being connected or disconnected. Signal terminals are located on the rear of the analyser and are identified as plugs PL1 to PL5. Two plugs PL1 and PL5 are always fitted, PL2, PL3 and PL4 are present only when the corresponding option cards are fitted.
  • Page 35 Plug PL5 provides the electrical connections for the analogue inputs, the autocalibrate initiate input and the range change input. The connection details for PL5 are summarised in Table 2.4. Each analogue input signal consists of an analogue current input ( for example pins 1 and 2 on PL5 for analogue input 1 ) plus a digital status input ( for example pins 9 and 10 on PL5 for analogue input 1).
  • Page 36 WARNING If the external circuits connected to PL1, PL2, PL3 and PL4 are at a voltage exceeding 30 Vrms (42.4 V peak) or 60 V dc the following precautions must be observed to prevent an electric shock hazard: The external circuits connected to PL1, PL2, PL3 and PL4 must not be powered with the connector unplugged.
  • Page 37: Figure 2.7 Signal Socket Assembly

    Figure 2.7 Signal socket assembly Table 2.2 Loose socket parts Item Description Screw terminal block End block Jacking screw Cover Cable tie 2.11...
  • Page 38: Table 2.3 Signal Terminal Location Pl1 To Pl4

    Table 2.3 Signal terminal location PL1 to PL4 Terminal number (optional) (optional) (optional) screen screen screen screen Not used Not used Not used Relay 1.5 Relay 4.4 Relay 3.4 Relay 2.4 Relay 1.4 Relay 4.3 Relay 3.3 Relay 2.3 Relay 1.3 screen screen screen...
  • Page 39: Serial Output Connection

    Table 2.4 Signal terminal location PL5 Terminal Function Analogue input 1 +ve Analogue input 1 -ve Analogue input 2 +ve Analogue input 2 -ve Not used Not used Analogue input 2 valid Analogue input 1 valid Auto calibration initiate Range change 2.7 Serial output connection The serial data output is provided via the 9 pin ’D’...
  • Page 40: External Autocalibration Connection

    2.8 External autocalibration connection For analysers configured with the external autocalibration option, an additional output connector, PL 8, is fitted into the sample gland plate ( see figure 2.10 ). This connector supplies two pairs of relay contacts which may be used to control external valves. These relay contacts are rated at 1.0 A, 264 V AC and 1.0 A, 30 V DC ( non-inductive ).
  • Page 41: Sample Stream Connection

    2.9 Sample stream connection WARNING Verify that connections are leak free at full operating pressure before applying sample or calibration gases. These gases may be toxic or asphyxiant. Consideration should be given to the toxicity and asphyxiant nature of the sample gas when selecting a vent location. The xentra 4900 is supplied with the internal transducers configured on either one or two sample streams.
  • Page 42: Figure 2.8 Sample Gland Plate Without Auto Calibration

    Figure 2.8 Sample gland plate without auto calibration Figure 2.9 Sample gland plate with internal auto calibration 2.16...
  • Page 43: Figure 2.10 Sample Gland Plate With External Auto Calibration

    Figure 2.10 Sample gland plate with external auto calibration Single gas stream configuration Figure 2.11 Typical single stream, dual Gfx configuration Figure 2.11 contains a typical flow diagram for single stream configuration analysers. Here up to three transducers are connected to a common inlet and outlet port. If two Gfx transducers are supplied then these will be connected in series so that the sample 2.17...
  • Page 44: Figure 2.12 Typical Dual Stream, Dual Gfx Configuration

    gas passes through the first transducer then passes into the second transducer. The paramagnetic transducer is connected in parallel with the Gfx transducers. An orifice restrictor is connected in series with the paramagnetic transducer to limit the sample flow rate through the transducer. This restrictor will produce approximately 250 ml/min flow through the paramagnetic transducer for an inlet pressure of 5 psig.
  • Page 45: Sample Gas Condition

    configuration analyser. These include needle valves to regulate the flow through the Gfx transducer. The flow through the Gfx transducer should not exceed 2.0 l/min. Where the optional needle valves are not used then external provision to limit the sample flow to 2.0 l/min should be provided. The dual stream analyser configuration may only be used with external calibration valves.
  • Page 46: Calibration Gas Sample Connection

    2.11 Calibration gas sample connection If your analyser has the optional internal auto calibration solenoids then the appropriate calibration gases must be connected to the instrument at the appropriate ports on the manifold. If no auto calibration manifold is fitted or the external autocalibration option is used then the calibration gases should be connected to the sample gas port by external means.
  • Page 47: Table 2.10 Recommended Calibration Gases

    500 vpm The accuracy of the calibration materials used with the analyser is an important contribution to the quality of the data measured. Servomex recommend that the xentra 4900 Continuous Emissions Analyser be calibrated using certified gravimetric gas mixtures from a reputable supplier. These should be accompanied by a compositional analysis certificate of certified accuracy .
  • Page 48: Reading Flowmeters

    2.12 Reading flowmeters The optional flow monitors are provided to control and measure the flow of sample gas through the analyser. The flow monitor consists of a needle valve and a rotameter type flowmeter. The reading of the flow rate through the flowmeter is obtained by observing the scale indication at the top of the float.
  • Page 49: Section 3 Initial Configuration

    SECTION 3 INITIAL CONFIGURATION Setting passwords The xentra has two passwords, the operator’s password gives access to CALIBRATE, while the supervisor’s password gives access to EDIT, SETUP and CALIBRATE. The xentra is delivered with both of the passwords set to 4000. The passwords may be changed to any four digit number.
  • Page 50: Setting Time And Date

    Setting time and date The time, date and date format (Day/Month/Year or Month/Day/Year) may be set by following the procedure in Table 3.2. History log entries will have an incorrect time and date stamp prior to setting the clock time and date. The time and date must be set correctly before setting up auto calibration.
  • Page 51: Section 4 Calibration

    SECTION 4 CALIBRATION Introduction to calibration The calibration of the analyser may be checked or adjusted. Either of these activities will result in an entry in the calibration history log. Calibration may be manual or automatic. In manual calibration the operator is guided through the required sequence of steps by messages on the xentra screen.
  • Page 52: Recommended Calibration Check Periods

    Recommended calibration check periods It is recommended that the calibration of gas sensor modules is checked at the periods shown in Table 4.1 and recalibration performed if required. Table 4.1 Recommended calibration periods Gas sensor module Low calibration High calibration Gfx sensor weekly monthly...
  • Page 53: Paramagnetic Transducer Low And High Manual Calibration

    Table 4.2 Setting low and high calibration tolerances MENU to obtain top level menu L < CALIBRATE/SETUP ENTER ALARMS/FAULTS L ? < SET ALARM/ASSIGN ENTER DISPLAY/UTILITY L > ENTER PASSWORD To change the value of a digit < 0000 To change to another digit When the number shown is correct ENTER UTILITY 1...
  • Page 54: Table 4.3 Paramagnetic Low And High Calibration

    Table 4.3 Paramagnetic low and high calibration MENU to obtain top level menu CALIBRATE/SETUP ENTER ALARMS/FAULTS MANUAL CAL ENTER AUTOCAL L > ENTER PASSWORD To change the value of a digit < 0000 To change to another digit When the number shown is correct ENTER L >...
  • Page 55: Gfx Gas Transducer Low And High Manual Calibration

    HT20.95 HC20.74 HT is the target concentration. I1 Oxygen OK? Y/N HC is the current concentration eg. Introduce high cal gas, when the current concentration has stabilised it may be accepted (**) ENTER L < or rejected ENTER. HIGH CAL IN Temporary message.
  • Page 56: Table 4.4 Gfx Sensor Low And High Calibration

    Table 4.4 Gfx sensor low and high calibration MENU to obtain top level menu CALIBRATE/SETUP ENTER ALARMS/FAULTS MANUAL CAL ENTER AUTOCAL L > ENTER PASSWORD To change the value of a digit 0000 < To change to another digit When the number shown is correct ENTER CALIBRATE To select desired gas sensor...
  • Page 57: Manual Cal Check Low And High

    I1 HIGH TARGET Change the number to the = 50.8 vpm concentration of the target gas in the calibration gas. L > To change the value of a digit < To change to another digit When the value shown is correct ENTER HT50.8 HC49.8 HT is the target concentration.
  • Page 58: Table 4.5 Low Cal Check

    Table 4.5 Low cal check MENU to obtain top level menu CALIBRATE/SETUP ENTER ALARMS/FAULTS MANUAL CAL ENTER AUTOCAL L > ENTER PASSWORD To change the value of a digit < 0000 To change to another digit When the value shown is correct ENTER L >...
  • Page 59: Auto Calibration Overview

    Auto calibration overview As implied by the name, the auto calibration facility allows the instrument’s calibration to be updated or checked without user intervention. The auto calibration software function is only available if an autocalibration hardware option is fitted to the instrument. Autocalibration facilities are offered to either measure or check the following:- Transducer low calibration ( ’zero’...
  • Page 60 The automatic calibration procedure is started by either user keyboard input, triggered by the instrument internal clock or via external contact closure. At this point the "Calibration in Progress" output signal is turned on. The first calibration gas is applied and the instrument then waits for the user specified DV lag.
  • Page 61: Monitoring The Progress Of Auto Calibration

    Monitoring the progress of auto calibration When the autocalibration facility is initiated an icon appears at the bottom of the screen. Progress of the autocalibration cycle can be monitored through each of the phases described in section 4.8 from the appearance of the icon. Figure 4.2 shows the different icon shapes that indicate the progress of the calibration.
  • Page 62 The DV lag may be set between 0.5 and 8 minutes in steps of 0.5 minutes. After the DV lag each calibration gas will flow for a further minute. This is to allow the new level to be recorded on a chart recorder. The autocalibration sequence will calibrate all transducers fitted.
  • Page 63: Table 4.7 Setting Up Auto Calibration And Auto Check

    Table 4.7 Setting up auto calibration and auto check MENU to obtain top level menu CALIBRATE/SETUP ENTER ALARMS/FAULTS MANUAL CAL ENTER AUTOCAL L > ENTER PASSWORD To change the value of a digit < 0000 To change to another digit When the number shown is correct ENTER SET UP CAL PARM...
  • Page 64: Initiating Auto Calibration Or Auto Check From Keypad

    ENTER START TIME As per period entry above. HOUR 00 ENTER START TIME As per period entry above. MINUTE 00 TIME 12:00:00 Temporary display of start time and date. This DATE 10/12/95 must be later than the current time and date. SET UP CAL PARM ENTER to perform an auto cal or check ONE CYCLE...
  • Page 65: Aborting An Auto Calibration In Progress

    4.12 Aborting an auto calibration in progress Aborting an autocalibration is accomplished by pressing any key during the autocalibration process. The procedure is shown in table 4.9. Table 4.9 Aborting auto cal or auto check ANY KEY to obtain the following screen AUTO CAL IN PROG ENTER to abort the auto cal or auto check L <...
  • Page 66: Scaling ( Calibration ) Of The External Analogue Inputs

    4.15 Scaling ( calibration ) of the external analogue inputs The external analogue inputs are scaled via the MANUAL CAL menu entry. The mechanism for scaling of the inputs is to specify the variable value that corresponds to the minimum analogue input ( 0 or 4mA ) and the maximum analogue input ( 20mA ).
  • Page 67: Section 5 Main Configuration

    SECTION 5 MAIN CONFIGURATION Alarms The xentra has four user configurable concentration software alarm settings for each gas sensor module fitted. These are referred to as AL1, AL2, AL3 and AL4. Each alarm may be enabled or disabled. On first power up of the instrument the default state of the alarms is that they are disabled.
  • Page 68: Table 5.1 Setting Up Alarms

    Table 5.1 Setting up alarms MENU to obtain top level menu L < CALIBRATE/SETUP ENTER ALARMS/FAULTS SET ALARM/ASSIGN ENTER DISPLAY/UTILITY L > ENTER PASSWORD To change the value of a digit < 0000 To change to another digit When the number shown is correct ENTER L >...
  • Page 69: Allocation Of Relays

    Allocation of relays Each relay is set up by selecting the conditions under which it is to operate. Each relay may be set up to respond to any combination of the following :- Fault Calibration in progress iii) Any number of alarms See Table 5.2 for procedure.
  • Page 70: Table 5.2 Allocation Of Relays

    Table 5.2 Allocation of relays MENU to obtain top level menu L < CALIBRATE/SETUP ENTER ALARMS/FAULTS L < SET ALARM/ASSIGN ENTER DISPLAY/UTILITY L > ENTER PASSWORD To change the value of a digit < 0000 To change to another digit When the number shown is correct ENTER RELAYS...
  • Page 71: Analogue Outputs

    Table 5.3 Clearing of relay assignment MENU to obtain top level menu L < CALIBRATE/SETUP ENTER ALARMS/FAULTS L < SET ALARM/ASSIGN ENTER DISPLAY/UTILITY RELAYS ENTER ANALOGUE L > SELECT RELAY to select the required relay ( must 1.3 ASSIGNED already be ASSIGNED ) then ENTER 1.3 UNASSIGNED L <...
  • Page 72: Table 5.4 Analogue Output Span Limits

    Table 5.4 Analogue output span limits Transducer Minimum Maximum Recommended analogue output analogue output span span Pm 1156 O 0.5% O 200% O Gfx Standard CO 200 vpm CO 6000 vpm CO Gfx High Sensitivity CO 50 vpm CO 1000 vpm CO Gfx NO 100 vpm NO 2000 vpm NO...
  • Page 73: Table 5.5 Setting Up Analogue Outputs

    Table 5.5 Setting up analogue outputs MENU to obtain top level menu L < CALIBRATE/SETUP ENTER ALARMS/FAULTS L < SET ALARM/ASSIGN ENTER DISPLAY/UTILITY L > ENTER PASSWORD To change the value of a digit < 0000 To change to another digit When the number shown is correct ENTER RELAYS...
  • Page 74: Table 5.6 Clearing An Analogue Output Assignment

    L > SELECT ANALOGUE to select another output then 1.1 ASSIGNED ENTER SELECT ANALOGUE MEASURE to return to measurement 1.1 UNASSIGNED display Table 5.6 Clearing an analogue output assignment MENU to obtain top level menu L < CALIBRATE/SETUP ENTER ALARMS/FAULTS L <...
  • Page 75: Component Name Definition

    Component name definition The component name of each measurement the xentra makes will already have been defined. This may be changed to any name up to six characters in length. See Table 5.7 for procedure. The characters which may be used are listed in appendix C. The default character is ’|’...
  • Page 76: External Analogue Input Configuration

    External analogue input configuration The naming and configuration of external analogue inputs is treated identically to internal process variables. Two external analogue inputs are provided on the instrument. The process variables associated with these inputs are identified as E1 and E2 ( the internal transducer process variables are I1 to I4 ).
  • Page 77: Defining And Selecting Measurement Displays

    Defining and selecting measurement displays Up to five measurement display screens may be defined. Each screen definition may have up to four measurements. These screen definitions must then be selected. The selected screen definitions may then be scrolled manually by pressing MEASURE or scrolled automatically every ten seconds.
  • Page 78: Display Resolution

    Display resolution The number of decimal places displayed for each measurement may be selected between 0 to 3 digits. The transducer display resolution will be factory configured with a relevant number of decimal places. See table 5.10 for the procedure for changing the display resolution.
  • Page 79: Calculation Of Total Nitrogen Oxides (No ) Concentration

    5.10 Calculation of total nitrogen oxides (NO ) concentration For analysers fitted with the Gfx 1210 transducer option for measuring nitric oxide (NO) the facility exists within the analyser software to calculate an estimate of the total nitrogen oxides (NOx) level, based on the measured NO level. This estimate of total NOx concentration can also be displayed, and output, as a separate measurement in the normal way.
  • Page 80: Table 5.11 Setting The No Conversion Parameters

    Table 5.11 Setting the NO conversion parameters MENU to obtain top level menu L < CALIBRATE/SETUP ENTER ALARMS/FAULTS L ? < SET ALARM/ASSIGN ENTER DISPLAY/UTILITY L > ENTER PASSWORD To change the value of a digit < 0000 To change to another digit When the number shown is correct ENTER UTILITY 1...
  • Page 81: Figure 5.2 Format Of Serial Output Data Frame

    The following facilities are provided to configure the system:- SET FRAME FREQ This sets up the frequency of transmission of the data frame down the RS232 communications port. For example if the value is set to 15 seconds then the output data frame will be transmitted once every 15 seconds.
  • Page 82 MENU to obtain top level menu L < CALIBRATE/SETUP to move the cursor to SETUP (cursor ALARMS/FAULTS position shown in inverse video). ENTER to choose SETUP. SET ALARM/ASSIGN to move the cursor to DISPLAY L < DISPLAY/UTILITY to move the cursor to UTILITY ENTER to choose UTILITY ENTER PASSWORD Both user and supervisor passwords are...
  • Page 83: Table 5.14 Setting The Serial Output Communications Parameters

    Table 5.14 Setting the serial output communications parameters MENU to obtain top level menu L < CALIBRATE/SETUP to move the cursor to SETUP (cursor ALARMS/FAULTS position shown in inverse video). ENTER to choose SETUP. SET ALARM/ASSIGN to move the cursor to DISPLAY L <...
  • Page 84 NOTES 5.18...
  • Page 85: Section 6 Review

    SECTION 6 REVIEW Introduction to review section This section describes the procedures for reviewing the analyser configuration without changing it. The only procedure which requires a password in this section is review of the calibration history. Displaying alarms present If the measurement display shows the ’ALARM’ icon the number and nature of the alarms present may be determined using the procedure described in Table 6.1.
  • Page 86: Displaying Relay Configuration

    Displaying relay configuration The conditions under which each relay will operate may be determined using the procedure described in Table 6.3. Table 6.3 Displaying relay configuration MENU to obtain top level menu L < CALIBRATE/SETUP ENTER ALARMS/FAULTS SET ALARM/ASSIGN ENTER DISPLAY/UTILITY OUTPUTS/ALARMS ENTER...
  • Page 87: Table 6.4 Displaying Analogue Output Configuration

    Table 6.4 Displaying analogue output configuration MENU to obtain top level menu L < CALIBRATE/SETUP ENTER ALARMS/FAULTS SET ALARM/ASSIGN ENTER DISPLAY/UTILITY OUTPUTS/ALARMS ENTER DIAGNOSTICS/ID RELAY ENTER ANALOGUE L > DISPLAY ANALOGUE to select the required analogue output 1.1 Oxygen then ENTER 1.1 UNASSIGNED 1.1 I1 Oxygen R1...
  • Page 88: Displaying Alarm Settings

    Displaying alarm settings The conditions under which each alarm is configured to operate may be determined using the procedure described in Table 6.5. Table 6.5 Displaying alarm settings MENU to obtain top level menu L < CALIBRATE/SETUP ENTER ALARMS/FAULTS SET ALARM/ASSIGN ENTER DISPLAY/UTILITY L <...
  • Page 89: Displaying Analyser Identity

    Displaying analyser identity The analyser identity display shown during the start up message sequence may be displayed by using the procedure described in Table 6.6. Table 6.6 Displaying analyser identity MENU to obtain top level menu L < CALIBRATE/SETUP ENTER ALARMS/FAULTS SET ALARM/ASSIGN ENTER...
  • Page 90: Displaying Fault History

    Table 6.7 Displaying alarm history MENU to obtain top level menu CALIBRATE/SETUP ENTER ALARMS/FAULTS DISPLAY ALARMS ENTER ALARM HISTORY L > Oxygen AL2 ON to view further entries 12:13:20 12/06 MEASURE to return to measurement display Displaying fault history An entry is made in the fault history buffer each time a fault appears or is cleared. The fault history file contains the most recent 20 occasions where a fault appeared or was cleared.
  • Page 91: Table 6.9 Displaying Paramagnetic Gas Sensor Calibration History

    The information is displayed in the following format:- [gas sensor module site number] [measurement name] [type] [difference] [time and date] I2 Oxygen CML -0.213 01:15:20 28/11 the event recorded is a manual low calibration of the Oxygen sensor in site 2 with a correction of -0.213 at 1:15 on 28 November.
  • Page 92: Displaying Diagnostics Information

    6.11 Displaying diagnostics information The signals from gas sensors may be displayed. These may be useful in diagnosing any problems which may arise. The procedure for displaying diagnostics information is described in Table 6.10. Table 6.10 Displaying diagnostic information MENU to obtain top level menu L <...
  • Page 93: Section 7 Routine Maintenance

    SECTION 7 ROUTINE MAINTENANCE Replacing fan filter element The external fan filter element should be checked every six months in laboratory conditions, for environments with a high dust content this period should be reduced. The filter element is washable and in laboratory or light dust conditions may be washed and refitted rather than replaced.
  • Page 94 Toxic Samples - routine leak test WARNING If toxic samples are being analysed it is essential to check the analyser and associated sample lines/system for leaks (every 6 months is recommended period). MAX pressure that may be applied to each module is 8 psig, however, this must be applied slowly to both the inlet and outlet simultaneously to avoid damage to the measuring sensors.
  • Page 95: Section 8 Fault Diagnosis

    See ’Review’ section 6 for directions on accessing fault and diagnostic information. When requesting technical assistance from Servomex you should advise the following:-...
  • Page 96 HIGH CAL/CHK User set low or high Check that calibration OUTSIDE TOL calibration tolerance empty. has been exceeded Increase tolerance if during auto calibration necessary. C h e c k t h a t t h e LOW CAL/CHK concentration of the OUTSIDE TOL calibration sample...
  • Page 97: Fault Diagnosis On The Gfx 1210 Transducer

    Table 8.2 Diagnostic signals for the Pm1156 transducer Fault Description Typical level Range CELL VOLTS Cell output volts 0.2 V -0.1 to 1.2 V CELL TEMP Cell temperature 35 °C 5 to 70 °C Fault diagnosis on the Gfx 1210 transducer Table 8.3 shows a list of the indicated fault conditions for the Gfx 1210 transducer.
  • Page 98: Table 8.4 Diagnostic Signals For The Gfx 1210 Transducer

    LO V/C OUTSIDE The gas concentration R e s p e c i f y t h e RANGE s p e c i f i e d t h e c a l i b r a t i o n g a s a u t o c a l i b r a t i o n concentration.
  • Page 99: Fault Diagnosis With A Non-Functioning Display

    Fault diagnosis with a non-functioning display Table 8.5 describes checks which can be made if the display is blank or not illuminated Table 8.5 Fault finding with non functioning display Symptoms Possible causes Recommended action DIM DISPLAY Improper viewing Adjust viewing angle angle of display DIM DISPLAY...
  • Page 100 NOTES...
  • Page 101: Section 9 Spares

    SECTION 9 SPARES Ordering spares Spare parts may be ordered from addresses shown on the rear cover of the manual. When ordering spares always give the model and serial number of your analyser. The analyser serial number is on the identification label on the underside of the analyser, it may also be displayed via the user interface.
  • Page 102 NOTES...

This manual is also suitable for:

Xentra 4900

Table of Contents