
Related Manuals for SKY-WATCHER AZ-GTix


Summary of Contents for SKY-WATCHER AZ-GTix
- Page 1 INSTRUCTION MANUAL AZ-GTix Mount Standard model Extended model Copyright Sky-Watcher 202111-V1...
-
Page 3: Table Of Contents
CONTENTS Parts Diagram PART I : SETTING UP THE AZ-GTix MOUNT 1.1 Setting up the Tripod 1.2 Attaching the AZ-GTix Mount to the Tripod 1.3 Telescope Assembly 1.4 Finderscope Assembly 1.5 Eyepiece assembly PART II :OPERATING YOUR TELESCOPE 2.1Aligning and using the finderscope 2.2 Focusing the telescope... -
Page 4: Parts Diagram
Parts Diagram Bubble Level Altitude Clutch Wheel OTA Lock Knob Dovetail Groove OTA Lock Knob Dovetail Groove Saddle Altitude Adjustment Knobs SNAP port LED Indicator External Power Power Switch Hand controller port Azimuth Clutch Knob Azimuth Adjustment Knobs Fork Arm Battery Compartment for 8x AA Batteries Adjustment Groove... -
Page 5: Part I : Setting Up The Az-Gtix Mount
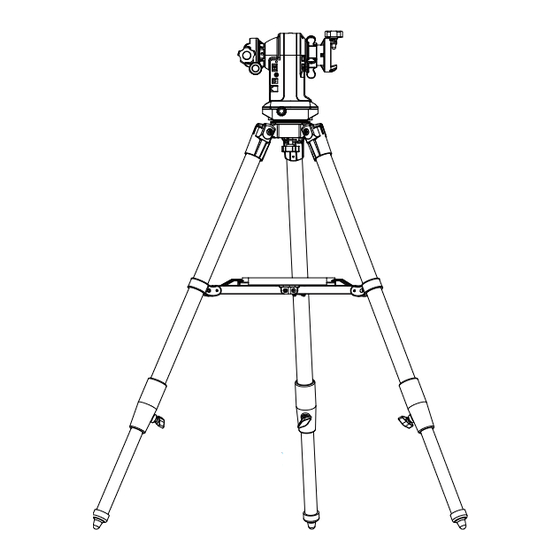
If using a short tube telescope, which does not hit the tripod legs when it points high up, with the AZ-GTix mount, the mount can be installed onto the tripod directly. Align the 3/8” socket at the base of the mount with the locking bolt on the tripod head. Lock the mount on the tripod by tightening the bolt (Fig. -
Page 6: Attaching The Az-Gtix Mount To The Tripod
PART I : SETTING UP THE AZ-GTix MOUNT If using a long tube telescope with AZ-GTix mount, an extension pier should be insert- ed between the tripod and the AZ-GTix mount to prevent the telescope from hitting the tripod legs when it points high up (Fig. -
Page 7: Eyepiece Assembly
PART I : SETTING UP THE AZ-GTix MOUNT Eyepiece assembly 1.Inserting eyepiece for refractor and Maksutov (Fig.1.5.a). 2.Ioosen the thumbscrew on the end of the focus tube. 3.Insert the diagonal into the focus tube adn re-tighten the thumbscrew to hold the diagonal in place 4.Loose the thunbscrews on the diagonal... -
Page 8: Part Ii :Operating Your Telescope
PART II: OPERATING YOUR TELESCOPE 2.1Aligning and using the finderscope ries. When they are correctly aligned with the telescope, objects can be quickly located and ing it back towards the bracket. The front lens holder can now be turned in and out to focus. When focus is reached, lock it in position with the locking ring (Fig.2.1.1a). -
Page 9: Choosing The Appropriate Eyepiece
PART II: OPERATING YOUR TELESCOPE 2.3 Choosing the appropriate eyepiece • length by the focal length of the eyepieces you are going to use. For example, a 10mm When you are looking at astronomical objects, you are looking through a column of air •... -
Page 10: Part Iii :Electronic Control Interface
PART III : ELECTRONIC CONTROL INTERFACE 3.1 Control Panel The control panel of the AZ-GTix mount is shown below: Hand Control Power SNAP 3.2 Panel Interface Components: POWER: This is an input for external power to avoid running on the 8 AA batteries in the AZ-GTix mount battery compartment. -
Page 11: Pinout Of The Interfaces
PART III : ELECTRONIC CONTROL INTERFACE 3.3 Pinout of The Interfaces: Note: Internal Circuit The SNAP port provides two trigger signals Optoisolator TRIGGER to the stereo plug. For a camera which only Control Signal needs a shutter-release signal, either trigger signals will work. -
Page 12: Part Iv : Using The Az-Gtix Mount
PART IV : USING THE AZ-GTix MOUNT 4.1 Installing The Telescope or Camera AZ-GTix provides the following ways to assemble the telescope or camera: Use only one telescope (Fig.4.1a). Install the telescope on one side and the camera on the other side. When installing the camera, you need to use a Fork arm attachment (Fig.4.1b). -
Page 13: Manually Rotating The Mount
PART IV : USING THE AZ-GTix MOUNT 4.2 Manually Rotating The Mount Refer to the following diagrams: Tighten Loosen Tighten Loosen Fig.4.2a Fig.4.2b Loosen the Alt clutch wheel to manually rotate the telescope vertically. Loosen the Azimuth adjustment knob to manually rotate the telescope horizontally. -
Page 14: Freedom Find Function
4.6 Freedom Find Function The AZ-GTix mount is equipped with auxiliary encoders on both the azimuth axis and al- titude axis. Therefore, the mount can keep track of its current position even when a user unlocks the clutches and rotates the mount in azimuth axis and altitude axis manually. -
Page 15: Part V: Observing The Sky
PART V: OBSERVING THE SKY 5.1 Sky Conditions • steadiness of the air, and transparency, light scattering due to the amount of water va- pour and particulate material in the air. When you observe the Moon and the planets, and they appear as though water is running over them, you probably have bad “seeing” because you are observing through turbulent air. -
Page 16: Cooling The Telescope
PART V: OBSERVING THE SKY 5.4 Cooling the Telescope • Telescopes require at least 10 to 30 minutes to cool down to outside air temperature. This may take longer if there is a big difference between the temperature of the telescope and the outside air. -
Page 17: Part Vi: Proper Care For Your Telescope
PART VI: PROPER CARE FOR YOUR TELESCOPE 6.1 Cleaning Your Telescope • Replace the dust cap over end of telescope whenever not in use. This prevents dust from settling on mirror or lens surface. Do not clean mirror or lens unless you are familiar with optical surfaces. -
Page 18: Dimensions
PART VII : SPECIFICATIONS Dimensions: 1074 Mount Tripod Product Name AZ-GTix Mount Mount Type Altitude-azimuth Mount Single Side Payload 6 kg Total Payload 10 kg Mount Weight 2 kg Tripod + Extension Pier Weight 2.7 kg + 0.5kg Power Requirement DC7.5~14V, 1A... - Page 20 AZ-GTix Mount NEVER USE YOUR TELESCOPE TO LOOK DIRECTLY AT THE SUN. PERMANENT EYE DAMAGE WILL RESULT. USE A PROPER SOLAR FILTER FIRMLY MOUNTED ON THE FRONT OF THE TELESCOPE FOR VIEWING THE SUN. WHEN OBSERVING THE SUN, PLACE A DUST CAP OVER YOUR FINDERSCOPE OR REMOVE IT TO PROTECT YOU FROM ACCIDENTAL EXPOSURE.
Need help?
Do you have a question about the AZ-GTix and is the answer not in the manual?
Questions and answers