Subscribe to Our Youtube Channel
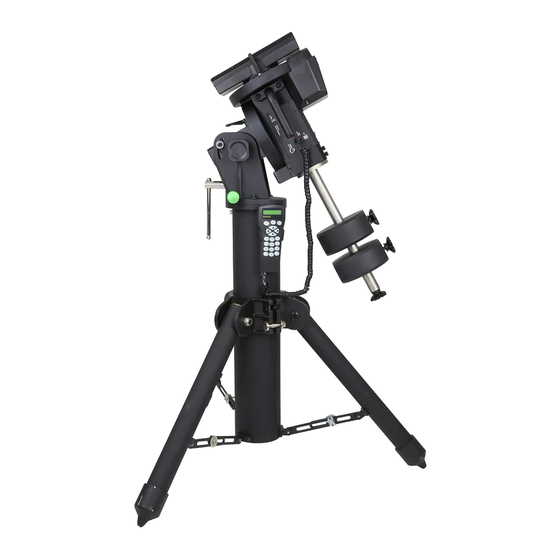
Summary of Contents for SKY-WATCHER EQ8-R Series
- Page 1 INSTRUCTION MANUAL EQ8-R Mount Apply to EQ8-R Series Mounts EQ8R-V2 Copyright © Sky-Watcher...
-
Page 2: Table Of Contents
CONTENT PART I : SETTING UP THE EQ8-R MOUNT 1.1 Setting Up the Tripod ....................4 1.2 Putting On the EQ8-R Mount ...................6 1.3 Installing the Counterweights ..................7 1.4 Installing the Telescope ...................7 1.5 Balancing the Mount Load ..................8 PART II : POLAR ALIGNMENT 2.1 Prepare the Mount for Polar Alignment .............. - Page 3 Packing List INSTRUCTION MANUAL EQ8-R Mount INSTRUCTION MANUAL AZ-EQ6 GT Mount SynScan Mount Package Includes: EQ8-R-V1 Copyright © Sky-Watcher 021112V1 Copyright © Sky-Watcher Counterweight Shaft x 1 Jackscrew Handle x 1 Cable Clamp x 1 SynScan Hand Control V5 x 1...
-
Page 4: Part I : Setting Up The Eq8-R Mount
PART I : SETTING UP THE EQ8-R MOUNT 1.1 Setting Up the Tripod Fully expand the tripod legs on level ground. Install the hand control bracket on the tripod. (Fig 1.1a) Place one or two counterweight(s) just between the bottom of the central post and the ground if there is enough space between them. - Page 5 PART I: SETTING UP THE EQ8-R MOUNT Assemble the 3 adjustable spider trusses as shown in 1.1e. Do not tighten Fig 1.1d the thumb screws at this moment. Thumb Screw Spider Truss See Fig. 1.1e Fig. 1.1e Fig. 1.1d Slide the central post up/down in the clamp to the proper height and then tighten (Fig.
-
Page 6: Putting On The Eq8-R Mount
PART I: SETTING UP THE EQ8-R MOUNT 1.2 Putting On the EQ8-R Mount Loosen the two azimuth adjustment knobs on the EQ8-R mount until there is sufficient space between the two knob screws Remove the two azimuth locking screws (Fig. 1.2a). and washers on the tripod top. -
Page 7: Installing The Counterweights
PART I: SETTING UP THE EQ8-R MOUNT Slide the jackscrew handle in the hole at the end of the latitude jackscrew’s shaft. Apply two ball head screws on the handle. (Fig. 1.2d) Ball-head Screw Latitude Jackscrew Jackscrew Handle Fig. 1.2d 1.3 Installing the Counterweights Screw the counterweight rod into the mount as shown in Fig. -
Page 8: Balancing The Mount Load
PART I: SETTING UP THE EQ8-R MOUNT Release the Dec. clutch lever and rotate the Dec. axis until the three knobs on (Fig 1.4) the saddle are facing upward and the dovetail groove is leveled 1.4). Tighten the (Fig Dec. clutch lever again. Saddle Arrow Sign Dec. -
Page 9: Part Ii : Polar Alignment
PART II : POLAR ALIGNMENT Prior to operating the EQ8-R mount, it must be polar-aligned. 2.1 Prepare the Mount for Polar Alignment Set up the EQ8-R mount, counterweights, and telescope as described in PART I. It is rec- ommended to polar-align the EQ8-R mount with all equipment installed. Loosen the primary locking knob and both azimuth locking screws;... -
Page 10: Based On Star Alignment
PART II: POLAR ALIGNMENT 2.2 Based on Star Alignment Use 2-Star alignment to align the mount by choosing two alignment stars with close dec- lination, and then perform the polar-alignment routine. Repeat these operations several times until the polar alignment error reported after 2-Star alignment is small. Refer to Syn- Scan hand controller’s manual for detail operation instruction. - Page 11 PART II: POLAR ALIGNMENT 2020 2012 2028 Southern Hemisphere 2032 2016 2024 Place the four stars in the Asterism here The left picture shows the pattern in the field of view (FOV) of the Northern Hemisphere Place Polaris on the ring polar scope.
-
Page 12: Align The Polar Scope
PART II: POLAR ALIGNMENT 2.5 Align the Polar Scope Before using the polar scope for polar alignment, the polar scope itself must be calibrated to ensure the pattern in the polar scope is aligned to the mount’s R.A. axis. This includes two calibration routines: Routine 1 - Align the pattern plate to the rotating axis of the polar scope Choose a fixed object (the Polaris at night, or a far-away object in daytime);... - Page 13 PART II: POLAR ALIGNMENT Note: • When adjusting the Allen screws, loosen one screw only ¼ of a turn, and then tighten the other two. • Do not over tighten the Allen screws; it might damage the pattern plate in the polar scope. •...
-
Page 14: Part Iii : Electronic Control Interface
PART III : ELECTRONIC CONTROL INTERFACE 3.1 Control Panel The control panel of the EQ8-R Mount is shown below: Fig. 3.1 3.2 Panel Interface Components: POWER: This is an outlet from which the mount and the hand control get power supply. -
Page 15: Pinout Of The Interfaces
PART III: ELECTRONIC CONTROL INTERFACE 3.3 Pinout of the Interfaces: Internal Circuit HAND CONTROL Vpp+ Vpp+ Note: RX(3.3V) Optoisolator TX(3.3V) TRIGGER Control Signal • The SNAP port provides two trigger sig- nals to the stereo plug. Some cameras need both “Shutter“ and “Focus“ signals. DEC- •... -
Page 16: Part Iv : Features Of The Eq8-R Mount
PART IV : EQ8-R MOUNT FEATURES 4.1 SynScan Telescope Control System Our customers have the following options on controlling the EQ8-R mount: • SynScan hand controller. • SynScan Pro application for Windows (Free download from www.skywatcher.com) or SynScan Pro application for Android (Free download from Google Play), using built-in USB or optional SynScan Wi-Fi dongle. -
Page 17: Appendix Dimensions
APPENDIX: DIMENSIONS Dimensions: Ø180 Ø180 Ø140 Ø140 45° 800~1100 800~1100 Mount Tripod Mount 4-M 6 2-Ø 6 Mount Bottom Plate Saddle Head... -
Page 18: Specifications
APPENDIX: SPECIFICATIONS Specifications: Product Name EQ8-R Mount EQ8-RH Mount (with high resolution R.A. encoder) Mount Type German Equatorial Mount Payload 50kg (Rated for astrophotography; counterweights excluded) Latitude Adjustment Range 10º to 65º Azimuth Adjustment Range ±10 º Weight (Tripod excluded) 25.8 kg Counterweight 2 x 10kg/ea. - Page 19 EQ8-R Mount...


Need help?
Do you have a question about the EQ8-R Series and is the answer not in the manual?
Questions and answers