Advertisement
- 1 OVER VIEW
- 2 INSTALLATION
- 3 BACKUP BATTERY INSTALLATION
- 4 TO SET TIME AND THE SNOOZE DURATION
- 5 TO SET THE ALARM (default at 6:00 AM)
- 6 TO SELECT THE ALARM MODE
- 7 TO STOP AND RESET THE ALARM FOR THE NEXT DAY
- 8 TO USE SNOOZE
- 9 TO USE THE HI-MED-LO DIMMER (TIME DIGITS)
- 10 TO USE FLASHLIGHT
- 11 TO USE THE PROJECTION (operated by adaptor only)
- 12 TO CHARGE YOUR MOBILE DEVICE WITH THE USB PORT
- 13 TEST MODE
- 14 TROUBLE SHOOTING
- 15 CARE OF YOUR PRODUCT
- 16 SPECIFICATIONS
- 17 Documents / Resources
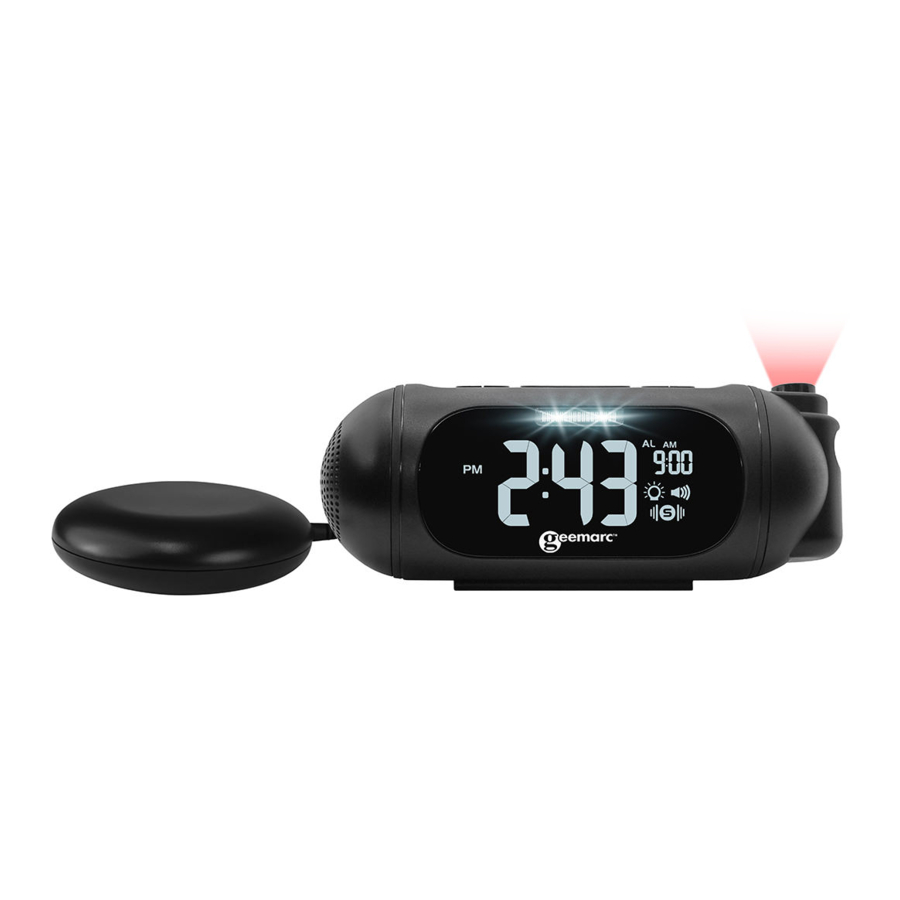
OVER VIEW

Please refer to our website: www.geemarc.com for an up to date user guide, as there may be important updates and changes you need to be aware of!
INSTALLATION
Plug the AC/DC adaptor to an AC household outlet, and then plug the DC jack to the back of the unit.
Your clock is ready to work for you.
The socket-outlet should be near the equipment and be easily accessible.
BACKUP BATTERY INSTALLATION
Your clock requires 2 x new AAA battery (not included) to provide backup power to the clock in the event of a temporary power interruption.
- Place your unit face down on a flat surface.
- Slide and remove the battery cover at the bottom of your unit.
- Insert 2 x new AAA batteries into the battery compartment by observing the correct "+" and "-" polarity.
- Replace the battery cover.
It's not necessary to insert a battery for the clock to function. The backup battery will only serve to keep the time and alarm settings in the event of a power cut or if the AC/DC adaptor gets unplugged. If AC / DC power is interrupted, the LED display will go off and the alarm will not function.
Check the batteries condition after one year, replace old batteries if needed. A leaking battery can damage your clock.
TO SET TIME AND THE SNOOZE DURATION
- Press
![]() once, the hour digits "0" flash. Press
once, the hour digits "0" flash. Press ![]() or
or ![]() to adjust the hours (hold
to adjust the hours (hold ![]() or
or ![]() to reach the desired value more quickly).
to reach the desired value more quickly). - Press
![]() again, the minute digits "00" flash. Press
again, the minute digits "00" flash. Press ![]() or
or ![]() to adjust the minutes. (hold
to adjust the minutes. (hold ![]() or
or ![]() to reach the desired value more quickly).
to reach the desired value more quickly). - Press
![]() again, the display shows "24Hr" and flashes. Press
again, the display shows "24Hr" and flashes. Press ![]() or
or ![]() to select "12Hr" or "24Hr" time format. If "12Hr" is selected, the AM / PM will appear on the upper left to indicate whether it is morning or afternoon.
to select "12Hr" or "24Hr" time format. If "12Hr" is selected, the AM / PM will appear on the upper left to indicate whether it is morning or afternoon. - Press
![]() again, the display shows "n05" and flashes. Press
again, the display shows "n05" and flashes. Press ![]() or
or ![]() to select your snooze time from 5 to 60 minutes.
to select your snooze time from 5 to 60 minutes. - Press
![]() again to exit the setting mode, if no key is pressed, the setting mode will close on its own after approximately 10 seconds.
again to exit the setting mode, if no key is pressed, the setting mode will close on its own after approximately 10 seconds.
 once, the hour digits "0" flash. Press
  or
or TO SET THE ALARM (default at 6:00 AM)
- Press and hold
![]() , AL appears and the alarm's hour digits flash. Press
, AL appears and the alarm's hour digits flash. Press ![]() or
or ![]() to adjust the hour. (hold
to adjust the hour. (hold ![]() or
or ![]() to reach the desired value more quickly).
to reach the desired value more quickly). - Press
![]() once again, the alarm's minute digits flash. Press
once again, the alarm's minute digits flash. Press ![]() or
or ![]() to adjust the minutes. (hold
to adjust the minutes. (hold ![]() or
or ![]() to reach the desired value more rapidly).
to reach the desired value more rapidly). - Press
![]() again, "HI" and "
again, "HI" and "![]() " flash (vibration at High level), press
" flash (vibration at High level), press ![]() or
or ![]() to select "LO" (vibration at Low level) if need.
to select "LO" (vibration at Low level) if need. - Press
![]() once more, "F-1" and "
once more, "F-1" and "![]() " flash, press
" flash, press ![]() or
or ![]() to select the alarm tone (frequency): F1 (low tone, 800 Hz), F2 (mid tone, 1 KHz), F3 (high tone, 1.5 KHz).
to select the alarm tone (frequency): F1 (low tone, 800 Hz), F2 (mid tone, 1 KHz), F3 (high tone, 1.5 KHz). - Press
![]() once more, "L1" and "
once more, "L1" and "![]() " (low) flash, press
" (low) flash, press ![]() or
or ![]() to select the alarm sound level: L1 (low), L2 (medium), L3 (high).
to select the alarm sound level: L1 (low), L2 (medium), L3 (high). - Press
![]() once more, the display shows "A60" and flashes. Press
once more, the display shows "A60" and flashes. Press ![]() or
or ![]() to select your alarm duration from 5 to 60 minutes.
to select your alarm duration from 5 to 60 minutes. - Press
![]() once more to exit the alarm setting mode, if no key is pressed, the alarm setting mode will close on its own after approximately 10 seconds.
once more to exit the alarm setting mode, if no key is pressed, the alarm setting mode will close on its own after approximately 10 seconds.
 " flash (vibration at High level), press
  " flash, press
 TO SELECT THE ALARM MODE
- At normal time display mode, press
![]() one at a time to activate the alarm(s), the corresponding alarm indicator(s) on the right side of the time display will be on:
one at a time to activate the alarm(s), the corresponding alarm indicator(s) on the right side of the time display will be on: ![]()
![]()
![]()
![]()
![]()
only shaker alarm is activated both sound and shaker alarm are activated both strobe light and shaker alarm are activated strobe light, sound and shaker alarm are activated - Press
![]() once more to turn off all the alarms, all
once more to turn off all the alarms, all ![]() ,
, ![]() ,
, ![]() , ALARM TIME and AL indicators are turned off.
, ALARM TIME and AL indicators are turned off.


 , ALARM TIME and AL indicators are turned off.
Remark: To use the shaker alarm, make sure the shaker is plugged in and connected to the back of the clock.
TO STOP AND RESET THE ALARM FOR THE NEXT DAY
When the alarm is sounding, the corresponding alarm indicator flashes. Press  once to stop the alarm and reset it for it to ring again the following day. The corresponding alarm indicator will then stay on the display.
TO USE SNOOZE
When the alarm is sounding, press  once, the alarm will be stopped temporarily and the corresponding alarm indicator will keep flashing. The alarm will come on again after the set snooze duration is over.
TO USE THE HI-MED-LO DIMMER (TIME DIGITS)
There is a 3-level brightness control for the backlight. Press to adjust the brightness (HI / MED / LO) of the backlight. This can only be done when the unit is not sounding.
TO USE FLASHLIGHT
Press and hold to activate the flashlight. Press and hold to deactivate the flashlight.
TO USE THE PROJECTION (operated by adaptor only)
- Press once
![]() to turn on the projection.
to turn on the projection. - Press once
![]() more to turn the projection dim.
more to turn the projection dim. - Press once
![]() more to turn off the projection.
more to turn off the projection. - When the projection is on, press and hold
![]() to flip the projection view upside down. Use the rotary knob on the right side of your unit to rotate the projection view by 90 degrees.
to flip the projection view upside down. Use the rotary knob on the right side of your unit to rotate the projection view by 90 degrees.
TO CHARGE YOUR MOBILE DEVICE WITH THE USB PORT
Connect the charging cable (not included) of your mobile device to the A-type USB port at the back of the unit, then connect the other end to your mobile device. The clock will charge the mobile device automatically.
Remarks:
- Make sure the original cable of your mobile device is used for charging
- Make sure the original adaptor supplied with your clock radio (5V 1.2A) is being used to power your clock. Using other adaptors may not enable you to charge your phone.
- iPad and notepad cannot be charged using your clock radio.
- Your mobile device will not be charging if the alarms are sounding / active.
TEST MODE
Press and hold  button for 2 seconds, test mode runs by itself to test the buzzer alarm sound (F1/F2/F3 + L1/L2/L3), the strobe light flashing and the vibration (Hi-Lo) which runs for one cycle (around 27 seconds). Press once to exit the test mode.
TROUBLE SHOOTING
If your clock displays irrelevant time or does not function properly which may be caused by an electro-static discharge or some other interference, unplug the DC jack to disconnect the AC power (and remove the backup battery), leave it for a few minutes and then plug in the adaptor to repower your clock. The clock will be reset to default settings and you will need to set it again.
CARE OF YOUR PRODUCT
- Place your clock on a stable surface, away from sunlight and sources of excessive heat or moisture.
- Protect your furniture when placing your units on a natural and / or lacquered wood by placing a cloth or protective material between your product and the piece of furniture.
- Clean your unit with a soft cloth moistened only with mild soap and water. Stronger agents such as Benzene, thinner or similar materials can damage the surface of the unit. Make sure the unit is unplugged before cleaning.
- If the unit is not to being used for a prolonged period, such as a month or longer, remove the batteries to prevent possible corrosion. Should the battery compartment become corroded or dirty, clean the compartment thoroughly and replace the batteries.
- Use a brush from time to time to gently clear the dust from the microphone. The brush should have soft, clean, dry bristles.
SPECIFICATIONS
| Alarm duration | 5 to 60 minutes | Default settings | |
| Snooze duration | 5 to 60 minutes | Time format | 24 hour |
| Audible alarm | 95 dB at 1m | Time | 0:00 |
| | Alarm | 6:00 (AM) | |
| Alarm and shaker level | Hi | ||
| Alarm sound frequency | F-1 | ||
| Alarm sound level | L1 (low) | ||
| Alarm duration | A60 | ||
| Snooze duration | 05 (5 minutes) | ||

Documents / Resources
References
Download manual
Here you can download full pdf version of manual, it may contain additional safety instructions, warranty information, FCC rules, etc.
Advertisement


Need help?
Do you have a question about the Wake 'n' Shake Spot and is the answer not in the manual?
Questions and answers