Advertisement
- 1 OVERVIEW
- 2 BACKUP BATTERY INSTALLATION
- 3 INSTALLATION
- 4 TO SET TIME AND THE SNOOZE DURATION
- 5 TO SET THE ALARM
- 6 TO TURN ON/OFF AND SELECT THE ALARM MODE
- 7 TO STOP AND RESET THE ALARM TO COME ON THE NEXT DAY
- 8 TO USE SNOOZE (default snooze duration is 5 minutes)
- 9 TO USE THE HI-MED-LO DIMMER (LCD TIME DIGITS)
- 10 TO USE THE RING OF LED LIGHT
- 11 CHARGE YOUR MOBILE PHONE WITH USB PORT
- 12 TEST MODE
- 13 TROUBLE SHOOTING
- 14 CARE OF YOUR PRODUCT
- 15 SPECIFICATIONS
- 16 Documents / Resources
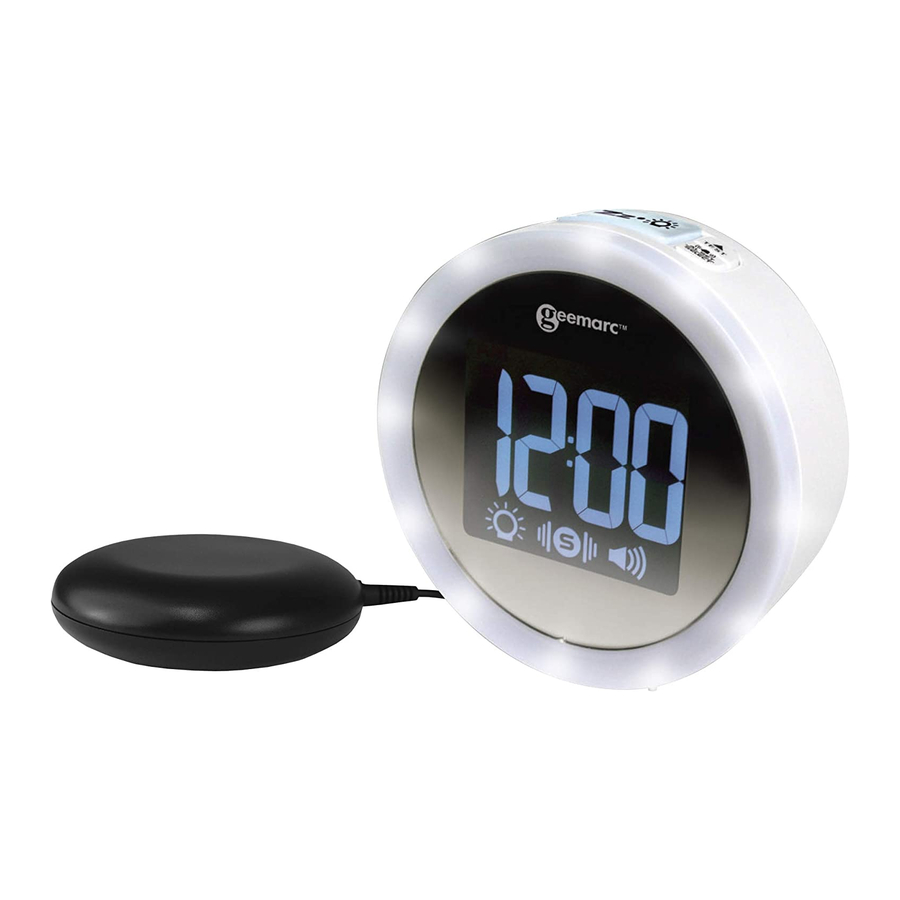
OVERVIEW
Please refer to our website: www.geemarc.com for an up to date user guide, as there may be important updates and changes you need to be aware of!

BACKUP BATTERY INSTALLATION
Your clock requires one CR2032 lithium battery(not included) to provide backup power to the clock in the event of a temporary power interruption. Place your unit face down on a flat surface.
- Use a screw driver to open the backup battery compartment, then use a coin and turn counterclockwise to open the battery door located on the back of the unit.
- Insert one new CR2032 lithium battery into the battery compartment with the "+" side facing up as indicated.
- Place the battery door on the battery compartment, use coins and turn clockwise to lock the battery door, then tighten the battery door screw.
It is not necessary to insert a back-up battery for the clock to function; however, fitting the backup battery will keep the time and alarm settings in the event of a power cut or the DC adaptor being unplugged.
If mains power is interrupted or the adapter is unplugged, the LED clock display will go off and the alarm will not function.
Please replace the battery every year to ensure that your device is not damaged.
INSTALLATION
Plug the AC/DC adaptor to an AC household outlet, and then plug the DC jack to the back of the unit. Your clock is ready to work for you.
TO SET TIME AND THE SNOOZE DURATION
- Press SET once, the hour digits "0" flash. Press
![]() or
or ![]() to set the time in hours (hold to advance rapidly).
to set the time in hours (hold to advance rapidly). - Press SET again, the minute digits "00" flash. Press
![]() or
or ![]() to set the time in minutes. (hold to advance rapidly).
to set the time in minutes. (hold to advance rapidly). - Press SET again, the display shows "24Hr" and flashes. Press
![]() or
or ![]() to select "12Hr" or "24Hr" time format. If "12Hr" is selected, the AM will appear on the upper left to indicate the morning time and PM will appear on the upper right to indicate the afternoon.
to select "12Hr" or "24Hr" time format. If "12Hr" is selected, the AM will appear on the upper left to indicate the morning time and PM will appear on the upper right to indicate the afternoon. - Press SET again, the display shows "05" and flashes. Press
![]() or
or ![]() to select your snooze time from 5 to 60 minutes.
to select your snooze time from 5 to 60 minutes. - Press SET again or if no key pressed for approx. 10 seconds to exit the setting mode.
 to set the time in hours (hold to advance rapidly).
TO SET THE ALARM
- Press and hold AL SET / AL STOP, AL appear and the alarm's hour digits flash. Press
![]() or
or ![]() to set the alarm in hours. (Hold or to advance rapidly).
to set the alarm in hours. (Hold or to advance rapidly). - Press AL SET / AL STOP once again, the minute digits flash. Press
![]() or
or ![]() to set the alarm in minutes. (Hold or to advance rapidly).
to set the alarm in minutes. (Hold or to advance rapidly). - Press AL SET / AL STOP again, LED displays "HI" (vibration at HI level), press
![]() or
or ![]() to select "LO" (vibration at Lo level)
to select "LO" (vibration at Lo level) - Press AL SET / AL STOP once again, LED displays "F-1 (ex. 800 Hz)" and flash, press
![]() or
or ![]() to select the alarm tone (frequency): F-1 (low tone, 800 Hz), F-2 (mid tone, 1 KHz), F-3 (high tone, 1.5 KHz)
to select the alarm tone (frequency): F-1 (low tone, 800 Hz), F-2 (mid tone, 1 KHz), F-3 (high tone, 1.5 KHz) - Press AL SET / AL STOP again, LED displays "L1" ( for the Low ringer level), press
![]() or
or ![]() to select "L3" (for the high ringer level)
to select "L3" (for the high ringer level) - Press AL SET / AL STOP once again to exit the alarm setting, also if no buttons are pressed for around 10 seconds this will also exit the alarm setting mode.
TO TURN ON/OFF AND SELECT THE ALARM MODE
- At normal time display mode, press AL SET / AL STOP one at a time to activate the alarm(s) and turn on corresponding alarm indicator(s) on the lower part of the display:
![]()
only shaker activated ![]()
both sound and shaker alarm activated ![]()
both strobe light and shaker alarm activated ![]()
strobe light, sound and shaker alarm activated - Press AL SET /AL STOP once more to turn off all the alarms, all
![]() ,
, ![]() and
and ![]() alarm indicators are turned off.
alarm indicators are turned off.


 and
and  alarm indicators are turned off.
Note:To use the shaker alarm, please plug in the shaker plug to the back of the clock. If user doesn't want to use the shaker alarm, unplug the shaker plug from the clock.
TO STOP AND RESET THE ALARM TO COME ON THE NEXT DAY
When alarm is sounding, the corresponding alarm indicator flashes. Press AL SET / AL STOP once to stop the alarm and reset it to come on the following day. After that, the corresponding alarm indicator stays on the display.
TO USE SNOOZE (default snooze duration is 5 minutes)
When the alarm is sounding, press  once, the alarm will stop temporarily and the corresponding alarm indicator will keep flashing. The alarm will come on again after the set snooze duration is over.
TO USE THE HI-MED-LO DIMMER (LCD TIME DIGITS)
There is a 3-level brightness control for the LCD clock display. Press to adjust the brightness (HI / MED / LO) on the LCD display. This can only be done when the unit is not alarming. At the start, the brightness is setting on Hi position.
TO USE THE RING OF LED LIGHT
Press and hold button to turn on the ring of LED light, the brightness level of the LED ring (Hi-Med-Lo) corresponds to the time display brightness (Hi-Med-Lo).
When the LED ring lights up, press button one at a time to adjust time display brightness and LED ring brightness accordingly.
Press and hold button to turn off the ring of LED light. (doesn't forget to readjust LCD dimmer after).
CHARGE YOUR MOBILE PHONE WITH USB PORT
Connect the charging cable of your mobile phone to the USB port at the back of the clock and then connect the other end to the micro USB charging socket on your mobile phone. The clock will charge the mobile phone automatically.
Note:
- Make sure the cable supplied with your mobile phone is used for charging.
- Make sure the adaptor supplied with this clock (5V 1.2A) is used to power it.
- It is not possible to charge an iPad® or notepad from the USB socket on this clock.
- When the alarms are sounding/active you can not charge phones etc using the USB port.
TEST MODE
Press and hold  / TEST button, strobe light flashing, shaker vibrating and buzzer sounding.
TROUBLE SHOOTING
Your clock may displays the incorrect time or may not function correctly due to electro-static discharge or other interference like an electrical surge when an electric timer or heater switches on/off (poor mains filtering). The mains adapter for the clock should only be plugged into a mains wall socket. The mains adapter for the clock should only be plugged into a mains wall socket–not a mains extension that is shared with electric heater (or other high wattage equipment).
CARE OF YOUR PRODUCT
- Place your clock on a stable surface, away from sources of direct sunlight or excessive heat or moisture.
- Protect your furniture when placing your unit on a natural wood and lacquered finish by using a cloth or protective material between the unit and the furniture.
- Clean your unit with a soft cloth moistened only with mild soap and water. Stronger agents such as benzene, thinners or similar materials can damage the surface of the unit. Make sure the unit is unplugged before cleaning.
- Remove the back-up battery if the clock is not going to be used for a month or longer to prevent possible corrosion. Should the battery compartment become corroded or dirty, clean the compartment thoroughly and replace the battery.
SPECIFICATIONS
| Alarm duration | 1 hour | |
| Snooze duration Adjustable | 5 to 60 minutes | |
| Default settings | Time format | 24 hour |
| Time | 0:00 | |
| Alarm | 6:00 | |
| Alarm and shaker level | Hi | |
| Alarm sound frequency | F-1 | |
| Alarm sound level | L1 (low) | |
| Snooze duration | 05 (5 minutes) | |
| Audible alarm | up to 95 dB at 1m | |

Documents / Resources
References
Download manual
Here you can download full pdf version of manual, it may contain additional safety instructions, warranty information, FCC rules, etc.
Advertisement


Need help?
Do you have a question about the Wake 'n' Shake Star and is the answer not in the manual?
Questions and answers