Table of Contents
Advertisement
Quick Links
Download this manual
See also:
Service Manual
Advertisement
Table of Contents

Related Manuals for Oki MB280


Summary of Contents for Oki MB280
-
Page 2: Dear Customer
Thanks to its navigator and its multitask access, it is powerful, user-friendly and easy to use. The MB280 multifunction machines come with a 600 dpi scanner and a black and white laser printer offering a printing speed of 20 ppm. The Companion Suite Pro software provided allows you to use your multifunction machine as a scanner and a printer from a personal computer. -
Page 3: Table Of Contents
MBX deposit in a remote fax MBX polling from a remote fax Deposit and Polling Placing a document in deposit Polling a deposited document SMS Parameters Presentation of the sender SMS Center transmission number Sending an SMS Parameters/Setup Date/Time - I - MB280... - Page 4 MB280 Summer time / Winter time setting Your fax number/Your name Type of network Geographical settings Country Telecommuncation Network Language Local prefix Transmission report Document feed type Economy period Reception Mode Reception without paper Number of copies Fax or PC reception...
- Page 5 Transmission from the feeder Transmission from memory Communication error codes General codes PC printing issues PC printing via USB connection PC printing via WLAN connection Specifications Physical specifications Electrical specifications Environmental specifications Peripheral specifications Consumable specifications - III - MB280...
-
Page 6: Preface
MB280 Preface Every effort has been made to ensure that the information in this document is complete, accurate, and up-to-date. Oki assumes no responsibility for the results of errors beyond its control. Oki also cannot guarantee that changes in software and equipment made by other manufacturers and referred to in this guide will not affect the applicability of the information in it. -
Page 7: Positions Of Safety Labels On The Machine
Toner cartridge. Symbols for the main power switch In accordance with IEC 60417, this machine uses the following symbols for the main power switch: means POWER ON. means POWER OFF. - 2 - MB280... -
Page 8: Emc
MB280 Note to users in the United States of America This equipment has been tested and found to comply with the limits for a Class B digital device, pursuant to Part 15 of the FCC Rules. These limits are designed to provide reasonable protection against harmful interference in a residential installation. -
Page 9: Environmental Information
MB280 Environmental Information - 4 -... -
Page 10: Software Use License
MB280 Software use license CAREFULLY READ ALL THE TERMS AND CONDITIONS OF THE PRESENT LICENSE BEFORE OPENING THE SEALED ENVELOPE CONTAINING THE SOFTWARE. OPENING THIS ENVELOPE INDICATES THAT YOU In case you should not accept the terms of this license, the CD-ROM packaging should be returned to the retailer unopened, along with the other components of the product. -
Page 11: Applicable Law
- passports; - driver's licenses. The preceding list is meant as a guide only and is not inclusive. If you have any questions concerning the legality of copying or printing certain items, consult with your legal advisor. - 6 - MB280... -
Page 12: Installation
Such items create fire hazards or electric shock hazards. - Prevent water and any other liquid from spilling on the machine or near to it. Any contact of the machine with water or liquid can cause a fire hazard or an electric shock hazard. - 7 - MB280... -
Page 13: Safety Information
MB280 - If liquid or metallic item gets accidentally inside the machine, turn it off immediately, unplug the power cord and contact your retailer. Otherwise, you will face a fire hazard or an electric shock hazard. - In case of heat, smoke, unusual smell or abnormal noise emissions, turn the machine off, unplug the power cord immediately and contact your retailer. -
Page 14: Power Supply
When moving the unit on a desk, it must be lifted, and not dragged. Handling the Toner Cartridge • Must not be stood on the side, or held upside down. • Must not be shaken strongly. - 9 - MB280... -
Page 15: Rules For Use Symbols
MB280 Rules for use symbols WARNING Indicates important safety notes. Ignoring these notes could result in serious injury or death. Be sure to read these notes. Refer to the security notices presented in the Safety booklet. CAUTION Indicates important safety notes. -
Page 16: Terminal Description
10. Master USB connection (USB key) 11. Manual paper feed setup guides 12. Manual input tray 13. Paper tray 14. Cartridge access cover 15. Fold-down stopper for paper delivery 16. Paper output 17. Smart card insertion point - 11 - MB280... -
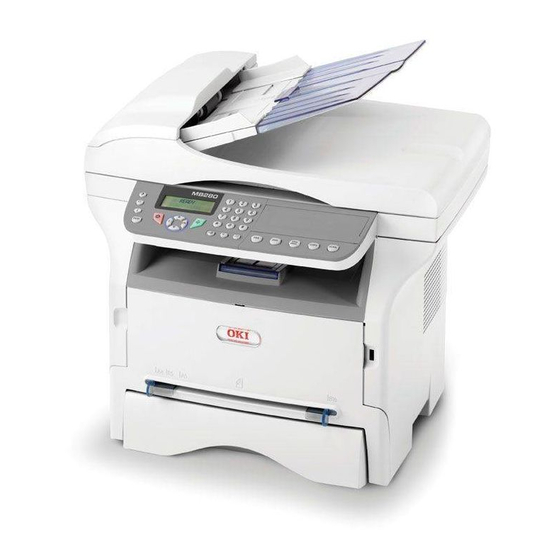
Page 17: Command Panel
MB280 Command panel 1. Screen. 2. Digital keypad. 3. Alphabetical keypad. 4. Key : deletes the character to the left of the cursor. 5. Key : input or line feed. 6. Key : access to special characters. 7. Key Shift. -
Page 18: Packaging Contents
MB280 Packaging contents The packaging contains the items listed below: Multifunction device 1 toner cartridge 1 Installation guide 1 PC installation CD ROM and 1 OCR PC software CD ROM (depending on model) 2 booklets (safety and warranty) 1 power cord... -
Page 19: Cartridge Installation
Hold it by its handle. 4 Insert the cartridge in its slot by pushing it until it clicks (last move down) as shown on the picture below. 5 Close the cover. - 14 - MB280... -
Page 20: Paper Delivery Stop
MB280 Paper delivery stop Adjust the paper delivery stop, depending on the format of the document to be printed. Do not forget to raise the flap to prevent the sheets from falling down. Starting your device Device connection Before plugging the power cord, it... -
Page 21: Paper Insertion In The Manual Input Tray
1 Spread the manual feed guides to the maximum. 2 Insert a sheet or an envelope in the manual input tray. - 16 - MB280 and M keys, or long press if no APER EMPTY Before inserting paper, refer to the paragraph Paper recommendations, page 9. -
Page 22: Use Of Envelopes
MB280 3 Adjust the paper guides against the right and left edges of the sheet or the envelope. 4 Print making sure that the chosen paper format corresponds to the selected format on the printer (refer to Copy, page 18). -
Page 23: Copy
- Mosaic mode (document feeder): 1 Page onto 1, 2 Pages onto 1, or 4 Pages onto 1. - Poster mode (flat-bed scanner): 1 Page to 1, 1 Page to 4 or 1 page to 9. Confirm with the OK button. - 18 - MB280 the printing option... -
Page 24: Id Card Copy Mode
MB280 6 Adjust the desired zoom level, from 25% TO 400% with the buttons , confirm with the OK button (only available in 1 Page to 1 copy mode). 7 Adjust the desired origin values with the digital keyboard buttons then confirm with the OK button. -
Page 25: Zoom Setup
3 Confirm your choice by pressing the OK button. 4 Quit this menu by pressing the - 20 - MB280 844 - ADVANCED FCT/COPY/ORIGIN , enter 844 using the keypad. button. 845 - ADVANCED FCT/COPY/CONTRAST , enter 845 using the keypad. -
Page 26: Paper Tray Selection
MB280 Paper tray selection The Automatic selection can have two meanings depending on the paper format defined on the paper trays. The following table describes the different cases. Default tray Selection between the AUTOMATIC main Same paper manual tray. format in the... -
Page 27: Fax
Place the next page on the scanner, select NEXT and confirm with OK. Select DONE when all pages have been scanned. Your document is stored and will be sent at the new time. - 22 - MB280... -
Page 28: Transmission With Auto Redial
MB280 Transmission with auto redial This function allows you to monitor the dialling operation during a fax transmission. In this case, the maximum transmission rate will be 14400 bps. This function allows for example: • to hear if the subscriber’s fax is engaged and if so, choose the moment when the line is clear to start the document transmission. -
Page 29: Fax Answering Machine
If the option OFF is selected, the menus 392 and 393 will not be included in the functions overview, when it is printed out. button. - 24 - MB280 382 - FAX / FAX ANSW. / ACTIVATION , enter 382 using the keypad. button. The printing is not possible on A5 (or Statement) paper format. -
Page 30: Setting The Re-Direction Contact
Rerouting fax messages to a USB memory key This function allows you to reroute received fax messages directly in the folder MB280\FAX on a USB memory key connected to your terminal. The folder MB280\FAX is created by the application. The USB memory key then becomes the terminal reception memory. -
Page 31: Consulting Or Modifying The Waiting Queue
5 Select option MAILBOX NAME and press OK. 6 Enter this MBX’s S.I.D. (20 characters max.) and press OK. The MBX is initialised. If you wish to initialise another, press C and repeat the same procedure. 7 To exit the MBX, press - 26 - MB280... -
Page 32: Modifying The Features Of A Mbx
MB280 Modifying the features of a MBX 71 - MAILBOXES / CREATE MBX 1 Press , enter 71 using the keypad. 2 Select the desired MBX out of the 31 MBX’s, or enter the number of the MBX directly and press OK. -
Page 33: Deposit And Polling
3 Depending on the type of poll, you should: Menu Procedure Immediate 1 Press poll 1 Press OK. 2 Next to the current time, enter Delayed poll the time you wish to poll the document and press - 28 - MB280... -
Page 34: Sms
MB280 The SMS service is dependent upon Important the country and the service provider. Thanks to the SMS button, you can send an SMS to subscribers all over the world. An SMS (Short Message Service) is a service which permits short written messages to be sent to mobile phones or other SMS- compatible devices. -
Page 35: Parameters/Setup
OK to confirm. For example, if you want to type the letter C, press the key C until it appears on the screen. 4 To exit this menu, press - 30 - MB280 25-03-07 02:01 CHECK TIME 28-10-07 02:01 CHECK TIME... -
Page 36: Type Of Network
MB280 Type of network You can connect your fax to either a PSTN or a private network such as private automatic branch exchange (PABX). You must select the network which is the most convenient. To select the type of network: 251 - SETUP / TEL. -
Page 37: Transmission Report
NEXT and confirm with OK. Select DONE when all pages have been scanned. - 32 - MB280 232 - SETUP / SEND / MEMORY SEND. , enter 232 using the keypad. 233 - SETUP / SEND / ECO PER. -
Page 38: Reception Mode
MB280 Reception Mode This function enables you, if you have an external device (telephone, answering machine) plugged in to the EXT socket on your terminal, via USB or to the telephone plug adapter, to select the device receiving faxes and/or voice messages. -
Page 39: Adjust To Page
4 - Echo protect 6 - EPT mode 7 - COM. display 8 - Eco energy 10 - RX header - 34 - MB280 , modify the parameter Signification Default value of the scan mode resolution for the documents to be transmitted. -
Page 40: Printing The Functions Guide
MB280 Parameter Signification 11 - RX speed Transmission speed for incoming documents. For a quality telephone line (compatible, no echo), communications occur at maximum speed. However, it may be necessary to restrict the transmission speed for some calls. 12 - Rings Number of rings to automatically start your machine. -
Page 41: Print The List Of Setups
821 - ADVANCED FCT / COUNTERS / SENT PAGES 1 Press 2 The number of sent pages appears on the screen. 3 Quit this menu by pressing the - 36 - MB280 , choose DIRECT ONLY button. , enter 815 using the keypad. , choose ON and confirm button. -
Page 42: Received Pages Counter
MB280 Received pages counter To view the number of pages received on your machine: 822 - ADVANCED FCT / COUNTERS / RECEIVED 1 Press , enter 822 using the keypad. 2 The number of received pages appears on the screen. -
Page 43: Directory
3 Press OK to confirm the deletion. 4 Repeat the operations for each record or list you want to delete. - 38 - MB280 12 - DIRECTORY / NEW GROUP to select from In the directory, the letter G placed next to a name identifies a subscribers group. -
Page 44: Printing The Directory
MB280 Printing the directory The printing is not possible on A5 Important (or Statement) paper format. To print the directory: 15 - DIRECTORY / PRINT Press , enter 15 using the keypad. The printing of the directory starts, in alphabetical order. -
Page 45: Games And Calendar
Note 5 Confirm with OK. The calendar of the year requested is printed. button. button. - 40 - MB280 button. button. The printing is not possible on A5 (or Statement) paper format. 53 - PRINT / CALENDAR , enter 5 using the keypad. Confirm... -
Page 46: Network Features
MB280 Network features You may connect your multifunction terminal to a wireless network. However, practical knowledge configuration is required to set up a network. You can connect your machine to a PC using a USB cable or make a wireless connection (via radio) with a PC or network. -
Page 47: Connect Your Wlan Adaptor
The WEP key number may be configured in the menu: Note SETUP / TECHNICALS / WEP KEYS NBR. If you choose WPA, enter the WPA or WPA2 key that you are using on your network. - 42 - MB280 and confirm 29 -... -
Page 48: Referring To Or Changing Your Network Parameters
MB280 8 IP CONF.: MANU or IP CONF.: AUTO appear on the screen. If you choose to set up the system manually, go to the next paragraph and enter the parameters IP ADDRESS, SUBNET MASK and GATEWAY. 9 At the end of this procedure, you return to the main menu of SETUP WIZARD. -
Page 49: An Example Of How An Ad-Hoc Network May Be Set Up
15 Exit this menu by pressing the Once the network has been set up, the LED of the WLAN USB key should be on. You must now set up the PC. - 44 - MB280 protection using following , select the menu SETUP using the keys and confirm with OK. -
Page 50: Setting Up The Pc
MB280 Setting up the PC For this section, refer to the instructions supplied by the manufacturer of the WLAN USB key to help you to find and join the "house" network. 1 You may need to install the software for the WLAN USB key on the PC, if this has not already been done. -
Page 51: Usb Memory Key
COPIES NUMBER appears on the screen, enter the desired number of copies with the numerical keypad and confirm with OK. - 46 - MB280 buttons and confirm 01 - MEDIA / PRINT DOC. / FILE buttons and buttons and confirm... -
Page 52: Delete Your Files Located In The Key
Save a document on a USB memory buttons and This function allows you to digitise and save a document directly in the folder MB280\SCAN on a USB memory key. buttons and The folder MB280\SCAN is created by the application. Important... - Page 53 - no icon: auto resolution. • Scanning in COLOUR: icon: text resolution. - no icon: auto resolution. The beginning button immediately starts the scan and sends a file to the support with the parameters defined in the analysis format. - 48 - MB280...
-
Page 54: Pc Features
MB280 PC Features Introduction The Companion Suite Pro software allows the connection of a personal computer with a compatible multifunction machine. From the PC, you can: • manage the multifunction machine, allowing you to set it up according to your needs, •... -
Page 55: Installing Drivers Only
7 The welcome screen appears. Click on the N button to launch the installation of the Companion Suite Pro kit on your PC. 8 To continue, you need to accept the proposed license agreement. ROGRAMS - 50 - MB280 OMPANION UITE NSTALL PRODUCTS and confirm by USTOMIZED OMPANION... -
Page 56: Installing The Drivers Manually
MB280 9 Click on the N button. 10 Select I in the list and click on the NSTALL DRIVERS button. 11 Select the destination folder for installation and click on the N button. 12 The final installation is ready to be executed. Click on the I button. -
Page 57: Connections
The PC detects the device and the drivers are automatically installed. 3 Once the installation is finished, a message indicates that the drivers are installed correctly. You can now use the multifunction machine to print or scan your documents. button. - 52 - MB280... -
Page 58: Multifunction Terminal's Supervision
MB280 Multifunction Terminal's Supervision The software that you have installed contains two multifunction machine management applications, and C OMPANION IRECTOR OMPANION allow you to: • check whether the multifunction machine is connected to your PC, • monitor the multifunction machine activities, •... -
Page 59: Status Of The Connection
The following information will be available from the ONSUMABLES • current consumables status, • number of printed pages, • number of scanned pages, • number of sent and received pages. - 54 - MB280 in the drop- ESOLUTION button. EMOVE tab: . To... -
Page 60: Companion Suite Pro Functionalities
MB280 Companion Suite Pro functionalities Document analysis The document analysis can be carried out in two ways: • either by the S function (application accessible from the Companion Director window or from the SCAN button on the machine), • or directly from a standard compatible application. -
Page 61: Printing
You have the possibility to print your documents via the USB connection or the WLAN connection. During the installation of the Companion Suite Pro software, the OKI MB280 printer driver will be installed automatically onto your PC. Printing on the multifunction machine Printing a document on the multifunction machine from your PC is like printing a document in Windows. -
Page 62: Address Book
MB280 • Long sides • Short sides 8 Press OK on the command panel to resume printing. 9 Even pages are printed on the other side of the sheets. Once all pages are printed, remove the explanation sheet. If a paper jam or a paper format error occurs, the job is cancelled. -
Page 63: Manage The Address Book
Important 1 Select I DDRESS BOOK 2 Select the file to import, click on O - 58 - MB280 ROPERTIES ROPERTIES ELETE When a contact is deleted from the address book, it is automatically deleted from any group in which it may be included. -
Page 64: Fax Communications
MB280 Fax communications The fax communication enables you to: • send documents as faxes from one of the scanners of your terminal, from the hard disk or from the screen of your PC, • receive fax documents, • monitor communications through various services: the inbox, the outbox, the sent items, the outbox log and the inbox log. -
Page 65: Send A Fax From An Application
1 From your desktop software, select F 2 Select the printer OKI MB280 (FAX) and click OK. The fax window is displayed. 3 To send your fax to a contact, enter his/her number... -
Page 66: The Send Memory (Items Sent)
MB280 The send memory (items sent) The sent memory is used to keep all faxes you have sent. The information in the send memory is: • the recipient of the fax, • the date the fax was created, • the date the fax was sent, •... -
Page 67: Description Of The Tab Fax Parameters
For the first step, there are two methods to create the background image. You can either • Option (A): Draw this background image in your preferred application (such as Word, Excel,...), • Option (B): Scan a sheet of paper containing the layout of the cover page. - 62 - MB280... - Page 68 (Word, Wordpad...). Draw the background image then print this document in the printer named "OKI MB280 (FAX)". At that point the MFSendFax dialog is displayed: Add any recipient to the recipient list, click on the tab...
-
Page 69: Creating A Cover Page
Important the text is readable. 4 As soon as fields are inserted, save the cover page. This cover page can be selected in the tab C the fax send window. - 64 - MB280 to display the available OVER PAGE... -
Page 70: Cover Page
MB280 Description of the tab C OVER PAGE Field Description Either the name of the page Name of the cover selected by default or the page page you have selected to use. You can enter information Sender concerning the sender. -
Page 71: Send An Sms
The information held in the log is: • the SMS recipient, • the date of sending of the SMS, • the status (sent, rejected,...). - 66 - MB280 The button D deletes the ELETE entire log, and not simply the selected message(s). -
Page 72: The Sent Item Memory (Items Sent)
MB280 The sent item memory (items sent) The sent item memory is used to keep a copy of all SMS messages you have sent. The information in the sent item memory is: • the SMS recipient, • the date of creation of the SMS, •... -
Page 73: Uninstall The Drivers Using The Companion Suite Pro Software
> C TART ONTROL > P RINTERS 2 In the O OKI MB280 item and click on the right button of the > S ERVER mouse. 3 Select U the mouse. 4 Click on the OK button to confirm the removal. -
Page 74: Maintenance
MB280 Maintenance Service General information For your safety, it is imperative to CAUTION refer to the security directives presented in the Safety booklet. To ensure that your machine is kept in the best conditions, it is recommended that you periodically clean the inner parts. -
Page 75: Issues With Smart Cards
5 Close the document-feeder scanner cover. 6 Plug the power cord to outlet on the wall and press the On/Off button to turn on the device (I position). 7 Make a copy to check that the symptoms have disappeared. - 70 - MB280 ** warns... -
Page 76: Printer Issues
MB280 Printer issues Error messages When the printer encounters any of the problems described below, the corresponding message is shown on the machine display. Message Action Check the presence of a CHECK TONER toner cartridge in the machine. Indicates that your... -
Page 77: Scanner Issues
Code 05 - Scanning default An incident occurred with the scanner, for example, the sheet is jammed. - 72 - MB280 FRI 12 DEC 20:13 0142685014 20:18 . To eject again. -
Page 78: Pc Printing Issues
MB280 Code 06 - Printer default An incident occurred in the printer: no paper, paper jam, opened cover... In the reception mode, this incident appears only if the reception parameter is switched to ITHOUT APER Code 07 - Disconnected The link has been cut (bad line). Check the number and try again. -
Page 79: Pc Printing Via Wlan Connection
Documents waiting to be printed, however, will be printed. Once the problem is resolved, the printing of the document Loss of WLAN restarts from the beginning, connection regardless of the number of pages already printed before the connection loss. - 74 - MB280... -
Page 80: Specifications
MB280 Specifications Physical specifications Dimensions: Weight: Electrical specifications Power supply (see rating plate): Electric consumption: Environmental specifications Operating temperature: Peripheral specifications Printer Type: Resolution: Speed: Preheating time: First page out time: a. Printing speed may vary depending on used operating systems, computer specifications, software applications, connection modes (USB or WLAN), paper formats as well as file types and sizes. -
Page 81: Consumable Specifications
Consumable specifications Reference paper Scanner : Printer : Specifications are subject to changes for improvement without notice. Inapa tecno SPEED A4 Ricoh T6200 A4 - 76 - MB280... - Page 82 10 Constellation Drive Mairangi Bay, Auckland, New Zealand Tel:(64) 9 477 0500 Fax:(64) 9 477 0549 http://www.comworth.co.nz Oki Data(S) P Ltd. Malaysia Rep Office Suite 21.03, 21st Floor Menara IGB, Mid Valley City, Lingkaran Syed Pura 59200, Kuala Lumpur, Malaysia...
- Page 83 5th Floor Kiev 01025 Tel: +380 44 537-52-88 e-mail: info@oki.ua Website: www.oki.ua Oki Sistem ve Yazıcı Çözümleri Tic. Ltd. Ști. Harman Sokak, No:4, Kat:6, 34394, Levent, Istanbul Tel : +90 212 279 2393 Fax : +90 212 279 2366 http://www.oki.com.tr www.okiprintingsolutions.com.tr...
- Page 84 07099801 iss.2...
Need help?
Do you have a question about the MB280 and is the answer not in the manual?
Questions and answers