Table of Contents
Advertisement
Quick Links
Advertisement
Table of Contents

Related Manuals for midiplus UP


Summary of Contents for midiplus UP
- Page 1 UP/UP+ USER MANUAL MIDIPLUS...
-
Page 2: Table Of Contents
2. Safety Warnings and Instructions: ..........................3 3. Getting Started ..................................4 3.1 Connecting Your Up ..............................4 3.2 Connecting Your Up+ (Extender) .......................... 4 3.3 Changing the Control Mode ..........................4 3.4 Using the Overlays ..............................5 4. Logic Pro X ................................... 5 4.1 Up / Up+ Setup................................. - Page 3 Faders ................................... 32 Dual-Purpose Sel Buttons ..........................32 Transport Buttons .............................. 33 7. Pro Tools .................................... 33 7.1 Up / Up+ Setup............................... 33 7.2 Pro Tools Setup ..............................33 7.3 Basic Functions ..............................34 Auto and Insert Buttons ............................ 34 Displays ................................
-
Page 4: Introduction
RGB backlight, to control your favorite DAWs. Please read this Quick Start Guide carefully before use to help you quickly set up your Up for the first time. 2. Safety Warnings and Instructions:... -
Page 5: Getting Started
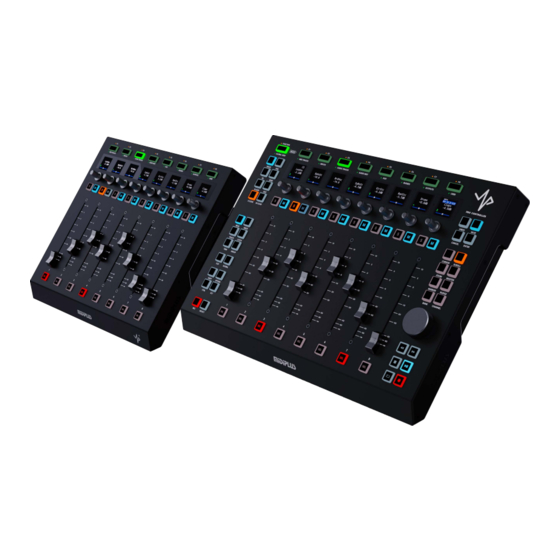
The Up can be extended by 3 Up+ (Extender) to create a 32-channel controller, just simple use the included USB A to C cable connect the TO UP+ port (USB A type) of Up to the TO UP port (USB C type) of Up+, and the rest 2 Up+s also connecting by daisy chain. -
Page 6: Using The Overlays
Mackie Control device in Logic Pro X, Cubase/Nuendo, and Ableton Live. HUI mode is recommended for use your Up and Up+ as a HUI emulation device in Pro Tools. MCU mode is a standard Mackie Control emulator use with most DAWs. - Page 7 2. Tick “Enable Complete Features” 3. Go to Logic Pro | Control Surfaces | Setup… 4. Go to New | Install… in the top-left of the window. 5. Select Mackie Control from the list and click the Add button.
- Page 8 6. Click the image of the Mackie Control and set the Input and Output ports to “Up Port 1”, now your Up is ready to use. If you have connected Up+ to the Up, the Up+s should be set up as extender units through the remaining steps.
-
Page 9: Basic Functions
9. Click the image of the Mackie Control Extender and set the Input and Output ports to “Up Port 2”, set the Fader Bank Offset to “8”. 10. Repeat step 7 and step 8, set the subsequent Up+s as Mackie Control Extenders, incrementing the MIDI Port number for each Extender, set the Fader Bank Offset to “16”... -
Page 10: Function / Global View Buttons
Function / Global View Buttons The FUNCTION / GLOBAL VIEW button lights Orange by default, press one of these 8 buttons (F1 through F8) will switches the Screenset in Logic, when press the FUNCTION / GLOBAL VIEW button to switch the backlight to Green, these 8 buttons are used in conjunction with the GLOBAL button to display (and edit) specific types of channel strips. -
Page 11: Assignment Buttons
Displays the channel metering. • Up+ State Displays the Up+ icon when the Up+ is connected to Up. • V-Pot Readout Bar Display the current position of the parameter you are adjusting with the V-Pot. • V-Pot Label or Value Displays the abbreviated parameter name and its value. -
Page 12: V-Pots
V-Pots The function of V-Pots depanding on which assignment mode is currently active, rotate V-Pot is typically used for adjust the channel’s send level and pan / balance or to adjust effect or instrument plug-in parameters. Also use to scroll through and choose items such as plug-ins, software instruments, and more from menus, and to determine send destinations. -
Page 13: Automation And Group Buttons
• M CLEAR Use to disable mute for all channel strips. Automation and Group Buttons • READ Set selected track’s automation to Read or Off. • WRITE Set selected track’s automation to Write. • TOUCH Set selected track’s automation to Touch. •... -
Page 14: Multi-Purpose Jog Wheel Section
Wheel . • CURSOR Use Jog Wheel as computer arrow key, press the Jog Wheel to toggle arrow Left / Right or arrow Up/ Down. • SCROLL Turn the Jog Wheel to control the playhead scrolling, press the Jog Wheel to enter scrub mode and the SCROLL button will blink. -
Page 15: Utilities Buttons
Utilities Buttons • UNDO Press to undo the last undoable action. Hold down the SHIFT button while pressing UNDO to perform a Redo. Hold down the OPTION button while pressing UNDO to open the Undo History window. • SAVE Press to save the current project file. Hold down the OPTION button while pressing SAVE opens the Save As dialog on the computer screen. -
Page 16: Transport Buttons
Starts recording on the selected MIDI, audio, or software instrument channel strip if it is armed for recording. 5. Cubase/Nuendo 5.1 Up / Up+ Setup Make sure you have changed your Up / Up+’s Control mode to Cubase mode, please refers to 3.3 Changing the Control Mode... -
Page 17: Cubase/Nuendo Setup
2. Click on the Add Device menu in the Setup window and select Mackie Control from the list. 3. Click on the Mackie Control and set the MIDI Input and Output to “Up”. If you have connected Up+ to the Up, please continue through the remaining steps, otherwise, please skip to step 7. - Page 18 5. Click on the Mackie Control 2 and Set the MIDI Input to “MIDIIN2(Up) ” and MIDI Output to “MIDIOUT2(Up) ”. 6. Repeat step 4 and step 5 if you have connected more Up+s, set the subsequent Up+s as Mackie Control 3 and 4, incrementing the MIDI Port number for each Mackie Control.
-
Page 19: Basic Functions
9. Select Cubase from the pop-up menu. Your Up is now ready to use. 5.3 Basic Functions This section introduces the basic functions of Up using with Cubase/Nuendo, please place the included Cubase overlays onto the Up before use. Function / Fader Bank Buttons... -
Page 20: Displays
(SMPTE). Press the SMPTE/BEATS button to switch between the two time formats. • Metering Displays the channel metering. • Up+ State Displays the Up+ icon when the Up+ is connected to Up. • V-Pot Readout Bar Display the current position of the parameter you are adjusting with the V-Pot. Assignment Buttons Press one of these Assignment buttons to select the type of parameter that you want to control or edit with the channel strip V-Pots, faders, and buttons. -
Page 21: V-Pots
Controls the routing settings for all audio channels of your project. • PAN Pan/Surround parameters. • EQ EQ parameters. • SEND Send parameters. • PLUG-INS Plug-in selection or Plug-in Edit mode. • DYN/FX/AUX Instrument selection or Instrument Edit mode. V-Pots The function of V-Pots depanding on which assignment mode is currently active, rotate the V-Pots to navigate in the settings or to edit the values of parameters. -
Page 22: Solo And Mute Buttons
Solo and Mute Buttons • S (Solo) Use to hear the channel strip in isolation. • M (Mute) Use to silence the channel. • S CLEAR Use to disable solo for all channel strips. The S CLEAR button will blink whenever any channel is soloed. •... -
Page 23: Flip And Edit Buttons
Use to control the master insert effects of the main output bus. • MIXER Press to open or close the MixConsole window. Flip and Edit Buttons • FLIP Switches the functions of faders and V-Pots. • EDIT Press to open or close the Channel Settings window for the current channel selection. Hold down SHIFT button and press EDIT to close the currently active window. -
Page 24: Multi-Purpose Jog Wheel Section
Wheel . • CURSOR Use Jog Wheel as computer arrow key, press the Jog Wheel to toggle arrow Left / Right or arrow Up/ Down. • SCROLL Turn the Jog Wheel to control the playhead scrolling, press the Jog Wheel to enter scrub mode and the SCROLL button will blink. -
Page 25: Faders
Faders Control the channel level or control other parameters by using Flip mode. Dual-Purpose Sel Buttons The SELECT button is actived by default, the eight SEL (select) buttons are used to choose and activate the channel for channel-based editing or assignment commands, when REC button is actived, these eight buttons are used to arm the channel strip for recording. -
Page 26: Ableton Live
Starts recording on the selected MIDI, audio, or software instrument channel strip if it is armed for recording. 6. Ableton Live 6.1 Up / Up+ Setup Make sure you have changed your Up / Up+’s Control mode to Live mode, please refers to 3.3 Changing the Control Mode chapter. -
Page 27: Basic Functions
“Up”. 3. If you have connected Up+ to the Up, set Control Surface 2 to Mackie Control XT and the Input and Output to “Up Port 2”. If more Up+ are connected, set the subsequent Up+s as Mackie Control XT, and incrementing the MIDI Port number for each Mackie Control XT. -
Page 28: The Top Row Buttons
• Time Display Shows the current playhead position, either in musical time divisions (BEATS) or in SMPTE timecode format (SMPTE). Press the SMPTE/BEATS button to switch between the two time formats. • Metering Displays the channel metering. • Up+ State... -
Page 29: Assignment Buttons
Displays the Up+ icon when the Up+ is connected to Up. • V-Pot Readout Bar Display the current position of the parameter you are adjusting with the V-Pot. Assignment Buttons Press one of these Assignment buttons to select the type of parameter that you want to control or edit with the channel strip V-Pots, faders, and switches. -
Page 30: Page Buttons
The function of V-Pots depanding on which assignment mode is currently active, rotate the V-Pots to navigate in the settings or to edit the values of parameters. In some cases, the V-Pots also serve a push-button function. Page Buttons Use to move through the various pages when in Plug-ins mode. Home and End Buttons •... -
Page 31: Browser And Detail Buttons
• SESS/ARR Toggle Session/Arrangement View. • CLIP/FX Toggle Device/Clip View. Browser and Detail Buttons • BROWSER Hide/Show Browser. • DETAIL Hide/Show Detail View. Draw and B.T.A. Buttons • DRAW Toggle Draw Mode. • B.T.A. Back to Arrangement. Utilities Buttons • UNDO Undo the last action. -
Page 32: Modifier Buttons
LEFT/RIGHT or UP/DOWN buttons. - Session View Rotate the Jog Wheel to select the scene or clip, which depends on either the LEFT/RIGHT or UP/DOWN button is actived, press ZOOM to launch the currently selected clip, press SCROLL to launch the currently selected scence. -
Page 33: Faders
Use Jog Wheel to control the Master level. • BANK Use Jog Wheel to shift the active channel bank up or down by one bank. • CHANNEL Use Jog Wheel to shift the active channel bank up or down by one channel. -
Page 34: Transport Buttons
Starts recording on the track if it is armed for recording. 7. Pro Tools 7.1 Up / Up+ Setup Make sure you have changed your Up / Up+’s Control mode to HUI mode, please refers to 3.3 Changing the Control Mode chapter. -
Page 35: Basic Functions
2. Click on the MIDI Controllers tab, set the #1 row as a HUI Type, Receive From Up and then Send To Up. 3. If you have connected Up+ to the Up, set the subsequent Up+s as HUI Type in the remaining row, and incrementing the MIDI Port number for the Receive From and Send To of each row. -
Page 36: Displays
Shows the abbreviated channel name, or displays a parameter name or value during edit operations. • V-Pot Readout Bar Display the current position of the parameter you are adjusting with the V-Pot. • Up+ State Displays the Up+ icon when the Up+ is connected to Up. Assignment Buttons • ASSIGN... -
Page 37: Assign Or Edit Plug-Ins
Assign the routing of sends. Press the ASSIGN button, the ASSIGN button will blink, press a SEND button (A - E), rotate the V-Pot to choose the desired destination, press the V-Pot to confirm the assignment fot that channel, or press ASSIGN to confirm all of your assignments at once. To change all channel to the same destination, rotate a V-Pot to choose the desired destination, press OPTION/ALL and the V-Pot to confirm. -
Page 38: V-Pots
5, Rotate the V-Pot 5 to toggle between displaying inserts 1 - 4 or insert 5, press the V-Pot 5 to confirm all of your assignments at once. • Edit Plug-ins 1, To edit assigned plug-ins for a channel, press the PLUGIN button to enter the Plug-in mode, 2, Press a INSERT button to select a channel. -
Page 39: Solo And Mute Buttons
Solo and Mute Buttons • S (Solo) Use to hear the channel strip in isolation. • M (Mute) Use to silence the channel. Automation Buttons • READ Hold down the READ button then press the AUTO (1 - 8) buttons to set the corresponding channel into Read mode. -
Page 40: Modifier Buttons
Hold down the OPTION/ALL button and press an automation button to change all channels for automation. • DEFAULT Returns a channel strip’s faders and V-Pots to their default settings. - To returns a channel strips’s fader to its default setting, press DEFAULT + SEL button. - To returns a channel strips’s Pan to its default setting, pressing the PAN button changes the V-Pot function to Pan, then press DEFAULT + V-Pot button. -
Page 41: Multi-Purpose Jog Wheel Section
Turn the Jog Wheel to control the playhead scrolling, press the SCROLL twice to enter scrub mode and the SCROLL button will blink. • BANK: Use Jog Wheel to shift the active channel bank up or down by one bank. • CHANNEL: Use Jog Wheel to shift the active channel bank up or down by one channel. -
Page 42: Faders
Faders Control the channel level or control the send level by using Send Flip mode. Dual-Purpose Sel Buttons The SELECT button is actived by default, the eight SEL (select) buttons are used to choose and activate the channel for channel-based editing or assignment commands, when REC button is actived, these eight buttons are used to arm the channel strip for recording. -
Page 43: Mcu Mode
Arms Pro Tools for recording. 8. MCU Mode In addition to the above four customized modes, the Up and Up+ also has a standard Mackie Control mode for you to use with other DAWs. Please refers to 3.3 Changing the Control Mode chapter to change your Up and Up+’s Control mode to MCU mode, then add the Mackie Control device in your DAW. - Page 44 V1.0.0...
Need help?
Do you have a question about the UP and is the answer not in the manual?
Questions and answers