Table of Contents
Advertisement
Quick Links
Advertisement
Table of Contents

Subscribe to Our Youtube Channel
Related Manuals for midiplus X Pro Series


Summary of Contents for midiplus X Pro Series
-
Page 2: Table Of Contents
5.6 REAPER (MACKIE CONTROL) ..............................16 5.7 CAKEWALK SONAR (MACKIE CONTROL) ..........................18 5.8 BITWIG (MACKIE CONTROL) ...............................20 5.9 ABLETON LIVE (MACKIE CONTROL) ............................22 6. MIDIPLUS CONTROL CENTER ............................23 7. APPENDIX .................................... 24 7.1 SPECIFICATIONS ..................................... 24 7.2 SCALES .......................................24 7.3 VOICE LIST ...................................... -
Page 3: Introduction
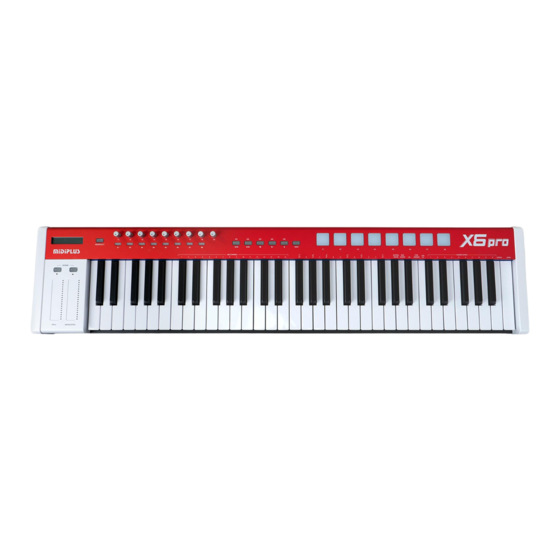
Introduction Thank you for purchasing the MIDIPLUS 2nd generation X Pro series MIDI keyboard products. This series of keyboards include the X6 Pro II and X8 Pro II, which have 61 keys and 88 keys,and all have 128 voices. The X Pro II features semi-weighted keys with velocity-sensitive, equipped with knob controllers, transport controls, touch-sensitive pitch bend and modulation controls. -
Page 4: Overview
1. Overview 1.1 The Top Panel X knob: For controlling DAW and software instrument parameters or setting the keyboard ① parameters. ② Transport buttons: For controlling the transport of DAW. ③ Knobs: For the control of DAW and software instrument parameters. ④... -
Page 5: Guide
2. Guide 2.1 Ready to use Connecting to your computer: Please use the supplied USB cable to connect the X Pro II to your computer. The X Pro II is a plug and play device in both Windows and MAC OS operating systems, and it will automatically install the required drivers without the need for additional installation steps. -
Page 6: Knob
2.2 X Knob The X-Knob has 2 modes, the default mode is General Mode, long press about 0.5 seconds to switch to Setup Mode, which allows you to set the keyboard's relevant parameter options, for more details please refer to Keyboard. -
Page 7: Transport Buttons
CC45 Expression Controller CC11 Chorus Send Level CC93 Reverb Send Level CC91 Timbre/Harmonic Intens CC71 Brightness CC74 Main Volume You can assign any MIDI CC (continuous controller) number to each knob in MIDIPLUS Control Center. X Pro II User Manual... -
Page 8: Control Buttons
Acoustic Bass Violin Alto Sax Clarinet String Ensemble 1 You can change the program or mode of buttons in MIDIPLUS Control Center. 2.8 Pads X Pro II has 8 Pads with backlit, default control MIDI channel 10: Button Voice Bass Drum 1... -
Page 9: Keyboard
2.9 Keyboard X Pro II provides 61 keys or 88 keys for sending note switch and velocity information in normal state. These keys also can be used as shortcuts to set controllers, MIDI channel in Setting Mode, for details, please refer to 3. -
Page 10: Changing The Bank Lsb
3. Press the X knob to confirm, the screen will display you just selected controller number, 3.3 Changing The Bank LSB Press and hold the X knob for 0.5 seconds, and when the display shows‘Edit’, proceed as follows: 1. Press the key labeled "LSB", the screen will display the currently value, 2. -
Page 11: Daw Settings
5. DAW Settings X Pro II has 6 buttons with three modes: Mackie Control (default), HUI and CC mode, they can be controls the transport of most popular DAWs. And most of DAWs can be used Mackie Control mode except Pro Tools, you need to change the buttons to HUI mode. 5.1 Steinberg Cubase/Nuendo (Mackie Control) 1. - Page 12 4. In the Mackie Control window, set the MIDI Input as MIDIIN2(X Pro II) and the MIDI Output as MIDIOUT2(X Pro II) 5. Click on the MIDI Port Setup 6. In the right side of the window, find the MIDIIN2(X Pro II), then deactivate the In “All MIDI” 7.
-
Page 13: Fl Studio (Mackie Control)
5.2 FL Studio (Mackie Control) 1. Go to menu: Options > MIDI settings (keyboard shortcut F10) 2. In the Input tab, find and Enable both X Pro II and MIDIIN2(X Pro II), set the Controller type of MIDIIN2(X Pro II) as Mackie Control Universal, Port 1 3. -
Page 14: Studio One (Mackie Control)
5.3 Studio One (Mackie Control) 1. Go to menu: Studio One > Options...(keyboard shortcut: Ctrl+,) 2. Select the External Devices 3. Then click on Add... 4. Select New Keyboard X Pro II User Manual... - Page 15 5. Set both Receive From and Send To as X Pro II 6. Click on OK to finish this part 7. Select another External Devices 8. And click on Add... X Pro II User Manual...
-
Page 16: Pro Tools (Hui)
MIDIIN2(X Pro II), then click on OK to finish setup. 5.4 Pro Tools (HUI) 1. Change the transport buttons in the MIDIPLUS Control Centre to HUI. 2. Go to menu: Setup > Peripherals... 3. In the pop-up window, click on the MIDI Controllers tab, find the #1 row, select HUI in the pop-up list of Type, select MIDIIN2(X Pro II) both in the pop-up list of the Receive From and Send To, then close the Peripherals window to finish setup. -
Page 17: Logic Pro X (Mackie Control)
5.5 Logic Pro X (Mackie Control) 1. Go to menu: Control Surfaces > Setup... 2. In the Control Surface Setup window, click on New, select Install from the pop-up list, 3. In the Install window, select Mackie Control, then click on Add 4. -
Page 18: Reaper (Mackie Control)
5.6 Reaper (Mackie Control) 1. Go to menu: Options > Preferences... (keyboard shortcut: Ctrl+P) X Pro II User Manual... - Page 19 2. In the Preferences window, click on the MIDI Devices tab, find and right click on the the X Pro II from the Device list, select Enable input, 3. In the Preferences window, click on the Control/OSC/web tab, then click on Add 4.
-
Page 20: Cakewalk Sonar (Mackie Control)
5.7 CakeWalk Sonar (Mackie Control) 1. Go to menu: Edit > Preferences... 2. In the Preferences window, click on Devices tab, then check the X Pro II and MIDIIN2(X Pro II) from the Friendly Name of the Inputs, 3. In the Preferences window, click on Control Surfaces tab, then click on the Add icon as picture below, X Pro II User Manual... - Page 21 4. In the Controller/Surface Settings window, select Mackie Control from the pop-up list of Controller/Surface, then click on the MIDI Devices... button, 5. In the MIDI Devices window, check the X Pro II and MIDIIN2(X Pro II) from the Friendly Name of the Inputs, and also check the X Pro II and MIDIOUT2(X Pro II) from the Friendly Name of the Outputs, then click on OK, 6.
-
Page 22: Bitwig (Mackie Control)
7. Go to menu: Utilities > Mackie Control - 1 8. In the pop-up window, find and check the Disable handshake from the Options box, close the window to finish setup. 5.8 Bitwig (Mackie Control) 1. Open Bitwig, click on SETTINGS tab in dashboard, then select Controllers tab, click on Add Controller, X Pro II User Manual... - Page 23 2. In the Add Controller window, select Generic from the pop-up list of Hardware Vendor, select MIDI Keyboard under the Product box, then click on Add, 3. In the Generic MIDI Keyboard window, select X Pro II as Input port, Repeat step 1 to add a controller, in the Add Controller window, select Mackie from the pop-up list of Hardware Vendor, select MCU PRO under the Product box, then click on Add,...
-
Page 24: Ableton Live (Mackie Control)
5.9 Ableton Live (Mackie Control) 1. Go to menu: Options > Preference... 2. Click on the Link MIDI tab, select MackieControl from the pop-up list of Control Surface, and select X Pro II (Port 2) from the pop-up list of both Input and Output. X Pro II User Manual... -
Page 25: Midiplus Control Center
8. PAD: You can configure the mode of PADs. In Note mode, you can change the note and MIDI Channel. And in CC mode, you can change the CC number, MIDI Channel and PAD type. Note: please visit CLICK HERE to download and install the MIDIPLUS CONTORL CENTER. X Pro II User Manual... -
Page 26: Appendix
7. Appendix 7.1 Specifications Product Name XPro II Keyboard 61/88-key Semi-weighted Maximum Polyphony OLED Screen Buttons 2 Octave buttons, 1 Transpose button, 6 Transport buttons and 8 control buttons 1 Clickable encoder and 8 knobs Knobs Pads 8 Pads with backlit Connectors USB port, MIDI OUT, Sustain Pedal Input, Expression Pedal Input,2 Balanced Output, 1 Headphone Jack... -
Page 27: Voice List
7.3 Voice List Name Name Name Name Acoustic Grand Piano 32 Acoustic Bass Soprano Sax FX 1 (rain) Bright Acoustic Piano 33 Electric Bass(finger) 65 Alto Sax FX 2 (soundtrack) Electric Grand Piano Electric Bass (pick) Tenor Sax FX 3 (crystal) Honky-tonk Piano Fretless Bass Baritone Sax... -
Page 28: Midi Cc List
7.4 MIDI CC List CC Number Purpose CC Number Purpose Bank Select MSB Sostenuto On/Off Modulation Soft Pedal On/Off Breath Controller Legato Footswitch Undefined Hold 2 Foot Controller Sound Variation Portamento Time Timbre/Harmonic Intens Data Entry MSB Release Time Main Volume Attack Time Balance Brightness... - Page 29 X Pro II User Manual...
Need help?
Do you have a question about the X Pro Series and is the answer not in the manual?
Questions and answers