Table of Contents
Advertisement
Quick Links
A MIDDLEBY COMPANY
OWNER'S
OPERATING
& INSTALLATION
MANUAL
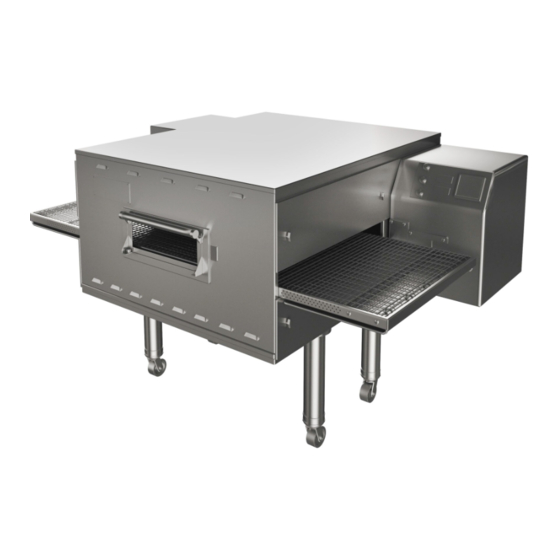
PS3240G-Series Gas Ovens
Model PS3240G
© 2021 Middleby Marshall Inc.
is a registered trademark of Middleby Marshall, Inc. All rights reserved.
1
PS3240G-Series Gas Ovens: English
Combinations:
• Single Oven
• Double Oven (Two-Stack)
• Triple Oven (Three-Stack)
P/N 77828 rev A
Advertisement
Table of Contents

Subscribe to Our Youtube Channel
Related Manuals for Middleby Marshall PS3240G Series


Summary of Contents for Middleby Marshall PS3240G Series
- Page 1 & INSTALLATION MANUAL Combinations: PS3240G-Series Gas Ovens • Single Oven Model PS3240G • Double Oven (Two-Stack) • Triple Oven (Three-Stack) © 2021 Middleby Marshall Inc. is a registered trademark of Middleby Marshall, Inc. All rights reserved. P/N 77828 rev A...
- Page 2 Gas Conversion Kit. For your safety, do not store or use gasoline or other Middleby Marshall suggests a service contract with a flammable vapors and liquids in the vicinity of this or Middleby Authorized Service Agent (ASA).
- Page 3 Seller shall not be liable for any prospective or lost profits of Buyer. for any prospective or lost profits of the buyer. This warranty is effective on Middleby Marshall equipment sold The foregoing shall be Seller’s sole and exclusive obligation and on, or after January 1st, 2007.
-
Page 4: Table Of Contents
Table of Contents SECTION 1 DESCRIPTION ..........5 Gas Conversion ..........22 MODEL IDENTIFICATION ........5 PS3240 Propane Conversion ......22 II. PS3240 SERIES SPECIFICATIONS ....... 6 Adjusting the Maximum Pressure Setting ..22 III. COMPONENT FUNCTION ........7 Adjusting the Minimum Pressure Setting ..23 Conveyor Drive Motor ........ -
Page 5: Section 1 Description
SECTION 1 DESCRIPTION I. MODEL IDENTIFICATION PS3240 Series Ovens can be used to bake and/or cook a wide variety of food products, such as pizza, pizza-type products, cookies, sandwiches, and others. The PS3240 may be used either as a single oven or stacked for use as double or triple ovens. -
Page 6: Ps3240 Series Specifications
* The current draw ratings shown above are maximum values for normal operation, amperage draw will be less than the listed value. NOTE: Each oven includes a 6 ft cord with NEMA# L6-20P plug. Customer to provide NEMA# L6-20R receptacle. PS3240G SERIES GAS SUPPLY SPECIFICATIONS Gas Type... -
Page 7: Component Function
SECTION 1 DESCRIPTION PS3240G-Series Oven Component Locations III. COMPONENT FUNCTION Machinery Compartment Access Panel Allows access to the oven’s interior and control Conveyor Drive Motor components. No user serviceable parts are located in Moves the conveyor. the machinery compartment. Crumb Trays Serial Plate Catch crumbs and other materials that drop through Provides specifications for the oven that affect... - Page 8 SECTION 1 DESCRIPTION NOTES...
-
Page 9: Section 2 Installation
SECTION 2 INSTALLATION SECTION 2 INSTALLATION WARNING NOTICE After conversions, readjustments, There must be adequate clearance between the service work on the oven: oven and combustible construction. Clearance must • Perform a gas leak test. also be provided for servicing and for proper operation. -
Page 10: Unloading And Rough-In
I. UNLOADING AND ROUGH-IN of crates. If apparent damage is found, make arrangements to file a claim against the carrier. Your Middleby Marshall PS3240G-Series Oven is Surface Interstate Commerce Regulations (U.S.A.) shipped partially assembled. It will arrive in a carton on require that the claim must be initiated by the a crate. - Page 11 SECTION 2 INSTALLATION PARTS LIST FOR PS3240G-SERIES SINGLE OVEN OPTION BASE w/15" LEGS AND TOP P/N 66957 ITEM NO. PART NO. DESCRIPTION 66948 LEG, 15" COMMON TUBE & CASTER 66159 COMPLETE BASE WELDMENT 59673 TOP COVER 21422-0016 1/2" SPLIT LOCK WASHER, PT 21422-0001 3/8"...
- Page 12 SECTION 2 INSTALLATION PARTS LIST FOR PS3240G-SERIES DOUBLE OVEN OPTION BASE w/6" LEGS AND TOP P/N 66958 ITEM NO. PART NO. DESCRIPTION 66946 LEG, 6" COMMON TUBE & CASTER 66159 COMPLETE BASE WELDMENT 59673 TOP COVER 21422-0016 1/2" SPLIT LOCK WASHER, PT 21422-0001 3/8"...
- Page 13 SECTION 2 INSTALLATION PARTS LIST FOR PS3240G-SERIES TRIPLE OVEN OPTION BASE w/CASTERS AND TOP P/N 66164 ITEM NO. PART NO. DESCRIPTION 22290-0009 SWIVEL CASTER W/BRAKE FLAT PLATE 22290-0010 SWIVEL CASTER FLAT PLATE 61783 QUAD OUTRIGGER WELDMENT 59673 TOP COVER 66159 COMPLETE BASE WELDMENT 61782 PLATE, SPACER 1/2"...
-
Page 14: Ventilation Guidelines
SECTION 2 INSTALLATION II. VENTILATION GUIDELINES kitchen can cause heat related problems to the oven components as if there were no ventilation at all. The Requirements best method of supplying return air is through the heating, ventilation, and air conditioning (HVAC) NOTICE system. -
Page 15: Assembly
SECTION 2 INSTALLATION Ventilation System III. ASSEMBLY For double or triple ovens: Top Panel and Base Pad Assembly Continue on to Part B, Stacking. Note that the top panel should NOT be installed for double and triple 1. Install the four leg extensions onto the base pad ovens until after stacking the oven cavities. -
Page 16: Stacking
IMPORTANT Middleby Marshall STRONGLY RECOMMENDS that PS3240 Gas oven cavities be stacked BY AUTHORIZED PERSONEL. Contact your Middleby Marshall Authorized Service Agent for complete stacking instructions. 1. Stack an oven cavity on top of the lower oven. Check the following: •... -
Page 17: Restraint Cable Installation
SECTION 2 INSTALLATION Conveyor Installation 1. Unfold the conveyor as shown in Figure 14. Then, begin to slide the conveyor into the end of the oven. The conveyor can only be installed from the end of the oven with the drive motor. 2. -
Page 18: Final Assembly
SECTION 2 INSTALLATION 5. If it is necessary to add or remove conveyor links to achieve the correct tension, OR if it is necessary to reverse the conveyor belt for correct orientation, the belt will need to be removed from the conveyor frame. -
Page 19: Conveyor Belt Reversal
SECTION 2 INSTALLATION Conveyor Belt Reversal available for change for approximately 8 seconds. Wait for the parameter of interest to appear, then Conveyor belt reversal consists of one step: Change use the up/down arrow to change the value. the parameter on the Speed Control from 0001 to 0002. -
Page 20: Electrical Supply
SECTION 2 INSTALLATION UTILITY ROUGH-IN FOR PS3240G-SERIES OVENS Utility Connection Locations for Gas Ovens Check the oven serial plate before making any electric WARNING supply connections. Electric supply connections must Do not use conduit or gas line for ground agree with data on the oven serial plate. The location connection. -
Page 21: Electrical Connection
One gas line connection method is shown in PS3240G Series Specifications in Section 1. Figure 20; however, compliance with the applicable Check the serial plate to determine the type of gas standards and regulations is mandatory. -
Page 22: Gas Conversion
SECTION 2 INSTALLATION Gas Conversion Where permitted by local and national codes, it is possible to convert ovens from natural to propane gas, or from propane to natural gas. Use the appropriate Middleby Gas Conversion Kit for the specific oven model. -
Page 23: Adjusting The Minimum Pressure Setting
SECTION 2 INSTALLATION 3. Disconnect electrical connection Moduplus ® 4. Make sure the appliance is in operation and the Moduplus coil is not energized. 5. Place an 8mm wrench on the maximum adjustment screw and hold in place while making minimum pressure adjustments. -
Page 25: Section 3 Operation
SECTION 3 OPERATION SECTION 3 OPERATION Control Panel I. LOCATION AND DESCRIPTION OF Digital Temperature Controller CONTROLS Continuously monitors the oven temperature. Settings Digital Temperature “BLOWER” Switch Controller control the activation of the burner. Keypad controls allow the operator to select Turns the blowers and cooling fans on and the cooking temperature and monitor oven off. -
Page 26: Step-By-Step Operation
SECTION 3 OPERATION II. STEP-BY-STEP OPERATION 6. Turn the HEAT switch to the “ON” or “I” position. The HEAT ON LED Daily Start-up Procedure lights to show that the oven is heating. 1. Check that the circuit breaker/fused disconnect is in the on (closed) position. -
Page 27: Power Failure
SECTION 3 OPERATION Power Failure NOTICE The burner will not operate and gas will not flow In case of power failure, turn all switches to the “OFF” through the burner without electric power. No attempt (“O”) position, open the oven window, and remove the should be made to operate the oven during a power product. -
Page 28: Temperature Controller Operation
SECTION 3 OPERATION III. TEMPERATURE CONTROLLER OPERATION NOTE: After 1 minute of no key activity, the controller will go to “Set Point Only” with the lower display blank. Operation Adjustments Programming Adjustments Adjusting the Set Point Adjusting Power Output The set point appears in the upper Press the Star and Up keys together for 3 seconds. -
Page 29: Section 4 Maintenance
ONLY be replaced by a perform the following procedure: Middleby Marshall Authorized Service Agent. It is also 6. Switch off the oven and allow it to cool. Do NOT strongly recommended that the 3-Month Maintenance service the oven while it is warm. -
Page 30: Maintenance - Monthly
SECTION 4 MAINTENANCE Removing Air Fingers and Plates 7. Disassemble the air fingers as shown in Figure 27. AS EACH FINGER IS DISASSEMBLED, WRITE THE “LOCATION CODE” FOR THE FINGER ON ALL THREE OF ITS PIECES. This will help you in correctly reassembling the air fingers. -
Page 31: Maintenance - Every 3 Months
SECTION 4 MAINTENANCE 8. Clean the air finger components and the interior of 6. Clean the shafts thoroughly using a rag. Then, the baking chamber using a vacuum cleaner and lubricate both the extended shaft and the interior a damp cloth. Refer to the boxed warnings at the of the hollow shaft using a light food-grade beginning of this section for cleaning precautions. -
Page 32: Blower Belt
SECTION 4 MAINTENANCE 12. Disassemble and lubricate the two sections of the drive shaft as described for the idler shaft, above. 13. Before reassembling the shafts into the conveyor frame, check that they are oriented properly. 14. Reassemble the drive shaft into the conveyor. Make sure that the bronze washer is in place between the two sections of the shaft. -
Page 33: Maintenance - Every 6 Months
SECTION 4 MAINTENANCE IV. MAINTENANCE - EVERY 6 MONTHS 1. Check that the oven is cool and the power is disconnected, as described in the warning at the beginning of this section. 2. Check for excessive wear on the conveyor drive motor brushes. -
Page 34: Key Spare Parts
SECTION 4 MAINTENANCE V. KEY SPARE PARTS Replacement parts can be purchased from your Middleby Marshall Authorized Parts Distributor (See Figure 32). PS3240G-SERIES GAS OVEN KEY SPARE PARTS (Figure 32) ITEM PART NO. ENGLISH DESCRIPTION QUANTITY 75729 Temperature Control 74106... - Page 35 SECTION 4 MAINTENANCE...
- Page 36 SECTION 4 MAINTENANCE NOTES...
-
Page 37: Section 5 Troubleshooting
SECTION 5 TROUBLESHOOTING SECTION 5 TROUBLESHOOTING QUICK REFERENCE SYMPTOM PROBLEM SOLUTION Oven will not turn on. No electrical power Check that the circuit breaker/fused disconnect is on. Make sure the emergency stop button is on. Oven will not heat. No gas pressure Make sure main gas is on. - Page 38 SECTION 5 TROUBLESHOOTING NOTES...
-
Page 39: Section 6 Electrical Schematics
SECTION 6 ELECTRICAL SCHEMATICS SECTION 6 ELECTRICAL SCHEMATICS Wiring Diagram, G208-240V 50/60 HZ • 77899 REV B... - Page 40 NOTICE During the warranty period, ALL parts replacement and servicing should be performed by your Middleby Marshall Authorized Service Agent. Service that is performed by parties other than your Middleby Marshall Authorized Service Agent may void your warranty.
Need help?
Do you have a question about the PS3240G Series and is the answer not in the manual?
Questions and answers