Advertisement
Quick Links
Pocket Quick
Reference Guide
on the
TOSHIBA
SMMSu
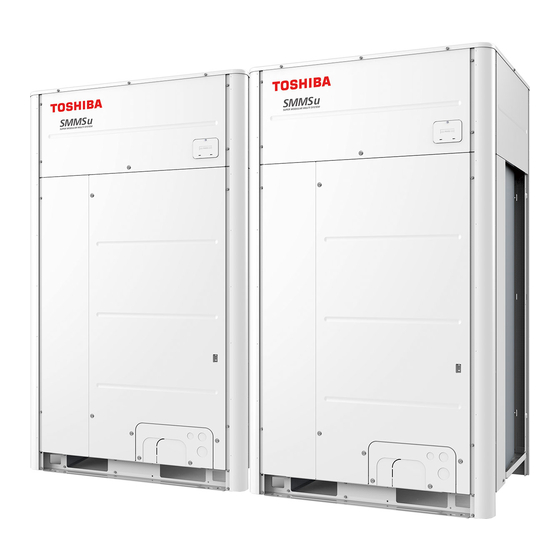
Two Pipe - Heat Pump
VRF System
www.cdlweb.info
Cool Designs Ltd makes every effort to ensure that the information provided within this publication is correct and error free, however we cannot guarantee that it is free of inaccuracies,
errors or omissions. Users should seek to clarify this information for themselves prior to basing any decisions upon such information.
Advertisement

Related Manuals for Toshiba SMMSu


Summary of Contents for Toshiba SMMSu
- Page 1 Pocket Quick Reference Guide on the TOSHIBA SMMSu Two Pipe - Heat Pump VRF System www.cdlweb.info Cool Designs Ltd makes every effort to ensure that the information provided within this publication is correct and error free, however we cannot guarantee that it is free of inaccuracies,...
- Page 2 The aim of this pocket guide is to assist engineers in understanding the configuration and refrigerant charge required to obtain optimum performance. For engineers who are familiar with Toshiba 2-pipe heat pump VRF systems, the new SMMSu units PRIOR requires new additional configurations setting to running the equipment.
- Page 3 CDU terminals fig 3 SMMSu Maximum of 5 Units fig 4 Refrigeration Prior to carrying out any pressure testing or evacuation, make sure that both Liquid and Suction valves FULLY CLOSED. fig 5 Cool Designs Ltd makes every effort to ensure that the information provided within this publication is correct and error free, however we cannot guarantee that it is free of inaccuracies,...
- Page 4 Liquid and Suction connections are both braze type, make sure to “WET RAG” the service valves whilst brazing, failure to do so could damage the seals within the service valves causing refrigerant loss. fig 6 BOTH Connect a suitable R410A refrigerant manifold to service valves, Liquid and Suction.
-
Page 5: Table Of Contents
Refrigerant charge for VRF equipment is critical to obtain optimum performance. This pocket guide will take you through the step by step guidance in calculating the correct refrigerant charge for your SMMSu system. Working out the correct refrigerant charge requires;... -
Page 6: Fig 13
This guide will breakdown the formula into easy steps using data from the supplied charts, (figs.7,8,9,10,11,12,13) 1) The outdoor equipment, quantity and size, (Compensation/Correction/Trim Charge) Individual outdoor units can be joined together via pipes and electric’s, forming a modularized system, there is a specific correction/trim charge for each combination of units, firstly identify the individual units which are forming the system = fig 13 Example 1. - Page 7 2) The quantity and size of indoor units installed. (Qty and size of Standard indoor units, Air to Air Heat Exchangers, Fresh Air Units) Additional refrigerant is added to the system for each indoor unit connected in the system, this is worked out dependant on the type of indoor unit installed;...
-
Page 8: Fig 15
In compliance with current F-Gas regulations a label should be attached to the outdoor unit adjacent to the Service Valves, with Factory Charge plus Additional Charge example 1 (fig 14), this would be 46.375 + 24.00 = 70.38kg example 2 (fig 15), this would be 39.675 + 24.00 = 63.68kg (A label is provided within the installation manual which accompanies the outdoor unit) 46.38 39.68... -
Page 9: Fig 16
Key changers between previous generation Heat Pump VRF and the current “U” generation Heat Pump VRF are; Where the outdoor unit is a stand-alone system, the unit needs setting up as a Header, this is done via the “Dip Switches” located in the outdoor unit, switch SW101 bit 1 needs to be set to the ON position, and SW100 bit 2 also needs to be set to the ON position. -
Page 10: Fig 17
With the equipment powered down and BEFORE Auto Addressing, at each header unit give the system a unique address via SW101 and SW102. By default switches SW101 and SW102 (4-bits per switch) are in the OFF, (X - down) position, using chart fig 3, give each system it’s own system address, starting with 1, (Factory), 2, 3 etc. - Page 11 On completion of the initial settings, if a central remote device or BMS interface is to be used on the system leave the electrical connections U3 & U4, (Uh) “DISCONNECTED”, apply power to the installation in the following order. (Note:, Power must be applied to the outdoor units for a period of 12/24 hours BEFORE running the system for the first time, (This will energies the crankcase heaters), to avoid addressing errors or issues, at the lead outdoor unit, disconnect the two core cable connected on terminals U1 &...
- Page 12 To check the systems configuration set rotary switches SW01,SW02,SW03 as follows, fig 21 SW01 to [1], SW02 to [2], SW03 to [3], this will display the systems capacity, (8 to 120) HP SW01 to [1], SW02 to [3], SW03 to [3], this will display the quantity of outdoor units (CDU) on the system, (1 to 5) SW01 to [1], SW02 to [4], SW03 to [3], this will display the quantity of indoor units (FCU) on the system, (1 to 128) If on completion of the automatic addressing the count of indoor units is lower than the actual, check if the affected indoor unit/s wired remote controller displays “Setting”...
- Page 13 Priority Mode - SMMSu - (Default Heating mode) Two pipe heat pump systems operate in either heating or cooling modes, by default the SMMSu are configured in the heating mode, any one indoor unit requesting heating will put the outdoor unit into heating mode.
- Page 14 Additional Functions (continued) Outdoor Fan High Static Pressure Setup - SMMSu This function is used when connecting a duct to the discharge outlet of an outdoor unit. This function must be enabled with every discharge duct connected outdoor unit for both of the header and follower units.
- Page 15 SMMSu CDU’s are equipped with an in built diagnostic facility called the “Wave Tool Advance”, and is accessed via an “NFC”, (Near Field Communication) and a smartphone, (smartphone need to have “NFC” facility). The smartphone “app” is available for IOS (Apple) and Android, using the following link, the “app” can be downloaded.
- Page 16 07590 775 510 / 07706 293 028 Monday - Friday 07.30 to 19.30 Email: support@cooldesignsltd.co.uk Web site: www.cdlweb.info Toshiba Air Conditioning 24/7 technical support 0870 843 0333 (Option 7) Text back service 07624 803 017 (Type fault code in lower case, no spaces)
Need help?
Do you have a question about the SMMSu and is the answer not in the manual?
Questions and answers