Table of Contents
Advertisement
Available languages
Available languages
T101
TREADMILL OWNER'S MANUAL
MANUEL DU PROPRIÉTAIRE DU TAPIS ROULANT
MANUAL DEL PROPIETARIO DE LA CAMINADORA
Read the TREADMILL GUIDE before using this OWNER'S MANUAL.
Lire le GUIDE D'UTILISATION DU TAPIS ROULANT avant de se référer au présent MANUEL DU PROPRIÉTAIRE.
Lea la GUÍA DE LA CAMINADORA antes de utilizar este MANUAL DEL PROPIETARIO.
Advertisement
Table of Contents

Related Manuals for Horizon Fitness T101


Summary of Contents for Horizon Fitness T101
- Page 1 T101 TREADMILL OWNER’S MANUAL MANUEL DU PROPRIÉTAIRE DU TAPIS ROULANT MANUAL DEL PROPIETARIO DE LA CAMINADORA Read the TREADMILL GUIDE before using this OWNER’S MANUAL. Lire le GUIDE D’UTILISATION DU TAPIS ROULANT avant de se référer au présent MANUEL DU PROPRIÉTAIRE.
- Page 2 ENGLISH FRANÇAIS ESPAÑOL...
-
Page 3: Important Precautions
IMPORTANT PRECAUTIONS SAVE THESE INSTRUCTIONS When using an electrical product, basic precautions should always be followed, including the following: Read all instructions before assembly or use of this treadmill. It is the responsibility of the owner to ensure that all users of this treadmill are adequately informed of all warnings and precautions. - Page 4 DANGER TO REDUCE THE RISK OF ELECTRICAL SHOCK: Always unplug the equipment from the electrical outlet before cleaning, performing maintenance and putting on or taking off parts. WARNING TO REDUCE THE RISK OF BURNS, FIRE, ELECTRICAL SHOCK OR INJURY TO PERSONS: •...
- Page 5 WARNING TO REDUCE THE RISK OF BURNS, FIRE, ELECTRICAL SHOCK OR INJURY TO PERSONS: • Keep power cord away from heated surfaces. Do not pull on this power cord or apply any mechanical loads to this cord. • Do not remove any protective covers unless instructed by Customer Technical Support. Service should only be done by an authorized service a technician.
-
Page 6: Grounding Instructions
GROUNDING INSTRUCTIONS This product must be grounded. If a treadmill should malfunction or breakdown, grounding provides a path of least resistance for electrical current to reduce the risk of electrical shock. This product is equipped with a cord having an equipment- grounding conductor and a grounding plug. - Page 7 ENTER YOUR SERIAL NUMBER AND MODEL NAME IN THE BOXES BELOW: SERIAL NUMBER: HORIZON T101-07 TREADMILL MODEL NAME: » Refer to the SERIAL NUMBER and MODEL NAME when calling for service.
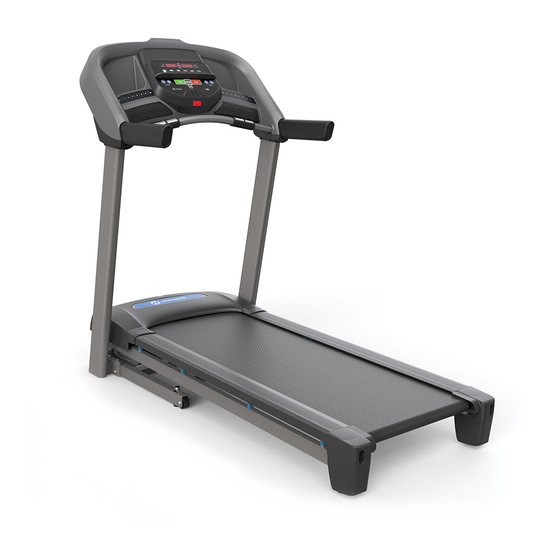
- Page 8 WATER BOTTLE HOLDER SPEAKERS CONTROL PANEL AND DISPLAY WINDOWS WATER BOTTLE HOLDER PULSE GRIP HANDLEBARS CONSOLE FAN PULSE GRIP HANDLEBARS SAFETY KEY PLACEMENT CONSOLE MAST ON/OFF SWITCH POWER CORD MOTOR COVER CONSOLE MAST FOOT LOCK LATCH (UNDERNEATH DECK) RUNNING BELT/RUNNING DECK SIDE RAIL BASE FRAME ROLLER END CAP...
-
Page 9: Tools Included
TOOLS INCLUDED: WARNING 6 mm T-Wrench FAILURE TO FOLLOW THESE INSTRUCTIONS COULD RESULT IN INJURY! 6 mm L-Wrench WARNING 5 mm L-Wrench DO NOT ATTEMPT TO LIFT THE TREADMILL! Do not move or lift treadmill from PARTS INCLUDED: packaging until specified to do so in the assembly instructions. You may remove the plastic wrap from console masts. - Page 10 ASSEMBLY STEP- UNPACKING BANDING STRAP BASE FRAME RED TRANSPORT CABLE RED TRANSPORT CABLE RED TRANSPORT CABLE (LEFT & RIGHT SIDES) DECK FRAME WARNING Place the treadmill carton on a level flat surface with the bottom of the box on the ground. Cut banding straps on outside of box and remove box lid.
-
Page 11: Assembly Step
ASSEMBLY STEP 1 1.1 Open HARDWARE FOR STEP 1. HARDWARE FOR STEP 1 PART TYPE DESCRIPTION 1.2 Attach the LEFT CONSOLE MAST (1) to the BOLT M8X1.25PX60L-30L BASE FRAME (2) using 3 BOLTS (A). NOTE: Do not fully tighten bolts until the end of STEP 3. - Page 12 ASSEMBLY STEP 2 2.1 Open HARDWARE FOR STEP 2. HARDWARE FOR STEP 2 PART TYPE DESCRIPTION 2.2 Attach LEAD WIRE to bottom end of CONSOLE BOLT M8X1.25PX60L-30L CABLE (3). Pull LEAD WIRE through RIGHT CONSOLE MAST (4). After pulling the lead wire through the mast, the top of the CONSOLE CABLE (3) should be located at the top of the mast.
- Page 13 ASSEMBLY STEP 3 HARDWARE FOR STEP 3 NOTE: Be careful not to pinch any wires while assembling the console. PART TYPE DESCRIPTION BOLT M8X1.25PX15L 3.1 Open HARDWARE FOR STEP 3. 8.0X13.0X1.5T SPRING WASHER 3.2 Gently place the CONSOLE (5) on top of the 8.2X13.0X1.4T FLAT WASHER CONSOLE MASTS (1&4).
- Page 14 ASSEMBLY STEP 4 - REMOVAL OF RED TRANSPORT CABLES WARNING FAILURE TO FOLLOW THESE INSTRUCTIONS COULD RESULT IN INJURY! Once the red transport cables have been detached from the treadmill, high pressure springs can cause the lower base frame to spring open. NEVER tip treadmill upside-down or on its side, and NEVER lift this unit if red transport cables are not connecting the upper deck frame to the lower base frame.
- Page 15 ASSEMBLY STEP 5 - MOVING TREADMILL 5.1 To move, make sure the treadmill is folded and securely latched. Then firmly grasp the handlebars, tilt the treadmill back (1) and roll (2). 5.2 Move treadmill off flattened box and into its final position, ready for use.
-
Page 17: Treadmill Operation
TREADMILL OPERATION This section explains how to use your treadmill’s console and programming. The BASIC OPERATION section in the TREADMILL GUIDE has instructions for the following: • LOCATION OF THE TREADMILL • USING THE SAFETY KEY • FOLDING THE TREADMILL •... - Page 18 P R O G R A M S TIME SPEED DISTANCE CALORIES INCLINE HEART RATE C H A N G E D I S P L AY E N T E R S TA R T S T O P...
-
Page 19: Console Operation
CONSOLE OPERATION Note: There is a thin protective sheet of clear plastic on the overlay of the console that should be removed before use. A) LED DISPLAY: Incline, Speed, Time, Distance, Calories, Heart Rate B) WORKOUT INDICATORS: indicates what workout is set for the current program. C) START: press to begin exercising, start your workout, or resume exercising after pause. -
Page 20: Display Windows
TIME SPEED DISTANCE CALORIES INCLINE HEART RATE DISPLAY WINDOWS • TIME: Shown as minutes : seconds. View the time remaining or the time elapsed in your workout. • SPEED: Shown as MPH. Indicates how fast your walking or running surface is moving. •... -
Page 21: Getting Started
GETTING STARTED 1) Check to make sure no objects are placed on the belt that will hinder the movement of the treadmill. 2) Plug in the power cord and turn the treadmill ON. (The ON/OFF switch is next to the power cord.) 3) Stand on the side rails of the treadmill. - Page 22 WORKOUT PROFILES P1) MANUAL: Adjust your speed and incline manually during your workout. P2) FAT BURN: A workout designed specifically to target fat. Promotes weight loss by increasing and decreasing the speed and incline, while keeping you in your fat burning zone. Includes 10 levels. Speed and Incline changes, segments repeat every 30 seconds.
- Page 23 P3) INTERVALS: Improves your strength, speed and endurance by increasing and decreasing the speed throughout your workout to involve your heart and other muscles. Includes 10 levels. Speed and Incline changes, segments repeat every 30 seconds. Segment Warm Up Cool Down Time 4:00 Mins 90 sec...
-
Page 24: Finishing Your Workout
4) If you don’t want to use the SPEAKERS, you can plug your headphones into the AUDIO OUT JACK on the right side of the console. 5) To connect to the Bluetooth speakers open your Bluetooth settings, turn on Bluetooth, scan for new devices, look for Horizon T101 and select connect. -
Page 25: Limited Home-Use Warranty
LIMITED HOME-USE WARRANTY... -
Page 26: Exclusions And Limitations
LABOR • 1 YEAR other consequential damages of whatsoever nature Horizon Fitness shall cover the labor cost for the repair of in connection with the purchase, use, repair or the device for a period of one year from the date of the original purchase, so long as the device remains in the possession of the original owner. - Page 27 • All returns must be pre-authorized by Horizon Fitness. • Equipment used for commercial purposes or any use • Horizon Fitness’ obligation under this warranty is other than a single family or Household, unless endorsed limited to replacing or repairing, at Horizon Fitness’...
- Page 28 FRANÇAIS...
-
Page 29: Précautions Importantes
PRÉCAUTIONS IMPORTANTES CONSERVEZ CES INSTRUCTIONS Lors de l’utilisation d’un produit électrique, des précautions de base doivent toujours être prises, notamment la suivante : Lisez toutes les instructions avant de procéder au montage ou d’utiliser cet appareil. Il relève de la responsabilité du propriétaire de s’assurer que tous les utilisateurs de ce tapis roulant sont suffisamment informés de tous les avertissements et précautions. - Page 30 DANGER POUR RÉDUIRE LE RISQUE DE DÉCHARGES ÉLECTRIQUES : Débranchez toujours l’équipement de la prise électrique avant de le nettoyer, d’en effectuer l’entretien ou d’installer ou retirer des pièces. AVERTISSEMENT POUR RÉDUIRE LES RISQUES DE BRÛLURES, D’INCENDIE, DE DÉCHARGES ÉLECTRIQUES ET DE BLESSURES : •...
- Page 31 AVERTISSEMENT PARA REDUCIR EL RIESGO DE QUEMADURAS, INCENDIOS, DESCARGAS ELÉCTRICAS O LESIONES A LAS PERSONAS: • Mantenga el cable de alimentación alejado de superficies calientes. No hale ni tensione el cable de alimentación. • No retire ninguna cubierta protectora a menos que se lo indique Asistencia Técnica al Cliente. El servicio solo debe ser realizado por un técnico de servicio autorizado.
-
Page 32: Instructions De Mise À La Terre
INSTRUCTIONS DE MISE À LA TERRE Cet appareil doit être mis à la terre. Si le tapis roulant ne fonctionne pas correctement ou s’il se brise, la mise à la terre offre un passage de résistance moindre au courant électrique, réduisant ainsi le risque d’électrocution. Cet appareil est équipé d’un cordon d’alimentation avec conducteur de mise à... - Page 33 INSCRIVEZ LE NUMÉRO DE SÉRIE ET LE NOM DU MODÈLE DANS LES CASES CI-DESSOUS : NUMÉRO DE SÉRIE : HORIZON T101-07 TAPIS ROULANT NOM DE MODÈLE : » Faites référence au NUMÉRO DE SÉRIE et au NOM DU MODÈLE lors de tout appel à un...
- Page 34 PORTE-BOUTEILLE D’EAU HAUT-PARLEURS PANNEAU DE CONTRÔLE ET FENÊTRES D’AFFICHAGE PORTE-BOUTEILLE D’EAU POIGNÉES DU CARDIO-FRÉQUENCEMÈTRE VENTILATEUR DE CONSOLE POIGNÉES DU CARDIO-FRÉQUENCEMÈTRE EMPLACEMENT DE LA CLÉ DE SÉCURITÉ MONTANT DE CONSOLE CORDON D’ALIMENTATION ÉQUIPÉ D’UN COMMUTATEUR MARCHE/ARRÊT COUVERCLE DU MOTEUR PÉDALE DE VERROUILLAGE MONTANT DE CONSOLE (SOUS LA PLATE-FORME) RUNNING BELT/RUNNING DECK...
-
Page 35: Outils Inclus
OUTILS INCLUS : AVERTISSEMENT Clé en T de 6 mm LE NON-RESPECT DE CES CONSIGNES POURRAIT ENTRAÎNER DES BLESSURES! Clé en L de 6 mm AVERTISSEMENT Clé en L de 5 mm N’ESSAYEZ PAS DE SOULEVER LE TAPIS ROULANT! Ne déplacez pas et ne PIÈCES INCLUSES : soulevez pas le tapis roulant de l’emballage avant que cela ne soit demandé... - Page 36 ÉTAPE D’ASSEMBLAGE - DÉBALLAGE BANDE DE CERCLAGE SOCLE DE BASE CÂBLE DE TRANSPORT ROUGE CÂBLE DE TRANSPORT ROUGE CÂBLE DE TRANSPORT ROUGE (CÔTÉS GAUCHE ET DROIT) CADRE DE LA PLATE-FORME AVERTISSEMENT Placez le carton du tapis roulant sur une surface plane avec le fond de la boîte reposant sur le sol. Coupez les sangles de cerclage à...
- Page 37 ASSEMBLAGE ÉTAPE 1 1.1 Ouvrez LE SACHET CONTENANT LA QUINCAILLERIE POUR L’ÉTAPE 1 QUINCAILLERIE À UTILISER LORS PIÈCE TYPE DESCRIPTION QTÉ DE L’ÉTAPE 1. BOULON M8X1.25PX60L-30L 1.2 Attachez le MONTANT DE CONSOLE GAUCHE (1) au CADRE DE LA BASE (2) avec 3 BOULONS (A). REMARQUE : ne serrez complètement les boulons qu’après ASSEMBLAGE ÉTAPE 3.
- Page 38 ASSEMBLAGE ÉTAPE 2 2.1 Ouvrez LE SACHET CONTENANT LA QUINCAILLERIE POUR L’ÉTAPE 2 QUINCAILLERIE À UTILISER LORS PIÈCE TYPE DESCRIPTION QTÉ DE L’ÉTAPE 2. BOULON M8X1.25PX60L-30L 2.2 Branchez le FIL DE GUIDAGE au CÂBLE DE LA CONSOLE (3). Passer le FIL DE GUIDAGE dans le MONTANT DE CONSOLE DROIT (4).
- Page 39 ASSEMBLAGE ÉTAPE 3 REMARQUE : Veillez à ne pincer aucun des fils QUINCAILLERIE POUR L’ÉTAPE 3 pendant l’assemblage de la console. PIÈCE TYPE DESCRIPTION QTÉ 3.1 Ouvrez LE SACHET CONTENANT LA BOULON M8X1.25PX15L QUINCAILLERIE À UTILISER LORS DE L’ÉTAPE 3. 8.0X13.0X1.5T RONDELLE ÉLASTIQUE 3.2 Déposez délicatement la CONSOLE (5) sur 8.2X13.0X1.4T RONDELLE PLATE les MONTANTS DE LA CONSOLE (1 ET 4).
- Page 40 ASSEMBLAGE ÉTAPE 4 - RETRAIT DES CÂBLES DE TRANSPORT ROUGES AVERTISSEMENT LE NON-RESPECT DE CES CONSIGNES POURRAIT ENTRAÎNER DES BLESSURES! Une fois que les câbles de transport rouges ont été détachés du tapis roulant, des ressorts à haute pression pourraient provoquer l’ouverture soudaine de la partie inférieure du socle.
- Page 41 ASSEMBLAGE ÉTAPE 5 - TAPIS ROULANT MOBILE 5.1 Pour déplacer l’appareil, assurez-vous que le tapis roulant est replié et bien verrouillé. Saisissez ensuite fermement le guidon, inclinez le tapis roulant vers l’arrière (1) et roulez (2). 5.2 Déplacez le tapis roulant de la boîte aplatie dans sa position finale, prêt à...
-
Page 43: Fonctionnement Du Tapis Roulant
FONCTIONNEMENT DU TAPIS ROULANT Cette section explique comment utiliser la console de votre tapis roulant et comment la programmer. La section FONCTIONNEMENT DE BASE du GUIDE D’UTILISATION DU TAPIS ROULANT comprend des instructions sur les points suivants : • EMPLACEMENT DU TAPIS ROULANT •... - Page 44 P R O G R A M S TIME SPEED DISTANCE CALORIES INCLINE HEART RATE C H A N G E D I S P L AY E N T E R S TA R T S T O P...
-
Page 45: Fonctionnement De La Console
FONCTIONNEMENT DE LA CONSOLE Remarque : Avant d’utiliser la console, enlevez la fine pellicule protectrice en plastique transparent qui la recouvre. A) ÉCRAN DEL : Inclinaison, Vitesse, Temps, Distance, Calories, Fréquence cardiaque. INDICATEURS D’ENTRAÎNEMENT : indique quel entraînement est réglé pour le programme en cours. C) DÉMARRAGE : appuyez sur ce bouton pour commencer une séance d’exercice, commencer un entraînement ou poursuivre l’exercice après une pause. - Page 46 TIME SPEED DISTANCE CALORIES INCLINE HEART RATE FENÊTRES D’AFFICHAGE • TEMPS : indiqué selon le format minutes:secondes. Affichage de la durée restante ou écoulée de votre séance d’entraînement. • VITESSE : indiquée en mi/h. Affichage de la vitesse de déplacement de la surface de marche ou de course. •...
-
Page 47: Pour Commencer
POUR COMMENCER 1) Assurez-vous qu’il n’y a aucun objet placé sur la courroie qui risquerait de gêner les mouvements du tapis roulant. 2) Branchez le cordon d’alimentation et mettez le tapis roulant sous tension. (L’interrupteur MARCHE/ARRÊT est situé près du cordon d’alimentation.) 3) Tenez-vous sur les glissières latérales du tapis roulant. - Page 48 PROFILS D’ENTRAÎNEMENT P1) MANUEL : ajustez la vitesse et l’inclinaison manuellement pendant votre entraînement. P2) BRÛLER LES GRAISSES : une séance d’entraînement conçue spécifiquement pour cibler la perte de graisse. Favorise la perte de poids en augmentant et en diminuant la vitesse et l’inclinaison, tout en vous maintenant dans la zone qui favorise la perte de graisse.
- Page 49 P3) INTERVALLES : augmentent votre force, votre vitesse et votre endurance en augmentant et en diminuant la vitesse tout au long de votre séance d’entraînement pour faire travailler votre coeur et vos autres muscles. Comprend 10 niveaux La vitesse et l’inclinaison varient et les segments se répètent toutes les 30 secondes. Segment Échauffement Récupération...
- Page 50 4) Si vous ne voulez pas utiliser les HAUT-PARLEURS, vous pouvez brancher vos écouteurs dans la PRISE DE SORTIE AUDIO à droite de la console. 5) Pour vous connecter aux haut-parleurs Bluetooth, ouvrez vos paramètres Bluetooth, activez le Bluetooth, recherchez de nouveaux périphériques, recherchez Horizon T101 et sélectionnez Se connecter.
- Page 51 GARANTIE LIMITÉE - USAGE DOMESTIQUE...
-
Page 52: Exclusions Et Limitations
étant la cause du dysfonctionnement du produit le gel ou d’autres catastrophes naturelles quelle qu’en par Horizon Fitness ou par un de ses techniciens certifiés soit la nature, une réduction, fluctuation ou défaillance avant qu’un moteur de remplacement ne soit autorisé... - Page 53 • Tous les retours doivent être préautorisés par Horizon Fitness. Fitness. • Les équipements détenus ou utilisés hors des États-Unis et • Les obligations d’Horizon Fitness en vertu de cette du Canada. garantie se limitent à la réparation ou au remplacement de l’équipement, à la discrétion d’Horizon Fitness, •...
- Page 54 ESPAÑOL...
-
Page 55: Precauciones Importantes
PRECAUCIONES IMPORTANTES CONSERVE ESTAS INSTRUCCIONES Cuando se usa un producto eléctrico, siempre se deben tomar precauciones básicas, incluidas las siguientes: Lea todas las instrucciones antes de montar o usar este equipo. Es responsabilidad del propietario asegurarse de que todos los usuarios de esta caminadora estén debidamente informados sobre todas las advertencias y precauciones. - Page 56 PELIGRO PARA REDUCIR EL RIESGO DE DESCARGA ELÉCTRICA: Desenchufe siempre el equipo del tomacorrientes antes de limpiarlo, realizar el mantenimiento y colocar o quitar piezas. ADVERTENCIA PARA REDUCIR EL RIESGO DE QUEMADURAS, INCENDIOS, DESCARGAS ELÉCTRICAS O LESIONES A LAS PERSONAS: •...
- Page 57 ADVERTENCIA PARA REDUCIR EL RIESGO DE QUEMADURAS, INCENDIOS, DESCARGAS ELÉCTRICAS O LESIONES A LAS PERSONAS: • Mantenga el cable de alimentación alejado de superficies calientes. No hale ni tensione el cable de alimentación. • No retire ninguna cubierta protectora a menos que se lo indique Asistencia Técnica al Cliente. El servicio solo debe ser realizado por un técnico de servicio autorizado.
-
Page 58: Instrucciones De Conexión A Tierra
INSTRUCCIONES DE CONEXIÓN A TIERRA Este producto debe conectarse a tierra. En el caso de que una caminadora se averíe o funcione incorrectamente, la conexión a tierra proporciona un camino de menor resistencia para la corriente eléctrica a fin de reducir el riesgo de descarga eléctrica. Este producto está... -
Page 59: Montaje
UBICACIÓN DEL NÚMERO DE SERIE INTRODUZCA SU NÚMERO DE SERIE Y NOMBRE DE MODELO EN EL ESPACIO DEBAJO: NÚMERO DE SERIE: CAMINADORA T101-07 HORIZON NOMBRE DEL MODELO: » Cuando llame para solicitar servicio técnico, haga referencia al NÚMERO DE SERIE... - Page 60 SOPORTE PARA BOTELLA DE AGUA ALTAVOCES PANEL DE CONTROL Y VENTANAS DE VISUALIZACIÓN SOPORTE PARA BOTELLA DE AGUA BARANDILLAS CON EMPUÑADURAS CON VENTILADOR DE LA CONSOLA SENSOR DE PULSO BARANDILLAS CON EMPUÑADURAS CON UBICACIÓN DE LA LLAVE DE SEGURIDAD SENSOR DE PULSO POSTE DE LA CONSOLA CABLE DE ALIMENTACIÓN DEL INTERRUPTOR DE...
-
Page 61: Herramientas Incluidas
HERRAMIENTAS ADVERTENCIA INCLUIDAS: ¡NO SEGUIR ESTAS INSTRUCCIONES PUEDE RESULTAR EN LESIONES! Llave en T de 6 mm ADVERTENCIA Llave en L de 6 mm Llave en L de 5 mm ¡NO INTENTE LEVANTAR LA CAMINADORA! No mueva ni levante la caminadora del embalaje hasta que se indique en las instrucciones de montaje. - Page 62 PASO DE MONTAJE- DESEMBALAJE CORREA DE LAS BANDAS ARMAZÓN DE LA BASE CABLE DE TRANSPORTE ROJO CABLE DE TRANSPORTE ROJO CABLE DE TRANSPORTE ROJO (LADOS IZQUIERDO Y DERECHO) MARCO DE CUBIERTA ADVERTENCIA Coloque la caja de cartón de la caminadora sobre una superficie plana nivelada con la parte inferior de la caja en el suelo.
-
Page 63: Paso 1 De Montaje
PASO 1 DE MONTAJE 1.1 Abra la BOLSA DE LA TORNILLERÍA PARA TORNILLERÍA PARA EL PASO 1 EL PASO 1. PIEZA TIPO DESCRIPCIÓN CANT. PERNO M8X1.25PX60L-30L 1.2 Una el MÁSTIL DE LA CONSOLA IZQUIERDA (1) al MARCO BASE (2) utilizando 3 PERNOS (A). NOTA: No apriete completamente los pernos hasta después del PASO 3 DE MONTAJE. - Page 64 PASO 2 DE MONTAJE 2.1 Abra la BOLSA DE LA TORNILLERÍA PARA TORNILLERÍA PARA EL PASO 2 EL PASO 2. PIEZA TIPO DESCRIPCIÓN CANT. PERNO M8X1.25PX60L-30L 2.2 Conectar el ALAMBRE DE ALIMENTACIÓN DEL CABLE al final del CABLE DE LA CONSOLA (3).
- Page 65 PASO 3 DE MONTAJE NOTA: Tenga cuidado de no pellizcar ningún TORNILLERÍA PARA EL PASO 3 cable mientras conecta la consola. PIEZA TIPO DESCRIPCIÓN CANT. 3.1 Abra la BOLSA DE LA TORNILLERÍA PARA PERNO M8X1.25PX15L EL PASO 3. 8.0X13.0X1.5T ARANDELA ELÁSTICA 3.2 Coloque suavemente la CONSOLA (5) encima de los POSTES DE LA CONSOLA (1 Y 4).
- Page 66 PASO 4 DE MONTAJE - QUITAR LOS CABLES DE TRANSPORTE ROJOS ADVERTENCIA ¡NO SEGUIR ESTAS INSTRUCCIONES PUEDE RESULTAR EN LESIONES! Una vez que los cables de transporte rojos se han desconectado de la caminadora, los resortes de alta presión pueden hacer que el armazón de la base inferior se abra.
- Page 67 PASO 5 DE MONTAJE - MOVER LA CAMINADORA 5.1 Para cambiarla de lugar, asegúrese de que esté doblada y con los pestillos bien cerrados. Luego agarre firmemente los manubrios, incline la caminadora hacia atrás (1) y ruédela (2). 5.2 Mueva la caminadora para quitarla de la caja aplanada y colóquela en su posición final, lista para usar.
- Page 69 FUNCIONAMIENTO DE LA CAMINADORA Esta sección explica cómo utilizar la consola y la programación de la caminadora. La sección de FUNCIONAMIENTO BÁSICO en la GUÍA DE LA CAMINADORA contiene instrucciones para lo siguiente: • UBICACIÓN DE LA CAMINADORA • USO DE LA LLAVE DE SEGURIDAD •...
- Page 70 P R O G R A M S TIME SPEED DISTANCE CALORIES INCLINE HEART RATE C H A N G E D I S P L AY E N T E R S TA R T S T O P...
-
Page 71: Funcionamiento De La Consola
FUNCIONAMIENTO DE LA CONSOLA Nota: Hay una lámina protectora delgada de plástico transparente en el revestimiento de la consola que debe quitarse antes de usarla. A) INDICADORES LED: Inclinación, Velocidad, Tiempo, Distancia, Calorías, Frecuencia cardíaca. INDICADORES DE ENTRENAMIENTO: indica qué entrenamiento está configurado para el programa actual. C) START (INICIO): oprima para comenzar a hacer ejercicio, para comenzar una sesión específica de ejercicio o para reiniciar el ejercicio después de una pausa. - Page 72 TIME SPEED DISTANCE CALORIES INCLINE HEART RATE VENTANAS DE VISUALIZACIÓN • TIME (TIEMPO): se muestra en minutos:segundos. Indica el tiempo restante o el que ha pasado en su sesión de ejercicio. • SPEED (VELOCIDAD): aparece en MPH. Indica a qué velocidad se mueve la superficie para caminar o correr. •...
-
Page 73: Para Empezar
PARA EMPEZAR 1) Verifique que no haya ningún objeto ubicado en la banda que dificulte el movimiento de la caminadora. 2) Enchufe el cable de corriente y ENCIENDA la caminadora. (El interruptor de ENCENDIDO/APAGADO está al lado del cable de corriente). 3) Párese sobre los rieles laterales de la caminadora. 4) Sujete el broche de la llave de seguridad en alguna parte de su ropa y asegúrese de que quede bien agarrado y de que no se pueda soltar durante el funcionamiento de la caminadora. - Page 74 PERFILES DE SESIÓN DE EJERCICIOS P1) MANUAL: ajuste la velocidad y la inclinación de forma manual durante el ejercicio. P2) QUEMAR GRASAS: ejercicio diseñado específicamente para eliminar la grasa. Promueve la pérdida de peso aumentando y reduciendo la velocidad y la inclinación, al tiempo que lo mantiene en la zona para quemar grasa. Incluye 10 niveles.
- Page 75 P3) INTERVALOS: mejora su fuerza, velocidad y resistencia al aumentar y reducir la velocidad durante toda su sesión de ejercicio para que participen tanto su corazón como otros músculos. Incluye 10 niveles. Los cambios de velocidad y los segmentos se repiten cada 90 segundos y 30 segundos. Segmento Calentamiento Enfriamiento...
- Page 76 4) Si no desea utilizar los ALTAVOCES, puede enchufar sus auriculares en la TOMA DE SALIDA DE AUDIO en la parte derecha de la consola. 5) Para conectar los altavoces Bluetooth, abra la configuración de Bluetooth, active Bluetooth, busque nuevos dispositivos, busque Horizon T101 y seleccione conectar.
- Page 77 GARANTÍA LIMITADA PARA EL USO DOMÉSTICO...
-
Page 78: Exclusiones Y Limitaciones
La garantía del motor no cubre la vendió. mano de obra ni la instalación del motor. Horizon Fitness o uno de sus técnicos acreditados debe confirmar los • Los daños o las fallas ocasionados por accidente, maltrato, defectos de mano de obra y del material del motor original corrosión, decoloración de la pintura o el plástico,... - Page 79 Horizon Fitness. • El equipo que se tenga u opere fuera de los EE. UU. y • La obligación de Horizon Fitness de acuerdo a esta Canadá. garantía se limita a sustituir o a reparar, a opción de •...
- Page 80 Horizon Fitness 1600 Landmark Drive, Horizon T101-07 10272021 © 2021 Horizon Fitness Cottage Grove WI, 53527 Designed & Engineered in the U.S.A. • Made in Vietnam | Conçu et élaboré aux États-Unis. • Fabriqué en Vietnam | Diseñado en los EE. UU. • Fabricado en Vietnam...
Need help?
Do you have a question about the T101 and is the answer not in the manual?
Questions and answers
How to lubricate the treadmill deck
To lubricate the Horizon Fitness T101 treadmill deck:
1. Loosen the belt: Use a T-wrench at the rear of the treadmill to turn the roller bolts counter-clockwise 10–15 times.
2. Lift the belt: Raise the belt to expose the bare deck underneath.
3. Apply lubricant: Squirt silicone lubricant in a zig-zag pattern across the deck. Do not get any on top of the belt. Apply on both sides if needed.
4. Tighten the belt: Let the belt fall back onto the deck, then re-tighten the roller bolts by turning them clockwise. Ensure you can lift the belt about 3 inches off the deck.
5. Run the treadmill: Plug it in, turn it on, and run it at 3 mph for 3 minutes without standing on it.
6. Walk on it: After 3 minutes, walk on the treadmill at a comfortable speed for another 3 minutes.
This answer is automatically generated
If I'm moving the assembled treadmill from one home to another is it best to separate the base from the arms & display panel? It won't fit into my car just folded up.
No, it is not recommended to separate the base from the arms and display panel when moving the Horizon Fitness T101 treadmill. The instructions advise not to lift or transport the unit unless it is fully assembled and in the upright folded position with the lock latch secure.
This answer is automatically generated
E1 code pops up