Table of Contents
Advertisement
Quick Links
SOME ADULT ASSEMBLY NECESSARY
TOOLS REQUIRED: HEX WRENCH (INCLUDED) AND
PHILLIPS SCREWDRIVER (NOT INCLUDED)
SE REQUIERE ENSAMBLAJE PARCIAL POR UN ADULTO
HERRAMIENTAS NECESARIAS: LLAVE HEXAGONAL (INCLUIDA) Y
DESTORNILLADOR PHILLIPS (DE CRUZ) (no incluido)
PARTS LIST / LISTA DE PIEZAS
Part Description / Descripción de piezas
A. Stationary Side / Lado estacionario
B. End panel / Panel del Extremo
C. Mattress support / Soporte del colchón
D. Mattress / Colchón
E. M6 x 25mm Connector bolt / Perno de conexión M6 x 25 mm
F. M6 Connector nut / Tuerca de conexión M6
G. M6 x 60 mm machine screw / Tornillo para metales M6 x 60 mm 8
H. M6 Barrel nut / Tuerca cilíndrica M6
J. Locking casters / Ruedas de inmovilización
K. Nonlocking casters / Ruedas libres
L. Hex Wrench / Llave hexagonal
ASSEMBLY INSTRUCTIONS
• Read all instructions BEFORE assembly and USE of crib.
• Unpack carton and identify all parts. In some cases, an extra fastener has been included.
• Ask your dealer or call Foundations
4:00 p.m. Eastern Time) for assistance, replacement parts, or instructions if needed. Please
have ready the crib model number and manufacture date from the label on the bottom
rail of Headboard.
• Before each usage or assembly, inspect crib for damaged hardware, loose joints, missing
parts or sharp edges. DO NOT use crib if any parts are missing or broken. DO NOT substitute
parts.
• Choking hazard - Crib assembly hardware includes small parts. Keep small parts away from
children.
Qty. / Cantidad
2
2
1
1
4
4
8
2
2
2
at 1-866-740-0195 (Monday through Friday, 9:00 a.m.–
™
SERENITY
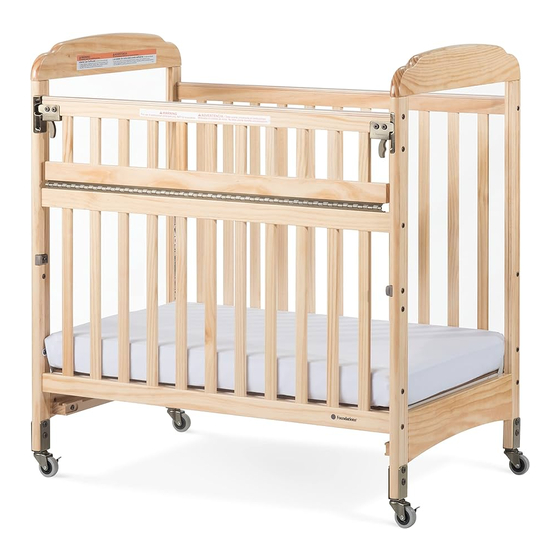
COMPACT STATIONARY SIDE CRIB
™
B. End Panel
Panel del Extremo
H.
G.
G.
E.
E.
C.
F.
H.
G.
F.
G.
J.
G.
B. End Panel
Panel del Extremo
H.
G.
F.
G.
J.
D. Mattress
Colchón
E
F
M6 x 25mm Connector Bolt and
M6 Connector Nut (4)
Perno de conexión y
Tuerca de conexión (4)
H
G
M6 x 60mm Machine Screw and
M6 Barrel Nut (8)
Tornillo para metales M6 x 60 mm y
Tuerca cilíndrica M6 (4)
L
Hex Wrench (2)
Llave hexagonal (2)
Sheet 1 of 5
Advertisement
Table of Contents

Summary of Contents for Foundations SERENITY COMPACT STATIONARYSIDE CRIB
- Page 1 • Read all instructions BEFORE assembly and USE of crib. • Unpack carton and identify all parts. In some cases, an extra fastener has been included. • Ask your dealer or call Foundations at 1-866-740-0195 (Monday through Friday, 9:00 a.m.–...
- Page 2 STEP 1 - STATIONARY SIDE ASSEMBLY • IMPORTANT SAFETY NOTICE: When assembling the crib, labels on the End Panels MUST face toward the inside of the crib. If crib is assembled incorrectly, it could create an entrapment hazard between the mattress and end panels. 1.
- Page 3 STEP 3 - CASTER ASSEMBLY • Caster Note: Locking Casters (J) should be positioned on the same side of the crib. Hole 1. Standing at the side, lift crib and insert a Locking Caster (J) into a caster hole on bottom Orificio of End Panel.
- Page 4 WARNING WARNING Infants can suffocate Failure to follow these warnings and the instructions could result in serious injury or death! - In gaps between a mattress too small or too thick and side of crib. - On soft bedding. •The crib, including side rails, must be fully erected prior NEVER add a mattress, pillow, comforter or padding.
- Page 5 • Never aim or point a vaporizer or humidifier directly at the crib. The water vapor will ruin the finish of the crib, as it would any other fine piece of furniture. • For parts or assistance, call Foundations ™ Adjusting Mattress Support: 1.


Need help?
Do you have a question about the SERENITY COMPACT STATIONARYSIDE CRIB and is the answer not in the manual?
Questions and answers