
Related Manuals for Taramps AMPLAYER


Summary of Contents for Taramps AMPLAYER
- Page 1 AMPLAYER A instalação deste produto deverá ser feita por um profissional qualificado. The installation of this product must be made by a qualified professional.
-
Page 2: Termo De Garantia
05 • Conector de saída e alimentação Termo de garantia A TARAMPS, localizada à Rua Abílio Daguano, 274 Res. Manoel Martins - Alfredo Marcondes - SP, CEP 19.180-000, garante este produto contra defeitos de projeto, fabricação, montagem e/ou solidariamente em decorrência de vícios de projeto que o torne impróprio ou inadequado ao uso a que se destina, pelo prazo de 12 meses, a partir da data de aquisição. -
Page 3: Requisitos De Segurança
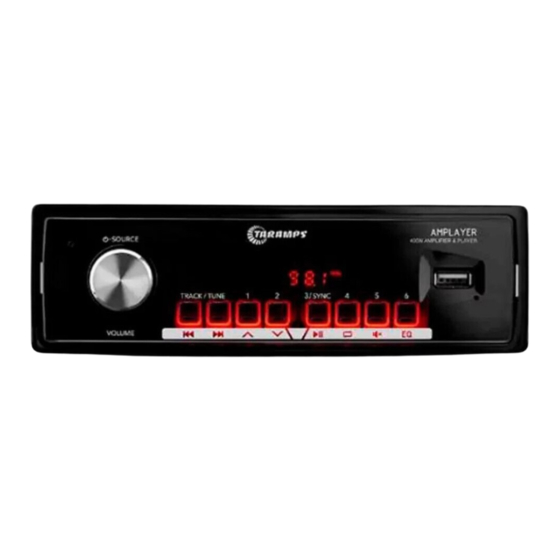
Internet. Requisitos de segurança - Para garantir o uso adequado, leia este manual antes de usar o Amplayer. É importante que você conheça os CUIDADOS contidos aqui. - A instalação deste produto deve ser feita por profissional qualificado. - Page 4 Funções 400W AMPLIFIER & PLAYER 1 - Source: ON/OFF / Volume: Com o Player desligado: Toque curto, liga o aparelho Com o Player ligado Toque longo: desliga o aparelho Toque curto: seleciona as funções: USB / BLUETOOTH / FM Volume: Aumenta ou diminui o volume do audio ao girar 2 - Track / Tune: Radio FM...
- Page 5 Funções (continuação) 400W AMPLIFIER & PLAYER 6 - Play / Pause / 3 / Sync: Radio FM Toque Curto: Seleciona radio da posição de memória 3 Toque longo: Salva a estação na posição 3 Bluetooth / USB Toque Curto: Play/Pause Sync: Com o player desligado, se pressionar por 10s, permite cadastro do controle longa distância.
- Page 6 Conector de saída e alimentação + 1 / 2 REAR + 3 / 4 FRONT + 5 / 6 FRONT LINE OUT + 7 / 8 REAR + 1 / 8 BTL REAR + 3 / 6 BTL FRONT FM ANTENNA FRONT REAR 1 , 2...
- Page 7 O Amplayer pode não ser compatível com outras cintas plásticas ou metálicas. Utilizar a cinta fornecida para o correto travamento no painel. 4 travas de fixação Concluindo as etapas acima, agora é hora de fazer a instalação do Amplayer no seu veículo. Veja na próxima página, a forma correta para instalação. Limpeza do Amplayer A limpeza do painel do AMPLAYER poderá...
- Page 8 Instalação Qualquer ligação nos conectores de alimentação, entrada ou saída deverá CUIDADO ser feita somente com o Amplayer desligado. Bitola de fiação e fusível recomendados Cabo de alimentação positivo / negativo____________________________________4mm² Cabo ACC___________________________________________________________0,75mm² Cabo P. Antena / Remote_______________________________________________0,75mm² Fusível ou disjuntor de proteção_____________________________________________20A *Calculado considerando um comprimento máximo de 4m.
- Page 9 Exemplo de conexão em stereo 2 Ohms por canal FRONT - FRONT + Ω Ω FRONT + FRONT - REAR - REAR + Ω Ω REAR + REAR - + 1 / 2 REAR + 3 / 4 FRONT + 5 / 6 FRONT LINE OUT + 7 / 8...
- Page 10 É possível o uso de até 3 controles simultaneamente. Para sincronizar um novo controle remoto, siga as instruções: 1- Certifique o AMPLAYER esteja desligado, porém o ACC deve estar energizado. 2- Pressione e segure a tecla 3/SYNC por 10 segundos.
-
Page 11: Características Técnicas
Características técnicas A Taramps reserva o direito de modi car o conteúdo deste manual sem aviso prévio e nem obrigatoriedade de aplicar as modi cações em unidades anteriormente produzidas. -
Page 12: Term Of Warranty
20 • Technical features Term of warranty TARAMPS, located on Abilio Daguano Street 274, Res. Manoel Martins – Alfredo Marcondes, SP - Brazil, ZIP CODE 19180-000, guarantees this product against any defects on terms of project, making, assembling, and/or with solidarity, due to project vices which cause it improper or inadequate to its original use within 12 months from the date of purchase. -
Page 13: Safety Requirements
- This product is for use with 12V batteries. Always check the voltage before installing. - Never install the Amplayer in places exposed to dust, humidity and water. Pay attention to install it far from fuel tank, fuel lines, heat sources and other parts of vehicle. - Page 14 Functions 400W AMPLIFIER & PLAYER 1 - Source: ON/OFF / Volume: With the Player turned off: Short press, turns on the device With the player turned on Long press: turns off the device Short touch: select functions: USB / BLUETOOTH / FM Volume: Increases or decreases the audio volume when turning 2 - Track / Tune:...
- Page 15 Functions (continuation) 400W AMPLIFIER & PLAYER 6 - Play / Pause / 3 / Sync: FM Radio Short Touch: Selects radio from memory location 3 Long press: Saves the station in position 3 Bluetooth / USB Short Touch: Play/Pause Sync: With the player turned off, if pressed for 10s, it allows registering the long-distance control. 7 - Repetition / 4: FM Radio Short Touch: Selects radio from memory location 4...
- Page 16 Output and power connector + 1 / 2 REAR + 3 / 4 FRONT + 5 / 6 FRONT LINE OUT + 7 / 8 REAR + 1 / 8 BTL REAR + 3 / 6 BTL FRONT FM ANTENNA FRONT REAR 1 , 2...
-
Page 17: Panel Installation
Install the plastic strap in the space intended for installing the radio on the vehicle's dashboard. Amplayer may not be compatible with other plastic or metal straps. Use the strap provided for correct locking on the panel. 4 fixing latches Having completed the steps above, it is now time to install Amplayer on your vehicle. -
Page 18: Installation
Installation CAUTION: All connections to power supply, input and output connectors must CAUTION be carried out only with amplifier off. Recommended wire gauge & fuse Positive / negative power supply cable _______________________________________ 4mm² ACC cable___________________________________________________________0.75mm² Cable P. Antenna / Remote______________________________________________0.75mm² Fuse or circuit breaker protection_____________________________________________20A Calculated considering a maximum length of 4m. - Page 19 Example of stereo connection 2 Ohms per channel FRONT - FRONT + Ω Ω FRONT + FRONT - REAR - REAR + Ω Ω REAR + REAR - + 1 / 2 REAR + 3 / 4 FRONT + 5 / 6 FRONT LINE OUT + 7 / 8...
- Page 20 It is possible to use up to 3 controllers simultaneously. To sync a new remote, follow the instructions: 1- Make sure the AMPLAYER is turned off, however the ACC must be energized. 2- Press and hold the 3/SYNC key for 10 seconds.
-
Page 21: Technical Features
Technical features Taramps reserves the right to modify the contents of this document at any time without prior notice and does not have the obligation to apply the changes in units which were previously produced. - Page 22 Fabricado por / Manufactured by: TARAMPS ELECTRONICS LTDA CNPJ / TAX ID: 11.273.485/0001-03 R. João Silvério, 121 • Res. Manoel Martins Alfredo Marcondes - SP Indústria Brasileira - Made in Brazil...
Need help?
Do you have a question about the AMPLAYER and is the answer not in the manual?
Questions and answers
Instructions in English