Table of Contents
Advertisement
Quick Links
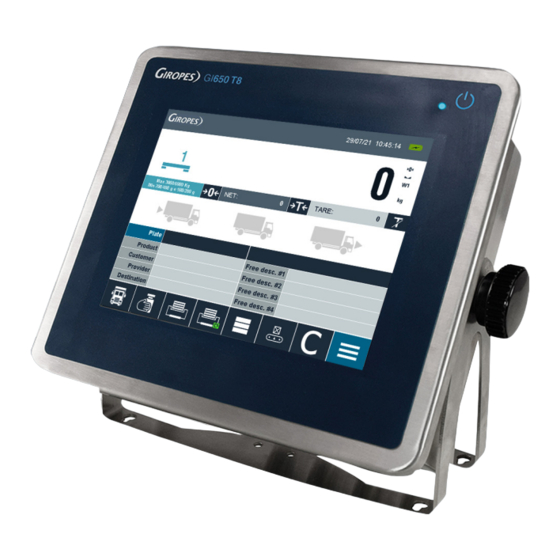
USER MANUAL
GI650
TOTALIZER
EN
TOUCH SCREEN INDICATOR
V.1.4_12/09/2022
Pol. Empordà Internacional C/Molló 3
17469 VILAMALLA - (Girona) SPAIN
T. (34) 972 527 212
The manufacturer reserves the right to modify the specifications of its products in order to make technical improvements or comply with new regulations.
1
Advertisement
Table of Contents

Related Manuals for Giropes GI650


Summary of Contents for Giropes GI650
- Page 1 USER MANUAL GI650 TOTALIZER TOUCH SCREEN INDICATOR V.1.4_12/09/2022 Pol. Empordà Internacional C/Molló 3 17469 VILAMALLA - (Girona) SPAIN T. (34) 972 527 212 The manufacturer reserves the right to modify the specifications of its products in order to make technical improvements or comply with new regulations.
- Page 2 USER MANUAL GI650...
-
Page 3: Table Of Contents
USER MANUAL GI650 INDEX 1. INTRODUCTION 1.1 CHARACTERISTICS CONNECTION OF THE LOAD CELL OPERATION INTERFACE COMMUNICATION POWER SUPPLY OPERATING CONDITIONS AND MECHANICAL DATA 1.2 GENERAL FUNCTIONAL CHARACTERISTICS 1.3 DIMENSIONS 1.4 DISPLAY 1.5 KEYS AND FUNCTIONS MAIN-DISPLAY KEYBOARD-DISPLAY NUMERIC-KEYBOARD 1.6 FUNCTIONS WHEN STARTING THE INDICATOR 2. -
Page 4: Introduction
USER MANUAL GI650 1. INTRODUCTION Dear User, the performance that the equipment you have acquired will offer you, will be all the greater the more attention you devote to the instructions for use included in this manual. Please break our traditional apathy towards the manuals and do not wait for “everything goes wrong” for a consultant, so you can enjoy optimal benefits from the execution of the first weight. -
Page 5: General Functional Characteristics
It is possible to store and manage up to 300 Tare values. Manage the Printer It is possible to work with 2 printer/labeler on the GI650. You can also free configure the printouts and on which printer, which information is printed. -
Page 6: Dimensions
USER MANUAL GI650 1.3 DIMENSIONS BENCH TOP ON WALL Diseñado: Revisado: Validado: Fecha: Unidades del plano: Número SAP: 13/05/2019 GI450T8 Propiedad: Tamaño del pape Vista general Escala: Pedid Giropès S.L. Pol. Empordà Internacional. Calle Molló. Parcela 15-16. Págin 17469 Vilamalla (Girona). -
Page 7: Display
USER MANUAL GI650 1.4 DISPLAY Number Function Platform-number and Configuration Date Time Charging-indicator Zero-indicator Stable-indicator Weight-range Net-indicator Net-weight Gross-weight Tare-weight Number and Weight of Subtotal Number and Weight of Total Categories Command-Keys... -
Page 8: Keys And Functions
USER MANUAL GI650 1.5 KEYS AND FUNCTIONS It is possible to choose between 3 different Keyboards: QWERTZ, QWERTY and AZERTY To change the Keyboard you have to access to the Main-menu by Choose the Menu point General and change the settings. -
Page 9: Keyboard-Display
USER MANUAL GI650 KEYBOARD-DISPLAY Function Exit the Keyboard Clear all letters Delete the last letter Save the changes Change to the special characters Arrow Keys NUMERIC-KEYBOARD Function Exit the Keyboard Clear all numbers Delete the last number Save the change... -
Page 10: Functions When Starting The Indicator
USER MANUAL GI650 1.6 FUNCTIONS WHEN STARTING THE INDICATOR To turn on the indicator press the key The Display turns on, showing the Firmware-, Bootloader- and Weightmodel-version, also the CRC-value and the number of Calibrations during the initialization. After finishing the initialization, the indicator is performing the initial zero. -
Page 11: Tare
To activate a memorized Tare press the button TLU on the right side, the list with memorized tare will open. Choose the tare you need in the list and confirm. The tare will be activated and the NET-indicator will turn on. CHECKWEIGHER The GI650 is equipped with a Checkweigher function. The different areas are displayed in different Colours. High Alarm There are 2 ways to activate. -
Page 12: Accumulation And Totalize
USER MANUAL GI650 ACCUMULATION AND TOTALIZE In general you have 3 Steps of storing the Data: - The first Step is the Subtotal for example a Package. - The second Step is the Total for example a Pallet of Boxes. -
Page 13: Menu Structure
USER MANUAL GI650 3. MENU STRUCTURE MENU Baudrate COM 1 Number of bits Communications Parity Stop bits Protocol Trigger type Security User password Interval time Default parameters Baudrate COM 2 Database initialization Database Number of bits Database configuration Parity Database tables... -
Page 14: Menu
7; 8 RS-232 None; Even; Odd Parity 1; 2 Stop bits None; Giropes; Sipi 2; Alibi; Sensocar; Printer; GiConf2; Smart; Bilancai; A+; Protocol Bizerba; Epsa; Eric; M-T; SB400; Soehnle; Barcode, PT6S3 No trigger; Weight trigger; Continuous Sending mode Interval time Freely Configurable (ms) 300;... -
Page 15: Security
USER MANUAL GI650 SECURITY Inside the menu are 2 sub-menus: User Password and Default parameters: • User Password: Inside here you can change the Password for the saved menus. • Default parameters: It is restoring to Factory settings, except the Database, Ticket-number and the weighing parameters. -
Page 16: Functionality
USER MANUAL GI650 FUNCTIONALITY In the functionality menu you have access to following working configurations: Tare-setting, Checkweigher-settings, the Print-/Accumulation-settings, and special functions-settings • You can decide to work with a blocked not blocked Tare (By default this option is blocked) Blocked Tare means, that the tare stays active even the Brut weight is 0. -
Page 17: Printers
USER MANUAL GI650 PRINTERS Here you have access to the general ticket configuration and also to the detailed configuration of each Com Port. • General tickets configuration Here you can set the Ticket-ID (ticket number) and the Header / Footer lines of the default-ticket. -
Page 18: Custom Tickets
USER MANUAL GI650 CUSTOM TICKETS It is possible to customize the ticket formats, explained in point 9. ADDITIONAL Inside this menu you can check and delete the stored Alibi-weighings. (when Alibi-Memory is plugged ) WEIGHING PLEASE NOTE: For access to the menu you need to insert a Password, by default 0000 When you access to this Menu, you have only access to the non-metrological. - Page 19 USER MANUAL GI650 Cal_open: You have access to all Sub-menus included the Calibration. Scales configuration: Inside this menu, you will find all the calibration settings and metrological settings. (explained in the next point) Legally relevant data: Inside this menu you can find all legally relevant data, such as WM-version, Events, Errors and Updates.
-
Page 20: Calibration And Metrology
USER MANUAL GI650 CALIBRATION AND METROLOGY PLEASE NOTE: For access to this menu you need to remove the calibration-jumper For be able to do this, you have to open the case of the device. Once you did this, you have to remove the sealed Cover from the Jumper. - Page 21 USER MANUAL GI650 To access to the metrological Part you have to access to the Main-menu and choose the menu Weighing. A password is required to access this menu, by Default 0000. Inside the menu, choose Scale configuration. Here you will find 4 Sub-menus: Calibration parameters;...
-
Page 22: Diagnostic
USER MANUAL GI650 • Theoric calibration: If the reference weight is not available, you can perform a theoretical calibration by using the capacity and sensitivity values (mV/V) of the load cells used. DIAGNOSTIC Inside this menu you can see the mV, and also the internal counts of the Load cell. In case of an error of the scale you can check here if theLoad cell is working properly. -
Page 23: Database
USER MANUAL GI650 3.2 DATABASE In the Database you can modify and manage the different Code-files and weighings. The Database menu has 4 Sub-menus: Database initialization; Database configuration; Database tables and Import / Export • Database initialization : In this point, you can modify and configure the different tables of the indicator.You also can modify the names of all Tables. - Page 24 USER MANUAL GI650 At first you have to access to the Main-menu by press Choose the Menu-point “Database” and you will find following screen: Access to the point Database tables and choose the file you want to modify/create, for example Product.
- Page 25 USER MANUAL GI650 After you press Add, the Product appear in the list, and also can be chosen in the Weight-window. To modify or delete a Product in the list you have to press the following button: (Modify Red, Delete Green) After you input the File in the List, you can choose and activate it in 2 Ways.
- Page 26 USER MANUAL GI650 Select the Product you want to use and validate. • Import / Export: It is possible to import and export information via USB to a PC. Export: You can export the Information about the Database and Weighings to the USB. It will be stored in an Excel-file.
-
Page 27: Error Messages
USER MANUAL GI650 4. ERROR MESSAGES The device shows various error messages in the screen: Error Messages Explication Overload, remove the weight above the platform. If it is empty and conti- --ol-- nues to display, check the platform and wiring. - Page 28 USER MANUAL GI650 Request Description Display the weight of one Chanel Minimal arguments Maximal arguments 0 -> Chanel 1 1- Chanel 1 -> Chanel 2 2 -> Chanel 3 3 -> Chanel 4 0 -> « Label » « Gross weight »...
- Page 29 USER MANUAL GI650 Request Description Number of accumulated Weights Minimal arguments Maximal arguments 1- Format 0 -> « Label » « Number of Weights » 1 -> « Number of Weights » 2- Length Length of the field “Weight” (always 0) 3- Alignment Alignment of the field “Weight”...
- Page 30 USER MANUAL GI650 Request Description Texts to be translated Minimal arguments Maximal arguments 1- Format 0 -> List 1 -> Code 2 -> Description 3 -> Gross 4 -> Tare 5 -> Net 6 -> Open Weights 7 -> Weights 8 ->...
- Page 31 USER MANUAL GI650 Request Description Allows the entry of the character vertical tab (0x0B) Example “FOO<VT>BAR” Equal to “FOO\x0BBAR” Request Description Allows the entry of the character ‘\f’ (form feed) Example “FOO<FF>BAR” Equal to “FOO\fBAR” Request Description Allows the entry of the character ‘\r’ (carriage return) Example “FOO<CR>BAR”...
-
Page 32: Connections
USER MANUAL GI650 Request Description Restores normal typology size Example “<H3>” 6. CONNECTIONS COM1 COM2 LOAD CELLS LOADCELL CONNECTION COM-PORT CONNECTION... -
Page 33: Dsd-Memory
USER MANUAL GI650 7. DSD-MEMORY It is possible to increase the Memory of the weight indicator with the additional plate that performs the function of FISCAL MEMORY; this consists in archiving all the weight values transmitted to a computer for a subsequent elaboration or integration of the data transmitted by the serial channel COM / ETHERNET. -
Page 34: Annex
USER MANUAL GI650 10. ANNEX FUNCIÓN DE LOS PIN CELULA DE CARGA FUNCTION OF PINS OF THE LOADCELL n.º pin n.º pin Descripción Función Descripción Función n.º pin Description Function n.º pin Description Function -EXC Excitación - +SENSE SENSE con signo +... - Page 35 USER MANUAL GI650...
- Page 36 USER MANUAL GI650 Pol. Empordà Internacional C/Molló 3 E-17469 VILAMALLA - (Girona) SPAIN T. (34) 972 527 212...
Need help?
Do you have a question about the GI650 and is the answer not in the manual?
Questions and answers