
Related Manuals for Lantronix MSS1-T


Summary of Contents for Lantronix MSS1-T
- Page 1 MSS Reference Manual For Lantronix MSS1-T, MSS1-T2, and MSS485 Micro Serial Servers...
-
Page 3: Table Of Contents
Contents Introduction 1.1 RS-485 Networking Overview ............... 1-2 1.1.1 RS-485 Protocols................1-2 1.1.2 Two-wire Mode................1-2 1.1.3 Four-wire Mode ................1-2 1.2 Terms ......................... 1-3 1.3 Protocols......................1-4 1.4 Software......................1-4 1.5 Configuration ....................1-5 Installation 2.1 MSS1 Components................... 2-1 2.2 MSS485 Components.................. - Page 4 3.2 Incoming Logins ....................3-3 3.2.1 Controlling Incoming Logins ............ 3-3 3.2.2 EZWebCon Login and Configuration........3-3 3.2.3 Other Incoming TCP/IP Logins ..........3-4 3.2.4 Incoming LAT Logins ..............3-4 3.3 Serial Port Logins..................... 3-4 3.4 Remote Console Logins .................. 3-5 3.5 Logout........................
- Page 5 5.2 Interactive Connections .................. 5-3 5.2.1 Session Control................5-3 5.2.2 Outgoing Connections ............... 5-5 5.2.3 Status Displays ................5-6 5.3 Emulating a Direct Serial Connection............5-8 5.4 Multihost Mode....................5-9 Commands Technical Support Troubleshooting Pinouts Specifications Updating Software Index...
- Page 7 Introduction 1.1 RS-485 Networking Overview ..............1-2 1.1.1 RS-485 Protocols ................. 1-2 1.1.2 Two-wire Mode................1-2 1.1.3 Four-wire Mode ................. 1-2 1.2 Terms ........................ 1-3 1.3 Protocols ......................1-4 1.4 Software......................1-4 1.5 Configuration ....................1-5...
-
Page 9: Introduction
Introduction 1 - Introduction The MSS1-T and MSS1-T2 are multiprotocol serial servers that provide Ethernet connections for personal computers, terminals, modems, and devices that would not otherwise be connected to a network. The MSS485 is a multiprotocol serial server that provides Ethernet connections for devices connected to an RS-485 network. -
Page 10: Networking Overview
• The maximum RS-485 network cabling length (without repeaters) is 4,000 feet. Lantronix recommends the use of shielded twisted-pair cabling. 1.1.1 RS-485 Protocols A large number and variety of protocols run over RS-485. However, the MSS does not convert or interpret serial data. -
Page 11: Terms
Introduction Terms Figure 1-2: Example Four-wire Mode Network Shield • • • Shield • • • • • • • • • • • • Shield Shield • • • Slave (Master) Slave Slave Slave It is important to connect the transmitter of the master device to the wire that is connected to the receive terminals on the slave devices, and connect the receiver of the master device to the wire that is connected to the transmit terminals on the slave devices. -
Page 12: Protocols
Protocols Introduction 1.3 Protocols A network protocol is a method of communicating over the Ethernet. Each protocol specifies a certain arrangement of data in the Ethernet packets, and provides different services for its users. The MSS supports the following protocols: •... -
Page 13: Configuration
NOTE: For more information about methods used to configure an IP address, see page 3-1. Lantronix has provided EZWebCon software to help users install and configure the MSS. It is also possible to configure the MSS settings by logging into it over a network via Telnet or Rlogin. See Chapter 3, Getting Started , for more information. - Page 15 Installation 2.1 MSS1 Components..................2-1 2.2 MSS485 Components..................2-2 2.3 Installation......................2-4 2.3.1 Power-up Diagnostics ............... 2-6 2.4 Is It Working? ....................2-7...
-
Page 17: Installation
This chapter covers the installation of the MSS in an Ethernet network and the attachment of a serial device (MSS1-T and MSS1-T2) or RS-485 devices and a serial console (MSS485). Basic knowledge of networking installation is assumed. Read this section completely before continuing. -
Page 18: Mss485 Components
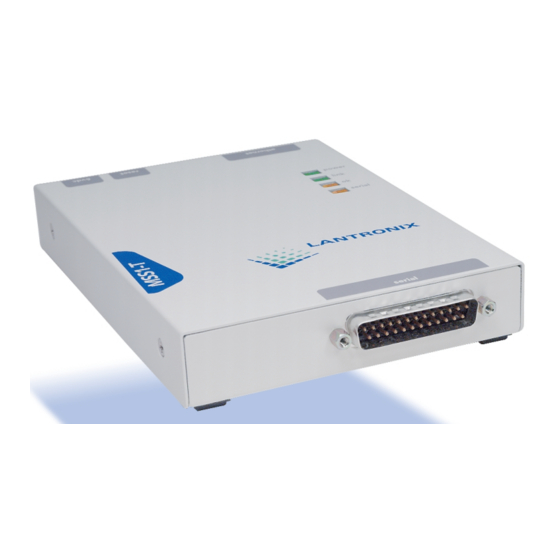
Power Link Link Serial Serial MSS1-T LEDs Micro Serial Server Serial NOTE: Although a red LED during boot mode usually signals an error, red LED patterns are part of the normal operation of the MSS and are not necessarily indicative of errors or dangerous operation. - Page 19 Installation MSS485 Components NOTE: When the reset button is pressed and held during the power up and boot procedures, the MSS returns to its factory default configuration. Four LEDs are located on the top of the unit. The first LED is a Power indicator, and should remain green while the MSS is plugged in.
-
Page 20: Installation
2.3 Installation Figure 2-8 and Figure 2-9 show example hardware layouts. Figure 2-8: MSS1 Network Layout Ethernet 10BASE-T Hub 10BASE2 Twisted Pair Repeater Thin Coax MSS1-T Serial Device MSS1-T2 File MicroVAX Server Serial Device Figure 2-9: MSS485 Network Layout Ethernet... - Page 21 Figure 2-10: Connecting Wire to Screw Terminal Block Screwdriver Wire NOTE: Lantronix recommends the use of shielded twisted pair cabling for RS-485 serial connections. To ensure that data wires are connected properly see RS-485 Networking Overview on page 1-2 and Appendix C, Pinouts.
-
Page 22: Power-Up Diagnostics
At this point, there is power to the server, so be sure to use appropriate care when handling the unit. NOTE: Ensure that you are using the MSS six volt power supply. The Lantronix EPS1, EPS2, and LRS2 units have a power supply that looks similar to the MSS power supply, but is a different voltage. -
Page 23: Is It Working
Installation Is It Working? 2. The MSS tries to obtain TCP/IP configuration information via BOOTP and RARP. This procedure takes approximately 20 seconds if no hosts answer the request. During this step, the OK LED blinks green approximately three times per second, and occasionally yellow as packets are sent and received. - Page 25 Getting Started 3.1 IP Address Configuration................3-1 3.1.1 Using a BOOTP or RARP Reply ..........3-1 3.1.2 Using an ARP Entry and the Ping Command ....... 3-2 3.1.3 Using the Serial Console ............3-3 3.2 Incoming Logins....................3-3 3.2.1 Controlling Incoming Logins ........... 3-3 3.2.2 EZWebCon Login and Configuration........
-
Page 27: Getting Started
Getting Started IP Address Configuration 3 - Getting Started This chapter covers all of the steps needed to get the MSS on-line and working. There are three basic methods used to log into the MSS and begin configuration. 1. Incoming (Remote) Logins: EZWebCon is the preferred method of login and configuration for TCP/IP and IPX users. -
Page 28: Using An Arp Entry And The Ping Command
After two minutes, an alternate method must be used or the MSS must be rebooted. NOTE: The ARP/ping method is also available under Windows NT. Refer to your Windows NT documentation or the Lantronix FAQs available from http://www.lantronix.com for information about the ARP tables. -
Page 29: Using The Serial Console
Getting Started Incoming Logins 3.1.3 Using the Serial Console Connect a terminal to the serial console and press the Return key. If the MSS is running normally when you press the Return key, a Local prompt will be displayed. You can become the privileged user and enter the Change IPaddress command at this prompt. Figure 3-3: Entering the IP Address at the Local Prompt Local>>... -
Page 30: Other Incoming Tcp/Ip Logins
Serial Port Logins Getting Started 3.2.3 Other Incoming TCP/IP Logins 3.2.3.1 Telnet To log into the MSS, type “Telnet” followed by the MSS IP address. Figure 3-4: A Telnet Connection % telnet 192.0.1.88 Unlike Remote Console Logins (see page 3-5), incoming Telnet logins do not require that the user enter a login password. -
Page 31: Remote Console Logins
Trying 192.0.1.88 Connected to 192.0.1.88 Escape character is ‘^]’ # access (not echoed) Lantronix MSS Version n.n/n (yymmdd) Type Help at the ‘Local>’ prompt for assistance. Enter Username> jerry 3.5 Logout To manually log out of the MSS, type “Logout”or “Logout Port” at the Local prompt or press Ctrl-D. - Page 33 Configuration 4.1 Command Set ....................4-1 4.2 System Passwords................... 4-1 4.2.1 Privileged Password ..............4-1 4.2.2 Login Password................4-2 4.3 Protocol Configuration................... 4-2 4.3.1 IP Configuration................. 4-2 4.3.2 IPX Configuration ..............4-4 4.3.3 LAT Configuration ..............4-5 4.4 Serial Port Configuration ................4-6 4.4.1 Access Mode ................
-
Page 35: Configuration
Configuration Command Set 4 - Configuration Certain parameters must be configured before the MSS can function in the network. EZWebCon is the recommended way to communicate with and configure the MSS. This chapter shows an additional method of configuration: the command line interface and MSS command set. NOTE: Instructions for using EZWebCon are included with the software. -
Page 36: Login Password
Protocol Configuration Configuration 4.2.2 Login Password The login password is required for remote console logins. The default login password is access. To specify a new login password, use the Change Loginpass command and specify a new password of up to six alphabetic characters. Figure 4-3: Changing Login Password Local>... - Page 37 Configuration Protocol Configuration 4.3.1.3 Name Resolution A TCP/IP host generally has an alphanumeric host name, such as Phred, in addition to its IP address. For this reason, the MSS supports domain name servers (DNS). A DNS is a host that can translate text host names into the numeric addresses needed to make a connection.
-
Page 38: Ipx Configuration
Protocol Configuration Configuration 4.3.2 IPX Configuration The first layer of an IPX Ethernet packet is the frame type, which includes routing information. By default, the MSS is configured to route packets of all four NetWare frame types. 4.3.2.1 Routing and Encapsulation If more than one frame type is in use on the LAN, the MSS will advertise itself as a router to the network using its internal network number. -
Page 39: Lat Configuration
Configuration Protocol Configuration The internal network number for the MSS is a four-byte number that defaults to the last four bytes of the unit’s Ethernet address (for example, a3001234). It is unlikely that this number will need to be changed. See Chapter 6, Commands for more information. NOTE: The MSS should be rebooted if the internal network number is changed. -
Page 40: Serial Port Configuration
Figure 4-15: Changing the Baud Rate Local>> CHANGE SPEED 19200 The MSS1-T and MSS1-T2 support Autobaud, which allows the serial port to match its speed to the attached serial device upon connection (see Change Autobaud on page 6-3 for an explanation of the baud rate negotiation process). -
Page 41: Flow Control
Configuration Serial Port Configuration 4.4.4 Flow Control NOTE: Flow Control is not available on the MSS485. Both RTS/CTS (hardware) and XON/XOFF (software) flow control methods can be used on the MSS. RTS/CTS controls data flow by sending serial port signals between two connected devices. XON/XOFF controls data flow by sending particular characters through the data stream: Ctrl-Q to accept data (XON) and Ctrl-S when data cannot be accepted (XOFF). -
Page 42: Logouts
Serial Port Configuration Configuration When MSS signal checking is enabled, the MSS will check for the presence of a DSR signal before allowing incoming connections. Remote connections to the serial port will not be permitted unless the DSR signal is asserted. To enable DSR signal checking, use the Change Signal Check command. -
Page 43: Preferred Port Service
Configuration Serial Port Configuration For example, to make the MSS log out the port after two minutes of inactivity, use the following commands: Figure 4-24: Enabling Timed Inactivity Logout Local>> CHANGE INACTIVE LOGOUT ENABLED Local>> CHANGE INACTIVE TIMER 2 4.4.7 Preferred Port Service A default service for a port can be defined using the Change Preferred command. - Page 45 Using the MSS 5.1 Host-Initiated Connections................5-1 5.1.1 Socket Connections ..............5-1 5.1.2 LAT Connections ............... 5-2 5.1.3 Host Applications ..............5-3 5.1.4 Code Examples ................5-3 5.2 Interactive Connections.................. 5-3 5.2.1 Session Control................5-3 5.2.2 Outgoing Connections .............. 5-5 5.2.3 Status Displays ................
-
Page 47: Using The Mss
Using the MSS Host-Initiated Connections 5 - Using the MSS This chapter explains how to use the MSS interactively and with host applications. Host-initiated connections include: • Making socket connections to TCP/IP and IPX/SPX hosts. NOTE: There are no services on the MSS. All connections are made via sockets. •... -
Page 48: Lat Connections
Host-Initiated Connections Using the MSS 5.1.1.2 IPX/SPX Socket Connections The MSS supports SPX socket connections to port 9001. To make a socket connection, use the SPX command followed by the SAP name of the MSS. Figure 5-2: SPX Socket Connection Local>... -
Page 49: Host Applications
Using the MSS Interactive Connections 5.1.3 Host Applications The MSS can be used with applications on Unix, Windows, Windows NT, OS/2, LAT, and Macintosh hosts, and any other hosts that have a TCP/IP or SPX socket interface. When a host application makes a socket connection to the MSS, it uses the socket as a data pipe to send and receive data. - Page 50 Interactive Connections Using the MSS 5.2.1.2 Local Switch If your terminal does not have a Break key, you can configure a local break switch key with the Change Local Switch command. Figure 5-7: Defining a Local Switch Local>> CHANGE LOCAL SWITCH ^L 5.2.1.3 Backward and Forward Switches The Backward and Forward commands, when entered in local mode, allow users to navigate through current sessions.
-
Page 51: Outgoing Connections
Using the MSS Interactive Connections 5.2.2 Outgoing Connections The MSS can make outgoing connections to hosts on TCP/IP, IPX/SPX, and LAT networks. NOTE: Outgoing connections can only be made from the serial port. 5.2.2.1 Telnet To start an outgoing Telnet session to a remote host on a TCP/IP network, type Telnet at the Local prompt, followed by either the host’s name or its numeric IP address. -
Page 52: Status Displays
Interactive Connections Using the MSS 5.2.2.4 LAT LAT devices broadcast their services to the network along with ratings, which are estimates of how busy the services are. Ratings range from 0 to 255; a 255 rating means that the service can accept connections while a zero rating means that the service is in use and connection attempts will be denied. - Page 53 Using the MSS Interactive Connections 5.2.3.4 Show Node LAT/SPX This command shows the LAT or SPX nodes that the MSS can see. For LAT, the name of each service node is listed along with its identification string and availability. For SPX, node information includes each node’s socket number, hop count, frame type, and status.
-
Page 54: Emulating A Direct Serial Connection
Emulating a Direct Serial Connection Using the MSS 5.3 Emulating a Direct Serial Connection Two MSS serial servers can be connected to emulate a direct serial connection on a LAN. MSSs connected in this way can pass data only. They will not be able to pass status signals (DSR, DTS, CTS/RTS, etc.) or preserve timing between characters. -
Page 55: Multihost Mode
Using the MSS Multihost Mode 5.4 Multihost Mode Multihost mode is used to set up a data pipe between a serial device attached to the MSS and multiple hosts on the network. Data from any network host goes out of the MSS serial port, and data from the serial port is sent to all connected network hosts. - Page 56 Multihost Mode Using the MSS If one of the host connections is terminated prematurely, the MSS will attempt to reconnect at preset intervals. If a UDP connection attempt receives an ICMP Unavailable message, the MSS will wait ten seconds before retrying. The waiting period for Telnet and Rlogin is 120 seconds, and for LAT it is 30 seconds.
-
Page 57: Commands
Commands 6.1 Command Line Editing.................. 6-2 6.2 Backward......................6-2 6.3 Change Access ....................6-3 6.4 Change Autobaud................... 6-3 6.5 Change Autostart .................... 6-4 6.6 Change Backward Switch ................6-4 6.7 Change BOOTP ....................6-5 6.8 Change Break....................6-5 6.9 Change Buffering .................... 6-5 6.10 Change Charsize ................... - Page 58 6.26 Change Loadhost ..................6-13 6.27 Change Local Switch...................6-14 6.28 Change Loginpass ..................6-14 6.29 Change Modem Control................6-14 6.30 Change Name ....................6-15 6.31 Change Nameserver ...................6-15 6.32 Change NetWare Encapsulation...............6-16 6.33 Change NetWare Internal Network ............6-16 6.34 Change NetWare Loadhost ...............6-17 6.35 Change NetWare Routing................6-17 6.36 Change Parity ....................6-18 6.37 Change Passflow ..................6-18 6.38 Change Password Incoming..............6-18...
- Page 59 6.61 Delete IPsecurity..................6-27 6.62 Disconnect ....................6-27 6.63 Finger ......................6-27 6.64 Forward ......................6-27 6.65 Help.......................6-28 6.66 Host .......................6-28 6.67 Initialize ......................6-29 6.68 LAT........................6-30 6.69 Logout Port ....................6-30 6.70 Netstat......................6-30 6.71 Ping........................6-31 6.72 Resume......................6-31 6.73 Rlogin ......................6-31 6.74 Set Privileged ....................6-32 6.75 Show IPsecurity ...................6-32 6.76 Show Hostlist ....................6-32 6.77 Show NetWare.....................6-32 6.78 Show Nodes ....................6-33...
- Page 61 Commands 6 - Commands This chapter describes the MSS command set. Each command and its basic syntax is shown, as well as whether the command is restricted to the privileged user. Where applicable, default settings are given. When reading through this chapter, take note of the following: •...
-
Page 62: Command Line Editing
Command Line Editing Commands 6.1 Command Line Editing The following table lists keys that can be used for command line editing. Table 6-1: Command Line Editing Keys Purpose Return Executes the current command line Delete Deletes the character before the cursor Ctrl-A Toggles insertion mode (insert or overstrike) Ctrl-D... -
Page 63: Change Access
Commands Change Access 6.3 Change Access LOCAL CHANGE ACCESS REMOTE DYNAMIC Specifies which types of connections the serial port will accept. Restrictions Requires privileged user status. Errors Autobaud must be disabled for Dynamic and Remote ports (see Host Applications on page 5-3). -
Page 64: Change Autostart
Change Autostart Commands 6.5 Change Autostart DISABLED CHANGE AUTOSTART ENABLED CHARACTER X Configures whether the port will wait for a Carriage Return before starting a connection. If enabled, the port will start automatically. Restrictions Requires privileged user status. -
Page 65: Change Bootp
Commands Change BOOTP 6.7 Change BOOTP DISABLED CHANGE BOOTP ENABLED Disables or enables querying for a BOOTP host at system boot time. Restrictions Requires privileged user status. Default Enabled 6.8 Change Break LOCAL ... -
Page 66: Change Charsize
Change Charsize Commands 6.10 Change Charsize CHANGE CHARSIZE Sets the number of data bits per character for the serial port. Restrictions Requires privileged user status. Errors Autobaud will only work for 8 data bits, or for 7 data bits with Even parity. Default 8 data bits See Also... - Page 67 Commands Change Dedicated SAPname Enter the target device’s SAP name. Specifies a Telnet host, or an Rlogin connection if the optional :R environment string is appended to the TCP keyword (with no space separating the two). By default, TCP opens a regular Telnet connection that includes Telnet IAC option negotiation.
-
Page 68: Change Domain
Change Domain Commands 6.12 Change Domain CHANGE DOMAIN DomainName NONE Specifies the default domain name to be used when attempting to resolve text TCP/IP host names. Restrictions Requires privileged user status. Parameters DomainName Enter a domain name of no more than 64 characters. None Disables a configured domain. -
Page 69: Change Flow Control
Commands Change Flow Control 6.15 Change Flow Control CTSRTS NONE CHANGE FLOW CONTROL SLOWCTS XONXOFF Sets the type of flow control to be used on the port. Restrictions Requires privileged user status. -
Page 70: Change Gateway
Change Gateway Commands 6.17 Change Gateway CHANGE SECONDARY GATEWAY IPaddress Specifies the host that is to be used as a TCP/IP gateway between networks. If a connection to a machine on a different network is attempted, messages will be directed to the gateway for forwarding. -
Page 71: Change Inactive Timer
Commands Change Inactive Timer 6.19 Change Inactive Timer CHANGE INACTIVE TIMER period Sets the period of time after which a port with Inactive Logout enabled will be considered inactive and automatically logged out. Restrictions Requires privileged user status. Parameters period Enter a length of time in minutes (1 to 120) or seconds (5 to 60). -
Page 72: Change Ipaddress
Change IPaddress Commands 6.21 Change IPaddress CHANGE IPADDRESS IPaddress Sets the MSS’s IP address. The IP address must be set before any TCP/IP functionality is available. If there are any active TCP logins or sessions, the new IP address will take effect when the MSS is rebooted. -
Page 73: Change Lat Groups
Commands Change LAT Groups 6.24 Change LAT Groups CHANGE LAT GROUPS groupList Establishes the list of group numbers denoting services provided by the MSS. Groups are numbered from 0 to 255. Commas can be used to separate individual groups, and hyphens can be used to denote ranges of groups. -
Page 74: Change Local Switch
Change Local Switch Commands 6.27 Change Local Switch character CHANGE LOCAL SWITCH NONE Defines a key that will switch the user between local mode and remote connections. The Local Switch key functions the same as the Break key. Any key can be specified unless it conflicts with MSS line editing, Break, Forward, or Backward keys, or keys used by remote operating systems. -
Page 75: Change Name
Renames the MSS. The unit’s default name, which is based on its default Ethernet address, is printed on its underside. NOTE: Changing the server name will also change the name of advertised IPX SAP pack- ets, which will affect Redirector operation. See your Lantronix Redirector docu- mentation for more information. Restrictions Requires privileged user status. -
Page 76: Change Netware Encapsulation
Change NetWare Encapsulation Commands 6.32 Change NetWare Encapsulation ETHER_II NATIVE DISABLED CHANGE NETWARE ENCAPSULATION SNAP ENABLED 802_2 Configures the frame types that the MSS will pay attention to during IPX connections. When NetWare routing is enabled with the Change NetWare Routing command, all frame types are enabled regardless of the settings made with this command. -
Page 77: Change Netware Loadhost
Commands Change NetWare Loadhost 6.34 Change NetWare Loadhost fileserver CHANGE NETWARE LOADHOST NONE ″ ″ Specifies the name of the fileserver from which download attempts will be made at boot time. Restrictions Requires privileged user status. Parameters fileserver Enter the name of the desired fileserver using no more than 8 characters. None Specifies that no loadhost will be used. -
Page 78: Change Parity
Change Parity Commands 6.36 Change Parity EVEN MARK CHANGE PARITY NONE SPACE Sets the serial port’s parity. Restrictions Requires privileged user status. Errors Autobaud will not work unless the port is using 8 bit characters, or 7 bit characters with Even Parity. -
Page 79: Change Password Limit
Commands Change Password Limit 6.39 Change Password Limit CHANGE PASSWORD LIMIT number Limits the number of failures allowed when entering the Set Privileged command. After the specified number of retries, the port will be logged out. The user can abort the password process by typing Ctrl-Z instead of the password. -
Page 80: Change Preferred
Change Preferred Commands 6.42 Change Preferred hostname :envString NONE SAPname NONE CHANGE PREFERRED servicename :envString NONE NONE Specifies a default service for the port. The MSS will attempt to use the preferred service for autoconnecting, or when no host name is specified for a TCP (Telnet), Rlogin, SPX, or LAT connection command. -
Page 81: Change Privpass
Commands Change Privpass 6.43 Change Privpass CHANGE PRIVPASS Sets the password needed to become the privileged user of the MSS.The user will be prompted to enter a new password of no more than six alphanumeric characters. This password will not be displayed when typed. -
Page 82: Change Secondary
Change Secondary Commands 6.47 Change Secondary Users can configure a secondary gateway, loadhost, and nameserver in case the primary ones are unreachable. For information, please see the Change Gateway, Change Loadhost, and Change Nameserver command entries. 6.48 Change Serial Delay CHANGE SERIALDELAY number Changes the amount of time the MSS will allow serial characters to accumulate before sending them out to the Ethernet. -
Page 83: Change Silentboot
Commands Change Silentboot 6.51 Change Silentboot DISABLED CHANGE SILENTBOOT ENABLED Causes the unit to attempt to boot without sending any status messages to the console port (unless there are errors). Restrictions Requires privileged user status. Default Disabled See Also... -
Page 84: Change Speed
Change Speed Commands 6.54 Change Speed CHANGE SPEED rate Specifies the baud rate of the serial port. Restrictions Requires privileged user status. Errors An error is displayed if an unsupported baud rate is specified. Parameters rate Available speeds (baud rates) are 300, 600, 1200, 2400, 4800, 9600, 19200, 38400, 57600, and 115200 baud. -
Page 85: Change Stopbits
Commands Change Stopbits None Clears any previously configured startupfile name, host, and retry setting. Retry Instructs the MSS to re-attempt load of the startupfile a certain number of times before giving up. Specify the desired number or retry attempts. If zero is specified, the server will retry until the startupfile is read (indefinitely). -
Page 86: Change Telnetpad
Change Telnetpad Commands 6.58 Change Telnetpad DISABLED CHANGE TELNETPAD ENABLED When enabled, Telnetpad tells the MSS to pad Carriage Returns with null characters for Telnet sessions. The Telnet RFC (Request for Comments) specifies Telnetpad Enabled. Restrictions Requires privileged user status. -
Page 87: Delete Ipsecurity
Commands Delete IPsecurity 6.61 Delete IPsecurity IPaddress DELETE IPSECURITY Removes entries from the IP Security table. Restrictions Requires privileged user status. Errors An error will be returned if the IPSecurity entry does not exist. See Also Change IPsecurity, page 6-12;... -
Page 88: Help
Help Commands 6.65 Help HELP keyword Allows the user to view command syntax levels. Typing Help alone will show a list of top-level commands. Parameters keyword Specify one of the top-level commands to view suboptions of that command. 6.66 Host ... -
Page 89: Initialize
Commands Initialize Adds a UDP host entry to the host table. envString Enter a :T to change a TCP host connection from Telnet to raw TCP, or a socket number to use a TCP or UDP socket other than the default. Delete Removes one or all entries from the hostlist. -
Page 90: Lat
Commands 6.68 LAT LAT serviceName :envString Establishes a connection with a LAT service. If no service or hostname is specified, a connection to the preferred host or service is attempted. In a case where more than one node or port offers the same LAT service, a particular node and/or port can be specified. -
Page 91: Ping
Commands Ping 6.71 Ping PING hostname Sends a TCP/IP echo packet request to another network host, and provides an easy way to test TCP/IP network connections. In general, any host that supports TCP/IP will respond if it is able, regardless of login restrictions, job load, or operating system. If the host does not reply, there may be a network TCP/IP configuration problem. -
Page 92: Set Privileged
Set Privileged Commands 6.74 Set Privileged SET PRIVILEGED OVERRIDE NOPRIVILEGE Changes the port’s privileged status. When the command is entered, the MSS will prompt the user for the privileged password. If the password is forgotten, the server can be reset to factory defaults. -
Page 93: Show Nodes
Commands Show Nodes 6.78 Show Nodes SHOW NODES Displays information about the desired LAT service nodes. Errors All nodes will be shown if no node is specified. Parameters Shows LAT nodes, including their identification strings and availability. Shows information about SPX nodes including their hop counts, frame types, and availability. -
Page 94: Show Services
Show Services Commands 6.81 Show Services SHOW SERVICES serviceName Displays the characteristics of the LAT services on the network. Restrictions This list is masked by the service groups that the port is able to see. In other words, users will not be able to see services to which they cannot connect. -
Page 95: Spx
Commands 6.85 SPX SPX SAPname Attempts a connection to an SPX-enabled device on the network. SPX devices announce their availability to the network with SAP names; the target device must be advertising itself via SAP announcements for the MSS to make a connection. Parameters SAPname Enter the target device’s SAP name, for example, MSS_xxxxxx. -
Page 96: Test
Test Commands 6.87 Test TEST Tests the serial port’s connection. When this command is entered, test lines of 70 characters are sent to the serial port until a key is pressed. Restrictions Nonprivileged users may only test their own port. 6.88 Zero ZERO Rests all counters on the MSS (both serial and Ethernet). - Page 97 If you are experiencing problems with the MSS or have suggestions for improving the product, please contact Lantronix Technical Support at (800) 422-7044 or (714) 453-3990. FAQs are available at http://www.lantronix.com. We are also reachable via Internet email at support@lantronix.com.
- Page 98 15353 Barranca Parkway, Irvine, CA 92618 USA • 714/453-3990 • Fax: 714/453-3995 North American Direct Sales: 800/422-7055 • North American Reseller Sales: 800/422-7015 North American Sales Fax: 714/450-7232 • Internet: sales@lantronix.com International Sales: 714/450-7227 • International Sales Fax: 714/450-7231 Internet: intsales@lantronix.com Technical Support: 800/422-7044 or 714/453-3990 Technical Support Fax: 714/450-7226 •...
- Page 99 This Appendix discusses how to diagnose and fix errors quickly yourself without having to contact a dealer or Lantronix. It will help to connect a terminal to the serial port while diagnosing an error to view any summary messages that will be displayed.
- Page 100 BOOTP Troubleshooting Troubleshooting B.2 BOOTP Troubleshooting BOOTP failure does not disable the unit from booting. If the BOOTP request fails even though you have configured your host to respond to the request, check the following areas: Table B-2: BOOTP Troubleshooting Area to Check Explanation Is BOOTP in your...
- Page 101 Troubleshooting Entering Commands at the Boot Prompt B.4 Entering Commands at the Boot Prompt If the Boot prompt appears on the serial console instead of the Local prompt, one of two things may be wrong. Either the MSS does not have enough information to boot, or the network or flash boot has failed.
- Page 102 Entering Commands at the Boot Prompt Troubleshooting B.4.3 CHANGE option Tailors your server configuration. B.4.4 BOOTP {Enabled, Disabled} Enables or disables the sending of BOOTP queries during the boot sequence. It is enabled by default. B.4.5 HARDWARE xx-xx-xx Specifies the last three numbers of the server’s Ethernet address. The first three numbers will be supplied automatically.
- Page 103 Troubleshooting Modem Configuration Checklist B.4.6 SHOW SERVER Use this command before and/or after issuing other commands to view the current MSS setup. B.4.7 FLUSH NVR This command is used to restore the MSS’s non-volatile RAM to its factory default settings. It will reset everything that is configurable on the server, including the unit’s IP address.
- Page 105 Pinouts DB25 Connector C - Pinouts In the following diagrams, unlabeled pins are not connected. C.1 DB25 Connector The figure below shows the pin connections of the MSS1 DB25 connector. Figure C-1: Pinout of DB25 Serial Port RX (in) Ground CTS (in) TX (out) RTS (out)
- Page 106 DIP Switches Pinouts C.3.2 Screw Terminal Block The figure below shows the pin connections of the MSS485 (RS-485) screw terminal block. Figure C-4: Pinout of Screw Terminal Block Shield Shield C.4 DIP Switches There are eight DIP switches located on the bottom of the MSS485, labeled left to right. For more information about their configuration, see Installation on page 2-5.
- Page 107 Specifications Power Specifications D - Specifications This appendix lists the power requirements, temperature requirements, altitude limitations, and relative humidity limitations of the MSS. D.1 Power Specifications The MSS is supplied with a power cube adaptor that has the following specifications. Adapter input voltage: 110 Volts AC domestic 220 Volts international...
- Page 109 Comments and/or requests for help via email are welcome - send them to support@lantronix.com and they will be routed appropriately. Questions or comments regarding the FTP/download pro- cess itself can be sent to ftp@lantronix.com. Mail can also be sent from within the dial-in modem menu access.
- Page 110 Updating Software E.1.2 Via a Modem The Lantronix BBS system uses modems capable of v.32, v.34, v.42, v.42bis, 9600/2400/1200 baud operation for the physical connection and the KERMIT software package for file transfer. The modem number is USA (714) 367-1051, the account name is ets, and the password is server (see Figure E-2).
- Page 111 Updating Software Reloading MSS Software • The MSS.SYS download file should be world-readable on the host, regardless of which download protocol is used. • Use the Show Server Bootparams command to check the MSS settings and verify that the correct download file has been configured before using the Initialize Reload command to reboot the server and reload the code.
- Page 112 Troubleshooting Flash ROM Updates Updating Software Some BOOTP and TFTP implementations require a specific directory for the MSS.SYS file. In this case, the path should not be specified in the bootptab file—the file must be placed in the bootptab directory. If BOOTP cannot be used to configure the MSS’s IP parameters, configure them by hand using the following commands: Figure E-4: Reloading Flash ROM from TCP/IP Local>>...
- Page 113 Index 2-1, 2-2, C-1 Access mode DB25 connector Altitude limitations Dedicated 5-8, 6-6 ARP entry Dedicated connections 4-6, 6-3, B-5 Autobaud Defaults, restoring 5-8, 6-4 6-27 Autostart Disconnect command Displaying current settings 5-7, 6-8 Domain 5-4, 6-2, 6-4 Backward switch 1-4, 4-3 Domain name server (DNS) 4-6, 5-7, 6-24...
- Page 114 6-17 Routing 1-4, 1-5, 4-4, E-2 IPX (NetWare) Specifying fileserver Node 1-3, 5-1, 5-7 Node 6-35 IPX/SPX NVRAM Lantronix FTP server 2-6, B-1 OK LED 3-4, 4-5, 5-2, 6-30, 6-33 Outgoing connections 6-12 Circuit timer 6-13 Groups 6-13 5-7, 6-18...
- Page 115 Index 4-7, 6-18 Passflow Slave 4-1, 5-7 Passwords Two-wire mode 6-18 Incoming RTS/CTS 6-19 Limit 6-14 Login 2-1, 2-2 6-21, 6-32 Serial connector Privileged 6-19 Serial console port Protect 6-22 2-7, 3-2, 4-3, 6-31 Serial delay Ping Serial device, connecting Port 7000 2-1, 2-3, 2-6, B-1 6-19...
- Page 116 Index Temperature limitations 6-26 Terminal type 6-36 Test command TFTP Timers 6-12 Circuit 6-11 Inactivity Troubleshooting Boot Error messages Flash ROM updates Modems Power-up 1-4, 5-8, 6-7 6-34 Users 6-26 Verification Wiring, modem 6-36 Zeroing counters Index-iv...
- Page 117 Inc. NetWare is a trademark of Novell Corp. Windows NT and Windows 95 are trademarks of Microsoft Corporation. Copyright 1998, Lantronix. All rights reserved. No part of the contents of this book may be transmitted or reproduced in any form or by any means without the written permission of Lantronix.
Need help?
Do you have a question about the MSS1-T and is the answer not in the manual?
Questions and answers