Subscribe to Our Youtube Channel
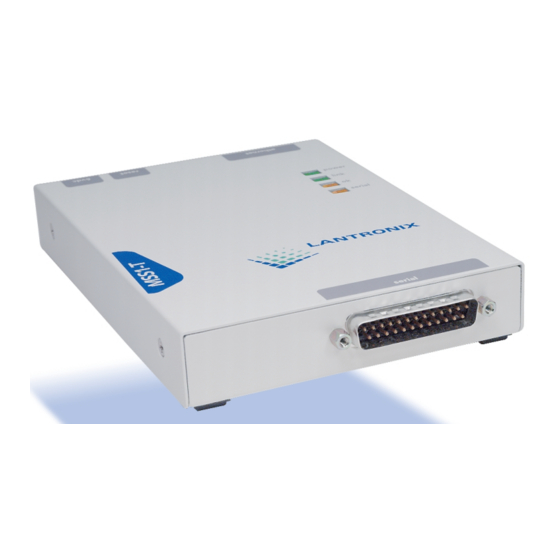
Summary of Contents for Lantronix MSS1-T
- Page 1 Serial Server Installation Guide For Lantronix MSS1-T and MSS1-T2 Micro Serial Servers and MSS100 Fast Ethernet Micro Serial Servers...
- Page 2 Novell Corp. Windows NT and Windows 95 are trademarks of Microsoft Corporation. Copyright 1998, Lantronix. All rights reserved. No part of the contents of this book may be transmitted or reproduced in any form or by any means without the written permission of Lantronix.
-
Page 3: Table Of Contents
Contents Introduction 1.1 Terms ..................1-2 1.2 Protocols ..................1-2 1.3 Software..................1-3 1.4 Configuration ................1-3 Installation 2.1 MSS Components..............2-1 2.2 Installation ................2-2 2.2.1 Power-up Diagnostics ........... 2-4 2.3 Is It Working? ................2-5 Getting Started 3.1 IP Address Configuration............3-2 3.1.1 Using a DHCP, BOOTP, or RARP Reply .... - Page 4 Basic Configuration 4.1 Command Set ................4-1 4.2 System Passwords..............4-1 4.2.1 Privileged Password............4-1 4.2.2 Login Password.............. 4-2 4.3 Protocol Configuration............4-2 4.3.1 TCP/IP Parameters ............4-2 4.3.2 IPX/SPX Parameters ............. 4-3 4.3.3 LAT Parameters ............. 4-4 4.4 Serial Port Configuration ............4-4 Using the MSS 5.1 Incoming Connections.............
- Page 5 Updating Software Specifications Warranty Statement Declaration of Conformity Index...
-
Page 7: Introduction
Introduction 1 - Introduction The MSS1-T and MSS1-T2 are multiprotocol micro serial servers that provide Ethernet connections for personal computers, terminals, modems, and devices that would not otherwise be connected to a network. The MSS100 additionally provides Fast Ethernet support. -
Page 8: Terms
Terms Introduction The PDF versions of the MSS manuals are located in the manuals directory of the CD. Use the Adobe Acrobat Reader (widely available on the Internet at no charge) to read and print all or parts of the manual from the PDF Þle. 1.1 Terms In this manual, the following terms are used to describe parts of a network. -
Page 9: Software
Introduction Software The MSS also implements basic Simple Network Management Protocol (SNMP) functionality. SNMP commands enable users, usually system administrators, to get information from and control other nodes on a local area network (LAN), and respond to queries from other network hosts. The MSS allows conÞguration of one community name with read/write access. - Page 10 NOTE: For more information about methods used to configure an IP address, see IP Address Configuration in. Lantronix has provided EZWebCon software to help users install and conÞgure the MSS. It is also possible to conÞgure the MSS settings by logging into it over a network via Telnet or Rlogin.
-
Page 11: Installation
Installation MSS Components 2 - Installation This chapter covers the installation of the MSS in an Ethernet network and the attachment of a serial device. Basic knowledge of networking installation is assumed. Read this section completely before continuing. 2.1 MSS Components The MSS front panel has a male DB25 serial connector. - Page 12 Installation Installation Four or Þve LEDs are located on the top of the unit. Table 2-1 explains their functions. Table 2-1: MSS LEDs Function Power Glows green when power is supplied to the Server Link Glows green while the Server is connected properly to a 10BASE-T or 100BASE-T (MSS100 only) Ethernet network (The Link LED does not function for 10BASE2 connections) MSS100 only: glows green to indicate a 100BASE-T Ethernet connection...
- Page 13 Installation Installation As you follow the installation steps, refer to the numbers in Figure 2-3. 1. Select a location. The MSS should be positioned close to the device it will be servicing. Since powering down the unit will terminate any active sessions, it may be desirable to place the server in a location secure from user access.
-
Page 14: Power-Up Diagnostics
1. The MSS runs through a set of power-up diagnostics for approximately Þve seconds. The Power LED should remain solid green. The Link LED should remain solid green for MSS1-T and MSS100 units. The OK and Serial LEDs should show varying patterns corresponding to the test being run. -
Page 15: Is It Working
Installation Is It Working? 2.3 Is It Working? If the MSS appears to be working and the unit is connected to the network, there are three ways to conÞrm that it is working correctly: ¥ If there is a terminal attached, press the Return key and log in. If you are able to log in, the server is running normally. -
Page 17: Getting Started
Getting Started 3 - Getting Started This chapter covers all of the steps needed to get the MSS on-line and working. There are three basic methods used to log into the MSS and begin conÞguration. 1. Incoming (Remote) Logins: EZWebCon is the preferred conÞguration method for TCP/IP and IPX users. -
Page 18: Ip Address Configuration
1. Start EZWebCon. Instructions for installing, running, and using EZWebCon can be found on the distribution CD-ROM. Click on the Lantronix logo menu in the bottom left corner of the EZWebCon window, then select Assign IP Address to Server. Fill in the following information: A. - Page 19 Getting Started IP Address Configuration NOTE: The ARP/ping method only works during the first two minutes of MSS operation. After two minutes, an alternate method must be used or the MSS must be rebooted. On a UNIX host, create an entry in the hostÕs ARP table and substitute the intended IP address and the hardware address of the server, then ping the server (see Figure 3-1).
-
Page 20: Using A Dhcp, Bootp, Or Rarp Reply
IP Address Configuration Getting Started Figure 3-3: Changing the IP Address % telnet 192.0.1.228 Trying 192.0.1.228 Lantronix Version n.n/n (yymmdd) Type Help at the ‘Local_>’ prompt for assistance. Enter Username> gopher Local> SET PRIVILEGED Password> system (not echoed) Local>> CHANGE IPADDRESS 192.0.1.228 Any host wishing to access the MSS will have to be told the MSSÕs IP address.


Need help?
Do you have a question about the MSS1-T and is the answer not in the manual?
Questions and answers