
Related Manuals for anko CF-2602


Summary of Contents for anko CF-2602
- Page 1 Seat Massager User Manual Model No.: CF-2602 Rev 1 Note: The specifications and/or components of this appliance are subject to change without prior notice.
- Page 2 Page 2 of 16...
-
Page 3: Table Of Contents
Warnings ................5 Important Safeguards ............5 Components ..............8 Features ................9 Operation Procedure ............9 Power supply ..............9 Massager Controller ............10 On / Off “PWR” Button: ..........10 Heat Button: ..............10 Intensity “INT” Button: ..........11 Mode Button (5 Modes): .......... - Page 4 Page 4 of 16...
-
Page 5: Warnings
1 Warnings Before using this appliance, read and follow all warnings and instructions in this manual, even if you are familiar with this product. This appliance is not intended for use by persons (including children) with reduced physical, sensory or mental capabilities, or lack of experience and knowledge unless they have been given supervision or instruction concerning the use of the appliance by a person responsible for their safety. - Page 6 Do not place this unit on other appliances, on uneven surfaces or where it could be subject to heat sources (e.g., radiators or stoves), direct sunlight, excessive dust, etc.). This Appliance should not be placed near a hot gas or electrical burner or placed in a heated oven.
- Page 7 The unattended use of heat by children or incapacitated persons may be dangerous. This product is Not to be used by very young children (0-3 years) Children under the age of three are not to use this appliance due to their inability to react to overheating.
-
Page 8: Components
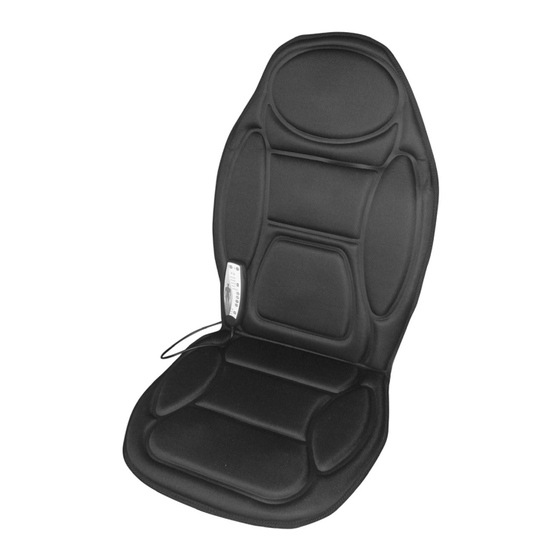
3 Components Seat Massager Massage Zone “Lower Back” Massage Zone “Upper Back” Massage Zone “Thigh” Massage Zone “Middle Back” Controller Heat Zone Power Supply: ZD012M120100AU Page 8 of 16... -
Page 9: Features
4 Features Built-in 5 vibration massage motors. • Back Heater. • • 5 pre-programmed massage modes. 4 levels of vibration intensity. • 15, 30 and 60 minute selectable Auto-Off timer. • • Convenient Corded Remote controller 5 Operation Procedure NOTE: This appliance will automatically turn off after approximately 15, 30 or 60 minutes of operation, depending on your selection. -
Page 10: Massager Controller
6 Massager Controller Note: When first turned on, the controller will default to Mode “Auto”. You can then change the Mode or operate the massage zones manually. On / Off “PWR” Button Manual Selector Button Heater On / Off Button Body Diagram Zone Indicator Intensity “INT”... -
Page 11: Intensity "Int" Button
Note: You may use this heat function whilst using the massager in any mode. Press the On / Off “PWR” button to turn the massager off. Intensity “INT” Button: Note: there are four intensity levels. When the massager is powered On, the default intensity (strength of massage) is set at Maximum. -
Page 12: Manual Mode
Press the “Mode” button again, and the massager mode will change to “Tapping” Mode and the corresponding indicator light will illuminate. The massage “Zone” will be indicated by the lights within the “Body” diagram illuminating in unison with the massage motors turning on and/or off. Description of Mode “Tapping: Intermittent light rhythmical striking motion through upper back, middle back, lower back, and thighs Press the “Mode”... -
Page 13: Auto-Off
Auto-Off: The default setting will automatically turn off after approximately 15 minutes. You can change the Auto Off timer from 15 mins or 30 mins or 60mins depending on your requirement by pressing the “Timer” button. 7 Cleaning the Massager CAUTION: DO NOT IMMERSE IN WATER OR LIQUID. -
Page 14: Troubleshooting
9 Troubleshooting Problem Cause Remedy Plug in the power supply and switch it On at the power point. If still no power, check if the power point power supplied Power Not Switched On. checking with another appliance such as a table lamp. If no power to the power point, call Power. -
Page 15: Warranty Against Defect
10 Warranty Against Defect 12 Month Warranty Thank you for your purchase from Kmart. Kmart Australia Ltd warrants your new product to be free from defects in materials and workmanship for the period stated above, from the date of purchase, provided that the product is used in accordance with accompanying recommendations or instructions where provided. - Page 16 Page 16 of 16...
Need help?
Do you have a question about the CF-2602 and is the answer not in the manual?
Questions and answers