ACLAS PP7MX User Manual
Hide thumbs
Also See for PP7MX:
- User manual (36 pages) ,
- User manual (28 pages) ,
- User manual (28 pages)
Table of Contents
Advertisement
Quick Links
Advertisement
Table of Contents

Related Manuals for ACLAS PP7MX


Summary of Contents for ACLAS PP7MX
- Page 1 PP7MX PRINTER USER’S MANUAL STAMPANTE PP7MX MANUALE UTENTE...
- Page 3 Safety Precautions Before using the present appliance, please keep the Prima di utilizzare il presente apparecchio, osservare le following safety regulations in order to prevent any seguenti norme di sicurezza per evitare pericoli o danni hazard or material damage. materiali.
-
Page 4: Table Of Contents
Contact Us/Contattaci ..........................22 Important Note/ Nota importante For driver, user manual, software and other information, please visit the website: https://www.aclas.tw/products/pp7x/ to download or consult. Per driver, manuale utente, software e altre informazioni, visitare il sito Web: https://www.aclas.tw/products/pp7x/ per scaricare o consultare. -
Page 5: Introduction/Introduzione
Introduction/Introduzione Specifications/ Specifiche Optional type PP7M31HX Tipo opzionale Speed 250mm/s Velocità Power Supply Alimentazione elettrica Print Method thermal print Metodo di stampa stampa termica Resolution 203dpi Risoluzione Paper type Thermal paper Tipo di carta Carta termica Paper Paper width 79.5± 0.5mm Carta Larghezza carta Paper roll diameter... -
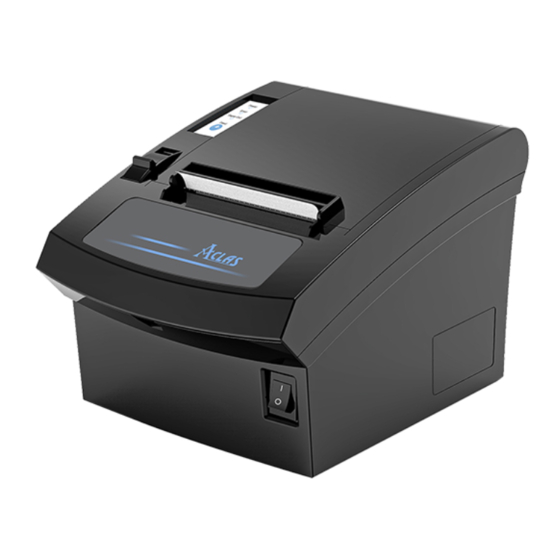
Page 6: Appearance/Aspetto
Printer head life as OJI, PD-160R or Aclas paper.) Durata della testina di stampa 150 km (si consiglia di utilizzare carta termica di alta qualità , come la carta OJI, PD-160R o Aclas.) Paper-cutter life 1,000,000 times Vita del tagliacarte 1.000.000 di volte... -
Page 7: Accessories/Accessori
OJI, PD-160R utilizzare carta termica di alta qualità , come or Aclas paper. carta OJI, PD-160R o Aclas. (1) (1) Make sure that the printer is not receiving Assicurarsi che la stampante non stia data;... - Page 8 (3) (3) Insert the paper roll to the printer as picture 2. Inserire il rotolo di carta nella stampante come nell'immagine 2. Picture 2 Immagine 2 (4) (4) Be sure to note the correct direction thats Assicurarsi di annotare la direzione the paper comes off the roll shown as picture corretta in cui la carta esce dal rotolo mostrata nell'immagine 3.
-
Page 9: Setting The Printer/Impostazione Della Stampante
(6) (6) After closing the upper cover,tear off the Dopo aver chiuso il coperchio superiore, paper as picture 5. strappare la carta come nell'immagine 5. Picture 5 Immagine 5 Setting the Printer/Impostazione della stampante 3.1 Using the Printer/Utilizzo della stampante Power indicator light Indicatore luminoso di alimentazione To prompt printer is abnormal... -
Page 10: Connecting The Power Supply/Collegamento Dell'alimentatore
3.3 Connecting the Power Supply/Collegamento dell'alimentatore ※ AVVERTENZE ※ CAUTIONS When connect the power supply to the Quando collega l'alimentazione alla printer, please refer to picture 7. When stampante, fare riferimento alla figura 7. disconnecting, the order is reverse. Otherwise Quando si scollega, l'ordine è... -
Page 11: Self Test/Test Di Autoverifica
4 SELF TEST/TEST DI AUTOVERIFICA Press key ‘Feed’ and hold it, and then power on Premere il tasto "Alimentazione" e tenerlo the machine at the same time, it will print a premuto, quindi accendere macchina piece of Test Page. The information of this Test contemporaneamente, stamperà... -
Page 12: Troubleshooting/Risoluzione Dei Problemi
Attention: Attenzione: Non toccare la testina della stampante Do not touch the thermal printer head. The paper cutter will become blunt after termica. La a period of time. Please ask the taglierina della carta diventerà maintenance man to replace the paper smussata dopo un certo periodo di tempo. - Page 13 4) The printed character is unclear. 4) Il carattere stampato non è chiaro. a. Make sure the printer head is clean enough. Assicurati che la testina della stampante sia b. Make sure the used paper meets the required sufficientemente pulita. specification.
-
Page 14: Printer Driver Installation Instruction/Istruzioni Per L'installazione Del Driver Della Stampante
Connect the printer to PC, and double click “Setup.exe” Collegare la stampante al PC e fare doppio clic su in the file “Aclas Printer” to install the printer driver. "Setup.exe" nel file "Aclas Printer" per installare il driver della stampante. - Page 15 Choose “Hardware” Scegli "Hardware" Click “OK”. Fare clic su "OK". Click “Install” Fare clic su "Installa"...
- Page 16 Type 2: If the printer connects with Ethernet Tipo 2: se la stampante si connette con la port, use the method. porta Ethernet, utilizzare il metodo. Choose “TCP” Scegli “TCP” Click “OK” Fare clic su "OK" Input the IP which is in the same network segment of the printer. Immettere l'IP che si trova nello stesso segmento di rete della stampante.
- Page 17 Type 3: If the printer connects with USB port, Tipo 3: se la stampante si collega con la porta use the method. USB, utilizzare il metodo. Choose “USB” Scegli "USB" Click “OK” Fare clic su "OK" Click “Install” Fare clic su "Installa" Note: Nota: After installing the printer driver, you can use the...
-
Page 18: How To Know The Connect Port/Come Conoscere La Porta Di Connessione
7.2. How to Know the Connect Port/Come conoscere la porta di connessione Connect the printer to the computer, follow steps below Collegare la stampante al computer, seguire i passaggi to know which port is connected. di seguito per sapere quale porta è collegata. Right click “This PC”... - Page 19 Serial printer connect port: Porta di connessione stampante seriale: Here you can see the connecting port of serial printer. Qui puoi vedere la porta di connessione della stampante seriale. USB printer connect port: Porta di connessione stampante USB: Here you can see the connecting port of USB printer. Qui puoi vedere la porta di connessione della stampante USB.
-
Page 20: How To Config Connect Port/Come Configurare La Porta Di Connessione
"Proprietà stampante". Click “Devices and Printers” in start menu. Fare clic su "Dispositivi e stampanti" nel menu di avvio. Right click “Aclas Printer”, choose “Printer properties”. Fare clic con il tasto destro del mouse su "Stampante Aclas", selezionare "Proprietà stampante". - Page 21 If your PC is installed with WIN10 system, please Se il PC è installato con il sistema WIN10, seguire follow the below steps to enter “Printer properties” i passaggi seguenti per accedere all'interfaccia interface. "Proprietà stampante". Right click “This PC” icon on the desktop, and choose “Properties”. Fare clic con il pulsante destro del mouse sull'icona "Questo PC"...
- Page 22 Click “View devices and printers”. Fare clic su "Visualizza dispositivi e stampanti". Right click “Aclas Printer”, choose “Printer properties”. Fare clic con il tasto destro del mouse su "Stampante Aclas", selezionare "Proprietà stampante".
- Page 23 Step 2: Choose connecting port Passaggio 2: scegli la porta di connessione Choose the connecting port that you have known Scegli la porta di connessione che conosci dal Capitolo 7.2. Ad from Chapter 7.2. For example, the connecting port esempio, la porta di connessione della stampante nota dal of the printer known from Chapter 7.2 is COM2, so Capitolo 7.2 è...
- Page 24 Choose “Hardware”. Scegli "Hardware". Click “OK”. Fare clic su "OK". Step 4: Finish port configuration Passaggio 4: completare la configurazione della porta Choose the item “General”. Scegli la voce "Generale". Click it to print test page, and then click “Close”. Fare clic per stampare la pagina di prova, quindi fare clic su "Chiudi".
- Page 25 Sample of Test Page/ Esempio di pagina di prova Note: there is the information about computer name, Nota: ci sono le informazioni sul nome del computer, il printer name and port name etc. on the print test page. nome della stampante e il nome della porta ecc. nella The printer can be used.
-
Page 26: Contact Us/Contattaci
You can contact us as following ways: Puoi contattarci nei seguenti modi: Website: www.aclas.tw Website: www.aclas.tw Email: osa@aclas.com Email: osa@aclas.com Facebook: @Pinnacle Aclas Facebook: @Pinnacle Aclas Twitter: @ArmPos Twitter: @ArmPos We will response within one business day. Risponderemo entro un giorno lavorativo. - Page 28 DPP7M01ITV0-A-01...
Need help?
Do you have a question about the PP7MX and is the answer not in the manual?
Questions and answers