ACLAS PP7MX User Manual
Hide thumbs
Also See for PP7MX:
- User manual (28 pages) ,
- User manual (28 pages) ,
- User manual (28 pages)
Table of Contents
Advertisement
Advertisement
Table of Contents

Related Manuals for ACLAS PP7MX


Summary of Contents for ACLAS PP7MX
- Page 1 PP7MX PRINTER USER’S MANUAL...
- Page 2 (7) Do not use the printer when it is out of order. Switch off and unplug the printer before calling your dealer. (8) Keep this manual for future use. Important Note For driver, user manual, software and other information, please visit the website: https://www.aclas.tw/products/pp7x/ to download or consult.
-
Page 3: Table Of Contents
CONTENTS Introduction ............................. 1 Specifications ........................... 1 Appearance ..........................2 Accessories ..........................2 Paper Installation ............................. 3 Setting the Printer ............................ 5 Using the Printer ........................5 Connecting the Computer ......................5 Connecting the Power Supply ....................6 SELF TEST ............................. 7 MAINTENANCE ............................ -
Page 4: Introduction
USB+RS232; Ethernet+USB Cash drawer driver 1 ports (compatible with EPSON) 150km (recommend to use high quality thermal paper, such as OJI, Printer head life PD-160R or Aclas paper.) Paper-cutter life 1,000,000 times Cash drawer impulse Work Temperature 0℃ ~ 40℃... -
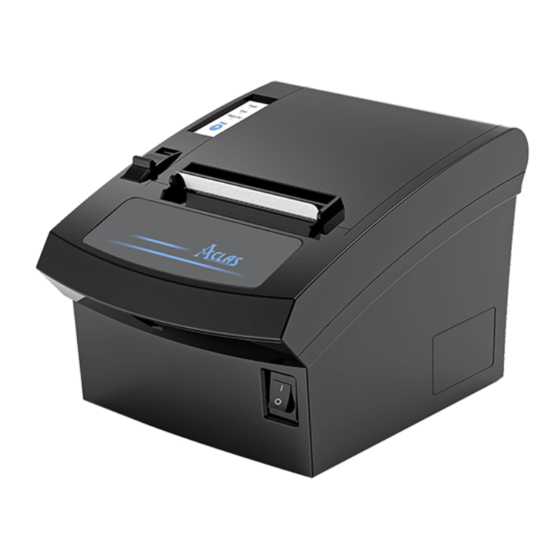
Page 5: Appearance
1.2 Appearance Upper cover switch Power switch 1.3 Accessories AC adapter AC power cord User manual Paper roll USB cable... -
Page 6: Paper Installation
Note: Bad quality thermal paper with rough surface and low sensetivity may reduce the life time of the printer head, please use high quality thermal paper, such as OJI, PD-160R or Aclas paper. (1) Make sure that the printer is not receiving data; otherwise, data may be lost. - Page 7 (4) Be sure to note the correct direction thats the paper comes off the roll shown as picture 3. √ × Thermal sensitive side Picture 3 (5) Pull out a small amount of paper to make it parallel with the alignment line as picture 4,and then close the upper cover by pressing its front middle part until you hear a ‘click’...
-
Page 8: Setting The Printer
3 Setting the Printer 3.1 Using the Printer Power indicator light To prompt error To prompt the paper is run out Press the button once to advance paper once line. You can also hold down the Feed button to feed paper continuously. 3.2 Connecting the Computer (1) Power off the printer. -
Page 9: Connecting The Power Supply
3.3 Connecting the Power Supply ※ CAUTIONS When connect the power supply to the printer, make sure first connect the power supply cable to the printer, then connect the power supply cable to the power supply. When disconnecting, the order is reverse. Otherwise you may damage the power supply or the printer. -
Page 10: Self Test
4 SELF TEST Press key ‘Feed’ and hold it, and then power on the machine at the same time, it will print a piece of Test Page. The information of this Test Page includes the printer’s model, version, IP address (Ethernet port), ID etc. -
Page 11: Troubleshooting
6 TROUBLESHOOTING 1) The printer is out of paper. If the printer is out of paper, the “Paper out” indicator light will lit up. In this case, the printer will stop printing. And then install a new paper roll, the printer will continue printing. 2) The printer could self-test but could not print. -
Page 12: Printer Tool Instruction
7 Printer Tool Instruction Double click to open ‘Printertool.exe’. Here, you can use the software to set printer parameters and test functions of the printer. 7.1 Communication Setting First, you need to do communication test. Click “Communication Setting” in the “Quick Navigation”... - Page 13 Click “Communication Test (F2)” to test communication. If there are no errors, pop-up window will be shown as follows. Otherwise, the failure window will be displayed. Users should correct the communication setting until pass the communication test.
-
Page 14: Serial Printer
7.1.2. Serial Printer If your printer is serial printer, select RS232 as the following picture. Note: Port: Select the COM-Port from the Port drop-down list according to your communication port. Baud Rate: Select the baud rate from the drop-down list according to the baud rate of your printer. -
Page 15: Usb Printer
7.1.3. USB Printer If your printer is USB printer, select USB as the following picture. Note: When the USB printer is equipped with USB virtual serial port, select “USB Virtual Serial Port”. Otherwise select “USB Printer”. Communication Test (F2): Refer to chapter 7.1.1 in this manual. -
Page 16: Parameter Setting
7.2 Parameter Setting Click “Parameter Setting” in the “Quick Navigation” menu. The window is displayed as follows. ⑤Click download parameter. ① Click upload parameters. Note: ②Input the new IP address of the printer, which is on the same network segment of the IP of the device which the printer connected with. - Page 17 Click OK.
-
Page 18: Logo Setting
7.3 Logo Setting If you want to set logo, you can click “Logo Setting” in the “Quick Navigation” menu. The window is displayed as follows. Here you can open logo file, download logo, print logo or clear logo. Note: the size of the logo file should be less than 8KB as shown in the following picture. The width and height mean pixels of the width and height of the logo picture. -
Page 19: Other Setting
7.4 Other Setting Click “Other Setting” in the “Quick Navigation” menu. The window is displayed as follows. Here you can set language of the printer tool, test the function of drawer. Voice function is reserved, and this model is not supported at present. -
Page 20: Printing Test
7.5 Printing test To test the printing effect, please click “Printing test” in the “Quick Navigation” menu. The window is displayed as follows. There are three methods to test printing. The first method: You can click here to print a test page. - Page 21 The second method: You can also input contents here. Then click “Send”, the printer will print a page.
- Page 22 The third method: ②Then tick “HEX”. ① If you need to send ESC/POS commands directly, please input the commands in this text box, such as 1B 2C. Confirm the commands and click “Send”, and ③ the printer will execute the commands.
-
Page 23: Printer Driver Installation Instruction
This driver is suitable for Windows XP system, Windows 7, Windows 8 and Windows 10. 8.1. Printer Driver Installation Connect the printer to PC, and double click “Setup.exe” in the file “Aclas Printer” to install the printer driver. Type 1: Choose “COM/LPT”... - Page 24 Choose “Hardware” Click “OK”. Click “Install”...
- Page 25 Type 2: Choose “TCP” Click “OK” Input the IP which is in the same network segment of the printer. Click “Install”...
- Page 26 Type 3: Choose “USB” Click “OK” Click “Install” Note: After installing the printer driver, you can use the printer. If the printer could not work, you can refer to Chapter 8.2 to see the connecting port and make sure that the connecting port you choose is correct and is not being used;...
-
Page 27: How To Know The Connect Port
8.2. How to Know the Connect Port Connect the printer to the computer, follow steps below to know which port is connected. Right click “This PC” icon on the desktop, and choose “Manage”. Click “Device Manager” Then click “Ports (COM&LPT)”... - Page 28 Serial printer connect port: Here you can see the connecting port serial printer. USB printer connect port: Here you can see the connecting port USB printer.
-
Page 29: How To Config Connect Port
No matter what system your PC has been installed, the goal is to find the location of “Printer properties”.) If your PC is installed with WIN7 system, please follow the below steps to enter “Printer properties” interface. Click “Devices and Printers” in start menu. Right click “Aclas Printer”, choose “Printer properties”. - Page 30 If your PC is installed with WIN10 system, please follow the below steps to enter “Printer properties” interface. Right click “This PC” icon on the desktop, and choose “Properties”. Click “Control Panel Home”.
- Page 31 Click “View devices and printers”. Right click “Aclas Printer”, choose “Printer properties”.
- Page 32 Step 2: Choose connecting port Choose the connecting port that you have known from Chapter 8.2. For example, the connecting port of the printer known from Chapter 8.2 is COM2, so you should choose COM2 in the following interface. Choose this item. Select the connecting port.
- Page 33 Choose “Hardware”. Click “OK”. Step 4: Finish port configuration Choose the item “General”. Click it to print test page, and then click “Close”.
- Page 34 Sample of Test Page Note: there is the information about computer name, printer name and port name etc. on the print test page. The printer can be used.
-
Page 35: Contact Us
It's our honor to offer the best solution and attention for you. You can contact us as following ways: Website: www.aclas.tw Email: osa@aclas.com Facebook: @Pinnacle Aclas Twitter: @ArmPos We will response within one business day. Thank you so much for your time and patience :-)...
Need help?
Do you have a question about the PP7MX and is the answer not in the manual?
Questions and answers