
Related Manuals for Phoenix Contact PSI-MODEM-3G/ROUTER


Summary of Contents for Phoenix Contact PSI-MODEM-3G/ROUTER
- Page 1 INTERFACE User manual UM EN PSI-MODEM- 3G/ROUTER — Order No.: Industrial 3G (UMTS/HSPA) mobile phone router with integrated firewall and VPN...
- Page 3 INTERFACE User manual Industrial 3G (UMTS/HSPA) mobile phone router with integrated firewall and VPN 2011-05-23 Designation: UM EN PSI-MODEM-3G/ROUTER Revision: Order No.: — This user manual is valid for: Designation Revision Order No. PSI-MODEM-3G/ROUTER From 00 2314008 104672_en_01 PHOENIX CONTACT...
- Page 4 User group of this manual The use of products described in this manual is oriented exclusively to PHOENIX CONTACT accepts no liability for erroneous handling or damage to products from PHOENIX CONTACT or third-party products resulting from disregard for the information contained in this user manual.
- Page 5 The receipt of technical documentation (in particular data sheets, installation instructions, user manuals, etc.) does not constitute any further duty on the part of PHOENIX CONTACT to furnish information on alterations to products and/or technical documentation. Any other agreement shall only apply if expressly confirmed in writing by Phoenix Contact.
- Page 6 Phoenix Contact. Violators are liable for damages. PHOENIX CONTACT reserves all rights in the case of patent award or listing of a registered design. Third-party products are always named without reference to patent rights. The existence of such rights shall not be excluded.
-
Page 7: Table Of Contents
Wireless Static Routes ..............3-22 3.5.7 DynDNS ....................3-23 3.5.8 Connection Check ................3-24 Network Security (Security settings)..............3-25 3.6.1 General Setup ...................3-25 3.6.2 Firewall (Definition of firewall rules) ........... 3-26 3.6.3 NAT Table (setting port forwarding) ..........3-29 104672_en_01 PHOENIX CONTACT... - Page 8 Exporting machine certificates ............4-14 Application examples.......................5-1 Internet access ....................5-1 5.1.1 Before you begin ................. 5-1 5.1.2 Setting up the PSI-MODEM-3G/ROUTER .......... 5-2 Safe VPN connections to FL MGUARD.............. 5-4 5.2.1 Before you begin ................. 5-4 5.2.2 Network overview ................5-5 5.2.3...
- Page 9 Loading certificates in the client router (Device "A") ......5-19 5.3.5 Setting up the VPN connection in the client router ......5-21 5.3.6 Loading certificates in the server router (Device "B") ......5-23 5.3.7 Setting up the VPN connection on the server router ......5-25 104672_en_01 PHOENIX CONTACT...
- Page 10 PSI-MODEM-3G/ROUTER PHOENIX CONTACT 104672_en_01...
-
Page 11: Description Of The 3G Router
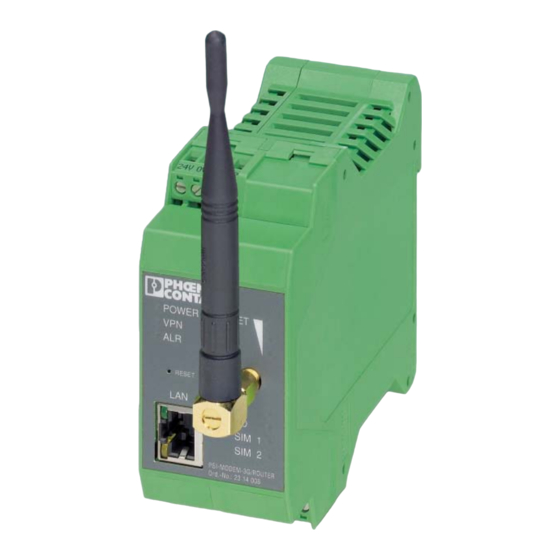
Description of the 3G router Description The 3G router PSI-MODEM-3G/ROUTER is a high-performance router for industrial Ethernet networks which can be used to securely transmit sensitive data via GSM networks. The integrated firewall and the VPN support (Virtual Private Network) protect your application against unauthorized access. -
Page 12: Ordering Data
PSI-MODEM-3G/ROUTER Ordering data Router Description Type Order No. Pcs. / Pkt. UMTS/HSPA cell phone router with Ethernet interface, firewall, VPN support PSI-MODEM-3G/ROUTER 2314008 and alarm inputs and outputs Accessories Description Type Order No. Pcs. / Pkt. GSM-UMTS antenna with omnidirectional... - Page 13 Dimensions (W x H x D) 99 mm x 45 mm x 114.5 mm Device weight 226 g Functional earth ground Housing contact to DIN rail Degree of protection IP 20 Separate ground levels VCC // UMTS // Ethernet // PE 104672_en_01 PHOENIX CONTACT...
- Page 14 PSI-MODEM-3G/ROUTER General data [...] Vibration resistance According to DIN EN 60068-2-6 5 g, per 1.5 h in x-, y-, z-direction Shock testing According to DIN EN 60068-2-27 Operation 15 g, 11 ms, half-sine shock pulse Bearings 30 g, 11 ms, half-sine shock pulse...
-
Page 15: Hardware Installation
Hardware Installation Housing dimensions 114,5 POWER RESET SIM1 SIM2 PSI-MODEM-3G/ROUTER Ord.-No.2314008 Figure 2-1 Housing dimensions (in mm) Mounting the module on a DIN rail NOTE: Only mount and remove the router when the power supply is disconnected. NOTE: The DIN rail must be connected to PE to ensure safe operation. -
Page 16: Description Of The Connections And Leds
PSI-MODEM-3G/ROUTER Description of the connections and LEDs Connection terminal blocks Connection terminal blocks (COMBICON): 24 V supply, 0 V supply 6 switching inputs, digital 4 switching outputs, digital Connectors SMA female antenna connector POWER RJ45, Ethernet interface (TP port) Reset button... -
Page 17: Establishing Connections
Disregarding this warning may result in damage to equipment and/or serious personal injury. WARNING: SELV operation The PSI-MODEM-3G/ROUTER is exclusively designed for the operation in the control cabinet and for connecting with the safety extra-low voltage (SELV) in accordance with IEC 60950 / EN 60950 / VDE 0805. -
Page 18: Connecting Ethernet Networks
NOTE: Only use shielded twisted pair cables and matching shielded RJ45 connectors. The PSI-MODEM-3G/ROUTER has an Ethernet interface on the front in RJ45 format, to which only twisted pair cables with an impedance of 100 Ω can be connected. Plug the Ethernet cable with the crimped RJ45 connector into the TP interface until the connector engages audibly. -
Page 19: Connecting The Antenna
16.5 mm in diameter in the top of the control cabinet. NOTE: Please observe the following during installation: – The antenna has a diameter of 76 mm and is 21 mm high. – The cable is 2 meters long. 104672_en_01 PHOENIX CONTACT... -
Page 20: Inserting The Sim Card
PSI-MODEM-3G/ROUTER Secure the antenna using the washer and nut provided: 102678A005 Figure 2-5 PSI-GSM/UMTS-QB-ANT antenna installation 2.4.4 Inserting the SIM card WARNING: Disconnect the device power supply before replacing the SIM card The device only supports 1.8 and 3 V SIM cards. For older SIM cards, please contact your GSM service provider. - Page 21 It is recommended that you enter the PIN code as described in Section "SIM" on page 3-15. When selecting the SIM card, please note that a packet data connection (GPRS or EDGE) is required for the core functions (VPN router). 104672_en_01 PHOENIX CONTACT...
-
Page 22: Connecting The Supply Voltage
2.4.5 Connecting the supply voltage WARNING: SELV operation The PSI-MODEM-3G/ROUTER is exclusively designed for the operation in the control cabinet and for connecting with the safety extra-low voltage (SELV) in accordance with IEC 60950 / EN 60950 / VDE 0805. -
Page 23: Connecting Switching Inputs And Outputs
Disconnect the Ethernet cable from the LAN connection on the router. Reconnect the Ethernet cable. Press and hold down the reset button for another 5 seconds. The IP address is reset to the setting default upon delivery. The router can be accessed at 192.168.0.1. 104672_en_01 PHOENIX CONTACT... - Page 24 PSI-MODEM-3G/ROUTER 2-10 PHOENIX CONTACT 104672_en_01...
-
Page 25: Configuration Via Wbm
Configuration via WBM Configuration via WBM Connection requirements – The router PSI-MODEM-3G/ROUTER must be connected to the power supply. – The computer that is to be used for configuration must be connected to the LAN female connector on the router. -
Page 26: Device Information (View Device Status)
PSI-MODEM-3G/ROUTER There are two user levels: – User: Read-only access to the "Device Information" menu item – Admin: Full access to all areas. To configure the router, make the desired settings on the individual pages of the router user interface. -
Page 27: Software
The IMEI (International Mobile Station Equipment Identity) is a 15-digit serial number that can be used to clearly identify each GSM or UMTS termination device. 3.3.2 Software All installed software modules with version codes are listed under this menu item. 104672_en_01 PHOENIX CONTACT... -
Page 28: Status
PSI-MODEM-3G/ROUTER 3.3.3 Status Current status information about the GSM network and the network connections is displayed here. 3.3.3.1 Radio Device Information >> Status >> Radio Radio Status Provider Provider name Network Status Status of the mobile phone network Registered home: Logged into the provider's home network... - Page 29 3G mobile phone network via HSDPA/UPA. HSDPA/UPA is a further development of the UMTS network with a higher data transmission rate. Local Area Code Area code within mobile phone network Cell ID Unique mobile phone cell ID 104672_en_01 PHOENIX CONTACT...
- Page 30 PSI-MODEM-3G/ROUTER 3.3.3.2 Network Connections The "Network Connections" page displays status information about the local Ethernet interface and the packet data interface in the mobile phone network. Device Information >> Status >> Network Connections Network Connections Wireless Network Link TCP/IP connected: There is an active packet data connection in the mobile phone network.
- Page 31 Configuration via WBM 3.3.3.3 I/O Status Current status information and input and output configurations are displayed on the "I/O Status" page. 3.3.3.4 Routing Table All routing table entries are displayed here. 104672_en_01 PHOENIX CONTACT...
-
Page 32: Local Network (Set Up Local Network)
PSI-MODEM-3G/ROUTER Local Network (Set up local network) 3.4.1 IP Configuration (Set up connection) The connection from the router to the local Ethernet computer can be set up here. The IP configuration can also be modified here. The IP address, subnet mask, and the type of address assignment can be set. - Page 33 With the help of the Alias Addresses, up to 8 additional IP addresses can be assigned to the router. This way, the router can be reached via different subnetworks. Enter the desired IP address and subnet mask. 104672_en_01 PHOENIX CONTACT...
-
Page 34: Dhcp Server
PSI-MODEM-3G/ROUTER 3.4.2 DHCP Server The Dynamic Host Configuration Protocol (DHCP) can be used to automatically assign the network configuration set here to the devices connected directly to the router. Local Network>> DHCP Server DHCP Server DHCP Server Deactivated/Activated Set the switch to "Enable" when the router should work as a DHCP server. -
Page 35: Static Routes
Local Network>> Static Routes Static Routes Network Network in CIDR format - see "CIDR (Classless Inter-Domain Routing)" on page 3-61 Gateway The gateway via which this network can be accessed. 3-11 104672_en_01 PHOENIX CONTACT... -
Page 36: Snmp Configuration
PSI-MODEM-3G/ROUTER 3.4.4 SNMP Configuration The mobile phone router supports the reading of information via SNMP. Local Network>> SNMP Configuration SNMP Configuration System Information Name of Device A freely assignable name for management purposes Description Description of the router Physical location... -
Page 37: Wireless Network (Mobile Phone Settings)
Period of time in hours, after which there will be a switch back to the primary mobile phone network. Daily Relogin Disable: Deactivate daily login Enable: Activate daily login; with daily login, first there will be an attempt to register with the primary mobile phone network. 3-13 104672_en_01 PHOENIX CONTACT... - Page 38 PSI-MODEM-3G/ROUTER Wireless Network >> Radio Setup [...] Time Time period at which the router logs out under controlled conditions and logs in again. During re-login, first there is an attempt to register with the primary mobile phone network. 3-14 PHOENIX CONTACT...
-
Page 39: Sim
Internet connection. Provider Select a provider via which the router is to establish the Internet connection. The country selected under Country limits the list of providers. Auto: The router automatically selects the provider. 3-15 104672_en_01 PHOENIX CONTACT... - Page 40 PSI-MODEM-3G/ROUTER Wireless Network >> SIM [...] Username User name for packet data access. The user name and password can be obtained from your provider. During configuration, do not leave the user name and password empty, even when the provider does not require a particular entry! Otherwise, a packet data connection is not possible.
-
Page 41: Backup Sim
Internet connection. Provider Select a provider via which the router is to establish the Internet connection. The country selected under Country limits the list of providers. Auto: The router automatically selects the provider. 3-17 104672_en_01 PHOENIX CONTACT... - Page 42 PSI-MODEM-3G/ROUTER Wireless Network >> Backup SIM [...] Username User name for packet data access. The user name and password can be obtained from your provider. During configuration, do not leave the user name and password empty, even when the provider does not require a particular entry! Otherwise, a packet data connection is not possible.
-
Page 43: Sms Configuration (Sms Settings)
IP address and port with which you would like to communicate. The default value for the server is Port 1432. The received SMS is forwarded in the following format: <?xml version="1.0"?> <cmgr origaddr="+49172123456789" timestamp="10/05/21,11:27:14+08"> SMS message</cmgr> origaddr = Sender telephone number timestamp = Service center time stamp in GSM 03.40 format 3-19 104672_en_01 PHOENIX CONTACT... - Page 44 PSI-MODEM-3G/ROUTER Wireless Network >> SMS Configuration SMS Configuration SMS control Disable: Remote operation of router via SMS not possible Enable: Remote operation of router via SMS activated SMS Password SMS password for remote operation SMS forward Disable: Not possible to forward SMS messages via Ethernet...
-
Page 45: Packet Data Setup
The Maximum Transmission Unit (MTU) describes the maximum packet size, in bytes, in the packet data network. Event Event that the packet data connection starts Initiate: automatic start after router boots Initiate on Input #1 ... #6: manual start per switching input 3-21 104672_en_01 PHOENIX CONTACT... -
Page 46: Wireless Static Routes
PSI-MODEM-3G/ROUTER Wireless Network >> Packet Data Setup [...] Manual DNS Disable: Deactivate manual DNS setting. The DNS settings are received automatically from the provider. Enable: Enable manual DNS setting. DNS server IP address of the primary DNS server in the mobile phone network Sec. -
Page 47: Dyndns
Here, enter your DynDNS account user name. DynDNS Password Here, enter your DynDNS account password. DynDNS Hostname The host name chosen for this router with the DynDNS service. Your router can be accessed via this host name. 3-23 104672_en_01 PHOENIX CONTACT... -
Page 48: Connection Check
PSI-MODEM-3G/ROUTER 3.5.8 Connection Check Using the "Connection check," it is possible to check whether the packet data connection in the mobile phone network is functional. Wireless Network >> Connection Check Connection Check Connection Check Disable: The packet data connection connection check is deactivated (default). -
Page 49: Network Security (Security Settings)
Disable: If a ping request is sent from the external IP network to the router, it is ignored (default). Enable: If a ping request is sent from the external IP network to the router, it is sent back. 3-25 104672_en_01 PHOENIX CONTACT... -
Page 50: Firewall (Definition Of Firewall Rules)
PSI-MODEM-3G/ROUTER Network Security >> General Setup [...] Web based This option can be used to specify whether the router may be Management external configured via the mobile phone network or the external network using WBM. Disable: External configuration via WBM is not possible. Set this option if you can configure and maintain the router locally (default). - Page 51 Log set to No (default setting) The "New" button adds a new firewall rule below the last rule. The "Delete" button deletes the relevant rule from the table. The arrows can be used to move the rule up/down a row. 3-27 104672_en_01 PHOENIX CONTACT...
- Page 52 PSI-MODEM-3G/ROUTER Network Security >> Firewall [...] Outgoing Traffic Lists the firewall rules that have been set up. They apply for outgoing data connections that have been initiated internally in order to communicate with a remote partner. Default settings: A rule is defined by default that allows all outgoing connections.
-
Page 53: Nat Table (Setting Port Forwarding)
For each individual rule you can specify whether the event is to be logged if the rule is applied. – Log set to Yes (event is logged) – Log set to No (default setting) 3-29 104672_en_01 PHOENIX CONTACT... - Page 54 PSI-MODEM-3G/ROUTER Network Security >> NAT table [...] The "New" button adds a new rule below the last rule. The "Delete" button deletes the relevant rule from the table. The arrows can be used to move the rule up/down a row.
-
Page 55: Vpn
Authentication via pre-shared secret key (PSK) or X.509 certificate – – Diffie-Hellman group 2 or 5 – 3DES or AES encryption – MD5 or SHA-1 hash algorithms – Tunnel mode – Quick mode – Main mode – SA lifetime (1 second to 24 hours) 3-31 104672_en_01 PHOENIX CONTACT... -
Page 56: Ipsec Connections (Ipsec Connection Setup)
PSI-MODEM-3G/ROUTER 3.7.1 IPsec Connections (IPsec connection setup) IPsec (Internet Protocol Security) is a security protocol that is used for communication via IP networks. VPN >> IPsec >> Connections IPsec Connections Monitor DynDNS If the VPN partner does not have a fixed IP address and a DynDNS name is used as a "Remote host", activate the... - Page 57 The Remote Host setting is only used if Initiate has been selected under Remote Connection, i.e., the router establishes the connection. If Remote Connection is set to Accept, the value "%any" is set internally for Remote Host in order to wait for a connection. 3-33 104672_en_01 PHOENIX CONTACT...
- Page 58 PSI-MODEM-3G/ROUTER VPN >> IPsec >> Connections >> Settings >> Edit [...] Authentication X.509 Remote Certificate - X.509 certificate authentication method With the X.509 certificate option, each VPN device has a private key and a public key in the form of an X.509 certificate, which contains additional information about the certificate's owner and the certification authority (CA).
- Page 59 (Initiate on Input) can be configured. The VPN can be started on SMS (Initiate on SMS) and on call (Initiate on Call). It also must be determined after how many minutes on auto reset the VPN tunnel will be stopped. 3-35 104672_en_01 PHOENIX CONTACT...
- Page 60 PSI-MODEM-3G/ROUTER 3.7.1.2 IKE >> Edit VPN >> IPsec >> Connections >> IKE >> Edit IPsec - Internet Key Name The name of the VPN connection entered under IPsec Exchange Settings Connections. Phase 1 ISAKMP SA ISAKMP SA Encryption Algorithm Encryption...
- Page 61 Behavior in the event that the IPsec connection is aborted: – Off: No Dead Peer Detection – On: Dead Peer Detection activated in "Restart" mode for VPN Initiate and/or in "Clear" mode for VPN Accept. 3-37 104672_en_01 PHOENIX CONTACT...
-
Page 62: Ipsec Certificates (Certificate Upload)
PSI-MODEM-3G/ROUTER VPN >> IPsec >> Connections >> IKE >> Edit [...] DPD Delay (sec.) Delay between requests for a sign of life Period of time in seconds after which DPD Keep Alive requests should be sent. These requests test whether the partner is still available. - Page 63 Local Certificate can be assigned to each VPN connection. Password In the Password field, enter the password used to protect the private key of the PKCS#12 file. The password is assigned when the key is exported. 3-39 104672_en_01 PHOENIX CONTACT...
- Page 64 PSI-MODEM-3G/ROUTER VPN >> IPsec >> Certificates [...] Remote Certificates Overview of the imported .cer/.crt certificates Click on "Delete" to delete a certificate. Own Certificates Overview of the imported PKCS#12 certificates Click on "Delete" to delete a certificate. The symbols indicate whether a CA certificate, a machine certificate or a private key was found in the PKCS#12 file (green = present).
-
Page 65: Ipsec Status (Status Of The Vpn Connection)
Configuration via WBM 3.7.3 IPsec Status (Status of the VPN connection) VPN >> IPsec >> Status Status Active IPsec Status of the active VPN connection Connection 3-41 104672_en_01 PHOENIX CONTACT... -
Page 66: Openvpn Client (Create Openvpn Connections)
PSI-MODEM-3G/ROUTER 3.7.4 OpenVPN Client (Create OpenVPN connections) OpenVPN is a program for creating a virtual, private network (VPN) via an encrypted connection. VPN >> OpenVPN >> Client OpenVPN Status Specifies whether the OpenVPN client should be active (Enable) or not (Disable). - Page 67 Default setting: 30 seconds. Restart Period of time in seconds after which the connection to the remote peer should be re-started, if there has been no response to the Keep Alive requests. Default setting: 120 seconds. 3-43 104672_en_01 PHOENIX CONTACT...
-
Page 68: Openvpn Certificates (Certificate Upload)
PSI-MODEM-3G/ROUTER 3.7.5 OpenVPN Certificates (Certificate upload) A certificate that is loaded on the router is used to authenticate the router at the partner. The certificate acts as an ID card for the router, which it shows to the relevant partner. -
Page 69: Openvpn Status (Vpn Connection Status)
Configuration via WBM 3.7.6 OpenVPN Status (VPN connection status) VPN >> OpenVPN >> Status Status Active OpenVPN Status of the active VPN connection Connection 3-45 104672_en_01 PHOENIX CONTACT... -
Page 70: Inputs (Configuring Inputs)
PSI-MODEM-3G/ROUTER The router has six integrated digital switching outputs and four integrated digital switching outputs for alerting and switching. 3.8.1 Inputs (Configuring inputs) The inputs can be used by SMS or e-mail alerts. Each input can be configured individually. Make sure that inputs that are, for example, used to start a VPN connection, cannot also be used for alerts. - Page 71 "To" field, the copy recipient in the "Cc" field, and the subject and message text in the "Subject" field. Alarm Activate the "ALR" LED and set the light duration for the LED in minutes. 3-47 104672_en_01 PHOENIX CONTACT...
-
Page 72: Outputs (Configuring Outputs)
PSI-MODEM-3G/ROUTER 3.8.2 Outputs (Configuring outputs) The outputs can be switched remotely or, alternatively, provide information about the router's status. Each output can be configured individually. I/O >> Outputs Outputs Function Manual: Manual switching of the output via the WBM. Remote Controlled: Remote switching via SMS or Socket Server. -
Page 73: Phonebook
Configuration via WBM 3.8.3 Phonebook Here, enter the call numbers for recipients of the alarm SMS messages and for those entitled to switch outputs. 3-49 104672_en_01 PHOENIX CONTACT... -
Page 74: Socket Server
PSI-MODEM-3G/ROUTER 3.8.4 Socket Server The router has a socket server that can accept operating commands via Ethernet interface. These commands must be sent in XML format. I/O >> Socket Server Socket Server Socket Server Disable: Operation via Ethernet interface is not possible. - Page 75 Make sure that the XML files do not contain any line breaks. <?xml version="1.0"?> <io> <output no="2" value="on"> <output no="3" value="off"> <input no="1"/> </io> Response from modem (representation with line break): <?xml version="1.0"?> <result> <io> <output no="2" value="on"/> <output no="3" value="off"/> <input no="1" value="off"/> </io> </result> 3-51 104672_en_01 PHOENIX CONTACT...
-
Page 76: System
PSI-MODEM-3G/ROUTER System 3.9.1 User (Password modification) System >> User User Setup Admin Unrestricted access to all areas Old password: Old password New password: New password Retype new password: Enter new password again User Restricted access (read-only) Default: public Old password: Old password... -
Page 77: Log Configuration
System >> Log Configuration Log Configuration Remote UPD Logging Disable: No external logging active. Enable: Logging on external server activated. Server IP Address Log server IP address Server Port (default Log server port (default 514) 514) 3-53 104672_en_01 PHOENIX CONTACT... -
Page 78: Log File
PSI-MODEM-3G/ROUTER 3.9.3 Log File With the help of the router log file, different events and operating conditions can be diagnosed. The log file provides circulating storage where the oldest entries are overwritten first. System >> Log File Log File Clear Deletes all entries in the log file. -
Page 79: Smtp Configuration
Encrypted Password: Authentication with user name and password. User name and password are transmitted in encrypted form. Username User name for login to mail server Password Affiliated password for login to mail server From Sender mail address 3-55 104672_en_01 PHOENIX CONTACT... -
Page 80: Configuration Up-/Download
PSI-MODEM-3G/ROUTER 3.9.5 Configuration Up-/Download The current configuration can be saved in a file and prepared configurations can be downloaded via WBM. System >> Configuration Up-/Download Configuration Download Click on "Save" to locally save the current configuration in a Up-/Download file. -
Page 81: Rtc (Time And Date Setup)
"clock" so that this can be adjusted as accurately as possible. Only then can the router act as the NTP server for the devices connected to its LAN interface and provide the system time. 3-57 104672_en_01 PHOENIX CONTACT... - Page 82 PSI-MODEM-3G/ROUTER System >> RTC [...] NTP Server NTP - Network Time Protocol The router can act as the NTP server for computers that are connected to its LAN port. In this case, the devices should be configured so that the local address of the router is specified as the NTP server address.
-
Page 83: Reboot (Router Restart)
Time specified in Hours:Minutes Event Choose the digital input for which the "High" signals from the router will be restarted as needed. Make sure that after restarting, the signal is "Low" again so the router boots up normally. 3-59 104672_en_01 PHOENIX CONTACT... -
Page 84: Firmware Update
PSI-MODEM-3G/ROUTER 3.9.8 Firmware Update System >> Firmware Update Firmware Update Modem Updates ensure that you can benefit from enhanced functions and product updates. Update Web Based Management Updates can be downloaded at: www.phoenixcontact.net/catalog. To install updates: Click on "Browse" and select the file that contains the update. -
Page 85: Cidr (Classless Inter-Domain Routing)
11110000 00000000 00000000 00000000 4 224.0.0.0 11100000 00000000 00000000 00000000 3 192.0.0.0 11000000 00000000 00000000 00000000 2 128.0.0.0 10000000 00000000 00000000 00000000 1 0.0.0.0 00000000 00000000 00000000 00000000 0 Example: 192.168.1.0/255.255.255.0 corresponds in CIDR format to: 192.168.1.0/24 3-61 104672_en_01 PHOENIX CONTACT... - Page 86 PSI-MODEM-3G/ROUTER 3-62 PHOENIX CONTACT 104672_en_01...
-
Page 87: Creating Certificates
Start the setup_xca-0.6.4.exe setup file and follow the on-screen instructions of the setup program. Creating a database These instructions for creating self-signed certificates are based on version 0.6.4 of the XCA program. Once installed, start the XCA program. Figure 4-1 XCA Version 0.6.4 (1) 104672_en_01 PHOENIX CONTACT... - Page 88 PSI-MODEM-3G/ROUTER Create a new database via the "File… New Database" menu item. Figure 4-2 XCA Version 0.6.4 (2) Assign a password to encrypt the database. Select the "File... Options" menu item. Figure 4-3 XCA Version 0.6.4 (3) Change the hash algorithm from SHA 256 to SHA 1.
-
Page 89: Creating A Ca Certificate
Switch to the "Certificate" tab and click on "New Certificate". Figure 4-4 XCA Version 0.6.4 (4) In the program window shown, there is already a preset self-signed certificate with the signature algorithm SHA-1. 104672_en_01 PHOENIX CONTACT... - Page 90 PSI-MODEM-3G/ROUTER Switch to the "Subject" tab. Figure 4-5 XCA Version 0.6.4 (5) Here, enter the information about the owner of the root certificate. Click on "Generate a new key". Figure 4-6 XCA Version 0.6.4 (6) Do not change the default key size and type.
- Page 91 In this example, the period of validity is set to 10 years. The certificate type is already set to "Certificate Authority" by default. Activate all the options as shown in Figure 4-7. 104672_en_01 PHOENIX CONTACT...
- Page 92 PSI-MODEM-3G/ROUTER Switch to the "Key Usage" tab. Figure 4-8 XCA Version 0.6.4 (8) 10. Select the "Certificate Sign" and "CRL Sign" options and click "OK" to complete root certificate creation. This certificate has been successfully created. 11. A new root certificate from which further machine certificates can be derived now appears in the overview.
-
Page 93: Creating Machine Certificates
XCA Version 0.6.4 (10) Click on "New Template" to create a terminal certificate. In the "Preset Template Values" prompt that appears, select "Nothing". On the "Subject" tab, specify the settings for the certificates that are to be created later. 104672_en_01 PHOENIX CONTACT... - Page 94 PSI-MODEM-3G/ROUTER The following window appears. Stay on the "Subject" tab. Figure 4-11 XCA Version 0.6.4 (11) Two names appear in angular brackets ("Internal name" and "Common name"). The names in the angular brackets are simply placeholders, as the actual names are assigned to the certificates.
- Page 95 Change the certificate type to "End Entity", as the template is to be used for machine certificates. 365 days should be specified as the period of validity of the certificates to be created. After the resulting end date, the certificates can no longer be used. 104672_en_01 PHOENIX CONTACT...
- Page 96 PSI-MODEM-3G/ROUTER Switch to the "Key Usage" tab. Figure 4-13 XCA Version 0.6.4 (13) Select the "Digital Signature", "Data Encipherment", and "Key Agreement" options and click "OK" to create the template. The template can now be used as a basis to create certificates signed with the root certificate.
-
Page 97: Creating Machine Certificates Based On A Template
XCA Version 0.6.4 (14) On the "Source" tab, specify the root certificate that is to be used for signing. In addition, you can select a template that has been created and read it in by clicking "Apply". 4-11 104672_en_01 PHOENIX CONTACT... - Page 98 PSI-MODEM-3G/ROUTER Switch to the "Subject" tab. Figure 4-15 XCA Version 0.6.4 (15) Here, enter the information about the owner of the machine certificate. When entering information on this tab, please note that the certificates must differ at least with regard to their name ("Internal name" and "Common name").
- Page 99 Creating certificates A machine certificate has now been created, which has been signed by the CA. Figure 4-17 XCA Version 0.6.4 (17) The machine certificate must be exported so that it can be used on the router. 4-13 104672_en_01 PHOENIX CONTACT...
-
Page 100: Exporting Machine Certificates
PSI-MODEM-3G/ROUTER 4.4.3 Exporting machine certificates Select the relevant certificate from the list and click on "Export". The entire certificate including the private key must be in PKCS#12 format and can then be uploaded to the relevant component as a machine certificate. -
Page 101: Application Examples
Application examples Internet access PSI-MODEM-3G/ROUTER makes it possible to access the Internet via the mobile phone network. For this, a SIM card from a mobile phone provider that has been activated for packet data services, such as GPRS/EDGE, is required. -
Page 102: Setting Up The Psi-Modem-3G/Router
PSI-MODEM-3G/ROUTER 5.1.2 Setting up the PSI-MODEM-3G/ROUTER Open a browser on the PC. Enter the IP address (default 192.168.0.1) in the address field of your browser. A user name and password are required in order to log in. The default user name is "admin"... - Page 103 In order to access the Internet from your PC, you must enter the router's IP address as the default gateway and DNS server in the network settings. Find out how to adjust these settings to your operating system in the corresponding documentation. 104672_en_01 PHOENIX CONTACT...
-
Page 104: Safe Vpn Connections To Fl Mguard
Internet connection in the control center would be the FL MGUARD RS VPN (Order No. 2989611), for example. In the router, a SIM card from a mobile phone provider that has been activated for packet data services, such as GPRS/EDGE, is required. For this application, the PSI-MODEM-3G/ROUTER is: – VPN Client –... -
Page 105: Network Overview
LAN internal IP address. Here, enter the information for "your" network "3": IP FL MGUARD LAN: __________ . __________ . __________ . __________ (Default gateway for all devices in the network) Subnetwork: __________ . __________ . __________ . __________ 104672_en_01 PHOENIX CONTACT... -
Page 106: Creating Certificates
PSI-MODEM-3G/ROUTER In the sample application, the "0" network is connected to the "3" network using the VPN tunnel. If the VPN tunnel is constructed, the other "1" and "2" networks are not visible to the application. 5.2.3 Creating certificates An individual X.509 certificate is required for each VPN endpoint to ensure a secure VPN connection. - Page 107 First, load the partner certificate (Remote Certificate). To do this, click on "Browse" and select the corresponding "B.crt" certificate file. Click "Apply" to load the certificate file. Next load the local machine certificate (Own PKCS#12 Certificate). To do this, click on "Browse" and select the corresponding "A.p12" certificate file. 104672_en_01 PHOENIX CONTACT...
-
Page 108: Setting Up The Vpn Connection On The Modem
PSI-MODEM-3G/ROUTER Enter the certificate file password and click on "Apply" to load the certificate file. 5.2.5 Setting up the VPN connection on the modem Open "VPN, IPsec, Connections". Assign a name to the IPsec VPN connection and confirm with "Apply". - Page 109 VPN connection should be made and enter the IP address/subnet mask for the local network (Network "0"). Use the CIDR format. For the VPN connection router to be made automatically after starting, choose "Initiate" under "Remote connection". 104672_en_01 PHOENIX CONTACT...
-
Page 110: Configuring The Fl Mguard Rs Vpn
PSI-MODEM-3G/ROUTER 5.2.6 Configuring the FL MGUARD RS VPN Configure the FL MGUARD as a router. Log into web-based management as the administrator. Open "Network, Interfaces". Choose "Router" as the network mode and then "static" as the router mode. Enter the IP address for the FL MGUARD WAN interface and the default gateway address (Network "2"). -
Page 111: Loading Certificates On The Fl Mguard Rs Vpn
Loading certificates on the FL MGUARD RS VPN Here, open "Authentication, Certificate". First load the machine certificate (Own PKCS#12 Certificate). Switch to the "Machine certificate" tab and add a new row. Click on "Browse" and select the corresponding "B.p12" certificate file. 5-11 104672_en_01 PHOENIX CONTACT... - Page 112 PSI-MODEM-3G/ROUTER Enter the associated certificate file password and click on "Import" to load the certificate file. Click on "Apply" to complete the certificate import. 5-12 PHOENIX CONTACT 104672_en_01...
-
Page 113: Setting A Packet Filter On The Fl Mguard Rs Vpn
Open "Network Security, Packet Filter". In the Incoming rules and the Outgoing rules tabs, under Protocol set "All" From IP "0.0.0.0/0" to IP "0.0.0.0/0". Under Action set "Accept". Click "Apply" to apply the changes. 5-13 104672_en_01 PHOENIX CONTACT... -
Page 114: Setting Up The Rs Vpn In The Fl Mguard
PSI-MODEM-3G/ROUTER 5.2.9 Setting up the RS VPN in the FL MGUARD Open "VPN, IPsec VPN, Connections". Insert a new row and assign a name for the IPsec VPN connection. Click on "Edit" to set the connection options. On the "General" tab under Transport and Tunnel Settings, choose the "Tunnel" type and enter the network address for the local (Network "3") and remote networks... - Page 115 Switch to the "IKE options" tab and change the ISAKMP SA encryption algorithm (key exchange) and the IPsec SA encryption algorithm (data exchange) to "AES-128". Change "Rekey" to "No". All other settings correspond to the settings in the router by default and can be left as such. 5-15 104672_en_01 PHOENIX CONTACT...
- Page 116 PSI-MODEM-3G/ROUTER Click "Apply" for the changes to be applied. 10. Check the status of the VPN connection. To do so, open "VPN, IPsec VPN, IPSec Status" on the FL MGUARD. 11. In addition, the status of the VPN connection to the router can be checked using the VPN LED and in the Web Based Management.
-
Page 117: Virtual Ethernet Dedicated Line
At least one of the routers must have a fixed IP address and router-to-router communication must take place in the mobile phone network. Should you have any questions, please contact your provider. For this application, the PSI-MODEM-3G/ROUTER is: – VPN client and/or VPN server –... -
Page 118: Network Overview
PSI-MODEM-3G/ROUTER 5.3.2 Network overview This application uses three different networks: – Client network "0", which is connected to a local Ethernet connection for the PSI- MODEM-3G/ROUTER and to the client PC. For all devices in this network, the default gateway is 192.168.0.1 (router IP address) with subnet mask 255.255.255.0 . -
Page 119: Loading Certificates In The Client Router (Device "A")
Log into web-based management as the administrator. Open "VPN, IPsec, Certificates". First, load the partner certificate (Remote Certificate). To do this, click on "Browse" and select the corresponding "B.crt" certificate file. Click "Apply" to load the certificate file. 5-19 104672_en_01 PHOENIX CONTACT... - Page 120 PSI-MODEM-3G/ROUTER Next load the local machine certificate (Own PKCS#12 Certificate). To do this, click on "Browse" and select the corresponding "A.p12" certificate file. Enter the certificate file password and click on "Apply" to load the certificate file. 5-20 PHOENIX CONTACT...
-
Page 121: Setting Up The Vpn Connection In The Client Router
(Local Certificate). Enter the IP address/subnet mask for the remote network (Network "2") on which the VPN connection is to be established and the IP address/subnet mask for the local network (Network "0"). Use the CIDR format. 5-21 104672_en_01 PHOENIX CONTACT... - Page 122 PSI-MODEM-3G/ROUTER For the VPN connection router to be made automatically after starting, choose "Initiate" under "Remote connection". 5-22 PHOENIX CONTACT 104672_en_01...
-
Page 123: Loading Certificates In The Server Router (Device "B")
Log into web-based management as the administrator. Open "VPN, IPsec, Certificates". First, load the partner certificate (Remote Certificate). To do this, click on "Browse" and select the corresponding "A.crt" certificate file. Click "Apply" to load the certificate file. 5-23 104672_en_01 PHOENIX CONTACT... - Page 124 PSI-MODEM-3G/ROUTER Next load the local machine certificate (Own PKCS#12 Certificate). To do this, click on "Browse" and select the corresponding "B.p12" certificate file. Enter the certificate file password and click on "Apply" to load the certificate file. 5-24 PHOENIX CONTACT...
-
Page 125: Setting Up The Vpn Connection On The Server Router
(Local Certificate). Enter the IP address/subnet mask for the remote network (Network "0") to which the VPN connection should be made and enter the IP address/subnet mask for the local network (Network "2"). Use the CIDR format. 5-25 104672_en_01 PHOENIX CONTACT... - Page 126 PSI-MODEM-3G/ROUTER Choose "Accept" from under "Remote connection" so the router can accept the incoming VPN connection. The status of the VPN connection to the two routers can be checked using the VPN LED and in the Web Based Management. Open "VPN, IPsec, Status".
Need help?
Do you have a question about the PSI-MODEM-3G/ROUTER and is the answer not in the manual?
Questions and answers