Table of Contents
Advertisement
Quick Links
Advertisement
Table of Contents

Related Manuals for Nexus 21 L-85


Summary of Contents for Nexus 21 L-85
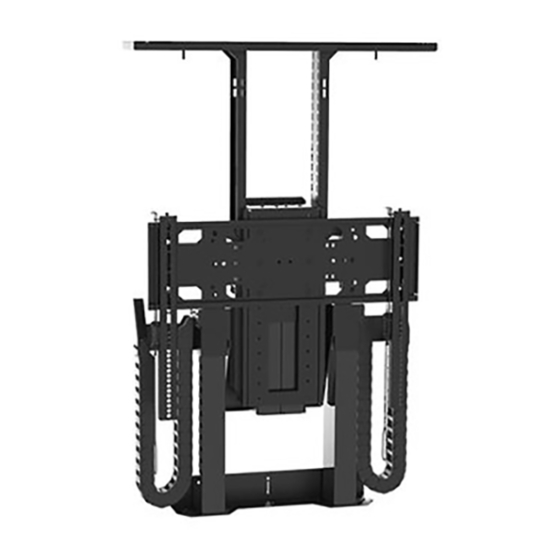
- Page 1 Installation Manual for L-85 & XL-85...
-
Page 2: Table Of Contents
Table of Contents Safety Information Parts & Hardware List Warranty & Return Policies Lower Actuation System Lower Cable Management Upper Actuation System Upper Cable Management TV Mounting Lid Attachment Version: 1.0.3 Date: 11-21-22... -
Page 3: Safety Information
Nexus 21 products. Nexus 21 bears no responsibility for incidental or consequential damages. This includes, but is not limited to, any labor charges for the servicing of Nexus 21 products performed by anyone other than Nexus 21. Nexus 21 intends to make this and all documentation as accurate as possible. -
Page 4: Parts & Hardware List
Parts & Hardware List Screen Back Plate (2) Vertical Mounting Bars Lid Adapter Plate Lid Plate (2) Lid Support Brackets Upper Assembly (2) Lower Lift Columns Center Riser Bracket Rear Support Bracket (2) Lower Column Clamps Base Mount (2) Upper & Lower Cable Control Box (4) 4.5m Motor Cables Backup Switch... - Page 5 Parts & Hardware List Hardware Pack Power Cord Control Kit (see pg. 41) TV Mounting Template (See Contents List Below) Hardware Pack Contents: M5 x 10 FHMS (12) M6 x 12 FHMS (20) M6 x 20 FHMS (8) M6 x 10 BHMS (22) M6 x 20 BHMS (2) #8 X 3/4”...
-
Page 6: Warranty & Return Policies
In the event that you do need a replacement part or system, we’ll ship it to you right away, along with a prepaid UPS return shipping label and a package for the defective part or system to be returned to our office. Nexus 21 will cover the shipping cost of the replacement part or system within the continental United States and Canada (excludes Hawaii, Alaska and Puerto Rico). - Page 7 Within 30 Days of Delivery: Customers may return a Nexus 21 product(s) for any reason within 30 days of the date it is received for a full refund of the purchase price. Shipping charges associated with your order are not eligible for refund. To initiate a product-return request, please review the following conditions: •...
-
Page 8: Lower Actuation System
Lower Actuation System Before you begin, consult the Dimensional Drawing for your lift system to ensure your cabinet dimensions are correct and ready for install. - Page 9 1a. Attach the Base Mount to the base and rear panels of the cabinet using (9) #10 x ¾” THWS. 1b. Attach the Rear Support to the rear of your cabinet, 15.75”(L-85) or 23.75”(XL-85) from the bottom of your Base Mount, using (12) #10 x ¾” THWS.
- Page 10 Tongue Pigtail 2a. Slide Lower Column Clamps around the Lower Column Assemblies with the holes on the outside, then seat the pigtails as shown above for each column. 2b. Slide Lower Column Assemblies onto Base Mount Studs with the Pigtails facing outwards. 2c.
- Page 11 3a. Attach the Lower Column Clamps to the Rear Support using (4) M6 x 12mm FHMS. 3b. Attach the Lower Column Assemblies to the Base Mount using (4) M6 Thumb Screws.
- Page 12 4. Place the Center Riser on top of the Lower Column Assemblies then attach it using (8) M6 x 20 FHMS.
- Page 13 5. Manuever the Lower Column Pigtails into slots on left and right sides of Center Riser.
-
Page 14: Lower Cable Management
Lower Cable Management... - Page 15 A u d i o V i d e o ( A V ) S i d e C o n t r o l B o x ( C B ) S i 6. Mount your Control Box to the inside of your cabinet on the CB Side, using (2) #10 x 1-3/4” FHWS. Important Notice: Identify which side the AV ports are on for your TV;...
- Page 16 7a. Feed (3) 4.5m Motor Cables through one of the Lower Cable Tracks and label one of the cables “#1”, leaving the other two cables unlabeled. 7b. Feed (1) 4.5m Motor Cable through the second Lower Cable Track, label this cable “#2”, then feed any necessary AV Cables through this track.
- Page 17 8a. Attach one end of the Lower Cable Track with Cable #1 to the CB Side of the Center Riser and Rear Support, using (4) M5 x 12 FHMS. 8b. Repeat this step for the other Lower Cable Track on the AV Side...
- Page 18 9a. Connect Cable #1 to the Lower Column Pigtail on the CB Side and Cable #2 to the Lower Column Pigtail on the AV Side 9b. Pull any slack on these cables down through their respective cable tracks then hang it behind the angled flanges on the Rear Support. 9c.
-
Page 19: Upper Actuation System
Upper Actuation System... - Page 20 Metal Wings Washers 10. Hang the Upper Column Assembly on the Center Riser as shown in the image above. Note: The metal wings on the back of the Upper Assembly should sit behind the washers on the Center Riser, allowing you let go of the Upper Assembly without it falling.
- Page 21 11. Temporarily connect the (2) unlabeled 4.5m Motor Cables to the Upper Column Pigtails then label these Cable #3 and Cable #4. Note: Ensure there is plenty of slack available to allow extension of the Upper Columns.
- Page 22 12a. Connect all (4) Motor Cables to their corresponding ports on the Control Box. Cable #1 to Port 1, Cable #2 to Port 2, etc. 12b. Connect the Power Cord to the AC Port and the Backup Switch to Port A1 or A2. 12c.
- Page 23 13a. Press the Up button on the Backup Switch and raise the system until the bottom of the Screen Support is just above the top of your cabinet, then tap the Down button to stop it at this position. 13b. Fasten the Upper Column Assembly to the Center Riser using (6) M6 x 12 FHMS. 13c.
-
Page 24: Upper Cable Management
Upper Cable Management... - Page 25 14a. Temporarily disconnect Cable #3 and #4 from the Upper Assembly, then feed them up through the L-shaped end on one of the Upper Cable Tracks. 14b. Attach the L-Shaped end of this Upper Cable Track to the top surface of the Center Riser on the CB Side using (2) M6 x 10 BHMS. 14c.
- Page 26 15a. Reconnect Cable #3 and #4 to the Upper Assembly, then open the Plastic Cable Channel on CB Side of the Upper Assembly. 15b. Place the cables into the Plastic Channel without them overlapping, then snap it shut. Feed any remaining slack down through the Upper & Lower Cable Track and towards the Control Box.
- Page 27 AV Cables 16a. Feed the previously managed AV Cables on the AV Side, up through the remaining Upper Cable Track. 16b. Attach the L-shaped end of the Upper Cable Track to the top surface of the Center Riser on the AV Side using (2) M6 x 10 BHMS. 16c.
- Page 28 17. Press the “Down” button on the Backup Switch to lower the system to its fully retracted position then back up to test your cable management, adjusting the slack as needed. When finished, leave your system in the retracted position and proceed to the next step.
- Page 29 18a. Measure the thickness of your lid and add 1/4” to it. Write that measurement here: _____________ 18b. Place a level or straight edge across the top of your opening. The bottom of the level or straight edge will be used to locate your Lid Supports. 18c.
- Page 30 19. Attach the Lid Plate to the Top of the Lid Supports using (4) M6 x 12 FHMS. Ensure the Arrow is pointing towards the front of the cabinet.
-
Page 31: Tv Mounting
TV Mounting This system has been tested to run within the following specifications: Min Screen Size = 65” Max Screen Size = 86” Max Weight Capacity = 175 lbs (TV + Lid + Soundbar) Failure to install your application within these specifications will void your warranty. - Page 32 1” 20a. Raise your lift, align the template with Screen Support Holes, then fold or cut the template to be flush with the bottom of the Lid Plate. 20b. Measure 1” from the new top of the Template and draw a line. This line indicates the position for where the top of the TV will go. 20c.
- Page 33 VESA Holes 21a. Attach Vertical Bars to Screen Backplate, ensure the spring-loaded latch on each Vertical Bar is engaged with the Screen Back Plate. 21b. Place the Vertical Bars and Screen Backplate on the back of the TV, and position the Vertical Bars over the VESA Holes. 21c.
- Page 34 Upper VESA Holes Lower VESA Holes 22a. Disconnect the Screen Back Plate from the Vertical Bars and attach it to the holes on the Screen Support that correspond with the marked holes on your Template using (6) M6 x 12 FHMS Screws. Note: You can disengage the spring-loaded latch on the Vertical Bars by pulling on the straps at the bottom or pushing the tab at the top.
- Page 35 23. Hang your TV on the Screen Backplate, ensure the spring-loaded latch on each Vertical Bar is engaged with the Screen Back Plate.
-
Page 36: Lid Attachment
Lid Attachment This system has been tested to run within the following specifications: Min Screen Size = 65” Max Screen Size = 86” Max Weight Capacity = 175 lbs (TV + Lid + Soundbar) Failure to install your application within these specifications will void your warranty. - Page 37 24a. Ensure the holes on the Lid Plate and Pin Receiver are centered with one another and the Pin Receiver Nuts are tight. 24b. Place the Lid Adapter on the top of the Lid Plate, aligning the Lid Pins with the holes on the Pin Receivers.
- Page 38 Min. 1” Gap 25a. Fully retract your lift system by pressing the “Down” button on the Backup Switch. 25b. Remove the (4) M6 x 10 Flat Head Screws for the Lid Plate Extensions and adjust them towards the front of the cabinet leaving a 1” gap or more. 25c.
- Page 39 26a. Press the “Up” button on the Backup Switch to partially extend the lift ~18” then press “Down” to stop it. 26b. Use a pencil or sharpie to mark the smaller of the two holes in the four corners of the Lid Adapter, then remove your lid from the Lid Plate and flip it over.
- Page 40 27a. Align the Lid Adapter with the marked holes, then affix your lid to the Lid Adapter using the provided #8 FHWS and countersunk holes or consult a general contractor for an appropriate adhesive. 27b. Place your lid back on top of the Lid Plate then retract your lift to ensure there is still an even gap all the way around. Note: If any adjustment is necessary, raise the lift, loosen the pin receiver nuts, lower the system, then adjust the lid position until there is an even gap all the way around.
- Page 41 28a. Press the “Down” button on the Backup Switch to lower your system, then press “Up” to stop it at your desired height. 28b. Plug the Height Limit Insert into an available RJ45 port on the Control Box to limit the extension to the current position of the system. Note: Using a Height Limit Insert is not required if you are using the full travel of the system.
- Page 42 Intentionally left blank...
- Page 43 Intentionally left blank...
Need help?
Do you have a question about the L-85 and is the answer not in the manual?
Questions and answers