Advertisement
- 1 Getting to know your Alcatel SMARTFLIP
- 2 Phone setup
- 3 Personalize
- 4 Lock and unlock your screen
- 5 Calls and Voicemail
- 6 Text and picture messaging
- 7 Camera and video
- 8 E-Mail
- 9 Mobile Web
- 10 Connectivity
- 11 Useful Tools
- 12 Google and Other Apps
- 13 More information
- 14 Accessories
- 15 Documents / Resources
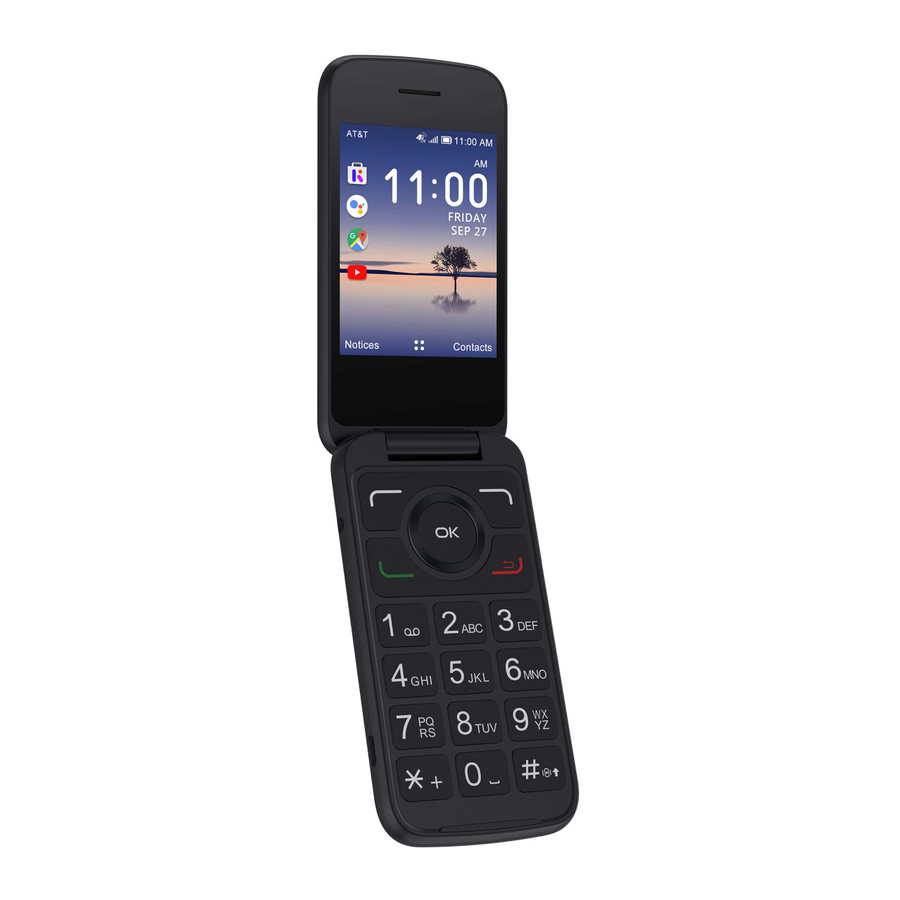
Getting to know your Alcatel SMARTFLIP™

Phone setup
- Remove back cover by gently pulling up on the indentation on the bottom left of the cover.
![]()
- Insert the NANO SIM card by carefully sliding it into the SIM slot with the gold contacts facing down and the slanted corner to the left.
![]()
- Insert the optional microSD TM card into the microSD slot, ensuring that the gold contacts are facing down and the flat edge is facing up.
- Insert the battery, making sure the gold contacts align. Gently push down on the battery until it clicks into place.
![]()
- Replace the back cover, pressing firmly on the sides to ensure the cover snaps back into place.


Personalize
Set wallpaper

- From the Home screen, press OK
![]() to open app list.
to open app list. - Navigate
![]() to Settings
to Settings ![]() , and press OK
, and press OK![]() to select.
to select. - Navigate left
![]() or right
or right ![]() to Personalization and press OK
to Personalization and press OK![]() to select.
to select. - Navigate down
![]() to Display and press OK
to Display and press OK![]() to select.
to select. - Press OK
![]() to select Wallpaper, then choose one of the following options:
to select Wallpaper, then choose one of the following options: - Select Camera to take a picture for the Wallpaper you would like to use.
- Select Wallpaper and use Navigation
![]() to scroll through images. When you have one you like, press Right Menu
to scroll through images. When you have one you like, press Right Menu ![]() to save your new home screen wallpaper.
to save your new home screen wallpaper. - Select Gallery to select from images that are stored on your device.
 to open app list.
 to Settings
  , and press OK
 or right
  to Personalization and
  to Display and press OK
 to save your new home screen wallpaper.
Lock and unlock your screen
To create a passcode

- From the Home screen, press OK
![]() to open app list.
to open app list. - Navigate
![]() to Settings
to Settings ![]() and press OK
and press OK![]() to select.
to select. - Navigate left
![]() or right
or right ![]() to Privacy & Security and press OK
to Privacy & Security and press OK![]() to select.
to select. - Navigate down
![]() to Screen Lock and press OK
to Screen Lock and press OK![]() to select.
to select. - Navigate
![]() to On, and press OK
to On, and press OK![]() to enable lock screen with password.
to enable lock screen with password. - Create a 4 digit passcode using the dial pad, and enter this passcode once again to confirm the passcode.
- Press Right Menu
![]() to create.
to create.
 to Settings
  and press OK
 or right
  to Privacy & Security and
  to Screen Lock and press OK
 to create.
To lock the phone screen
Closing the phone will lock the screen.
To unlock the phone screen
Open the phone and enter your password using the dial pad to unlock the screen.
Calls and Voicemail
HD Voice Capable
HD Voice means clearer conversations with reduced background noise when both participants are using HD Voice compatible phones and the call is made over Cricket's LTE network or a compatible network.*
Make a Call

- From the Home screen, enter the phone number then press Call/Answer
![]() to place the call.
to place the call. - If you make a mistake, press the Back/Hang Up
![]() to delete the incorrect digits.
to delete the incorrect digits. - You can also press Call/Answer
![]() to access your Call log. Navigate down
to access your Call log. Navigate down ![]() to scroll and select the desired number. Press OK
to scroll and select the desired number. Press OK ![]() to place the call.
to place the call. - During the call, you may press Left Menu
![]() to mute, Right Menu
to mute, Right Menu![]() to open options, or OK
to open options, or OK![]() to enable speaker.
to enable speaker. - To end the call, press Back/Hang Up
![]() .
.
 to place the call.
 to delete the incorrect digits.
 to scroll and select the desired number. Press OK
  to place the call.
 to mute, Right Menu
 to open options, or OK
Check voicemail
Press and hold ![]() to call and listen to your voicemail.
to call and listen to your voicemail.
* To experience Cricket HD Voice, both callers must have a compatible HD Voice capable device and make the call over Cricket's LTE Network or a compatible network. Cricket's LTE coverage is not equivalent to its overall network coverage. HD Voice calls made on a compatible device and on the LTE network may not experience an HD Voice connection at times of network congestion. Other carriers' networks may interoperate with Cricket's LTE network to support an HD Voice call.
Text and picture messaging
Send a Text Message

- From the Home screen, press OK
![]() to open app list.
to open app list. - Navigate
![]() to Messages
to Messages ![]() and press OK
and press OK![]() to select.
to select. - Press Left Menu
![]() to create a new message.
to create a new message. - Enter the phone number of the recipient in the To: bar, or press Right Menu
![]() to Add a Contact.
to Add a Contact. - Navigate down
![]() to access SMS bar to type in the message.
to access SMS bar to type in the message. - Press Left Menu
![]() to send text message.
to send text message.
 to Messages
  and press OK
 to create a new message.
 to Add a Contact.
 to access SMS bar to type in the message.
 to send text message.
Send a Multimedia Message

- Repeat steps 1-4 above.
- Press Right Menu
![]() to access Options.
to access Options. - Press OK
![]() to select Add Attachment.
to select Add Attachment. - Select Gallery to choose a picture, or Camera to take a picture to attach.
- Once your image is attached, press Left Menu
![]() to send.
to send.
Camera and video
Take a Picture

- From the Home screen, press OK
![]() to open app list.
to open app list. - Navigate
![]() to Camera
to Camera ![]() and press OK
and press OK ![]() to select.
to select. - Press OK
![]() to take a photo.
to take a photo.
 to open app list.
 to Camera
  and press OK
 Record a Video

- With the Camera
![]() open, Navigate left
open, Navigate left![]() or right
or right ![]() to select Video
to select Video ![]() mode.
mode. - Press OK
![]() to start/stop recording.
to start/stop recording.
 or right
  to select Video
  mode.
mode.Access Pictures or Videos

Pictures are saved in the Gallery  app.
app.
- From the Home screen, press OK
![]() to access the app list.
to access the app list. - Navigate
![]() to Gallery
to Gallery ![]() , and press OK
, and press OK ![]() to select.
to select. - Select a picture and press Right Menu
![]() to access options such as Delete, Edit, and Share.
to access options such as Delete, Edit, and Share.
 to Gallery
  to access options such as Delete, Edit, and Share.
Videos are saved in the Video app.
- From the Home screen, press OK
![]() to access the app list.
to access the app list. - Navigate
![]() to Video
to Video ![]() app and press OK
app and press OK ![]() to select.
to select. - Select a video and press Right Menu
![]() to access options such as Share, Delete, and File Info.
to access options such as Share, Delete, and File Info.
 to Video
  app and press OK
  to access options such as Share, Delete, and File Info.
Email setup (Hotmail™, Gmail™, Yahoo!®, etc.)

- From the Home screen, press OK
![]() to open app list.
to open app list. - Navigate
![]() to Email
to Email ![]() and press OK
and press OK ![]() to select.
to select. - Press Right Menu
![]() to select Next and set up your email account.
to select Next and set up your email account. - Follow the required steps by entering your name, email address, password, and other fields. Once complete, you will be able to access your email account from this device.
 to Email
  and press OK
  to select Next and set up your email account.
Note: Press ![]() key to enter special characters like the @ symbol.
key to enter special characters like the @ symbol.
Create and send an email message

- Press Left Menu
![]() to compose a new email from the Inbox screen.
to compose a new email from the Inbox screen. - Enter recipient(s) email address(es) in the To field, press OK
![]() to confirm and add new recipient(s).
to confirm and add new recipient(s). - Type the subject and the content of the message.
- If necessary, press Right Menu
![]() to add Cc/Bcc or add attachment to the message.
to add Cc/Bcc or add attachment to the message. - If you do not want to send the mail right away, press Right Menu
![]() and select Save as draft to save a copy.
and select Save as draft to save a copy. - Press Left Menu
![]() to send.
to send.
 to compose a new email from the Inbox screen.
 to add Cc/Bcc or add attachment to the message.
Mobile Web
Browse the web

- From the Home screen, press OK
![]() to open app list.
to open app list. - Navigate
![]() to Browser
to Browser ![]() press OK
press OK ![]() to select.
to select. - Press Left Menu
![]() to select Search, then use the keypad to enter either search criteria or a website address. Press OK
to select Search, then use the keypad to enter either search criteria or a website address. Press OK![]() to search or load the website.
to search or load the website. - Use Navigation
![]() to scroll around the webpage, and use OK
to scroll around the webpage, and use OK ![]() to select links when browsing.
to select links when browsing. - Press Back/Hang Up
![]() to return to the previous page.
to return to the previous page.
 to Browser
  press OK
  to select Search, then use the
  to return to the previous
 Connectivity
Connect your Bluetooth device
- From the Home screen, press OK
![]() to open app list.
to open app list. - Navigate
![]() to Settings
to Settings ![]() and press OK
and press OK ![]() to select.
to select. - Navigate left
![]() or right
or right![]() to Network & Connectivity.
to Network & Connectivity. - Navigate down
![]() to Bluetooth and press OK
to Bluetooth and press OK![]() to select.
to select. - Navigate
![]() to On, and press OK
to On, and press OK ![]() to enable Bluetooth.
to enable Bluetooth. - Navigate down
![]() to Nearby Devices and press OK
to Nearby Devices and press OK ![]() to start searching for devices to pair.
to start searching for devices to pair. - Once your desired Bluetooth device shows in the list, Navigate
![]() to the device and press OK
to the device and press OK ![]() to select. If asked, confirm passkey to complete pairing.
to select. If asked, confirm passkey to complete pairing. - Once your device is paired, it will show up in Paired Devices list in the Bluetooth menu.
 to Settings
  and press OK
  or right
 to Network & Connectivity.
 to Bluetooth and press OK
Connect to a Wi-Fi network
- Follow steps 1-3 above.
- Navigate down
![]() to Wi-Fi and press OK
to Wi-Fi and press OK ![]() to select.
to select. - Navigate
![]() to On, and press OK
to On, and press OK![]() to enable Wi-Fi.
to enable Wi-Fi. - Navigate
![]() to Available Networks and press OK
to Available Networks and press OK ![]() to see available Wi-Fi networks.
to see available Wi-Fi networks. - Navigate
![]() to the desired Wi-Fi connection and press OK
to the desired Wi-Fi connection and press OK![]() to select.
to select. - Navigate
![]() to Password and use keypad to enter Wi-Fi password.
to Password and use keypad to enter Wi-Fi password. - Press Right Menu
![]() to Connect.
to Connect.
 to Wi-Fi and press OK
  to Connect.
Useful Tools
Use these tools to keep you organized and entertained.
![]() Clock: Set alarms, use the timer or stopwatch to keep you on track.
Clock: Set alarms, use the timer or stopwatch to keep you on track.
![]() Gallery: View photos and organize your photos.
Gallery: View photos and organize your photos.
![]() Calendar: Keep your schedule in your pocket. Track your events with notes and get schedule reminders.
Calendar: Keep your schedule in your pocket. Track your events with notes and get schedule reminders.
![]() Music: Listen to music loaded on or downloaded to your phone.
Music: Listen to music loaded on or downloaded to your phone.
![]() My Cricket: Sign in to view your account, features.
My Cricket: Sign in to view your account, features.
![]() Calculator: Figure out tips, add up your bills and other calculations.
Calculator: Figure out tips, add up your bills and other calculations.
![]() FM Radio: Listen to your favorite radio stations on the go (Wired headset required).
FM Radio: Listen to your favorite radio stations on the go (Wired headset required).
Google™ and Other Apps
To access any of the following apps from the Home screen, press left on Navigation and press up or down to select the desired app. Press OK ![]() to open the app.
to open the app.
![]() Google Assistant: Allows you to make calls, send messages, open an app or perform other commands all with your voice.
Google Assistant: Allows you to make calls, send messages, open an app or perform other commands all with your voice.
- To open Google Assistant, press and hold OK
![]() for at least three seconds, and speak your voice command out loud. For example, say "Call Katie," and your device will automatically call "Katie" from your Contacts.
for at least three seconds, and speak your voice command out loud. For example, say "Call Katie," and your device will automatically call "Katie" from your Contacts.
![]() Google Maps: Find locations on a map, search for businesses nearby and get directions.
Google Maps: Find locations on a map, search for businesses nearby and get directions.
- Open Google Maps and Navigateto Your location. Press OK
![]() to allow the device to get your location automatically. Get
to allow the device to get your location automatically. Get
 turn by turn directions by selecting Directions, entering your destination, starting location and mode of transportation. YouTube: Enjoy movies, TV shows, and popular video clips.
- Open YouTube and use Navigation
![]() to browse the videos available on the homepage, or to enter search criteria and browse the results.
to browse the videos available on the homepage, or to enter search criteria and browse the results.
![]() KaiStore: Download apps and games to fulfill the needs of daily life, work and entertainment.
KaiStore: Download apps and games to fulfill the needs of daily life, work and entertainment.
- Open KaiStore and use Navigation
![]() to browse the library of available apps. For example, find KaiWeather under the Utilities tab, scroll to the app and press OK
to browse the library of available apps. For example, find KaiWeather under the Utilities tab, scroll to the app and press OK ![]() to download and install.
to download and install.
Once installed, you can locate your new app in the app menu.
More information
On the web
Detailed support information including a full user manual and device specifications are available at www.cricketwireless.com/support/devices
On the phone
- Call Customer Care at 1-855-246-2461 or
- Dial 611 from your cell phone
Accessories
- Battery
- Micro USB charger
- Cricket SIM card
- Quick start guide
- Safety information guide
- Terms of service
For more information about accessories, please visit your local Cricket store or go to www.cricketwireless.com/shop/accessories.
Note: Store and online inventories may vary.
Product meets FCC Radio Frequency Exposure Guidelines--FCC ID 2ACCJN031. This device complies with Part 15 of the FCC Rules. Operation is subject to the following two conditions:
- this device may not cause harmful interference, and
- this device must accept any interference received, including interference that may cause undesired operation.
© 2019 Cricket Wireless LLC. All rights reserved. Cricket and the Cricket logo are registered trademarks under license to Cricket Wireless LLC. Alcatel is a trademark of Nokia used under license by TCL Communication Technology Holdings Limited. SMARTFLIP is a trademark of TCL Communication Technology Holdings Limited. © 2019 TCT Mobile Limited. All rights reserved.


Documents / Resources
References
Download manual
Here you can download full pdf version of manual, it may contain additional safety instructions, warranty information, FCC rules, etc.
Advertisement


Need help?
Do you have a question about the SMARTFLIP and is the answer not in the manual?
Questions and answers