RGBlink Q16pro User Manual
Hide thumbs
Also See for Q16pro:
- User manual (54 pages) ,
- Quick start manual (23 pages) ,
- Quick start manual (29 pages)
Table of Contents
Advertisement
Quick Links
Advertisement
Table of Contents

Related Manuals for RGBlink Q16pro


Summary of Contents for RGBlink Q16pro
- Page 1 Q16pro User Manual Article No: RGB-RD-UM-Q16pro E000 Revision No: V1.0...
-
Page 2: Table Of Contents
4.2 Module Codes ............................22 4.2.1 Input Modules ..........................22 4.2.2 Output Modules ...........................22 Chapter 5 Support ..............................23 5.1 Contact US .............................. 23 Chapter 6 Appendix .............................. 24 6.1 Specification ............................24 6.2 Terms & Definitions ..........................25 6.3 Revision History ............................31 Q16pro User Manual... -
Page 3: Declarations
RGBlink. If the purchaser or a third party carries out modifications or repairs on goods delivered by RGBlink, or if the goods are handled incorrectly, in particular if the systems are commissioned operated incorrectly or if, after the transfer of risks, the goods are subject to influences not agreed upon in the contract, all guarantee claims of the purchaser will be rendered invalid. -
Page 4: Operators Safety Summary
To protect users from electric shock, ensure that the chassis connects to earth via the ground wire provided in the AC power Cord. The AC Socket-outlet should be installed near the equipment and be easily accessible. Q16pro User Manual... - Page 5 Site Preparation The environment in which you install your device should be clean, properly lit, free from static, and have adequate power, ventilation, and space for all components. Q16pro User Manual...
-
Page 6: Chapter 1 Your Product
1 x USB Disk 1 x DB9-RJ11 1 x Anti-static Cable Note: AC Power Cable supplied as standard according to destination market. Upgrading tool package and user manual are stored in the U disk, please keep it. Q16pro User Manual... -
Page 7: Product Overview
H.264/265 for 2K and 4K signals. The standard unit comes with 4 HDMI 1.3 outputs and builds with local front control panel and remote control interfaces with RS 232 and ethernet ports. Q16pro is available to be remote controlled by XPOSE or 3rd party APP / controller by open API. -
Page 8: Rear Panel
4×HDMI-IN, resolutions up to 1920*1080@60, support EDID Output Connectors Standard: 4×HDMI-OUT, resolutions up to 1920*1080@60, support EDID Control Connectors LAN RJ45 / RS232 RJ11 Use for system upgrade and remote control via APP Power Socket 1×IEC power socket Q16pro User Manual... -
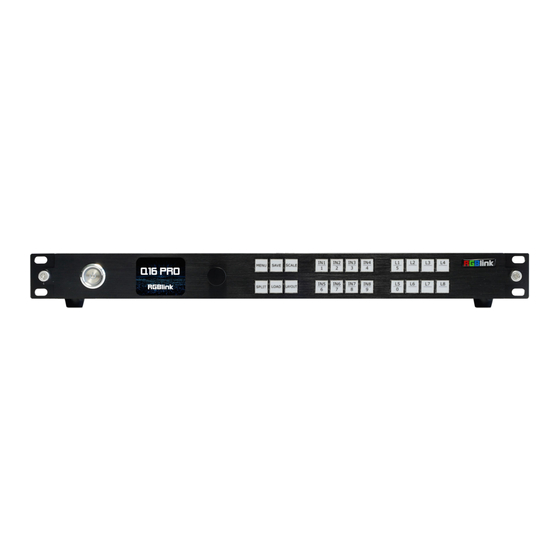
Page 9: Front Panel
1, 2, 3, 4, 6, 7, 8, 9 digital button LCD Panel. Display current status of the product, and for feature selections,provides interactive Sleep Button choices in conjunction with buttons on the front panel. Confirm by pushing, selecting items by rotating Q16pro User Manual... -
Page 10: Dimension
1.2.3 Dimension Following is the dimension of Q16pro for your reference: Dimension: 490mm x 343mm x 55mm Q16pro User Manual... -
Page 11: Chapter 2 Install Your Product
Connect IEC cable to device and plug into wall socket. Turn on power at wall socket. 2.3 Turn on Your Product After the device is boot up, the screen shows as below, meanwhile the screen will show its input and output state and IP address. Q16pro User Manual... -
Page 12: Chapter 3 Use Your Product
Push the knob to confirm the operation. The symbol* means the selected item is under editing state, ready to be set or checked. 3.2 Menu Structure The MENU structure includes Presentation, Split, Advanced, System and Scene Manage, shown in the figure below. Q16pro User Manual... -
Page 13: Use The Menu
Standard: Push the knob for output resolution selection. The symbol * in front of the resolution indicates that this item can be edited. Then rotate the knob to choose standard resolution. Output Resolution -> 1920×1080@60 Changing resolution of a different size will clean up the saved scene!!! Q16pro User Manual... - Page 14 Image Layout:Select the image layout for presentation mode. There are 15 layout patterns built-in as follows: Image Select:L1-L8 Layer optional. Source:Input signal selection. Width, Height, H Pos, V Pos: Set size and position for image. Crop: To edit width, height, H Pos, V Pos for different layers. Reset: Cancel above settings. Q16pro User Manual...
-
Page 15: Split
Split Mode Split Layout >> 4K Input Mode >> Reset Split Layout There are 6 background split mode available and each basic split mode comes with useful multi-picture layout. Split Mode Background Multi-Picture Layout Cross H 1/2 Q16pro User Manual... - Page 16 4K Input Mode Input Source 1 Input Source 2 Save Setting Input Source 1:Select one from HDMI 2.0,DP 1.2 in 4K×2K Input Source 2:Select two from HDMI 2.0,DP 1.2 in 4K×1K Save Setting to confirm. Reset Cancel above settings. Q16pro User Manual...
-
Page 17: Advanced
After successful setting, the interface will pop up a reminder “ Copy EDID Success. Please reset layer. ” Input Adjustment Image Quality >> Scale >> Crop >> Image Quality: Input Signal 1-4: Adjust brightness, contrast and color saturation, sharpness and temperature of each input source port. Q16pro User Manual... - Page 18 3 HDMI 2.0 Width Height H Pos V Pos Save Reset Crop Crop: adjust each input source by crop. Input Signal 8 DVI Width Height H Pos V Pos Save Reset Output Adjustment Output Type >> Output Exchange >> Q16pro User Manual...
-
Page 19: System
>> Save Reset Device Encryption Q16pro supports device encryption. The password defaults to 20090721. Users can use numeric keys to enter password. Users should firstly key in default password to enter the following interface. License Status Trial Period to >>... -
Page 20: Scene Management
Save To ->SCENE 5 Button on is ready to recall Button flashes means current scene Load From Load saved scene from SCENE 1-16. Load From ->SCENE 5 Button on is ready to recall Button flashes means current scene Q16pro User Manual... -
Page 21: Button
PIP or less PIP than 4, users can push the unlighted Layer button to open up more PIP. L1 and L5 can also be used as 5, 0 digital button respectively. 3.5 XPOSE 2.0 Physically Connect Device to Computer Q16pro User Manual... - Page 22 XPOSE 2.0 Operation Download XPOSE 2.0 software from RGBlink website. https://www.rgblink.com/xpose_software.aspx Please refer to user manual of XPOSE 2.0 for how to install and operate XPOSE 2.0 https://www.rgblink.com/resource_type.aspx?pro_id=67...
-
Page 23: Chapter 4 Order Codes
Chapter 4 Order Codes 4.1 Product Codes 712-0004-04-0 Q16pro 1U (Standard) 712-0004-04-0 Q16pro 1U (With Communication Module ONLY) 4.2 Module Codes 4.2.1 Input Modules 790-1004-01-0 Quad HDMI 1.3 Input Module 790-1004-02-0 HDMI 2.0 &DP 1.2 4K@60 Input Module 790-1004-04-0 Quad 3G SDI Input Module (to be published) 4.2.2 Output Modules... -
Page 24: Chapter 5 Support
Chapter 5 Support 5.1 Contact US Q16pro User Manual... -
Page 25: Chapter 6 Appendix
Dual DP 1.2 Output Module Connector Appearance Numbers of Output Connector Type 2×DisplayPort Supported Standard DP 1.2 Output Resolution 800×600@60~3840×2160@60 Quad HDMI 1.3 Output Module Connector Appearance Numbers of Output Connector Type 4×HDMI-A Supported Standard HDMI 1.3 Output Resolution 800×600@60~2048×1150@60 Q16pro User Manual... -
Page 26: Terms & Definitions
●HD-SDI: high-definition serial digital interface (HD-SDI), is standardized in SMPTE 292M this provides a nominal data rate of 1.485 Gbit/s. ● 3G-SDI: standardized in SMPTE 424M, consists of a single 2.970 Gbit/s serial link that allows replacing dual Q16pro User Manual... - Page 27 ● DP 1.2: introduced on 7 January 2010, effective bandwidth to 17.28 Gbit/s support increased resolutions, higher refresh rates, and greater color depth, maximum resolution 3840 × 2160@60Hz ● DP 1.4: publish on 1 Mar, 2016.overall transmission bandwidth 32.4 Gbit/s ,DisplayPort 1.4 adds support for Q16pro User Manual...
- Page 28 ● USB 1.1: Full–Bandwidth USB, specification was the first release to be widely adopted by the consumer market. This specification allowed for a maximum bandwidth of 12Mbps. ●USB 2.0:or Hi–Speed USB, specification made many improvements over USB 1.1. The main improvement was an increase in bandwidth to a maximum of 480Mbps. Q16pro User Manual...
- Page 29 ●SDVoE: Software Defined Video over Ethernet (SDVoE) is a method for transmission, distribution and management AV signals using a TCP/IP Ethernet infrastructure for transport with low latency. SDVoE is commonly used in integration applications. Q16pro User Manual...
- Page 30 Built on the DMX512 data format, ArtNet enables multiple “universes” of DMX512 to be transmitted using ethernet networks for transport. ●MIDI: MIDI is the abbreviation of Musical Instrument Digital Interface. As the name indicates the protocol Q16pro User Manual...
- Page 31 On computer monitors the most commonly used colour bars are two rows of reversed colour bars ●Seamless Switching: A feature found on many video switchers. This feature causes the switcher to wait until Q16pro User Manual...
-
Page 32: Revision History
2022-12-16 0000# All information herein is Xiamen RGBlink Science & Technology Co Ltd. excepting noted. is a registered trademark of Xiamen RGBlink Science & Technology Co Ltd. While all efforts are made for accuracy at time of printing, we reserve the right to alter otherwise make change without notice.
Need help?
Do you have a question about the Q16pro and is the answer not in the manual?
Questions and answers