Medela The Symphony Technical Manual
Hide thumbs
Also See for The Symphony:
- Quick start manual ,
- Instructions for use manual (292 pages) ,
- Instructions for use – hospital use (244 pages)
Table of Contents
Advertisement
Advertisement
Table of Contents

Related Manuals for Medela The Symphony


Summary of Contents for Medela The Symphony
- Page 1 The Symphony ® Breastpump Maintenance & Technical Guide...
-
Page 2: Table Of Contents
Table of Contents Save These Instructions .................1 Symphony Technical Description ..............2 ® Symphony Breastpump Controls & Parts ............3 ® Symphony Diagram ........................3 Symphony Kit Diagram ......................3 Visual & Functionality Checklist ..............4 Vacuum Check ....................5 Recommendations for Replacement ............6 How to Check Pump Total Running Hours ...........7 Error Codes .................... -
Page 3: Save These Instructions
Refer to the and mobility are concerned. The operating separate accessory kit user’s instructions principle of the Medela Symphony is for further details. to simulate the natural, physiological conditions encountered in breastfeeding. -
Page 4: Symphony Technical Description
Warranty: 3-years for the unit from the date of delivery, excluding pump set and batteries. The manufacturer is not liable for any damage or consequential damage caused by incorrect operation, inappropriate usage or use by unauthorized persons. Routine checks, servicing and battery exchange may only be carried out by Medela authorized personnel. -
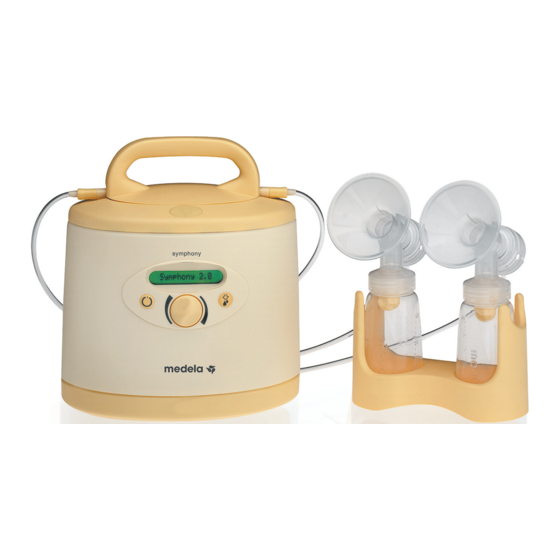
Page 5: Symphony Breastpump Controls & Parts
Symphony Breastpump Controls & Parts ® Symphony Diagram Symphony Kit Diagram Kit shown is Symphony Double Pumping Kit (67099S) 1. PersonalFit ™ Breastshield, Standard (24mm) ..... 87073 2. PersonalFit Breastshield Connector ......87071 3. Valve & Membrane ............87089 4. Collection Connector ........... 8117009 5. -
Page 6: Visual & Functionality Checklist
Symphony Breastpump. A visual and functional check of the Symphony breastpump should be performed for optimal performance on a periodic basis. If maintenance or repairs are needed, this guide will walk you through the steps. -
Page 7: Vacuum Check
Vacuum Check Performing a vacuum check on your pump ensures your Symphony is operating correctly ® for breastpumping mothers. Follow the instructions in the Proper Use of Vacuum Gauge Technical Bulletin on pages 24-25 for detailed instructions. The following values will guide you through gauging your Symphony vacuum levels: The following values should read: Stimulation... -
Page 8: Recommendations For Replacement
The ® more preventative maintenance that is conducted on the Symphony, the less parts will have to be replaced. The following are recommended guidelines for when certain parts should be replaced. -
Page 9: How To Check Pump Total Running Hours
How to Check Pump Total Running Hours Checking Pump Total Running Hours 1. Turn the pump on. 2. Go to service menu by pushing the “On” button again while turning the vacuum control knob. 3. Turn the vacuum control knob until you get “Htot” (hours total). -
Page 10: Error Codes
Breastpump will communicate that the unit has ® an issue. If the Symphony is experiencing an issue, an error code will be displayed on the LCD screen (see fig. 1). Previous problems are recorded in the Menu function under “Err:”. -
Page 11: Battery Care & Maintenance
2. Replace program card. Reboot pump with new card. See reboot instructions. (refer to Technical Bulletin No. 109A to replace program card) 3. Return pump to Medela, Inc. for repair if this does not solve the issue. 1. If program card is missing: a. - Page 12 The battery should be re-charged using the above instructions. Charging Battery 4. Check battery connections by 1. The Symphony Plus should removing battery caps and be charged: inspecting wires. • upon receipt of pump (for approximately 12 hours).
- Page 13 Battery Care & Maintenance Battery Check (if battery model) 1. Charge pump for 12 hours. *NOTE: Display switches from charging to Symphony 2.0 when battery reaches 80% charge. It takes the full 12 hours to get 100% charge. 2. Turn the pump on. 3.
-
Page 14: Inspect & Replace Diaphragms
Inspect & Replace Diaphragms Replace Symphony diaphragms need to be ® inspected periodically to ensure proper Remove diaphragm screws with suction levels. If you experience issues flathead screwdriver. replacing the diaphragms, please contact Customer Service at 800.435.8316. 4-5. Gently pry and remove each diaphragm with flathead screwdriver. - Page 15 Battery Care & Maintenance DAMAGED UNDAMAGED DO NOT SPRAY PUMP WHILE DIAPHRAGMS ARE REMOVED If you experience other issues regarding suction reference Technical Bulletin 103A. Warning • Stop when screws stop turning. • Do not over tighten or internal sensor may get damaged. If the above steps do not correct the issue, please contact Customer Service at 800.435.8316.
-
Page 16: Low Or No Suction
Low or No Suction Directions In the event that your Symphony breast- ® pump is producing low or no suction this 1. Inspect Symphony Membranes. If technical bulletin will guide you through membranes do not appear to have a rip the steps to troubleshoot your issue. - Page 17 Battery Care & Maintenance If the above steps do not correct the issue, please contact Customer Service at 800.435.8316.
-
Page 18: Trolley Repair
Trolley Repair In the event that your Symphony trolley Tighten rod by using 13mm socket ® becomes loose, this technical bulletin will wrench while holding nut, which is guide you through methods to resolve this located on bottom of trolley with issue. - Page 19 Battery Care & Maintenance Bottom of Trolley If the above steps do not correct the issue, please contact Customer Service at 800.435.8316.
-
Page 20: No Power
Service at 800.435.8316. 8-9. Replace with new fuse. (Item #9310035) Tools Required 10. Insert fuse holder (black round cap) back into the bottom of the Symphony. Fuse - Item #9310035 Flathead Screwdriver (small Directions 1. Inspect power cord and replace if damaged.
Need help?
Do you have a question about the The Symphony and is the answer not in the manual?
Questions and answers