Table of Contents
Advertisement
Quick Links
Advertisement
Chapters
Table of Contents

Related Manuals for Wittenborg FB 7100


Summary of Contents for Wittenborg FB 7100
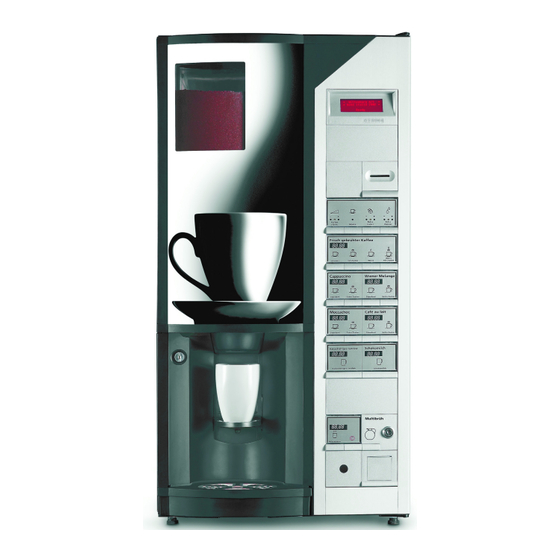
- Page 1 Drink Vending Machine FB 7100 Service Manual 75521400 January, 2005...
- Page 2 Wittenborg cannot take over any liability for errors and faults in manuals, brochures and other printed matter, Wittenborg reserve the right to change their products without prior notice.
- Page 3 Brewing System Dosing system Product Delivery Cooling System (Not available) Housing / Cabinet Power Supply Unit and Control External options (Not available) Payment Systems Preventive Maintenance Service Procedures Technical Information Modification Instructions Spare Parts List © 2005 Wittenborg A/S, Odense, Denmark...
- Page 4 © 2005 Wittenborg A/S, Odense, Denmark...
-
Page 5: Table Of Contents
Service Manual FB 7100 Preface and safety instructions Table of contents Preface and safety instructions Preface / How to use this manual General 1.1.1 Structure of the manual 1.1.2 Definition of options and accessories 1.1.3 Safety instructions Various safety instructions 1.2.1... - Page 6 Service Manual FB 7100 Preface and safety instructions 1 - 2 January, 2005...
-
Page 7: Preface And Safety Instructions
Service Manual FB 7100 Preface and safety instructions 1 Preface and safety instructions 1.1 Preface / how to use this manual 1.1.1 General Introduction This service manual is intended for trained service technicians, who have gone through the product training courses of this machine. - Page 8 Service Manual FB 7100 Preface and safety instructions Example The Brewing system serves as an example and it can be found under: Chapter 5 Functions Section B Brewing system Subsection 1 Adjustments - This subsection describes all possible adjustments for this section, regarding timing, calibration, etc.
-
Page 9: Definition Of Options And Accessories
Service Manual FB 7100 Preface and safety instructions 1.1.3 Definitions of options and accessories Definition Options and accessories are also described in this manual. They are de- fined as follows: Definition Description Options Various options result in different versions, types or models. -
Page 10: Safety Instructions
Service Manual FB 7100 Preface and safety instructions 1.2 Safety instructions Introduction This subsection is intended as an overview of the instructions and warnings used in this manual, and which you must observe. The following general safety precautions apply to the operation and main- tenance of the machine and must always be observed. -
Page 11: Various Safety Instructions
Service Manual FB 7100 Preface and safety instructions 1.2.1 Various safety instructions Introduction Below is listed the instructions divided into the hazard intensity levels Danger • Warning • Caution • Never insert the power supply plug of the machine in a wet or damp Danger •... - Page 12 Service Manual FB 7100 Preface and safety instructions the yellow service key into the door switch. Before starting any maintenance or repair of energized or moving parts, the machine must always be disconnected at the mains plug. When the yellow service key is inserted in the slot of the door key, the •...
- Page 13 Service Manual FB 7100 Installation Table of contents Installation Transport / Handling Dimensions and general transport instructions 2.1.1 Transport and storage conditions 2.1.2 Installation requirements Prerequisites to water supply 2.2.1 Prerequisites to electricity supply 2.2.2 Physical dimensions of required space 2.2.3...
-
Page 14: Installation
Service Manual FB 7100 Installation 2 - 2 January, 2005... -
Page 15: Transport / Handling
Service Manual FB 7100 2 Installation 2.1 Transport / Handling 2.1.1 Dimensions and general transport instructions The following table states the dimensions of the machine Dimensions Topic Measurement Height 870 mm Width 450 mm Depth 378 mm (cabinet), 475 mm (cabinet+door) Approx. - Page 16 Service Manual FB 7100 Step Action Drain the boiler completely. Danger of being scalded by hot water. Ensure that the water system is drained completely when machine is to be stored for a longer period of time or in a room with temperatures below 0°C.
-
Page 17: Installation Requirements
Service Manual FB 7100 2.2 Installation requirements 2.2.1 Prerequisites to water supply Water supply line with stop valve and non return valve. Customer’s site • Connection to cold water line only with suitable supply lines. • Supply system requirements: •... - Page 18 Service Manual FB 7100 55 mm 210 mm 2 - 6 January, 2005...
-
Page 19: Physical Dimensions Of Required Space
Service Manual FB 7100 2.2.3 Physical dimensions of required space Diagram 120 mm 450 mm January, 2005 2 - 7... -
Page 20: Unpacking
Service Manual FB 7100 2.3 Unpacking 2.3.1 How to unpack the machine Do not use any sharp utensils in order to avoid scratches on the machine. Note Follow these steps to unpack the machine: Unpacking Step Action Ensure that the machine has not been damaged during transportation. -
Page 21: List Of Items, Delivered With The Vending Machine
Service Manual FB 7100 The rear wall of the machine is provided with holes to allow wall securing Wall securing brackets to be fitted to the machine. The wall securing brackets have to be brackets ordered separately. 2.3.2 List of all items, delivered with the vending machine... - Page 22 Service Manual FB 7100 2.4 Installation requirements and safety notes Before starting the installation: Prerequisite for installation Check for adequate space for correct ventilation. • A distance of 120 mm is required from the rear side of the machine to the wall.
-
Page 23: Installing The Vending Machine
Service Manual FB 7100 2.5 Installing the vending machine The installation instructions can be divided into the below topics: Introduction Connecting machine to mains and putting into operation • Attaching loose parts • Adjusting manual price indication • Adjusting electronic price indication •... -
Page 24: Checklist Of Customer Instructions
Service Manual FB 7100 2.6 Checklist of customer instructions 2 - 12 January, 2005... -
Page 25: Technical Specifications (Total Overview)
Service Manual FB 7100 2.7 Technical specifications (total overview) Table of dimensions of machine with or without packing: Dimensions and Weight Description Dimensions with Dimensions without packing packing Height) 1010 mm 870 mm Width 670 mm 450 mm Depth 575 mm... - Page 26 Service Manual FB 7100 Phases Single phase+neutral+earth (IEC-standard) Brown: Phase Blue: Neutral Yellow/green: Earth The machine must be connected to an earthed electric circuit which is secured by an extra fuse. The connection to a supply with an integrated fault current safety switch is recommended.
- Page 27 Service Manual FB 7100 Capacities Waste containers: Coffee waste bucket: 6.7 l Drip tray: 0.6 l Freshbrew ingredient canisters: - Standard freshbrew product canister 5.5 l / approximately 2 kg ground coffee Portions per filling: at 7 g.: 285 cups...
- Page 28 Service Manual FB 7100 The machine is marked with the CE label and conforms to the legislative Directives directions of the directives - 89/336/EEC- Electro magnetic Compatibility - 73/23/EEC - Low voltage and further amendments and intergrations. IMQ. Approvals Max. 45dB(A) at a distance of one meter in stand by Noise level Standard 1 point lock.
- Page 29 Service Manual FB 7100 Event recording and troubleshooting Table of contents Event recording and troubleshooting Events indicated in the display Event messages in connection with Diagnostic/Test 3.1.1 Event messages in event book and credit display 3.1.2 Troubleshooting - events not indicated in display...
- Page 30 Service Manual FB 7100 Event recording and troubleshooting 3 - 2 January, 2005...
- Page 31 Service Manual FB 7100 Event recording and troubleshooting 3 Event recording and troubleshooting 3.1 Events indicated in the display Introduction This section lists in alphabetical order events indicated in the display, explanations to these events and corrective action in cases where this is necessary.
- Page 32 Service Manual FB 7100 Event recording and troubleshooting 3.1.1 Event messages in connection with Diagnostic/Test Diagnostic/Test Event messages that may appear during the testing of any of the machine’s messages functions are explained in chapter 4 Programming, section 4.3.11 Diagnostic/Test menu, page 4-79 as these messages are closely connected to the testing procedures.
- Page 33 Service Manual FB 7100 Event recording and troubleshooting Factory info xxx This message indicates an internal application error which may or may not (log book only) cause the machine to stop operating. Possible cause Remedy System error Note! Report error to manufacturer together with error no.
- Page 34 Service Manual FB 7100 Event recording and troubleshooting FB Ing motor t.out This message indicates that the brewer ingredient motor is not running (log book only) correctly. The message “Out of service” appears in credit display. Possible cause Remedy Calibration error Check calibration of ingredients.
- Page 35 Service Manual FB 7100 Event recording and troubleshooting FB unexpected This message indicates an unexpected motion of the brewer motor or tacho ingredient motor. The message “Out of service” appears in the credit (log book only) display. Possible cause Remedy Defective FB print Check print, replace if necessary.
- Page 36 Service Manual FB 7100 Event recording and troubleshooting Possible cause Remedy Defective harness for coin mechanism Check cable, replace if necessary. See chap. 5P, page 5P-3 Defective SPC Check, replace if necessary. See chap. 5K, page 5K-13 Out of service...
- Page 37 Service Manual FB 7100 Event recording and troubleshooting VMC short circuit This message indicates a short circuit causing the machine to stop (log book only) operating. The message “Out of service” appears in the credit display. Possible cause Remedy Short circuit in Harness.
- Page 38 Service Manual FB 7100 Event recording and troubleshooting Possible cause Remedy Foreign body blocking pump Disassemble water system, remove foreign body. See chap. 5A, page 5A-6 Water tank This message indicates that the water temperature has reached boiling overboil point, causing the machine to stop operating.
- Page 39 Service Manual FB 7100 Event recording and troubleshooting 3.2 Errors not shown in display Introduction This section describes errors that are not indicated in the credit display and Event log book, and suggestions for remedy. Machine is out of function...
- Page 40 Service Manual FB 7100 Event recording and troubleshooting Possible cause Remedy Short-circuit on print board Using a voltmeter, measure voltage across inlet valve terminal. • A constant voltage (of 24 V DC) indicates a controller fault. • Change the VMC.
- Page 41 Service Manual FB 7100 Event recording and troubleshooting Possible cause Remedy Canister dislocated Relocate canister. Blocked up mixing funnels Check, and clean if necessary. Quantity of drink is inadequate Possible cause Remedy Ingredient residue blocking funnel/ Clean/replace blocked component(s). whipper housing/delivery tube Dispensing hose has a kink Check hoses.
- Page 42 Service Manual FB 7100 Event recording and troubleshooting Leak in mixing system Possible cause Remedy Funnel/Whipper housing not correctly Reinstall and reconnect components. connected Seal for whipper housing leaking or not Replace seal. installed Machine does not block when bucket...
- Page 43 Service Manual FB 7100 Programming Table of contents Programming Menu navigation Navigation buttons and display 4.1.1 Button functions 4.1.2 Short cuts 4.2.3 Operator menu Purpose of the Operator menu 4.2.1 How to access the Operator menu 4.2.2 Sub menus of the Operator menu 4.2.3...
- Page 44 Service Manual FB 7100 Programming 4 - 2 January, 2005...
-
Page 45: Programming
Service Manual FB 7100 Programming 4 Programming Software version This chapter describes the FB 7100 menu system, software release 6.0. 4.1 Menu navigation Introduction In this section the menu system and the way to find your way through it is introduced. -
Page 46: Button Functions
Service Manual FB 7100 Programming 4.1.2 Button functions Introduction The two tables below show the functions of the navigation buttons. The functions vary according to which part of the menu system you are in and which options are at hand. - Page 47 Service Manual FB 7100 Programming Table 2 This table describes how the buttons are used to enter or change numbers, e.g., price or quantity settings. Display Button Function ‘Minus’ button. The button is used to Price: [Drink] *Set price: xx.xx...
-
Page 48: Short Cuts
Service Manual FB 7100 Programming Step Action Display Press ‘OK’ to save the new price in the system Coffee white *Cappuccino Café latte 4.1.3 Short cuts Introduction Some functions of the menu system can be reached quickly through short cuts. -
Page 49: Operator Menu
Service Manual FB 7100 Programming 4.2 Operator menu 4.2.1 Purpose of the Operator menu Purpose The Operator menu is intended for persons with a daily responsibility for the running and maintenance of the machine e.g., cleaning, setting up prices, managing sales turnover and performing light adjustments to ensure a faultless operation. -
Page 50: Sub Menus Of The Operator Menu
Service Manual FB 7100 Programming 4.2.3 Sub menus of the Operator menu Presentation This table gives a short presentation of the main contents of the Operator menu. The Operator menu can be accessed by all users. Menu Purpose Filling / Clean Assists in filling or rinsing the machine. -
Page 51: Operator Menu Flow
Service Manual FB 7100 Programming 4.2.4 Operator menu flow This diagram displays the full flow of the Operator menu. Operator Filling/Clean Rinse Rinse Total Machine Rinse With Stop FB1 Counters Sales Audit Total number, nres Total turnover,nres Total number, res Total turnover,res No. - Page 52 Service Manual FB 7100 Programming Step prices audit SP. turnover ,nres SP. turnover ,res Test Audit Test no. ,nres Test no. ,res No. per group, nres No. per group, res Reset Counters Reset sales audit Reset cash audit Reset Test audit...
- Page 53 Service Manual FB 7100 Programming Set counters on/off Selfcheck setting Test Complete selections January, 2005 4- 11...
- Page 67 Service Manual FB 7100 Programming 4.2.5 Filling / Clean Introduction The Filling / Clean options assist in filling the ingredient canisters and in rinsing the machine. Options The Filling / Clean menu includes the following option: • Rinse, see 4.2.5.1.
- Page 68 Service Manual FB 7100 Programming 4.2.6 Counters menu Introduction The Counters menu stores detailed information regarding the number of drinks dispensed and the turnover. Furthermore, the Counters menu enables resetting of the individual counters and printing of reports. Options The Counters menu includes the following options: •...
- Page 69 Service Manual FB 7100 Programming Sub menu Description No. p. group, nres Shows the number of drinks sold per group since the machine was put into operation. (Non resettable counter) No. p. group, res Shows the number of drinks sold per group since the last Sales audit resetting.
- Page 70 Service Manual FB 7100 Programming 4.2.6.3 Cashless audit The Cashless audit option is described in this table. Cash audit * Cashless audit Sub menu Description Free vend audit Revalued amount Shows the total amount which has been inserted in the machine to add value to cards.
- Page 71 Service Manual FB 7100 Programming 4.2.6.5 MB discount audit The MB (multibrew) discount audit option makes it possible to view the number of drinks dispensed as multibrew and the total discount amount Free vend audit given on multibrew vends. * MB discount audit...
- Page 72 Service Manual FB 7100 Programming 4.2.6.7 Step prices audit The Step prices audit options show the amounts that have been added to and deducted from the standard drink prices due to pre-selections. Discount key audit * Step prices audit Test audit...
- Page 73 Service Manual FB 7100 Programming 4.2.6.9 Reset counters The options of the Reset counters menu are described in this table. Test audit * Reset counters Sub menu Description Printing Reset sales audit Resets the counters from the Sales audit, Cashless audit, Cup audit, Free vend audit, MB discount audit, Discount key audit and Step price audit menus.
- Page 74 Service Manual FB 7100 Programming Sub menu Description Free vend Prints a report on the number of free drinks dispensed. Discounts Prints a report on the total number of drinks sold at a discount and the total discount amount granted.
- Page 75 Service Manual FB 7100 Programming 4.2.7 Cash action menu Introduction The Cash action menu is used to set handling of coins: Options The Cash action menu includes the following options: • Cash collected, see 4.2.7.1 • Dispense coins, see 4.2.7.2 •...
- Page 76 Service Manual FB 7100 Programming 4.2.7.3 Manual filling The Manual filling option is described in this table. Dispense coins Note: The option is applicable only if the vending machine is equipped * Manual filling with a BDV or an MDB/ICP coin mechanism.
- Page 77 Service Manual FB 7100 Programming 4.2.8 Basic operations menu Introduction The Basic operations menu is used for price settings. Options The Basic operations menu includes the following options: • Change prices, see 4.2.8.1 • Change quantities, see 4.2.8.2 • Drink On/Off, see 4.2.8.3 •...
- Page 78 Service Manual FB 7100 Programming Sub menu Description Step prices A step price will be added to or subtracted from the standard price every time a customer presses a pre- selection button one or more times to increase or decrease the default setting of strength, amount of whitener or sugar, etc.
- Page 79 Service Manual FB 7100 Programming 4.2.8.2 Change quantities The function of the Change quantities menu is described in this table. Change prices * Change quantities Sub menu Description Drink On/Off Change quantities Quantities of water and ingredient powder for each drink available can be adjusted in this menu.
- Page 80 Service Manual FB 7100 Programming 4.2.9 Service information menu Introduction Detailed information about operation errors and events is registered in the Service information menu. Furthermore, information about the machine’s software program versions is found in this menu. Options The Service information menu includes the following options: •...
- Page 81 Service Manual FB 7100 Programming 4.2.9.2 Reset log book The function of the Reset log book menu is described in this table. SERVICE INFORMATION * Reset log book Sub menu Description Program versions Reset log book Deletes all errors and events registered in the Event log book.
- Page 82 Service Manual FB 7100 Programming 4.2.10 Machine settings menu Introduction The Machine settings menu allows for setting the machine according to individual preferences. Options The Machine settings menu includes the following options: • Set free vend, global, see 4.2.10.1 • Set beep mode, see 4.2.10.2 •...
- Page 83 Service Manual FB 7100 Programming Sub menu Description Clock on display By selecting ‘On’, you set the display to show the time (hour and minute) when the machine is in vend mode. To set the time, see 4.2.10.5, Set date and time, on page 4-41.
- Page 84 Service Manual FB 7100 Programming 4.2.10.7 Machine info The Machine info option is described in this table. Set key discount * Machine info Sub menu Description Energy saving Machine code A machine code can be entered to give the machine a unique number for identification when retrieving data electronically.
- Page 85 Service Manual FB 7100 Programming Sub menu Description Set day(s) Up to seven automatic rinse periods can be set in the machine. In this menu days are defined: The setting of day(s) is carried out in two steps: 1. Select a period (1-7).
- Page 86 Service Manual FB 7100 Programming Example The vending machine is to run Monday to Friday from 07:00 till 22:00. The remaining time of the week and during the weekend the machine is set to energy saving. Three periods have to be set as follows:...
- Page 87 Service Manual FB 7100 Programming 4.2.10.9 Set counters on/off The Set counters on/off option makes it possible to have the display show the number of drinks dispensed (resettable and non resettable counters) Energy saving during initialization of the machine. * Set counters on/off...
- Page 88 Service Manual FB 7100 Programming 4.2.11 Test menu Introduction The Test menu makes it possible to perform various tests of the dispensing system. Options The Test menu includes the following option: • Complete selections, see 4.2.11.1. 4.2.11.1 Complete selections The Complete selections option makes it possible to dispense any of the available drinks for testing.
-
Page 89: Technician Menu
Service Manual FB 7100 Programming 4.3 Technician menu 4.3.1 Purpose of the Technician menu Purpose The Technician menu is intended for trained service technicians who have gone through the product training courses of this vending machine. 4.3.2 How to access the Technician menu Accessing the Follow the steps below to access the Technician menu. - Page 90 Service Manual FB 7100 Programming 1 Close the door. Turn the key counterclockwise to lock the door Returning to vend 2 Press ‘Esc’ once. Wait for a maximum of 30 seconds until the machine mode is back in vend mode.
-
Page 91: Sub Menus Of The Technician Menu
Service Manual FB 7100 Programming 4.3.3 Sub menus of the Technician menu This table gives a short presentation of the main contents of the Technician Presentation menu. Menu Description Adjust system • For calibration of valves and ingredients. • Water temperature settings •... -
Page 92: Technician Menu Flow
Service Manual FB 7100 Programming 4.3.4 Technician menu flow This diagram displays the full flow of the Technician menu. Technician Adjust system Calibration Ingredient Valve Cold water Temperatures Lower cup sensor Cup sensor status Brewer park pos. Pot Sensor On/Off Reset relationship Change Comm. - Page 93 Service Manual FB 7100 Programming Multibrew settings Preset value Min value Max value Means of action MB Discount Change config files Set language file Set recipe file Set menu file Diagnostics/Test Overall functions Wittlink test Full dispense test Test vend...
- Page 106 Service Manual FB 7100 Programming 4.3.5 Adjust system menu Introduction The Adjust system menu makes it possible to calibrate the valves and canisters. Options The Adjust system menu includes the following options: • Calibration, see 4.3.5.1 • Temperatures, see 4.3.5.2 •...
- Page 107 Service Manual FB 7100 Programming 4.3.5.2 Temperatures This table describes the options of the Temperatures menu. Calibration * Temperatures Sub menu Description Lower cup sensor Nominal temp. Setting of maximum water temperature in the boiler. Default settings are: For freshbrew machines: 95 °C.
- Page 108 Service Manual FB 7100 Programming Sub menu Description Cup sensor status Use the Cup sensor option to turn the cup sensor on or off. The option is set to off if the cups used are low and do not reach to the sensors or if cups of a transparent material, e.g.
- Page 109 Service Manual FB 7100 Programming 4.3.6 Reset relationship menu Introduction The Reset relationship menu is used to remove the electronic lock that links the vending machine to a specific portable data carrier. The first time a data carrier is used with the vending machine, the machine is electronically locked to this particular data carrier in order to protect data from being retrieved and reset by other data carriers.
- Page 110 Service Manual FB 7100 Programming 4.3.7 Change comm. route menu Introduction The Change comm. route menu is used to set the mode of data read-out to a pc or a hand held terminal. Data can be retrieved via infra-red connection or via a serial data cable 4.3.7.1 Change comm.
- Page 111 Service Manual FB 7100 Programming 4.3.8 Payment settings menu Introduction The Payment system menu allows for handling of payment, e.g. coin mechanisms and multi vend/single vend. Options The Payment system menu includes the following options: • Single/Multi vend, see 4.3.8.1 •...
- Page 112 Service Manual FB 7100 Programming 4.3.8.2 Set payment type This option is used to define the payment type, ie the type of coin mechanism in the vending machine. Single/Multi vend * Set payment type Set max credit Sub menu Description...
- Page 113 Service Manual FB 7100 Programming 4.3.8.5 Obligation to buy This option is used to set the Obligation to buy option on or off. Set max change * Obligation to buy Sub menu Description Coin inhibit Obligation to buy If this option is set to “On”, the customers have to make at least one vend before the coin mechanism will return the change.
- Page 114 Service Manual FB 7100 Programming 4.3.8.8 Audit unit Ext/Int This option is used to shift between the activation of an internal and an external audit unit. Audit unit install. * Audit unit Ext/Int. Exact change eq. Sub menu Description Audit unit Ext/Int If an external audit unit has been installed, it must be activated through this option.
- Page 115 Service Manual FB 7100 Programming Sub menu Description Exact change offs. The “Exact change offset” option renders the possibility of adding a number of coins to the preprogrammed empty numbers in the coin tubes in order that the customer is requested to insert the exact amount before the coin unit switches to “Coin tubes empty”...
- Page 116 Service Manual FB 7100 Programming 4.3.8.13 Revalue This option is used to activate or deactivate the card revaluation option. Price mode * Revalue Sub menu Description Immediate change Revalue The Revalue option makes it possible to let customers add value to the credit amount on their cards.
- Page 117 Service Manual FB 7100 Programming Sub menu Description Currency code Setting of the currency available in the machine. Options: Note: If the required currency is not available, see manual setting option below. 4.3.8.16 Currency code (man) If the required currency code is not available among one of the preset...
- Page 118 Service Manual FB 7100 Programming 4.3.9 Multibrew settings menu Introduction The Multibrew settings menu is used to set parameters for the multibrew function. This table describes the options of the Multibrew settings menu. MULTIBREW SETTINGS * Preset value Sub menu...
- Page 119 Service Manual FB 7100 Programming Key discount and This table describes how the Key discount function (4.2.10.6) works Multibrew settings together with different settings of the Multibrew function. Multibrew Multibrew Key discount Multibrew Key discount Multibrew Both key discount and multibrew Multibrew activated by multibrew activated by key.
- Page 120 Service Manual FB 7100 Programming 4.3.10 Change config. files menu Introduction The Change config. files menu is used to choose menu language, recipe settings and menu configurations. This table describes the options of the Change config files menu. CHANGE CONFIG. FILES...
- Page 121 Service manual FB 7100 Programming 4.3.11 Diagnostic/Test menu Introduction The Diagnostic/Test menu is used to manually test the functioning of various parts of the vending machine. Options The Diagnostic/Test menu includes the following submenus: • Overall functions, see 4.3.11. • Cup handling, see 4.3.11.2.
- Page 122 Service manual FB 7100 Programming Sub menu Description Full dispense test Note: During this test it is not required that the door is closed. The test will reveal if any of the components of the dispensing system have been incorrectly assembled.
- Page 123 Service manual FB 7100 Programming 4.3.11.2 Cup handling In the submenu Cup handling, sensors related to the dispensing system are tested. Overall functions * Cup handling User interface General error The following message may occur in the submenu of the Cup handling message menu: “No response from SPC.
- Page 124 Service manual FB 7100 Programming Sub menu Description Button/Key test Tests the operating panel buttons and key. To perform the test: • Press the coin return button. The status will change from Off to On until released. • Turn the Multibrew/Discount key. The status will change from Off to On or vice versa.
- Page 125 Service manual FB 7100 Programming Sub menu Description Coin return motor Performs a test run of coin return motor. After a successful test the message ‘Motor and switch working correctly’ is given. If the test is not successful, either the general error...
- Page 126 Service manual FB 7100 Programming Sub menu Description Fan on/off Tests if the fan is running correctly by turning it on for five seconds. Test whipper no. x Runs a test of selected whipper for 0.5 seconds. To perform the test, press ‘Sel’, select whipper no. (no.
- Page 127 Service manual FB 7100 Programming Sub menu Description Test all IN motors Runs a test of all IN motors in a sequence from left to right. To perform the test, press ‘Sel’. The message “Please remove the IN canisters” now appears in the display.
- Page 128 Service manual FB 7100 Programming Sub menu Description Test FB1 positions Tests that Freshbrewer 1 can move to three positions: Fully open, Close and Bottom. To perform the test: 1. Press ‘Sel’. The brewer will move to “Fully open” position.
- Page 129 Service manual FB 7100 Programming Sub menu Description Move piston up 1. The piston stops when the cylinder has moved the (continued) selected distance, and the message “Entered distance moved correctly” is given. 2. The piston stops when one of the positions “Fully open”...
- Page 130 Service Manual FB 7100 Programming 4.3.12 Change password menu Introduction The Change password menu is used to change the password used to access the Technician menu. Change password Sub menu Description Enter new password Enter a new four-digit password and press ‘OK’ to confirm.
- Page 131 Service Manual FB 7100 Contents Table of contents Functions Total overview - Components of FB 7100 General safety instructions Water system Adjustments (Dis-)assemblies Releasing the distribution head A.2.1 Removing the cover for water system A.2.2. Draining water from the boiler A.2.3...
- Page 132 Service Manual FB 7100 Contents Removing the actuator B.3.9 Disassembling the tachoboard B.3.10 Removing the actuator motor B.3.11 Disassembling the actuator and its driving parts B.312 Disassembling driving parts of actuator without removing actuator B.3.13 Replacing the microswitch BSSW B.3.14 Replacing the ejector spring B.3.15...
- Page 133 Service Manual FB 7100 Contents Electrical diagrams Technical specifications Options Accessories Cooling system (Not available here) Housing / Cabinet Adjustments (Dis-)assemblies Removing the fan G.2.1 Removing the coin mechanism G.2.2 Removing the coin chute G.2.3 Replacing the selection signs G.2.4 Removing the selection panel G.2.5...
- Page 134 Service Manual FB 7100 Contents External options (Not available yet) Payment systems Adjustments (Dis-)assmeblies Removing the coin mechanism P.2.1 Disassembly of the Zip card reader P.2.2 Disassembling the CPU for the ZIP card reader P.2.3 Disassembly the Proton card reader (Proton = Chipper/Chipknip) P.2.4...
-
Page 135: Functions
Service Manual FB 7100 Functions Functions 5.1 Total Overview - Components of FB 7100 Refer to Spare Parts List, chapter 10. 5.2 General safety instructions CAUTION When the work has been finished, always carry out a functional test. DANGER: The work described in this... - Page 136 Service Manual FB 7100 Contents 5 - 6 January, 2005...
-
Page 137: Water System
Service Manual FB 7100 Water System A Water System A.1 Adjustments General adjustments Water temperature Adjustable via software, see Chap. 4 “Programming” Recirculation valve Close the adjusting screw on the valve. Then unscrew 1.5 rotations using an Allen key (wrench size 5 mm). -
Page 138: Dis-)Assemblies
Service Manual FB 7100 Water System A.2.(Dis-)assemblies A.2.1 Releasing the distributor head Preparation • Open the door. • Switch off the main switch Releasing Follow these steps to release the distributor head: Step Action Illustration Remove green retaining pin from distributor head. -
Page 139: Draining Water From The Boiler
Service Manual FB 7100 Water System Removal Follow these steps to remove cover: Step Action Illustration Loosen one screw. Pull cover to the left and lift it off. Assembly Assembly is done in reverse order. A.2.3 Draining water from the boiler... -
Page 140: Removing The Water System (Boiler And Pump)
Service Manual FB 7100 Water System • Remember to tighten screw of hose clamp after draining. A.2.4 Removing the water system (boiler and pump) Preparation Before removing the boiler • Open the door. • Switch off the main switch. • Remove coffee waste bucket and pull forward the base tray. - Page 141 Service Manual FB 7100 Water System Step Action Illustration Remove electrical connections to • pump • inlet valve • overboil safety cut-out • temperature sensor • water level sensor • recirculation valve Loosen two screws from base sensor bracket, and pull out sensor.
-
Page 142: Disassembling The Water System (Boiler And Pump)
Service Manual FB 7100 Water System A.2.5 Disassembling the water system (boiler and pump) Preparation Before disassembling the water system • Open the door . • Switch off the main switch.. • Remove coffee waste bucket and pull forward the base tray •... -
Page 143: Removing The Temperature Sensor (Thermal Feeler)
Service Manual FB 7100 Water System Assembly Assembly is done in reverse order. Clean hoses before refitting to pump or replace by new ones to prevent blocking of the pump because of scales. • Clean pump feed hose before refitting to pump or replace by new one to prevent blocking of the pump or valves because of scales. -
Page 144: Removing The Overboil Thermostat
Service Manual FB 7100 Water System If the temperature sensor is not connected properly electrically, the heating element will not be switched off as long as the machine is switched on (boiling over). A.2.7 Removing the overboil thermostat Preparation Before removing the safety cut-out thermostat •... -
Page 145: Removing The Water Level Sensor (Electrode)
Service Manual FB 7100 Water System Illustration The overboil thermostat is located at the front of the boiler as illustrated below: Installation Installation is done in reverse order. A.2.9 Removing the water level sensor (electrode) Preparation Before removing the water level sensor •... -
Page 146: Disassembling The Heating Element And Dry-Boiling Thermostat
Service Manual FB 7100 Water System Check the sensor holder for tear and brittleness, replace it if necessary. Check that the electrical connection is properly connected, as otherwise the water intake is not stopped automatically when the water reaches the water level sensor. -
Page 147: Resetting The Dry-Boiling Thermostat
Service Manual FB 7100 Water System A.2.11 Resetting the dry-boiling thermostat Preparation Before resetting the dry-boiling thermostat • Open the door. • Switch off the main switch. • Remove coffee waste bucket and pull forward the base tray. • Release distributor head and rest it on top of its mounting arm, see this section, page 5A-2. -
Page 148: Disassembling The Inlet Valve
Service Manual FB 7100 Water System Drain the boiler before you proceed. If the boiler is not drained, hot water will flow from the hoses as soon as the hoses are disconnected. Disassembly Follow these steps to disassemble the water inlet parts:... -
Page 149: Resetting The Pressure Security Valve Of The Inlet Valve
Service Manual FB 7100 Water System Disassembly Follow these steps to disassemble the inlet valve and connecting hose: Step Action Illustration Disconnect the electrical plug connections of the inlet valve. Remove hoses from the inlet valve. 1) Connecting hose 2) Hose from overflow... -
Page 150: Disassembing The Recirculation Valve
Service Manual FB 7100 Water System Assembly Assembly is done in reverse order. A.2.15 Disassembing the recirculation valve Preparation Before removing the recirculation valve • Open the door. • Switch off the main switch. • Remove coffee waste bucket and pull forward the base tray. -
Page 151: Disassembling A Dispensing Valve For Instant Ingredients
Service Manual FB 7100 Water System A.2.16 Disassembling a dispensing valve for instant ingredients Preparation Before disassembling a dispensing valve • Open the door. • Switch off the main switch • Remove the instant ingredient mixing unit in question, see chap. -
Page 152: Disassembling The Dispensing Valve For Freshbrewer Unit
Service Manual FB 7100 Water System A.2.17 Disassembling the dispensing valve for freshbrewer unit Preparation • Open the door. • Switch off the main switch. • Remove instant ingredient canisters. • Remove cover plate for instant ingredient module, see chap. 5.C.2.3, page 5C-3. -
Page 153: Functional Descriptions
Service Manual FB 7100 Water System A.3. Functional descriptions A.3.1 Total overview of the water system A Water level sensor P Pump Legend B Boiler T Temperature sensor C Recipient, e.g. cup VR Recirculation valve D Dry boiling protection V1 - V3 IN Dispensing valves... -
Page 154: Function: Inlet Valve And Water Inlet Into The Boiler
Service Manual FB 7100 Water System A.3.2 Function: Inlet valve and water inlet into the boiler Description • The inlet valve ‘I’ is opened until the water level sensor ‘A’ recognizes that the boiler ‘B’ is filled. • When the correct filling level in the boiler is reached, the water inlet valve is closed. - Page 155 Service Manual FB 7100 Water System The water of high temperature now runs from the boiler and circulates through the entire hose system and back into the boiler through the valve ‘VR’ for approximately two seconds, thus ensuring that the hottest temper- ature is obtained and that possible air bobbles are removed from the hose system.
-
Page 156: Water Flow Diagram
Service Manual FB 7100 Water System A.4. Water flow diagram 5A - 20 January, 2005... -
Page 157: Technical Specifications
Service Manual FB 7100 Water System A.5.Technical specifications Not available here. A.6.Options Not available here. A.7. Accessories Not available yet. January, 2005 5A - 21... - Page 158 Service Manual FB 7100 Water System 5A - 22 January, 2005...
-
Page 159: Adjustments
Service Manual FB 7100 B Brewer System B.1 Adjustments General adjust- Water volume, minimum + maximum (depending on the flow and the cor- ments responding valve adjustments (l/min.)) Machine adjustments min. 60 ml - max. 80 ml • Programming max. 240 ml •... -
Page 160: Overview Of Brewer Parts
Service Manual FB 7100 B.2 Overview of brewer parts Parts and func- This illustration shows the location of the brewer components tions Legend for figure: Part Function Safety switch switches as soon as the brewer moves beyond the closing position. -
Page 161: Dis-)Assemblies
Service Manual FB 7100 Brewer System B.3 (Dis-)assemblies B.3.1 Safety instructions Installation and repair works on the machine may only be carried out by trained service technicians. General Mounting Instructions Scraper guide Follow this instruction to assemble the scraper guide: Instruction •... -
Page 162: Dismounting The Brewer Unit
Service Manual FB 7100 Brewer System B.3.2 Dismounting the brewer unit When repairing the brewer unit, these safety rules must be observed: Beware of sharp edges • Beware of spring loaded actuator, if defective • Tools needed: Clamp (if actuator is taken out of the brewer unit) - Page 163 Service Manual FB 7100 Brewer System Removal Follow these steps to remove the brewer unit Step Action If necessary, remove the filter plate, the scraper, and the brewer cylinder. Unscrew 2 screws and lift out brewer. Warning! If brewer cylinder is not closed, lift out brewer by the sides. Do not touch underneath the unit! Disconnect the 15-pole plug of the harness at the back of the brewer.
-
Page 164: Testing The Brewer Unit Next To The Machine
Service Manual FB 7100 Brewer System B.3.3 Testing the brewer unit next to the machine There is an increased risk of injuries. Keep parts of your body and loose clothing away from the brewer. Preparation • Switch off the main switch, disconnect the power supply, and close the water tap. -
Page 165: Removing The Brewer Cylinder, Filter Plate Holder And Scraper
Service Manual FB 7100 Brewer System B.3.4 Removing the brewer cylinder, filter plate holder and scraper Removal Follow these steps to remove the parts: Step Action Remove the outlet pipe from the filter plate. Press lock at the filter plate... -
Page 166: Removing The Brewer Housing
Service Manual FB 7100 Brewer System B.3.5 Removing the brewer housing Preparation Before removing the brewer housing • Switch off the main switch, disconnect the power supply, and close the water tap. • Remove the brewer, see this section, page 5B-4 •... -
Page 167: Disassembling The Tie Rods
Service Manual FB 7100 Brewer System B.3.6 Disassembling the tie rods Preparation Before disassembling the tie rods: • Switch off the main switch, disconnect the power supply, and close the water tap. • Remove the brewer, see this section, page 5B-4. - Page 168 Service Manual FB 7100 Brewer System Continued on next page.. • The self-locking nuts must be exchanged. • Do not retighten the self-locking nuts too tight when reassembling the tie rods. 5B - 10 January, 2005...
-
Page 169: Disassembling The Ingredient Motor
Service Manual FB 7100 Brewer System B.3.7 Disassembling the ingredient motor Preparation • Switch off the main switch, disconnect the power supply, and close the water tap. • Remove the brewer, see this section, page 5B-4. • Remove the brewer cylinder, the filter plate holder and the scraper, see this section, page 5B-7. - Page 170 Service Manual FB 7100 Brewer System Continued on next page... When the ingredient motor stucks, check whether the fastening of the base console to the brewer base is defective. In this case, press the actuator against the brewer base. There is the possibility that the fastening domes were broken so that the actuator slided from the brewer base towards the top.
-
Page 171: Disassembling The Scraper Arms
Service Manual FB 7100 Brewer System B.3.8 Disassembling the scraper arms Preparation Before disassembling the scraper: • Switch off the main switch, disconnect the power supply, and close the water tap. • Remove the brewer, see this section, page 5B-4. - Page 172 Service Manual FB 7100 Brewer System Step Action Illustration If necessary, remove the inner scraper arm through the lower bore in the side plate. Assembly Assembly is done in reverse order. 5B - 14 January, 2005...
-
Page 173: Removing The Actuator
Service Manual FB 7100 Brewer System B.3.9 Removing the actuator Preparation Before removing the actuator: • Switch off the main switch, disconnect the power supply, and close the water tap. • Remove the brewer, see this section, page 5B-4. • Remove the brewer cylinder, the filter plate holder and the scraper, see this section, page 5B-7. - Page 174 Service Manual FB 7100 Brewer System Step Action Illustration Continued on next page .. Carefully pull out the actuator, and simultaneously unplug the cable of the brewer closed switch Installation Installation is done in reverse order. 5B - 16 January, 2005...
-
Page 175: Disassembling The Tachoboard
Service Manual FB 7100 Brewer System B.3.10 Disassembling the tachoboard Preparation Before disassembling the tachoboard: • Switch off the main switch, disconnect the power supply, and close the water tap. • Remove the brewer, see this section, page 5B-4. • Remove the brewer housing, see this section, page 5B-8. - Page 176 Service Manual FB 7100 Brewer System When reassembling: Observe the correct polarity. • The higher number (irrespectively of roman numbers or multiple- digit numbers) on the stranded wire connections represents the negative pole. When using a new tachoboard, ensure that rubber sleeves are •...
-
Page 177: Removing The Actuator Motor
Service Manual FB 7100 Brewer System B.3.11 Removing the actuator motor Preparation Before removing the actuator motor: • Switch off the main switch, disconnect the power supply, and close the water tap. • Remove the brewer, see this section, page 5B-4. - Page 178 Service Manual FB 7100 Brewer System When reassembling: Observe the correct polarity. • The higher number (irrespectively of roman numbers or multiple- digit numbers) on the stranded wire connections represents the negative pole. When using a new tachoboard, ensure that rubber sleeves are •...
-
Page 179: Disassembling The Actuator And Its Driving Parts
Service Manual FB 7100 Brewer System B.3.12 Disassembling the actuator and its driving Parts Preparation Before disassembling the actuator and the driving parts: • Switch off the main switch, disconnect the power supply, and close the water tap. • Remove the brewer, see this section, page 5B-4. - Page 180 Service Manual FB 7100 Brewer System Step Action Illustration Remove the bearing housing (1) and the spring (2). Fix the tachodisc by means of eg. a screwdriver while unscrewing the nut. Hold the large gear wheel tightly and remove the nut (1).
-
Page 181: Disassembling Driving Parts Of Actuator Without Removing Actuator
Service Manual FB 7100 Brewer System B.3.13 Disassembling driving parts of actuator without removing actuator Preparation Before disassembling the driving parts of the actuator: • Switch off the main switch, disconnect the power supply, and close the water tap. • Remove the brewer, see this section, page 5B-4. -
Page 182: Replacing The Microswitch Bssw
Service Manual FB 7100 Brewer System B.3.14 Replacing the microswitch BSSW Definition BSSW is an abbreviation of brewer safety switch. Preparation Before replacing the brewer safety switch: • Switch off the main switch, disconnect the power supply, and close the water tap. -
Page 183: Replacing The Ejector Spring
Service Manual FB 7100 Brewer System B.3.15 Replacing the ejector spring Preparation • Switch off the main switch, disconnect the power supply, and close the water tap. • Remove the brewer, see this section, page 5B-4. • Remove the brewer cylinder, the filter plate holder and the scraper, see this section, page 5B-7. -
Page 184: Replacing The Gaskets Of The Plunger
Service Manual FB 7100 Brewer System B.3.16 Replacing the gaskets of the plunger The gaskets of the plunger is contained in a valve, located in the centre of the plunger: Preparation Before replacing the gaskets: • Remove the brewer cylinder, the filter plate holder and the scraper, see this section, page 5B-7. - Page 185 Service Manual FB 7100 Brewer System B.3.17 Removing and decscaling the filter plate The filter plate has to be descaled on a regular bases after approx. 1000 dis- pensings (depending on the hardness of the water and the coffee type (oil)).
- Page 186 Service Manual FB 7100 Brewer System Assembly Assembly is done in reverse order. • Make sure that the disc is positioned correctly, i.e. the smooth side must face the rubber sealing (see ill.) • Avoid damage of the fine-pore filter.
-
Page 187: General Notes
Service Manual FB 7100 Brewer System B.3.18 General notes All actuators/brewers as well as recycled actuators/brewers are equipped with an additional label for brewer (Part-no. 35207300): Label for brewer The label looks like this: MACH.TYPE MACH.TYPE INSTAL.DATE......INSTAL.DATE......FB50... FB50... -
Page 188: Function Of The Brewer
Service Manual FB 7100 Brewer System B.4 Function of the brewer Introduction Through an electronically controlled brewing process the brewer takes in coffee and water and dispenses freshly brewed coffee. The principle of the brewing process is that a plunger moves down inside a cylinder pressing the freshly brewed coffee through a filter plate. - Page 189 Service Manual FB 7100 Brewer System Phases Continued from previous page.. • Dosing of ingredients Stage Description of function Illustration The dosing motor is driven and the outlet valve dispenses water. The water flushes the coffee powder into the brewing chamber.
- Page 190 Service Manual FB 7100 Brewer System Phases Continued from previous page.. • Brewer returning to start position Stage Description of function Illustration The actuator motor stops as soon as the guiding nut closes the microswitch BAE (Brewer at End). The plunger is now in lower end position.
-
Page 191: Electrical Diagrams
Service Manual FB 7100 Brewer System B.5 Electrical diagrams Not available here. B.6 Technical specifications Not available here. B.7 Options Not available yet. B.8 Accessories • Filter plate for tea • Filter plate for coffee • Filter paper holder. January, 2005... - Page 192 Service Manual FB 7100 Brewer System 5B - 34 January, 2005...
-
Page 193: Dosing System C
Service Manual FB 7100 C Dosing System C.1 Adjustments The basic elements of a recipe may be adjusted via the Operator menu. General More advanced settings of recipes have to be carried out via the adjustments Wittenborg Configurator tool. This table gives a brief overview of the possible adjustments to recipes. -
Page 194: Removing The Instant Ingredient Mixing Units
Service Manual FB 7100 C.2 (Dis-)assemblies C.2.1 Removing the instant ingredient mixing units Before removing mixing units Preparation • Open the door. • Switch off the main switch. Follow these steps to remove ingredient mixing units: Removing Step Action Illustration... -
Page 195: Removing The Hot Water Module
Service Manual FB 7100 C.2.2 Removing the hot water module Before removing the hot water module Preparation • Open the door. • Switch off the main switch. • Remove instant ingredient mixing unit next to hot water module, see this section, page 5C-2. - Page 196 Service Manual FB 7100 Follow these steps to remove the cover plate for instant module: Removal Step Action Illustration Remove four screws from cover plate. Remove cover plate Installation is done in reverse order. Installation 5C - 4 January, 2005...
-
Page 197: Disassembling A Dispensing Valve For Instant Ingredients
Service Manual FB 7100 Dosing System C.2.4 Disassembling a dispensing valve for instant ingredients Preparation Before disassembling a dispensing valve • Open the door • Switch off the main switch. • Remove the instant ingredient mixing unit in question, see this section, page 5C-2. -
Page 198: Replacing A Whipper Motor
Service Manual FB 7100 Dosing System C.2.5 Replacing a whipper motor Preparation Before replacing a whipper motor • Open the door • Switch off the main switch. • Remove the instant ingredient mixing unit in question, see this section, page 5C-2. - Page 199 Service Manual FB 7100 Dosing System When reinserting the whipper wheel make sure to turn it correctly con- cidering that the insertion hole and the connecting pin are D-shaped. C.2.6 Removing an instant ingredient motor Preparation Before removing an instant ingredient motor •...
-
Page 200: Removing The Spring For Lid From Ingredient Canisters
Service Manual FB 7100 Dosing System C.2.7 Removing the spring for lid from ingredient canister Preparation Before removing the spring for lid from instant ingredient canisters • Open the door • Remove the instant ingredient canister in question, see Operator Man- ual. -
Page 201: Removing The Suspension For Ingredient Canisters
Service Manual FB 7100 Dosing System Removing the suspension for ingredient canisters Preparation Before removing the suspension for the instant ingredient canisters • Open the door. • Switch off the main switch. • Remove the instant ingredient canisters, see Operator Manual. -
Page 202: Removing The Guide For Ingredient Canister From Suspension Rail
Service Manual FB 7100 Dosing System Removing the guide for ingredient canister from suspension rail Preparation Before removing the guide for ingredient canister from the suspension rail • Open the door. • Switch off the main switch. • Remove the instant ingredient canisters, see Operator Manual. -
Page 203: Removing The Up-Key Connection From Suspension Rail
Service Manual FB 7100 Dosing System Step Action Illustration Remove one screw from stop for canister. Pull out stop for canister. Installation Installation is done in the reverse order C.2.9 Removing the up-key connection from suspension rail Preparation Before removing the up-key connection from the suspension rail •... -
Page 204: Removing The Rs 232 Print From Suspension Rail
Service Manual FB 7100 Dosing System C.2.10 Removing the RS 232 print from suspension rail Preparation Before removing the RS 232 print from the suspension rail • Open the door. • Switch off the main switch. • Remove the instant ingredient canisters, see Operator Manual. -
Page 205: Functional Descriptions
Service Manual FB 7100 Dosing System C.3 Functional descriptions Not available here. C.4 Electrical diagrams Not available here. C.5 Technical specifications Not available here. C.6 Options Not available yet. C.7 Accessories Not available yet. January, 2005 5C - 13... - Page 206 Service Manual FB 7100 Dosing System 5C - 14 January, 2005...
-
Page 207: Product Delivery D
Service Manual FB 7100 D Product Delivery D.1 Adjustments Not available here. D.2 (Dis-)assemblies D.2.1 Replacing the opto-sensor glasses for cup sensors Preparation Before replacing the opto sensor glasses for cup sensors: • Open the door • Switch off the main switch. -
Page 208: Removing Locking Catch For Drip Guide
Service Manual FB 7100 D.2.2 Removing locking catch for drip guide Preparation Before removing the locking catch for drip guide • Open the door • Switch off the main switch. Follow these steps to replace the locking catch: Replacement Step... -
Page 209: Removing The Cup Station
Service Manual FB 7100 D.2.3 Removing the cup station Preparation Before removing the cup station: • Open the door. • Switch off the main switch. • Pull out the drip tray, see Operator Manual Removal Follow these steps to remove the cup station. -
Page 210: Removing The Spring Contacts For Drip Tray Sensors
Service Manual FB 7100 Removing the spring contacts for drip tray sensors Preparation: Before removing the spring contacts for drip tray sensors: • Open the door. • Switch off the main switch. • Pull out the drip guide • Remove the cup room, see this section, page 5D-3. - Page 211 Service Manual FB 7100 Position Action Illustration Higher Remove screw no. 1. This will allow the cup platform to be set in a higher position, e.g. for very small cups. Lower Remove screw no. 2. This will allow the cup platform to be set in a lower position, e.g.
-
Page 212: Functional Descriptions
Service Manual FB 7100 Product Delivery D.3 Functional descriptions D.3.1 Total overview Cup staton Essential parts of the cup station: 1 Cup sensors 2 Drip grate 3 Drip tray sensors Description This table gives a brief description of the various parts of the cup station. -
Page 213: Electrical Diagrams
Service Manual FB 7100 Product Delivery D.4 Electrical diagrams D.5 Technical specifications Not available here. D.6 Options Not available here. D.7 Accessories Not available here. January, 2005 5D - 7... - Page 214 Service Manual FB 7100 Product Delivery 5D - 8 January, 2005...
-
Page 215: Adjustments
Service Manual FB 7100 Cooling F Cooling F.1 Adjustments (Not available) January, 2005 5F - 1... - Page 216 Service Manual FB 7100 Cooling 5F - 2 January, 2005...
-
Page 217: Dis-)Assemblies
Service Manual FB 7100 G Housing / Cabinet G.1 Adjustments Not available here. G.2 (Dis-)assemblies G.2.1 Removing the fan Preparation Before removing the fan: • Open the door • Switch off the mains switch. • Remove all canisters. • Remove tray under canisters. -
Page 218: Removing The Coin Mechanism
Service Manual FB 7100 When remounting the fan, make sure to turn it correctly so that the air is blown out of the machine. G.2.2 Removing the coin mechanism Preparation Before removing the coin mechanism: • Open the door. • Switch off the main switch. -
Page 219: Removing The Coin Chute
Service Manual FB 7100 G.2.3 Removing the coin chute Preparation Before removing the coin chutes: • Open the door. • Switch off the main switch. • Remove the coin mechanism, see this section, page 5G-2. Removal Follow these steps to remove the coin chutes:... -
Page 220: Replacing The Selection Signs
Service Manual FB 7100 G.2.4 Replacing the selection signs Preparation Before replacing the selection signs: • Open the door. • Switch off the main switch. • Remove the coin mechanism, see this section, page 5G-2. Replacement Follow these steps to replace the selection signs:... -
Page 221: Removing The Selection Panel
Service Manual FB 7100 G.2.5 Removing the selection panel Preparation Before removing the selection panel: Open the door. • Switch off the main switch. • Remove the coin mechanism, see this section, page 5G-2. • Caution: Electrostatic discharge may cause damage to Printed Circuit Boards (PCBs) and electronic components. - Page 222 Service Manual FB 7100 Step Action Illustration From the front side of the door disconnect all board connectors. Installation Follow these steps to install the selection panel: Step Action Illustration From front of door reconnect the board connectors as follows:...
-
Page 223: Replacing A Selection Button
Service Manual FB 7100 Replacing a selection button Step Action Illustration Push selection panel with SPC circuit board back into its mounting frame. From rear side of door fasten selection panel with three wing nuts. Reinstall all remaining parts in door. - Page 224 Service Manual FB 7100 Replacing a selection button Removal Follow these steps to remove a selection button: Step Action Illustration Place the selection panel ( 1 ) on a flat surface with the selection buttons facing downwards. Remove four rivets ( 2 )
-
Page 225: Removing The Advertising Poster Frame
Service Manual FB 7100 Replacing a selection button Installation Installation is done in reverse order. G.2.7 Removing the advertising poster frame Preparation Before removing the advertising poster frame • Open the door • Switch off the main switch. Removal The procedure for removing the advertising poster is as follows:... - Page 226 Service Manual FB 7100 Replacing a selection button G.2.8 Replacing the advertising poster Preparation Before replacing the advertising poster: • Open the door. • Switch off the main switch. • Remove the advertising poster frame, see this section, page 5G-9.
-
Page 227: Removing The Door Switch
Service Manual FB 7100 Replacing a selection button G.2.9 Removing the door switch Preparation Before replacing the advertising poster: • Open the door. • Switch off the main switch. • Remove the brewer unit, see chap. 5.B.3.2, page 5B-4. Removal... -
Page 228: Disassembling The Door Switch
Service Manual FB 7100 Replacing a selection button G.2.10 Disassembling the door switch Preparation Before replacing the advertising poster: • Open the door. • Switch off the main switch. • Remove the brewer unit, see chap. 5.B.3.2, page 5B-4. • Remove door switch, see this section, page 5G-11. -
Page 229: Functional Descriptions
Service Manual FB 7600 Housing / Cabinet G.3 Functional descriptions Not available here. G.4 Electrical diagrams Not available here. G.5 Technical specifications Not available here. G.6 Options Not available yet. G.7 Accessories Not available yet. January, 2005 5G - 13... -
Page 231: Power Supply Unit And Control K
Service Manual FB 7100 K Power Supply Unit and Control K.1 Adjustments Not available here. K.2 (Dis-)assemblies K.2.1 Safety instructions Installation and repair works on the machine may only be carried out by trained service technicians. Be extremely careful, your life can be endangered! The vending machine controllers and power supply box parts are carrying the mains voltage if the machine is connected to the power supply. -
Page 232: Disassembling The Power Supply Cord
Service Manual FB 7100 K.2.2 Disassembling the power supply cord Preparation Before disassembling the power supply cable: • Disconnect the power supply Ensure that the machine is disconnected from the mains electrical supply! The machine is only isolated from the mains supply when the plug has been pulled out. -
Page 233: Removing The Cover Plate For Power Supply Box, Fb Print And Cpu
Service Manual FB 7100 K.2.3 Removing the cover plate for power supply box, FB print and CPU Preparation Before removing the cover plate for power supply box: • Disconnect the power supply. • Open the door. • Remove the freshbrewer unit, see chap. 5.B.3.2, page 5B-4. -
Page 234: Disassembling The Power Supply Box
Service Manual FB 7100 K.2.4 Disassembling the power supply box Preparation Before disassembling the power supply box: • Disconnect the power supply. • Open the door • Remove the freshbrewer unit, see chap. 5.B.3.2, page 5B-4. • Remove cover plate for power supply box, FB print and CPU, see this section, page 5K-3. -
Page 235: Removing The Transformer
Service Manual FB 7100 Ensure that connectors are correctly fitted. K.2.5 Removing the transformer Preparation Before removing the transformer: • Disconnect the power supply. • Open the door • Remove the freshbrewer unit, see chap. 5.B.3.2, page 5B-4. • Remove cover plate for power supply box, FB print and CPU, see chap. -
Page 236: Removing The Relay For Heating Element
Service Manual FB 7100 K.2.6 Removing the relay for heating element Preparation Before removing the relay for heating element • Disconnect the power supply. • Open the door • Remove the freshbrewer unit, see chap. 5.B.3.2, page 5B-4. • Remove cover plate for power supply box, FB print and CPU, see this section, page 5K-3. - Page 237 Service Manual FB 7100 Removal Follow these steps to remove the noise capacitor: Step Action Illustration Pull off the electrical connections from capacitor. Loosen nut Detach noise capacitor from its bracket. Installation Installation is done in reverse order. Ensure that connectors are correctly fitted.
-
Page 238: Disassembling The Icb / Cpu
Service Manual FB 7100 K.2.8 Disassembling the ICB / CPU Preparation Before disassembling the printed circuit board: • Disconnect the power supply. • Open the door • Remove the freshbrewer unit, see chap. 5.B.3.2, page 5B-4. • Remove cover plate for power supply box, FB print and CPU, see this section, page 5K-3. -
Page 239: Disassembling The Expansion Board Of The Icb / Cpu
Service Manual FB 7100 K.2.9 Disassembling the expansion board of the ICB / CPU Preparation Before disassembling the printed circuit board: • Disconnect the power supply. • Open the door • Remove the freshbrewer unit, see chap. 5.B.3.2, page 5B-4. -
Page 240: Disassembling The Brewer Printed Circuit Board
Service Manual FB 7100 K.2.10 Disassembling the brewer printed circuit board Preparation Before disassembling the printed circuit board: • Disconnect the power supply. • Open the door • Remove the freshbrewer unit, see chap. 5.B.3.2, page 5B-4. • Remove cover plate for power supply box, FB print and CPU, see this section, page 5K-3. -
Page 241: Removing The Cover For Vending Machine Controller (Vmc)
Service Manual FB 7100 K.2.11 Removing the cover for vending machine controller (VMC) Preparation Before removing the cover for electronic box: • Disconnect the power supply. • Open the door • Remove instant ingredient canisters. Ensure that the machine is disconnected from the mains electrical supply! The machine is only isolated from the mains supply when the plug has been pulled out. -
Page 242: Disassembling The Vending Machine Controller (Vmc)
Service Manual FB 7100 K.2.12 Disassembling the vending machine controller (VMC) Preparation Before disassembling the vending machine controller: • Disconnect the power supply. • Open the door • Remove instant ingredient canisters. • Remove cover for VMC, see this section, page 5K-11. -
Page 243: Replacing The Spc Circuit Board
Service Manual FB 7100 Replacing the SPC circuit board K.2.13 Replacing the SPC circuit board Preparation Before replacing the SPC circuit board: • Open the door. • Switch off the main switch. • Remove the coin mechanism, see chap. 5.G.2.2, page 5G-2. - Page 244 Service Manual FB 7100 Replacing the SPC circuit board Step Action Remove the PIC micro controller (4) from the SPC circuit board (5) using a special tool (6). Installation Follow these steps to install the SPC circuit board: Step Action Place the insulating foil (1) on the mouting plate (2).
- Page 245 Service Manual FB 7100 Replacing the SPC circuit board Step Action From front of door reconnect the board connectors as follows: P4: Power P5: Wittlink P22: Display P24: Power for payment system MDB/BDV P25: Coin return P31: Door light relay...
- Page 246 Service Manual FB 7100 Replacing the SPC circuit board - Illustration of correct location of PIC micro processor Checking After installation of the new SPC circuit board and the PIC micro communication of processor the machine should be checked for proper communication as...
- Page 247 Service Manual FB 7100 Replacing the SPC circuit board January, 2005 5K - 17...
-
Page 248: Functional Descriptions
Service Manual FB 7100 Power Supply Unit and Control K.3 Functional descriptions Not available here. 5K - 18 January, 2005... -
Page 249: Electrical Diagrams
Service Manual FB 7100 Power Supply Unit and Control K.4 Electrical diagrams January, 2005 5K - 19... -
Page 252: Technical Specifications
Service Manual FB 7100 Power Supply Unit and Control K.5 Technical specifications Not available here. K.6 Options Not available here. K.7 Accessories Not available here. 5K - 20 January, 2005... - Page 253 Service Manual FB 7100 External Options L External Options (Not available). January, 2005 5L - 1...
- Page 254 Service Manual FB 7100 External Options 5L - 2 January, 2005...
-
Page 255: Payment Systems P
Service Manual FB 7100 Payment systems P Payment systems P.1 Adjustments Unit Setting BDV coins mechanism All settings related to the BDC coin mechanism are made via the Menu System, under Payment settings, in techni- cian mode. The following setting options exist:... - Page 256 Service Manual FB 7100 Payment systems Unit Setting Coin validator All settings related to the coin validator are made via the Menu System under Payment settings. The following setting options exist: - Payment type - Max credit - Coin validator Please refer to chapter 4.
-
Page 257: Removing The Coin Mechanism
Service Manual FB 7100 Payment systems P.2 (Dis-)assemblies P.2.1 Removing the coin mechanism Preparation Before removing the coin mechanism: • Open the door. • Switch off the main switch. Removal Follow these steps to remove the coin mechanism: Step Action Swing cover for pay- ment system open. - Page 258 Service Manual FB 7100 Payment systems P.2.2 Disassembling the Zip card reader Preparation Before disassembling the Card reader • Open the door. • Switch off the main switch. Disassembly Follow these steps to disassemble the card reader: Step Action Illustration Swing cover for payment system open.
-
Page 259: Disassembling The Cpu For The Zip Card Reader
Service Manual FB 7100 Payment systems P.2.3 Disassembling the CPU for the ZIP card reader reparation Before disassembling the Card reader • Open the door. • Switch off the main switch. Disassembly Follow these steps to disassemble the card reader:... -
Page 260: Disassembly The Proton Card Reader
Service Manual FB 7100 Payment systems P.2.4 Disassembling the Proton card reader (Proton = Chipper/Chipknip) Preparation Before disassembling the Card reader • Open the door. • Switch off the main switch. Disassembly Follow these steps to disassemble the card reader:... -
Page 261: Functional Descriptions
Service Manual FB 7100 Payment systems P.3 Functional descriptions P.3.1 Function of the BDV or the MDB/ICB coin mechanism Standard The BDV coin mechanism operates in accordance with a standard pre- pared by ‘Bundesverband der Dienstleistungsunternehmen für Verpfle- gungssysteme e.V.’. - Page 262 Service Manual FB 7100 Payment systems Cf. manual of producer. Coin rejection?. If coins have difficulty getting accepted, it is usually due to impurities in the coin track of the validator in the coin mechanism. Cf. manual of producer. 5P - 8...
-
Page 263: Electrical Diagrams
Service Manual FB 7100 Payment systems P.4 Electrical diagrams Not available here. P.5 Technical specifications Payment System Voltage from power supply print board: between 24V - 36V DC. MDB/ICP Voltage from power supply print board: between 24V - 36V DC. - Page 264 Service Manual FB 7100 Payment systems 5P - 10 January, 2005...
- Page 265 Service Manual FB 7100 Preventive maintenance Table of contents Preventive maintenance Preventive maintenance for the Service Additional preventive maintenance instructions by the distributors January, 2005 6 - 1...
- Page 266 Service Manual FB 7100 Preventive maintenance 6 - 2 January, 2005...
- Page 267 Service Manual FB 7100 Preventive maintenance 6 Preventive maintenance 6.1 Preventive maintenance for the Service Item Action Interval (Months) Remarks 1.Scraper arms lubricate approximately every 50,000 dis- pensings 2. Water stop valve rinse after approx. 50,000 dispensings 3. Boiler decalcify...
- Page 268 Service Manual FB 7100 Preventive maintenance 6.2 Additional preventive maintenance instructions by the distributors 6 - 4 January, 2005...
- Page 269 Service Manual FB 7100 Service procedures Table of contents Service procedures January, 2005 7 - 1...
- Page 270 Service Manual FB 7100 Service procedures 7 - 2 January, 2005...
- Page 271 Service Manual FB 7100 Service procedures 7 Service procedures January, 2005 7 - 3...
- Page 272 Service Manual FB 7100 Service procedures 7 - 4 January, 2005...
- Page 273 Service Manual FB 7100 Technical Information Table of contents Technical Information January, 2005 8 - 1...
- Page 274 Service Manual FB 7100 Technical Information 8 - 2 January, 2005...
- Page 275 Service Manual FB 7100 Technical Information 8 Technical Information January, 2005 8 - 3...
- Page 276 Service Manual FB 7100 Technical Information 8 - 4 January, 2005...
- Page 277 Service Manual FB 7100 Modification Instructions Table of contents Modification Instructions January, 2005 9 - 1...
- Page 278 Service Manual FB 7100 Modification Instructions 9 - 2 January, 2005...
- Page 279 Service Manual FB 7100 Modification Instructions 9 Modification Instructions January, 2005 9 - 3...
- Page 280 Service Manual FB 7100 Modification Instructions 9 - 4 January, 2005...
- Page 281 Service Manual FB 7100 Spare parts list Table of contents Spare parts list January, 2005 10 - 1...
- Page 282 Service Manual FB 7100 Spare parts list 10- 2 January, 2005...
- Page 283 Service Manual FB 7100 Spare parts list 10 Spare parts list January, 2005 10 - 3...
- Page 284 Service Manual FB 7100 Spare parts list 10- 4 January, 2005...
Need help?
Do you have a question about the FB 7100 and is the answer not in the manual?
Questions and answers