Agilent Technologies 3000 Series User's And Service Manual
Hide thumbs
Also See for 3000 Series:
- User's and service manual (156 pages) ,
- Datasheet (30 pages) ,
- Manual (168 pages)

Related Manuals for Agilent Technologies 3000 Series


Summary of Contents for Agilent Technologies 3000 Series
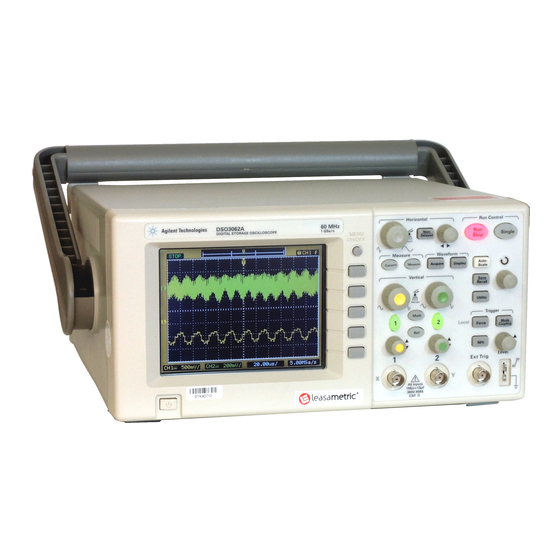
- Page 1 User’s and Service Guide Publication number D3000-97000 March 2005 © Copyright Agilent Technologies 2005 All Rights Reserved 3000 Series Oscilloscopes...
- Page 2 In This Book This book gives you the information you need to begin using the 3000 Series Oscilloscopes. It contains the following chapters: Getting Started Chapter 1 contains inspection, power requirements, probe compensation instructions, cleaning instructions, and setup information. Using the Oscilloscope Chapter 2 gives information on how to use the front panel and the graphical user interface, and tells you how to perform various operations with the oscilloscope.
-
Page 3: Table Of Contents
Contents 1 Getting Started Inspecting the Package Contents 1-2 Performing a Functional Check 1-5 Compensating Probes 1-7 Front Panel and User Interface Descriptions 1-9 Automatically Displaying a Waveform 1-12 Cleaning the Oscilloscope 1-13 2 Using the Oscilloscope Vertical Controls 2-3 Vertical System Setup 2-4 Channel Coupling Control 2-6 Bandwidth Limit Control 2-9... - Page 4 3 Specifications and Characteristics Specifications 3-2 Characteristics 3-3 4 Service Returning the oscilloscope to Agilent Technologies for service 4-2 Testing Performance 4-3 Before Performing Performance Verification Testing 4-5 DC Gain Accuracy Test 4-7 Analog Bandwidth - Maximum Frequency Check 4-13...
-
Page 5: Getting Started
Getting Started... -
Page 6: Inspecting The Package Contents
Technologies Sales Office. • If the shipping container is damaged, or the cushioning materials show signs of stress, notify the carrier and your Agilent Technologies Sales Office. Keep the shipping materials for the carrier’s inspection. The Agilent Technologies Sales Office will arrange for repair or replacement at Agilent’s option without... - Page 7 Getting Started Inspecting the Package Contents Figure 1-1 CD-ROM Manuals Package Contents...
- Page 8 Getting Started Inspecting the Package Contents Table 1-1 Power Cords Plug Type Cable Part Plug Description Length Color Country (in/cm) 250V 8120-1351 Straight *BS1363A 90/228 Gray United Kingdom, Cyprus, Nigeria, 8120-1703 90° 90/228 Mint Gray Zimbabwe, Singapore 250V 8120-1369 Straight *NZSS198/ASC 79/200 Gray Australia, New...
-
Page 9: Performing A Functional Check
Getting Started Performing a Functional Check Performing a Functional Check Perform this quick functional check to verify that your oscilloscope is operating correctly. See Figure 1-2. 1 Turn on the oscilloscope. Use only power cords designed for your oscilloscope. Use a power source that delivers 100 to 240 VAC, 47 Hz to 440 Hz. - Page 10 Getting Started Performing a Functional Check C A U T I O N To avoid damage to the oscilloscope, make sure that the input voltage at the BNC connector does not exceed the maximum voltage (300 Vrms maximum).
-
Page 11: Compensating Probes
Getting Started Compensating Probes Compensating Probes Perform this adjustment to match your probe to the input channel. This should be done whenever you attach a probe for the first time to any input channel. Low Frequency Compensation 1 Set the Probe menu attenuation to 10X. Press the appropriate channel button on the front panel ( ), then select the Probe... - Page 12 Getting Started Compensating Probes 2 Set the square wave generator to a frequency of 1 MHz and an amplitude of 1 Vp-p. 3 Press the Autoscale front panel button. Figure 1-4 High frequency compensation adjustments Correctly Compensated Over Compensated Under Compensated Probe Compensation 4 If the waveform does not appear like the Correctly Compensated waveform shown in Figure 1-4, then use a nonmetallic tool to adjust the...
-
Page 13: Front Panel And User Interface Descriptions
Getting Started Front Panel and User Interface Descriptions Front Panel and User Interface Descriptions One of the first things you will want to do with your new oscilloscope is to become acquainted with its front panel. The front panel has knobs and buttons. The knobs are used most often and are similar to the knobs on other oscilloscopes. - Page 14 Getting Started Front Panel and User Interface Descriptions Figure 1-5 Vertical controls Measure controls Horizontal controls Waveform controls Run controls MENU ON/OFF Entry knob Menu controls Menu defined buttons Trigger controls Front Panel The definitions of the buttons and the knobs are as follows: Measure controls Meas and Cursors Waveform controls...
- Page 15 Getting Started Front Panel and User Interface Descriptions Figure 1-6 Trigger position in Trigger position in Waveform window memory waveform window position in memory Acquisition Status Menu Waveform Channel 1 Ground Symbol Sample Rate Channel 1 Status Timebase Status User Interface 1-11...
-
Page 16: Automatically Displaying A Waveform
The trigger source selected is the lowest numbered channel that has a waveform applied. The 3000 Series Oscilloscopes are two channel oscilloscopes with an external trigger input. -
Page 17: Cleaning The Oscilloscope
Getting Started Cleaning the Oscilloscope Cleaning the Oscilloscope • Clean the oscilloscope with a soft cloth dampened with a mild soap and water solution. C A U T I O N Do not use too much liquid in cleaning the oscilloscope. Water can enter the oscilloscope’s front panel, damaging sensitive electronic components. - Page 18 1-14...
-
Page 19: Using The Oscilloscope
Using the Oscilloscope... - Page 20 Using the Oscilloscope This chapter describes the oscilloscope’s buttons, knobs, and menus. It is recommended that you perform all of the exercises in this chapter to become familiar with the powerful measurement capabilities of the oscilloscope.
-
Page 21: Vertical Controls
Vertical Controls Each channel has a vertical controls menu that appears after pressing either the 1 or the 2 front panel button. This section of the manual describes the vertical channel controls. -
Page 22: Vertical System Setup
Vertical Controls Vertical System Setup Vertical System Setup Figure 2-1 shows the vertical system controls. Figure 2-1 Scale knob Position knob Vertical Controls The following exercise guides you through the vertical buttons, knobs, and status bar. 1 Center the waveform on the display using the position knob. The position knob moves the waveform vertically. - Page 23 Vertical Controls Vertical System Setup 2 Notice that changing the vertical setup also affects the status bar. You can quickly determine the vertical setup from the status bar in the display. Change the vertical sensitivity with the scale knob and notice that it causes the status bar to change.
-
Page 24: Channel Coupling Control
Vertical Controls Channel Coupling Control Channel Coupling Control The channel coupling control can be used to remove any DC offset voltage on a waveform. By setting the coupling control to AC the DC offset voltage is removed form the input waveform. To remove any DC offset voltage from a waveform on channel 1, press the 1 front panel key. - Page 25 Vertical Controls Channel Coupling Control Figure 2-3 DC Coupling DC Coupling Status DC Coupling Control...
- Page 26 Vertical Controls Channel Coupling Control When GND coupling is selected, the waveform is disconnected from the oscilloscope input. See Figure 2-4. Figure 2-4 Ground Coupling Ground Coupling Status GND Coupling Control...
-
Page 27: Bandwidth Limit Control
Vertical Controls Bandwidth Limit Control Bandwidth Limit Control The bandwidth limit control can be used to remove high frequency components on a waveform that are not important to the analysis of the waveform. To remove high frequency components from a waveform on channel 1, press the 1 front panel key. - Page 28 Vertical Controls Bandwidth Limit Control Figure 2-6 Bandwidth limit OFF BW Limit Control OFF 2-10...
-
Page 29: Probe Attenuation Control
Vertical Controls Probe Attenuation Control Probe Attenuation Control The probe attenuation control changes the attenuation factor for the probe. The attenuation factor changes the vertical scaling of the oscilloscope so that the measurement results reflect the actual voltage levels at the probe tip. To change the probe attenuation factor for channel 1, press the 1 front panel key. -
Page 30: Invert Control
Vertical Controls Invert Control Invert Control The invert control inverts the displayed waveform with respect to the ground level. When the oscilloscope is triggered on the inverted waveform, the trigger is also inverted. To invert the waveform on channel 1, press the 1 front panel key. Press the Invert menu key until ON appears. - Page 31 Vertical Controls Invert Control Figure 2-9 The waveform after inversion. 2-13...
-
Page 32: Digital Filter Controls
Vertical Controls Digital Filter Controls Digital Filter Controls Pressing the Digital Filter menu key displays the Filter Controls. The filter controls set the digital filter used to filter the sampled waveform data. The types of filters that are available are shown in Table 2-2. Table 2-2 Filter Menu Menu... -
Page 33: Math Functions Control
Vertical Controls Math Functions Control Math Functions Control The math functions control allows the selection of the math functions add, subtract, multiply, and FFT (Fast Fourier Transform) for CH1 and CH2. The mathematical result can be measured visually and also using the cursor controls. To select a math function, press the Math button to display the Math menu. - Page 34 Vertical Controls Math Functions Control Figure 2-11 Math Scale Setting Table 2-3 Math Menu Menu Settings Description Operation Add source A to source B Subtract source B from source A Multiply source B by source A Fast Fourier Transform Source A Set CH1 or CH2 as source A Source B Set CH1 or CH2 as source B...
- Page 35 Vertical Controls Math Functions Control Using the FFT The FFT math function mathematically converts a time-domain waveform into its frequency components. FFT waveforms are useful for finding the harmonic content and distortion in systems, for characterizing noise in DC power supplies, and for analyzing vibration.
- Page 36 Vertical Controls Math Functions Control Key points The FFT resolution is the quotient of the sampling rate and the number of FFT points. With a fixed number of FFT points, the lower the sampling rate the better the resolution. The Nyquist frequency is the highest frequency that any real-time digitizing oscilloscope can acquire without aliasing.
-
Page 37: Reference Control
Vertical Controls Reference Control Reference Control The reference control saves waveforms to a nonvolatile waveform memory. The reference function becomes available after a waveform has been saved. To display the reference waveform menu, press the Ref button. Table 2-5 Ref Menu Menu Settings Comments... - Page 38 Vertical Controls Reference Control Saving a Reference Waveform. 1 Push the button to show the reference waveform menu. 2 Set the Source to to select the channel you want. 3 Press Save to save the selected channel into the reference memory. The reference function is not available in X-Y mode.
-
Page 39: Removing Waveforms From The Display
Vertical Controls Removing Waveforms from the Display Removing Waveforms from the Display The channel 1 and channel 2 waveforms are turned on and off by pressing the 1 and 2 buttons on the front panel. The math functions and reference waveforms are similarly turned on and off by pressing the Math and Ref buttons on the front panel. -
Page 40: Horizontal Controls
Horizontal Controls The oscilloscope shows the time per division in the status bar. Since all waveforms use the same time base, the oscilloscope only displays one value for all channels, except when you use Delayed Sweep. The horizontal controls can change the horizontal scale and position of waveforms. -
Page 41: Horizontal System Setup
Horizontal Controls Horizontal System Setup Horizontal System Setup Figure 2-13 shows the front panel horizontal system controls. Figure 2-13 Position knob Scale knob Horizontal Controls The following exercise guides you through these buttons, knobs, and status bar. 1 Turn the scale knob and notice the change it makes to the status bar. The scale knob changes the sweep speed in a 1-2-5 step sequence and the value is displayed in the status bar. -
Page 42: Horizontal Knobs
Horizontal Controls Horizontal Knobs Horizontal Knobs The position knob adjusts the horizontal position of all channels and math functions. The resolution of this control varies with the time base. The oscilloscope digitizes waveforms by acquiring the value of an input waveform at discrete points. -
Page 43: Horizontal Menu
Horizontal Controls Horizontal Menu Horizontal Menu Pressing the Main/Delayed button displays the associated menu. Figure 2-14 shows the screen icon descriptions and control indicators. Figure 2-14 Displayed waveform window ([ ]) position in memory. Trigger position in memory. Trigger position in waveform window. - Page 44 Horizontal Controls Horizontal Menu Figure 2-15 Delayed Sweep window Delayed Sweep window view Delayed Sweep Window The screen is divided into two parts. The top half of the display shows the main waveform window. The bottom half of the displays shows an expanded view of the main waveform window.
- Page 45 Horizontal Controls Horizontal Menu X-Y Format This format compares the voltage levels of two waveforms point by point. It is useful for studying phase relationships between two waveforms. This format only applies to channels 1 and 2. Choosing the X-Y display format displays channel 1 on the horizontal axis and channel 2 on the vertical axis.
- Page 46 Horizontal Controls Horizontal Menu Holdoff Holdoff can be used to stabilize a waveform. The holdoff time is the oscilloscope's waiting period before starting a new trigger. During the holdoff time oscilloscope will not trigger until the holdoff has expired. Figure 2-17 Holdoff The following exercise guides you through setting the holdoff time.
-
Page 47: Roll Mode
Horizontal Controls Roll Mode Roll Mode Roll mode continuously moves data across the display from left to right. It allows you to see dynamic changes (like adjusting a potentiometer) on low frequency waveforms. Two frequently used applications are transducer monitoring and power supply testing. -
Page 48: Trigger Controls
Trigger Controls The trigger determines when the oscilloscope starts to acquire data and display a waveform. When a trigger is set up properly, it can convert unstable displays or blank screens into meaningful waveforms. The oscilloscope acquires data while waiting for the trigger condition to occur. After it detects a trigger, the oscilloscope continues to acquire enough data so that it can draw the waveform on the display. -
Page 49: Trigger System Setup
Trigger Controls Trigger System Setup Trigger System Setup Figure 2-18 shows the front panel trigger system controls. Figure 2-18 Trigger level knob Trigger Controls The following exercise guides you through these trigger buttons, knobs, and status bar. 1 Turn the trigger knob and notice the changes it makes to the Level display. - Page 50 Trigger Controls Trigger System Setup Figure 2-19 Trigger Menu Press the Mode menu button and notice the differences between Edge trigger, Pulse trigger, and Video trigger. Leave in the Edge mode. Press the trigger Slope menu button to notice the differences between rising edge and falling edge.
-
Page 51: Trigger Modes
Trigger Controls Trigger Modes Trigger Modes The oscilloscope provides three trigger modes: edge, pulse, and video. Edge trigger can be used with analog and digital circuits. An edge trigger occurs when the trigger input passes through a specified voltage level with the specified slope. - Page 52 Trigger Controls Trigger Modes Pulse Trigger A pulse trigger occurs when a pulse is found in a waveform that matches the pulse definition. The When and Setting menu buttons control the pulse definition. Table 2-7 Pulse Trigger Menu Buttons Menu Settings Comments Source...
- Page 53 Trigger Controls Trigger Modes Table 2-8 Video Trigger Menu Buttons Menu Settings Comments Source Sets CH1 as the trigger waveform Sets CH2 as the trigger waveform Sets EXT TRIG as the trigger waveform EXT/5 Sets EXT TRIG/5 as the trigger waveform Polarity Normal polarity Trigger on the negative edge of the sync pulse...
- Page 54 Trigger Controls Trigger Modes Figure 2-21 Video Field Trigger 2-36...
-
Page 55: Waveform Controls
Waveform Controls Figure 2-22 shows the location of the Acquire button in the Waveform section of the front panel. Figure 2-22 Waveform Controls Pressing the Acquire button displays the Acquire menu as follows: Table 2-9 Menu Settings Comments Mode Normal Normal acquisition mode Average Average acquisition mode... -
Page 56: Stop Acquisition
Waveform Controls Stop Acquisition Stop Acquisition When acquisition is stopped, the last acquired waveform is displayed. The waveform can be moved by using the vertical and horizontal controls. When the horizontal scale is set to 20 ns or faster, the oscilloscope uses sine(x)/x interpolation to expand the horizontal signal resolution. - Page 57 Waveform Controls Average Acquisition Figure 2-23 Noisy Waveform Without Averaging Figure 2-24 Noisy Waveform With Averaging 2-39...
-
Page 58: Peak Detect
Waveform Controls Peak Detect Peak Detect Peak Detect mode captures the maximum and minimum values of a waveform over multiple acquisitions. Figure 2-25 Peak Detect Waveform 2-40... -
Page 59: Sequence Capability
Waveform Controls Sequence Capability Sequence Capability The sequence capability or waveform recorder can record input waveforms from channel 1 or channel 2, with a maximum acquisition depth of 1000 frames. This recording behavior can also be activated by the Mask Test, which makes this function especially useful for capturing abnormal waveforms over a long period of time. - Page 60 Waveform Controls Sequence Capability Table 2-11 Playback Menu 1 Menu Settings Comments Operation (Play) Press to start playback (Stop) Press to stop playback Msg Display On Turn on recorder information display Turn off recorder information display Play mode Set continuous play mode Set one time play mode Table 2-12 Playback Menu 2...
-
Page 61: Display Controls
Display Controls Figure 2-26 shows location of the Display button in the Waveform area of the front panel. Figure 2-26 Display Menu Pressing the Display button produces the Display menu as follows: Table 2-14 Display Menu 1 Menu Setting Comments Type Vectors Display waveforms as vectors... - Page 62 Display Controls Sequence Capability Table 2-15 Display Menu 2 Menu Settings Comments Press to increase display brightness Press to decrease display brightness Menu Display 1s, 2s, 5s, 10s, 20s, and Infinite Sets the time before hiding menus Screen Normal Sets to normal display colors Invert Sets to inverted display colors 2-44...
-
Page 63: Save And Recall Controls
Save and Recall Controls Figure 2-27 shows the location of the Save/Recall button on the front panel. Figure 2-27 Save/Recall Button Location Pressing the Save/Recall button produces the associated menu as follows: Table 2-16 Save/Recall Menu Buttons Menu Settings Comments Save/Recall Waveforms Save or recall waveforms... -
Page 64: Waveforms
Save and Recall Controls Waveforms Waveforms You can save 10 waveforms for the two channels in the nonvolatile memory of the oscilloscope and overwrite the previously saved contents as needed. Setups You can save 10 settings in the nonvolatile memory of the oscilloscope and overwrite previously saved setups. -
Page 65: Utility Controls
Utility Controls Figure 2-28 shows the location of the Utility button on the front panel. Figure 2-28 Utility Button Pressing the Utility button produces the associated menu as follows: 2-47... - Page 66 Utility Controls Save Table 2-17 Utility Menu 1 Menu Setting Comments Mask Test Setup Mask Test I/O Setup Produces the I/O Setup menu Language English Select language (More languages may be added in German later software versions) French Italian Russian Portuguese Simplified Chinese Traditional Chinese...
-
Page 67: Mask Test
Utility Controls Mask Test Mask Test The Mask Test function monitors waveform changes by comparing the waveform to a predefined mask. Pressing the Mask Test key produces the following menu: Table 2-19 Mask Test Menu 1 Menu Setting Comments Enable Test Turn on Mask Test Turn off Mask Test Source... - Page 68 Utility Controls Mask Test Table 2-21 Mask Test Menu 3 Menu Settings Comments X Mask Set the mask’s horizontal failure margin (0.04 div to 4.00 div) < x div > Y Mask Set the mask’s vertical failure margin (0.04 div to 4.00 div) <...
-
Page 69: I/O Setup Menu
Utility Controls I/O Setup Menu I/O Setup Menu Requires the I/O module to be installed before the GPIB and RS-232 ports can be configured. Before installing or uninstalling the I/O module, make sure that the oscilloscope power is off. More details can be found in the Programmer’s Guide on the CD-ROM. -
Page 70: System Info
Utility Controls System Info System Info Press this menu button to display the oscilloscope’s model number, serial number, software version, and installed module information. 2-52... -
Page 71: Self-Calibration
Utility Controls Self-Calibration Self-Calibration Before performing the automatic calibration, allow the oscilloscope to warm-up at least 30 minutes. Pressing the Self-Cal menu key starts the automatic calibration routine which adjusts the internal circuitry of the oscilloscope for the best measurement accuracy. -
Page 72: Self-Test
Utility Controls Self-Test Self-Test Pressing the Self-Test key produces the Self-Test menu as follows: Table 2-23 Self-Test Menu Menu Settings Screen Test Press to run the screen test Key Test Press to run the front panel key and knob test Screen Test Press this menu button to run the Screen Test program. -
Page 73: Automatic Measurement Controls
Automatic Measurement Controls The Meas button located on the front panel actives the automatic measurement system. The instructions below will guide you in using the various measurement functions. Pressing the Meas button produces the Measure menu used to select automatic measurement. -
Page 74: Voltage Measurements
Automatic Measurement Controls Voltage Measurements Voltage Measurements Pressing the Voltage menu button produces the following menus. Table 2-25 Voltage Measurement Menu 1 Menu Comments Voltage 1/3 Press to display menu 2 voltage measurements Measure peak-to-peak voltage of a waveform Vmax Measure maximum voltage of a waveform Vmin Measure minimum voltage of a waveform... -
Page 75: Time Measurements
Automatic Measurement Controls Time Measurements Time Measurements Pressing the Time menu button produces the following menus. Table 2-28 Time Measurement Menu 1 Menu Comments Time 1/3 Press to display menu 2 time measurements Freq Measure the frequency of a waveform Period Measure the period of a waveform Rise Time... -
Page 76: Automatic Measurement Procedure
Automatic Measurement Controls Automatic Measurement Procedure Automatic Measurement Procedure 1 Select either according to the waveform you want to measure. 2 To see all time and voltage measurement values, set the Display All menu 3 Select the menu button to display the list of Voltage Time measurements. -
Page 77: Measurement Concepts
Automatic Measurement Controls Measurement Concepts Measurement Concepts This section describes the way that the automatic measurements are made. Voltage Measurements There are 10 automatic voltage measurements: • Vpp (Peak-to-Peak Voltage) • Vmax (Maximum Voltage) • Vmin (Minimum Voltage) • Vavg (Average Voltage) •... - Page 78 Automatic Measurement Controls Measurement Concepts Time Measurements There are 10 automatic time measurements: • Frequency • Period • Rise Time • Fall Time • +Width • -Width • +Duty • -Duty → • Delay 1 → • Delay 1 The following figures show how the different time measurements are made. Figure 2-32 Frequency = 1/Period Time...
- Page 79 Automatic Measurement Controls Measurement Concepts Figure 2-33 Time origin line Vtop 90% (upper) 50% (middle) 10% (lower) Vbase 3000b02.cdr Rising Falling edge edge Rise Time and Fall Time Measurements Figure 2-34 Time Time origin origin line line Amplitude Amplitude Base Base 0 Volts 0 Volts...
- Page 80 Automatic Measurement Controls Measurement Concepts Figure 2-35 Time origin line Channel 1 Channel 2 3000b05.cdr Delay from channel 1 to channel 2 falling edge Time origin line Channel 1 Channel 2 3000b06.cdr Delay from channel 1 to channel 2 rising edge Delay Measurements 2-62...
-
Page 81: Cursor Measurement Controls
Cursor Measurement Controls Figure 2-36 shows the location of the Cursors button on the front panel. Figure 2-36 Cursors Button There are three cursor measurement modes. • Manual • Track • Auto Measure 2-63... -
Page 82: Manual
Cursor Measurement Controls Manual Manual In the manual mode, the screen displays two parallel cursors. You can move the cursors to make custom voltage or time measurements on the waveform. The cursor values are displayed in the boxes at the top of the screen. Before using cursors, you should make sure that you have set the waveform source to the channel that is to be measured. - Page 83 Cursor Measurement Controls Manual Table 2-33 Manual Cursors Position Readouts Readout Type Description CurA Voltage Shows the current voltage value for Cursor A Time Shows the time position for Cursor A CurB Voltage Shows the current voltage value for Cursor A Time Shows the time position for Cursor A ∆...
-
Page 84: Track
Cursor Measurement Controls Track Track In the track mode, the screen displays two cross hair cursors. The cross hair of the cursor is positioned on the waveform automatically. You can adjust the selected cursor's horizontal position on the waveform by turning the entry knob. The oscilloscope displays the values of the coordinates in the boxes at the top of the screen. -
Page 85: Auto Measure
Cursor Measurement Controls Auto Measure Auto Measure The Auto Measure cursors mode is only available when automatic measurements are on. The oscilloscope displays cursors corresponding to the most recently invoked automatic measurement. There will be no cursor display if no automatic measurements are selected in the Measure menu. -
Page 86: Autoscale And Run/Stop Controls
Autoscale and Run/Stop Controls The Autoscale button is used to automatically set the oscilloscope controls for the input waveform that is present at the input of the oscilloscope. The Run/Stop button is used to manually start or stop the oscilloscope’s acquisition system. 2-68... -
Page 87: Autoscale Button
Autoscale and Run/Stop Controls Autoscale Button Autoscale Button Figure 2-37 shows the location of the Autoscale button on the front panel. Figure 2-37 Autoscale Button The Autoscale feature automatically adjusts the scope to produce a usable display of the input waveform(s). 2-69... - Page 88 Autoscale and Run/Stop Controls Autoscale Button After the Autoscale button is pressed the oscilloscope is configured to the following default control settings. Table 2-35 Menu Settings Display format Sampling mode Real time Acquire mode Normal Vertical coupling Adjust to AC or DC according to the waveform Vertical "V/div"...
-
Page 89: Run/Stop Button
Autoscale and Run/Stop Controls Run/Stop Button Run/Stop Button The Run/Stop front panel button starts and stops the oscilloscope’s acquisition system. When stopped, the button is red and the vertical and horizontal scales can be adjusted within a fixed range. When the horizontal scale is 50 ms/div or faster, the stopped waveform can be expanded or contracted by 5 horizontal scale steps. - Page 90 2-72...
-
Page 91: Specifications And Characteristics
Specifications and Characteristics... -
Page 92: Specifications
Specifications and Characteristics Specifications Specifications All specifications are warranted. Specifications are valid after a 30-minute warm-up period and ±5 °C from last calibration temperature. Bandwidth (-3dB) DSO3062A: 60 MHz DSO3102A: 100 MHz DSO3152A: 150 MHz DSO3202A: 200 MHz DC Vertical Gain Accuracy 2 mV/div to 5 mV/d: ±4.0% full scale 10 mV/div to 5 V/div: ±3.0% full scale... -
Page 93: Characteristics
Specifications and Characteristics Characteristics Characteristics All characteristics are the typical performance values and are not warranted. Characteristics are valid after a 30-minute warm-up period and ±5 °C from last calibration temperature. - Page 94 Specifications and Characteristics Characteristics Acquisition System Max Sample rate 1 GSa/s Vertical Resolution 8 bits Peak Detection 5 ns Averages selectable from 2, 4, 8, 16, 32, 64, 128, and 256 Vertical System Analog channels Channels 1 and 2 simultaneous acquisition DSO3062A: 60 MHz DSO3102A: 100 MHz DSO3152A: 150 MHz...
- Page 95 Specifications and Characteristics Characteristics Horizontal Range 2 ns/div to 50 s/div ±100 ppm over any time interval ≥ 1 ms Timebase Accuracy Modes Main, Delayed, Roll, XY Trigger System Sources Channel 1, channel 2, ac line, ext, and ext/5 Sweep Auto and Normal Holdoff Time 100 ns to 1.5 s...
- Page 96 Specifications and Characteristics Characteristics Measurements Automatic Measurements Voltage Peak-to-Peak (Vpp), Maximum (Vmax), Minimum (Vmin), Average (Vavg), Amplitude (Vamp), Top (Vtop), Base (Vbase), Overshoot, Preshoot, RMS (Vrms) Time Frequency (Freq), Period, Positive Pulse Width (+Width), Negative Pulse Width (-Width), Positive Duty Cycle (+Duty), Minus Duty Cycle (-Duty), Rise Time, Fall Time, Rising Edge →...
-
Page 97: Service
Service... -
Page 98: Returning The Oscilloscope To Agilent Technologies For Service
Returning the oscilloscope to Agilent Technologies for service Before shipping the oscilloscope to Agilent Technologies, contact your nearest Agilent Technologies oscilloscope Support Center (or Agilent Technologies Service Center if outside the United States) for additional details. 1 Write the following information on a tag and attach it to the oscilloscope. -
Page 99: Testing Performance
Testing Performance This section documents performance test procedures. Performance verification for the products covered by this manual consists of three main steps: • Performing the internal product self-tests to ensure that the measurement system is functioning properly • Calibrating the product •... - Page 100 However, with some modification to the test procedures, oscilloscopes, cables and accessories that satisfy the critical specifications in these lists may be substituted for the recommended models with some modification to the test procedures. Contact Agilent Technologies for more information about the Agilent products in these lists.
-
Page 101: Before Performing Performance Verification Testing
Service Before Performing Performance Verification Testing Before Performing Performance Verification Testing Let the oscilloscope warm up before testing The oscilloscope under test must be warmed up (with the oscilloscope application running) for at least 30 minutes prior to the start of any performance test. Equipment Required Description Critical Specifications... - Page 102 Vertical Performance Verification This section contains the following vertical performance verification: • DC Gain Accuracy Test • Analog Bandwidth Test...
-
Page 103: Dc Gain Accuracy Test
Service DC Gain Accuracy Test DC Gain Accuracy Test C A U T I O N Ensure that the input voltage to the oscilloscope never exceeds 300 Vrms. Specifications DC Gain Accuracy ±1.5% of full scale at full resolution channel scale Full scale is defined as 8 vertical divisions. - Page 104 Service DC Gain Accuracy Test Figure 4-1 4 Select the item in the Save/Recall menu. Default Setup 5 Press the front panel button. Acquire 6 Select the mode item in the Acquire menu until Average appears. 7 Select the Averages item in the Acquire menu until 256 appears.
- Page 105 Service DC Gain Accuracy Test Figure 4-2 8 Set the channel 1 vertical sensitivity value to 2 mV/div. 9 Set the power supply to +6 mV. 10 Connect the equipment as shown in Figure 4-3.
- Page 106 Service DC Gain Accuracy Test Figure 4-3 Oscilloscope Power Supply Digital Multimeter BNC tee BNC (f) to dual banana 11 Press the button on the front of the oscilloscope. Meas 12 Select the menu item. Voltage 4-10...
- Page 107 Service DC Gain Accuracy Test 13 Select the measurement as shown below. Vavg Vavg measurement 14 Record the DMM voltage reading as V and the oscilloscope Vavg DMM+ reading as V in the DC Gain Test section of the Performance Test Scope+ Record.
- Page 108 Service DC Gain Accuracy Test 27 Calculate the DC Gain using the following expression and record this value in the DC Gain Test section of the Performance Test Record: ∆V – V scope+ scope- -------------- = ---------------------------------------- - DCGain = ∆V –...
-
Page 109: Analog Bandwidth - Maximum Frequency Check
Service Analog Bandwidth - Maximum Frequency Check Analog Bandwidth - Maximum Frequency Check C A U T I O N Ensure that the input voltage to the oscilloscope never exceeds 300 Vrms. Specification Analog Bandwidth (-3 dB) DSO3062A 60 MHz DSO3102A 100 MHz DSO3152A... - Page 110 Service Analog Bandwidth - Maximum Frequency Check Connections Connect the equipment as shown in Figure 4-4. Figure 4-4 Power meter E4418B Oscilloscope Signal Generator 8648A Power sensor cable Ω feed through Power splitter 11667B SMA to BNC adapter Power sensor 8482A Type N to SMA SMA cable...
- Page 111 Service Analog Bandwidth - Maximum Frequency Check Figure 4-5 5 Select the item in the Save/Recall menu. Default Setup 6 Press the front panel button. Autoscale 7 Set the channel 1 vertical scale to 200 mV/div. Figure 4-6 8 Set the horizontal scale to 500 ns/div. 4-15...
- Page 112 Service Analog Bandwidth - Maximum Frequency Check Figure 4-7 9 Press the front panel button. Acquire 10 Select the menu item until Average appears. Mode 11 Select the menu item until 8 appears. Average Figure 4-8 12 Press the front panel button. Meas 13 Select the menu item.
- Page 113 Service Analog Bandwidth - Maximum Frequency Check 14 Select the menu item until appears. Voltage 15 Select the menu item. 16 Set the signal generator to a 1 MHz sine wave with a peak-to-peak amplitude of about 6 divisions as it appears on the oscilloscope screen. Figure 4-9 Vpp reading 17 Using the Vpp reading, calculate the Vrms value using the following...
- Page 114 Service Analog Bandwidth - Maximum Frequency Check 18 Using the power meter reading, convert this measurement to Volts RMS using the expression and record it in the Performance Test Record (page 4-22): × 50Ω meas 1MHz Example For Pmeas = 3.65 mW. ×...
- Page 115 Service Analog Bandwidth - Maximum Frequency Check For Vpp = 1.24 V Example 1.05 1.05 --------- - ------------ - Vout 371 mV 2.828 23 Using the power meter reading, convert this measurement to Volts RMS using the expression and record it in the Performance Test Record (page 4-22): ×...
- Page 116 Service Analog Bandwidth - Maximum Frequency Check 25 Move the power splitter from channel 1 to channel 2 and repeat steps 3 through 24 using channel 2 as the source. 4-20...
-
Page 117: Performance Test Record
Service Performance Test Record Performance Test Record DC Gain Test Vertical Power Calculated Offset Gain DMM+ DMM- Scope+ Scope- Sensitivity Supply DC Gain Test Limits Setting Channel 1 2 mV/div ±6 mV +0.96 to +1.04 5 mV/div ±15 mV +0.96 to +1.04 10 mV/div ±30 mV +0.97 to +1.03... - Page 118 Analog Bandwidth - Maximum Frequency Check Max frequency: DSO3062A = 60 MHz, DSO3102A = 100 MHz, DSO3152A = 150 MHz, DSO31202A = 200 MHz Vout Calculated Vout Calculated @ 1 MHz @ 1 MHz Gain @ 1 MHz @ Max Freq @ Max Freq Gain @ Max Freq (Test Limit =...
- Page 119 Index accessories Digital filter controls 2-14 package contents 1-2 supplied 1-2 Display packing for return 4-2 Acquire Controls 2-43 Peak detect 2-40 Average 2-38 performance characteristics 3-1 Equivalent time sampling 2-38 plugs Peak detect 2-40 power 1-4 Edge trigger 2-33 Auto measurement cursors 2-67 power cables 1-4 Equivalent time sampling 2-38...
- Page 120 Index Utility Controls 2-47 GPIB control 2-51 I/O settings 2-51 RS-232 control 2-51 Self-Calibration control 2-53 Self-Test 2-54 Sequence Capability control 2-41 Vertical Bandwidth limit control 2-9 Controls 2-3 Coupling control 2-6 Digital filter control 2-14 Invert control 2-12 Math functions control 2-15 Probe attenuation control 2-11 Ref control 2-19 Video trigger 2-34...
- Page 121 (for volt- age reduction or mains isola- tion), the common terminal must be connected to the earth termi- nal of the power source. Agilent Technologies Inc. P.O. Box 2197 1900 Garden of the Gods Road Colorado Springs, CO 80901-2197, U.S.A.
- Page 122 Trademark Acknowledgements WARNING The material contained in this document is provided A WARNING notice © Agilent Technologies, Inc. “as is,” and is subject to 2005 denotes a hazard. It calls being changed, without No part of this manual may be attention to an operating notice, in future editions.