Advertisement
Table of Contents
- 1 Table of Contents
- 2 Welcome
- 3 About
- 4 What's Included
- 5 Technical Specification
- 6 Compatibility
- 7 Notice
- 8 General Information of OBDII
- 9 Diagnostic Trouble Codes (Dtcs)
- 10 Product Overview
- 11 Preparation & Connection
- 12 Operation Introduction
- 13 Warnings
- 14 Cautions
- 15 Faq
- 16 Warranty
- Download this manual
Advertisement
Table of Contents

Related Manuals for Topdon ArtiDiag Pro


Summary of Contents for Topdon ArtiDiag Pro
- Page 2 ArtiDiag Pro Professional Diagnostic Tool USER MANUAL...
-
Page 4: Table Of Contents
CONTENTS Welcome ......................1 About ......................... 1 What's Included ..................1 Technical Specification ................ 2 Compatibility ....................2 Notice ....................... 2 General Information of OBDII ............3 Diagnostic Trouble Codes (DTCs) ..........3 Product Overview ..................4 Preparation & Connection..............6 Operation Introduction ..............10 Warnings ..................... -
Page 6: Welcome
Thank you for purchasing the TOPDON ArtiDiag Pro, an automotive diagnostic tool. Please read manual prior to operation. ABOUT The TOPDON ArtiDiag Pro is an ideal diagnostic tablet designed to work on all available electronic systems. Beyond OBD2 diagnostics, the user can expect AutoVIN technology to accelerate diagnostic work, and the well-organized interface can run reset services for effective vehicle maintenance. -
Page 7: Technical Specification
And more • NOTICE ArtiDiag Pro may automatically reset while being disturbed by strong static electricity. THIS IS A NORMAL REACTION. This Product Manual is subject to change without written notice. Read the instructions carefully and use the unit properly. Failure to do so may cause damage and/or personal injury, which will void the product warranty. -
Page 8: General Information Of Obdii
GENERAL INFORMATION OF OBDII The OBDII system is designed to monitor emission control systems and key engine components by performing either continuous or periodic tests of specific components and vehicle conditions, which will relay the following information: Whether the Malfunction Indicator Light (MIL) is commanded “on” •... -
Page 9: Product Overview
PRODUCT OVERVIEW... - Page 10 Name Descriptions 5V DC Charging To charge the tablet. Port DB-15 Diagnostic To connect to the diagnostic cable. Connector • Hold the button for 5 seconds to turn the tablet • Hold the button for 3 seconds to turn the tablet Power/Lock off.
-
Page 11: Preparation & Connection
5. Plug the adaptor to vehicle's DLC connector. 6. Turn the ignition on. The engine can be off or running. 7. Hold the power button for 5 seconds to turn the TOPDON ArtiDiag Pro on. The tablet will start initializing and enter the welcome... - Page 12 *Note: Don’t connect or disconnect any test equipment with the ignition on or engine running. 8. Language Setting Select the tool language in the following interface: 9. Choose Time Zone Choose the time zone of your current location. The system will automatically configure the time according to the time zone you selected.
- Page 13 10. Connect Wi-Fi The system will automatically search all available Wi-Fi networks. You can choose the Wi-Fi needed. *Note: Since the first use of the scanner requires data interaction with the server to activate it, the first use must connect to WIFI; otherwise, the diagnostic software will not be able to use, but after the activation of the scanner, the diagnostic function can be used in the offline state.
- Page 14 12. User Agreement Please read all the terms and conditions of the user agreement carefully. Check “Agree all the above terms” and tap “Next” to complete the registration process. It will automatically jump to the Home Menu.
-
Page 15: Operation Introduction
A diagnostic report will be automatically generated after the diagnosis. 1.1 Smart Diagnosis (Auto-Detect) Power on the ArtiDiag Pro. Tap “Settings”, and make sure the “Automatic detection on connect” is on. *Note: Alternatively, the user can also tap "Diagnose" -> "AutoDetect"... - Page 16 display as follows: Input the VIN and tap “OK”; the system will automatically identify the vehicle model. If the VIN is successfully decoded, it will perform Smart Diagnosis until a diagnostic report is automatically generated. Otherwise it will enter the Manual Diagnosis mode. *Note: •...
- Page 17 Select “Diagnose” Select Vehicle Manufacturer Select Vehicle Model Select Scan Mode Automatic System Manual System Detection Detection (System Scan) (System Selection) Select Test Function Read Version Read Fault Clear Fault Read Data Actuation Special Information Code Code Stream Test Function *Note: •...
- Page 18 Take “Demo V15.43” as an example to demonstrate how to manually diagnose a vehicle. Tap “OK” to continue. The following screen will appear: Take “NISSAN” as an example to continue.
- Page 19 1.2.1 Health Report (Quick Test) This function enables you to quickly access all electronic control units of the vehicle and generate a detailed report about vehicle health. Tap “Health Report”, and the system will start scanning the ECUs. Once the scanning is complete, the following screen will appear: The system with fault codes will be displayed in red ( ).
- Page 20 1.2.3 System Selection (Manual System Detection) This function allows you manually select the system and perform the related diagnostic functions. Tap “System Selection”, and then select the desired system (take “ENGINE” for example). The following screen will appear: a. Version Information This function can read the version information of system mode, vehicle VIN, software and ECU.
- Page 21 *Explanation of terms: • Freeze Frame: A snapshot of critical parameter values at the time the DTC occurs. • Help: To view the help information. • Code Search: To search for more information about the current DTC online. • Report: To save the current data in text format. All diagnostic reports can be accessed from “Data”...
- Page 22 After selecting the desired items, tap “OK” to enter the data stream reading page. The system will display the selected data streams in 3 modes available: 1) Value (default): Shows parameters with numbers and lists. 2) Figure: Displays parameters with wave patterns. 3) Combine: The graphs can be merged for easier comparisons.
- Page 23 Tap “Report” to save the current data as a diagnostic report. All diagnostic reports can be accessed from “Data” -> “Diagnostic Report”. Tap “Record” to record and save the Live Data as valuable information to help troubleshoot and diagnose. All diagnostic records can be accessed from “Data”...
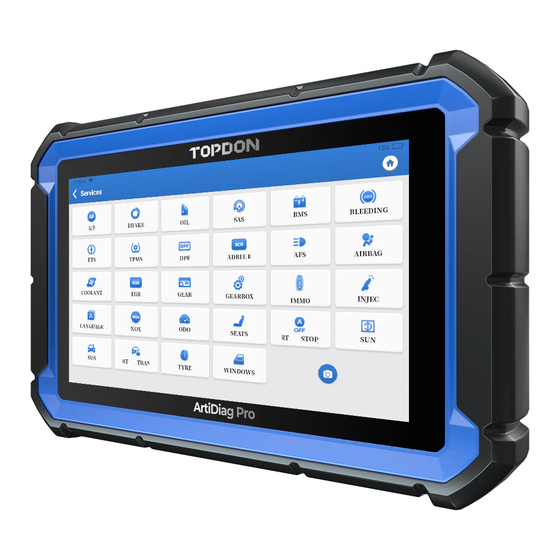
- Page 24 Tap “History” in the “Diagnose” module. All diagnostic records will be listed on the screen in a date sequence. 2. Maintenance Services TOPDON ArtiDiag Pro features 29 of the most commonly used maintenance services. 2.1 Maintenance Light Reset (Oil Reset)
- Page 25 After that, reset the driving mileage or driving time, so as to turn off the service lamp, and enable a new driving cycle. • If the service lamp is not on, but you have changed the engine oil or electric appliances that monitor oil life, you need to reset the service lamp.
- Page 26 It needs to be performed in the following cases: • When the ABS contains air. • When the ABS computer, ABS pump, brake master cylinder, brake cylinder, brake line, or brake fluid is replaced. 2.6 Throttle Matching (ELEC. THROTTLE RLRN) This function initializes the throttle actuator so that the learning value of the ECU returns to the initial state.
- Page 27 • Repair and replacement of the DPF regeneration control module. 2.9 Anti-theft Matching (IMMO) This function can match the anti-theft key after replacing the ignition key, ignition switch, instrument cluster, engine control unit (ECU), body control module (BCM), and remote control battery. 2.10 Tire Pressure Reset (TPMS RESET) This function can reset the tire pressure and turn off the tire pressure fault indicator when the car tire pressure fault indicator light is on.
- Page 28 2.16 A/F Reset This function is applied to set or learn air/fuel rate parameters. 2.17 EGR Adaption This function is used to learn the EGR (Exhaust Gas Recirculation) valve after it is cleaned or replaced. 2.18 AC System Relearn/Initialization AC system relearn/initialization must be performed when the vehicle AC ECU or actuator is replaced or the ECU memory is lost.
- Page 29 2.26 Transport Mode To lower vehicle power consumption, user may perform the following operations: limit vehicle speed, not wake up the network for door open and disable remote key etc. In this case, deactivating transport mode is needed to recover vehicle being normal. 2.27 Tyre Reset This function is used to set the size parameters of the modified or replaced tire.
- Page 30 3. OBDII/EOBD Diagnostics This function presents a quick way to check for DTCs, isolate the cause of the illuminated Malfunction Indicator Lamp (MIL), check monitor status before emissions certification testing, verify repairs, and perform other services that are emission-related. Tap “OBD II” in the Home Menu after the tablet is properly connected to the vehicle’s DLC port.
- Page 31 3.2 Read Live Data This function retrieves and displays live data and parameters from the vehicle’s ECU. 3.3 Read Freeze Frame This function takes the snapshot of the operating conditions when an emission-related fault occurs. 3.4 Read Fault Code This function can identify which section of the emission control system has malfunctioned.
- Page 32 6. Upgrade A number will be displayed upon the “Upgrade” module in the Home Menu indicating a new version of software is available. It is strongly suggested to update the software on regular basis for more functions and better service. Once the download is finished, the software packages will be installed automatically.
- Page 33 *Explanation of terms: • Graph: Display parameters in waveform graphs. • Combine: Merge graphs for data comparison. Items will be in different colors. • Value (default): Display the parameters as text in a list format. • Auto Playback: Automatic playback of the selected data stream items.
- Page 34 7.4 DLC (Data Link Connector) Location This function helps you to find the location of the vehicle’s DLC. 7.5 Feedback This function allows you to send the feedback of your diagnostic problems to us for further analysis and troubleshooting. There are 3 options: 1) Diag.
- Page 35 8. Settings 8.1 Units of Measurement This option can set the measurement unit. Metric System and Imperial System are available. 8.2 Screen Capture This option can set the Screen Capture icon to be shown or not on the screen. 8.3 Automatic detection on connect This option enables you to determine whether to start an automatic VIN detection once the tool is properly connected to the vehicle’s DLC.
- Page 36 *Note: After switching the language, please re-download all diagnostic software, otherwise the system will use the English software by default. 8.9 Exipration Date This option allows you to check the expiration date of the diagnostic software and renew the software subscription. 8.10 E-mail This option can set up the default email address for receiving the diagnostic reports or screenshots.
-
Page 37: Warnings
WARNINGS • Always perform automotive testing in a safe environment. • DO NOT smoke near the vehicle during testing. • DO NOT place the diagnostic tool near the engine or exhaust pipe to avoid damage from high temperatures. • DO NOT wear loose clothing or jewelry when working on an engine. •... -
Page 38: Faq
Q: System halts when reading the data stream. What is the reason? A: It may be caused by a slackened connector. Please turn off the tablet, firmly connect the connector, and switch it on again. Q: Screen flashes at engine ignition start. A: Normally caused by an electromagnetic disturbance. -
Page 39: Warranty
TOPDON shall not be liable for any incidental or consequential damages arising from the device's use, misuse, or mounting. If there is any conflict between the TOPDON warranty policy and local laws, the local laws shall prevail. This limited warranty is void under the following conditions: •... - Page 40 FCC Statement: FCC ID: 2AVYW-ADPRO This device complies with part 15 of the FCC Rules. Operation is subject to the following two conditions: (1) This device may not cause harmful interference, and (2) this device must accept any interference received, including interference that may cause undesired operation. Note: This equipment has been tested and found to comply with the limits for a Class B digital device, pursuant to part 15 of the FCC Rules.
- Page 41 – This radio is designed for and classified as “General population/uncontrolled Use”, the guidelines are based on standards that were developed by independent scientific organizations through periodic and thorough evaluation of scientific studies. The standards include a substantial safety margin designed to assure the safety of all persons regardless of age or health.The exposure standard for wireless radio employs a unit of measurement known as the Specific Absorption Rate, or SAR, the SAR limit set 1.6W/kg.
Need help?
Do you have a question about the ArtiDiag Pro and is the answer not in the manual?
Questions and answers
I cannot get past workshop information
If you cannot get past the workshop information on the Topdon Pro, you may try using the "Recovery" option to reset the tool or the "Cleanup" option to clear out the cache. These functions are intended for issues with the tool. Use them only if you are experiencing a problem. If the issue continues, contact support and be ready to provide your tool's serial number.
This answer is automatically generated
Before using long coding I did a back up now I can’t find it